by
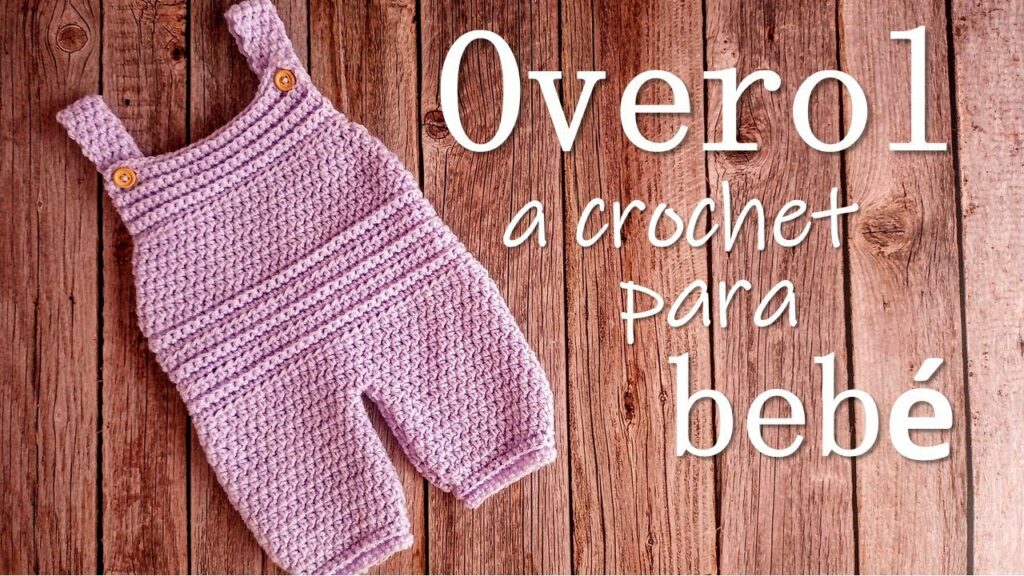
by Cozy Threads: A Step-by-Step Guide to a Crocheted Baby Jumpsuit (or “Gardener”)
A handmade crochet baby jumpsuit, often called a “gardener” or romper, is an absolutely adorable and practical garment for any little one. It offers full-body warmth and comfort for playtime, naptime, or special outings. While a jumpsuit may look complex, this project is surprisingly approachable for crocheters ready to take on their first garment. The key is to break it down into simple, manageable pieces.
This detailed, step-by-step guide will walk you through crocheting an easy baby jumpsuit, from choosing your yarn to assembling the final, cozy piece.
1. Planning Your Jumpsuit: Key Decisions
A bit of planning will make the process much smoother and ensure a perfect fit.
- Choose Your Yarn: Since this garment will be worn close to a baby’s skin, pick a yarn that is soft, durable, and easy to wash.
- Baby-Friendly Fibers: Baby acrylics are a top choice for their softness and easy care. Cotton and cotton blends are also excellent for their breathability, especially for warmer weather.
- Weight: DK (Double Knitting, Category 3) or Worsted (Category 4) is perfect. They provide a nice, cozy fabric without being too bulky.
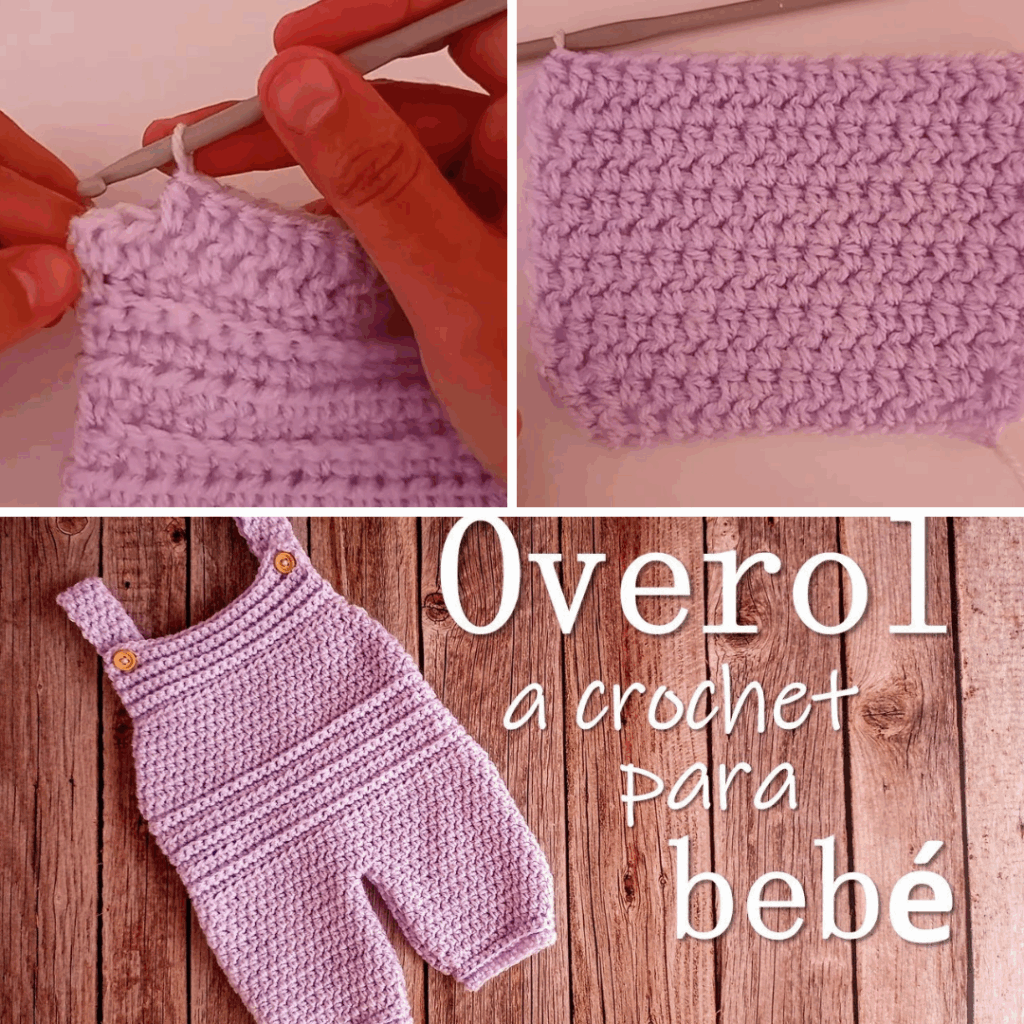
- Choose Your Stitch Pattern: A simple stitch will let the yarn and shape shine.
- Half Double Crochet (hdc) or Double Crochet (dc): These stitches work up quickly and create a soft, flexible fabric that’s great for garments.
- Moss Stitch (or Linen Stitch): An alternating single crochet and chain stitch that creates a beautiful, dense texture.
- Construction Method: This guide focuses on a classic construction: crocheting two legs separately, joining them to form the body, and then working up to create the bib and straps.
2. Essential Materials and Tools
Gather your supplies to ensure you have everything you need on hand.
- Yarn: The amount needed will depend on the baby’s size and your chosen pattern.
- Crochet Hook: The size recommended on your yarn label for your chosen yarn weight.
- Stitch Markers: Invaluable for marking rounds and seams.
- Tapestry Needle: For seaming your panels and weaving in ends.
- Scissors.
- Measuring Tape: Crucial for checking your gauge and dimensions.
- Buttons: Two or three buttons for the straps.
3. The Construction Journey: Step-by-Step
Follow these steps to crochet and assemble your baby jumpsuit.
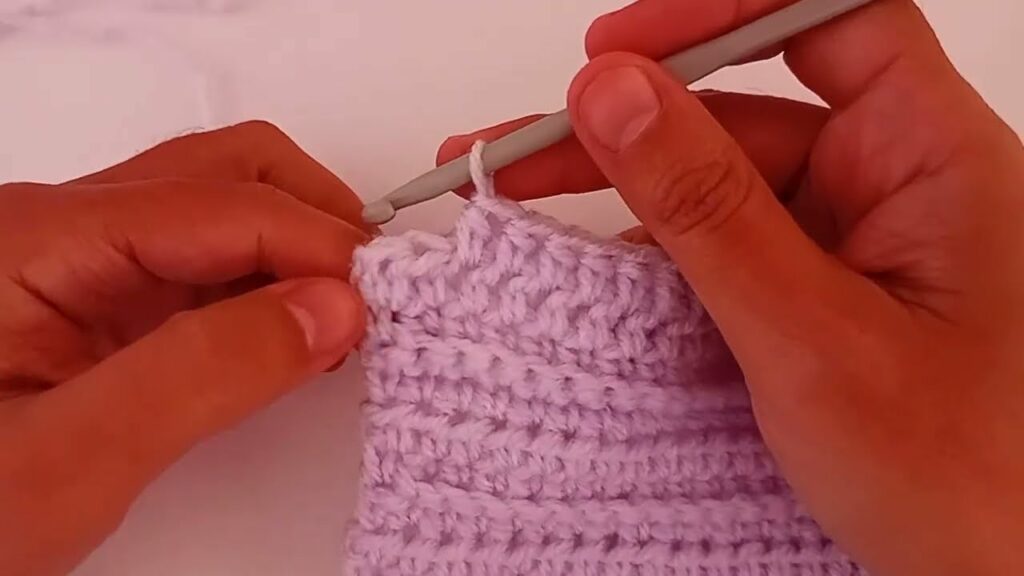
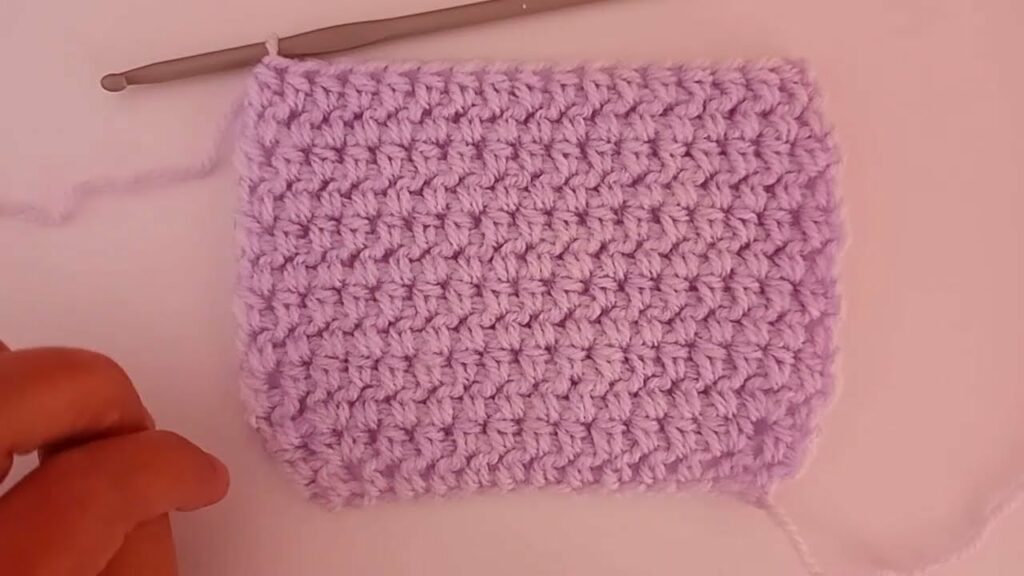
Step 1: The Gauge Swatch (Do Not Skip!)
This is the most critical step for any garment. Crochet a swatch (at least 4×4 inches / 10×10 cm) in your chosen stitch and yarn. Wash and block the swatch according to your yarn’s care instructions, as this will show you how the finished fabric will behave. Measure your stitches and rows per inch. Adjust your hook size until your gauge matches your pattern’s recommendation. This ensures the jumpsuit will fit the baby correctly.
Step 2: Crochet the Legs (You’ll Make Two!)
- Start the Foundation: Begin by chaining a length that corresponds to the circumference of the baby’s thigh or leg opening. Join the chain with a slip stitch to form a circle.
- Work in Rounds: Work in continuous rounds using your chosen stitch pattern (e.g., hdc).
- Increase for Shaping: You may need to add a few increases every few rounds to gradually widen the leg as you work your way up to the crotch area. This shaping ensures a comfortable fit over the diaper.
- Finish the Leg: Continue crocheting in rounds until the leg reaches the length from the ankle to the crotch.
- Repeat: Make a second leg, following the exact same steps.
Step 3: Join the Legs and Crochet the Body
- Join: Place the two finished legs side-by-side. You will now join them by continuing to crochet in rounds, working around the circumference of both legs. This single round will connect them at the crotch.
- Crochet the Body: Continue crocheting in continuous rounds, working up from the crotch to the waist. At this point, you can add a few decreases to shape the waistline if your pattern calls for it.
- Separate for the Bib: Once the body reaches the waist, you will stop working in the round and begin working in rows to create the bib (the front panel).
Step 4: Crochet the Bib
- Work in Rows: You will now work back and forth in rows, using a portion of the stitches from the body (e.g., the front half of the stitches) to form the bib.
- Shape the Bib: Continue working in rows until the bib reaches the desired height (e.g., to the top of the chest). You can shape it to be a straight rectangle or add some decreases to create a tapered look.
Step 5: Add the Straps
- Create the Straps: From the top corners of the bib, chain a long length for the straps. Work back down the chain in single crochet or slip stitches to create a sturdy strap. You can also work in rows from the bib, creating a flat strap.
- Attach: Securely sew the straps to the back of the jumpsuit at the waistline or back panel.
Step 6: Add Buttons and Finishing Touches
- Add Buttons: Sew your chosen buttons to the straps on the back of the jumpsuit.
- Create Buttonholes: On the back panel, you can create simple buttonholes by chaining a few stitches and skipping the same number of stitches in the next row.
- Weave in Ends: Use your tapestry needle to meticulously weave in all yarn ends. A neat finish is key to a professional-looking garment.
- Blocking: For a beautiful drape and to even out your stitches, block your finished jumpsuit. Gently soak it in cool water, lay it flat on a towel, and pin it to its desired shape and measurements. Let it dry completely.
A crocheted baby jumpsuit is a rewarding project that results in a beautiful, cherished piece. With these step-by-step instructions, you can create a cozy and stylish outfit that’s made with love.
Video Tutorial :