 by
by Sure thing!
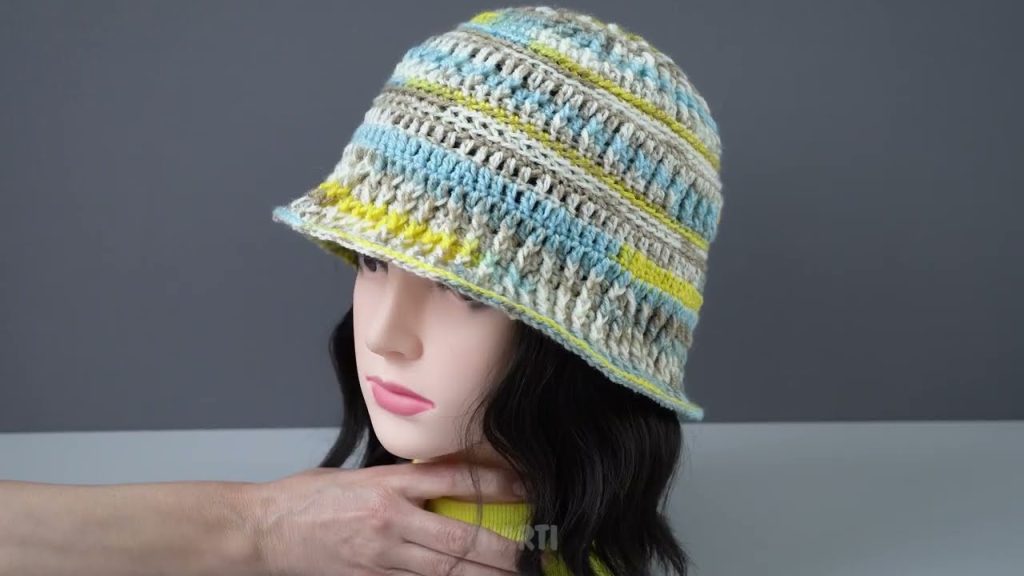
Here’s a detailed, beginner-friendly tutorial on how to make a simple crochet bucket hat. This pattern uses basic stitches, works in the round, and is easy to follow even if you’re new to crochet.
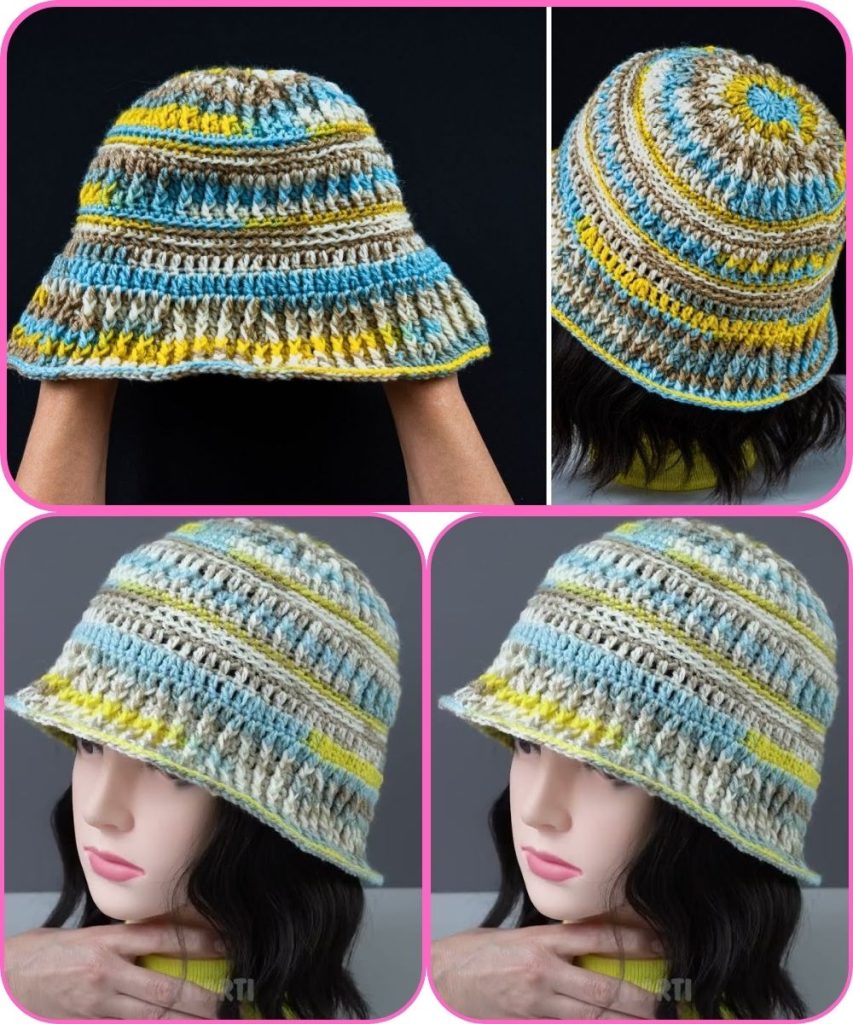
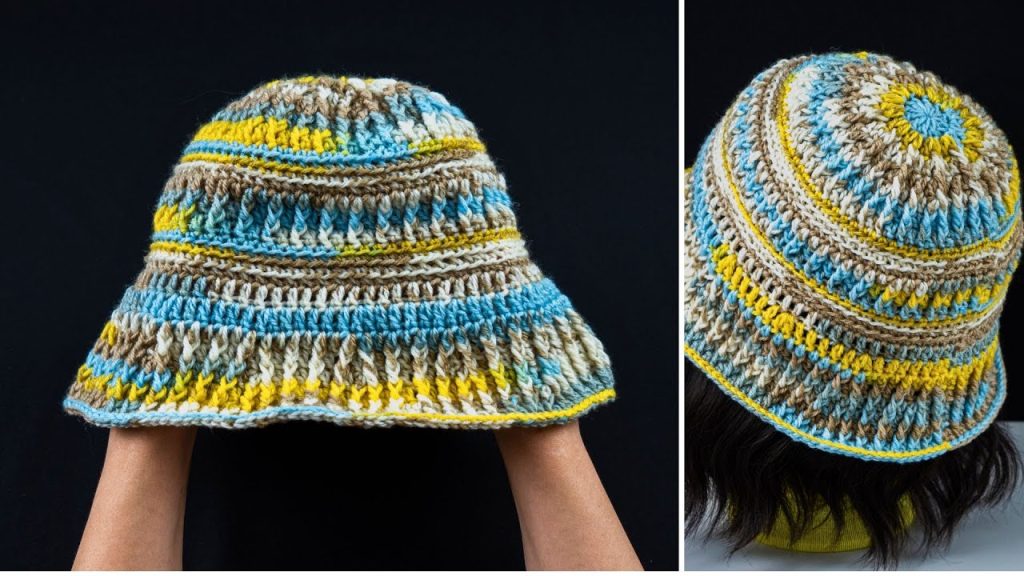
How to Make a Simple Crochet Bucket Hat
Step-by-Step Tutorial for Beginners
Skill Level
Beginner
Time Needed
About 2–3 hours
Materials You’ll Need
- Yarn: Medium-weight yarn (Category 4). Cotton yarn is great for bucket hats because it keeps its shape.
- Crochet Hook: 5.0 mm (H/8)
- Scissors
- Yarn needle (for weaving in ends)
Crochet Abbreviations (US Terms)
- ch – chain
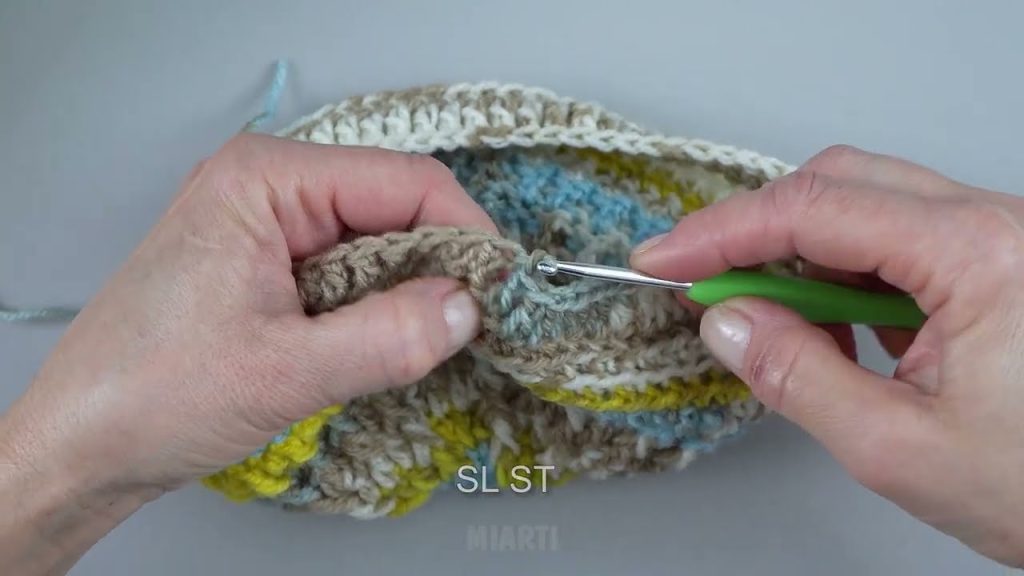
- sl st – slip stitch
- sc – single crochet
- inc – increase (2 sc in the same stitch)
- st(s) – stitch(es)
Finished Size (Approx.)
- Adult size head circumference: 21–23 inches
- Easily adjustable by adding or reducing rounds
Step-by-Step Instructions
Step 1: Start with a Magic Ring
- Make a magic ring
- Work 6 single crochet (sc) into the ring
- Pull tight and join with a slip stitch
Total: 6 stitches
You can also chain 4 and join to form a ring if you prefer.
Step 2: Round 2 – Increase
- Chain 1
- Work 2 sc in each stitch around
- Join with slip stitch
Total: 12 stitches
Step 3: Round 3 – Continue Increasing
- Chain 1
- 1 sc in first stitch, inc in next stitch
- Repeat around
- Join with slip stitch
Total: 18 stitches
Step 4: Round 4 – Shape the Crown
- Chain 1
- 2 sc, inc
- Repeat around
- Join with slip stitch
Total: 24 stitches
Continue increasing in this pattern (adding 6 stitches per round) until the crown measures about 6.5–7 inches across.
Step 5: Crochet the Hat Sides
- Chain 1
- Work 1 sc in each stitch around
- Do not increase
- Join with slip stitch
- Repeat for 4–6 rounds, depending on how deep you want the hat
Try it on to check the fit as you go.
Step 6: Create the Bucket Hat Brim
- Chain 1
- 5 sc, inc around
- Join with slip stitch
- Continue increasing slightly each round
- Work 3–5 brim rounds until you reach your desired width
This gives the hat its classic bucket shape.
Step 7: Finish the Hat
- Cut yarn, leaving a small tail
- Pull through the last stitch
- Weave in all loose ends with a yarn needle
Your crochet bucket hat is complete!
Optional Customizations
- Change colors for stripes
- Use a smaller hook for a firmer brim
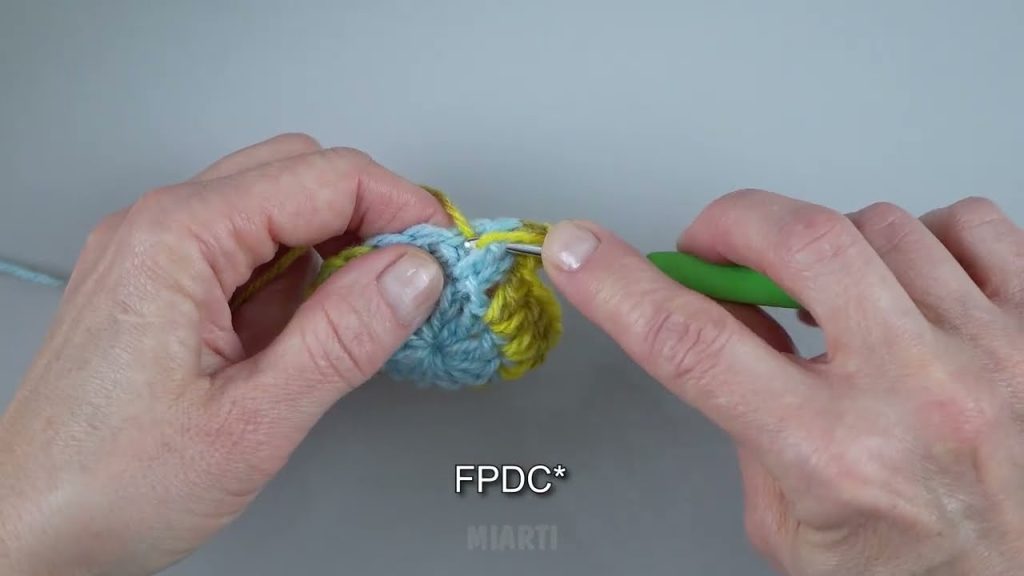
- Add a decorative edge (crab stitch or slip stitch)
- Sew on a label or patch
Beginner Tips
Use stitch markers to mark the start of each round
Keep your tension even
Count stitches every round
Don’t worry if it’s not perfect—practice helps!
If you’d like, I can:
- Adjust this pattern for kids or baby sizes
- Make a chunky or summer version
- Turn this into a print-friendly pattern
- Add a super-quick version for experienced beginners
Just tell me
Watch tutorial: