 by
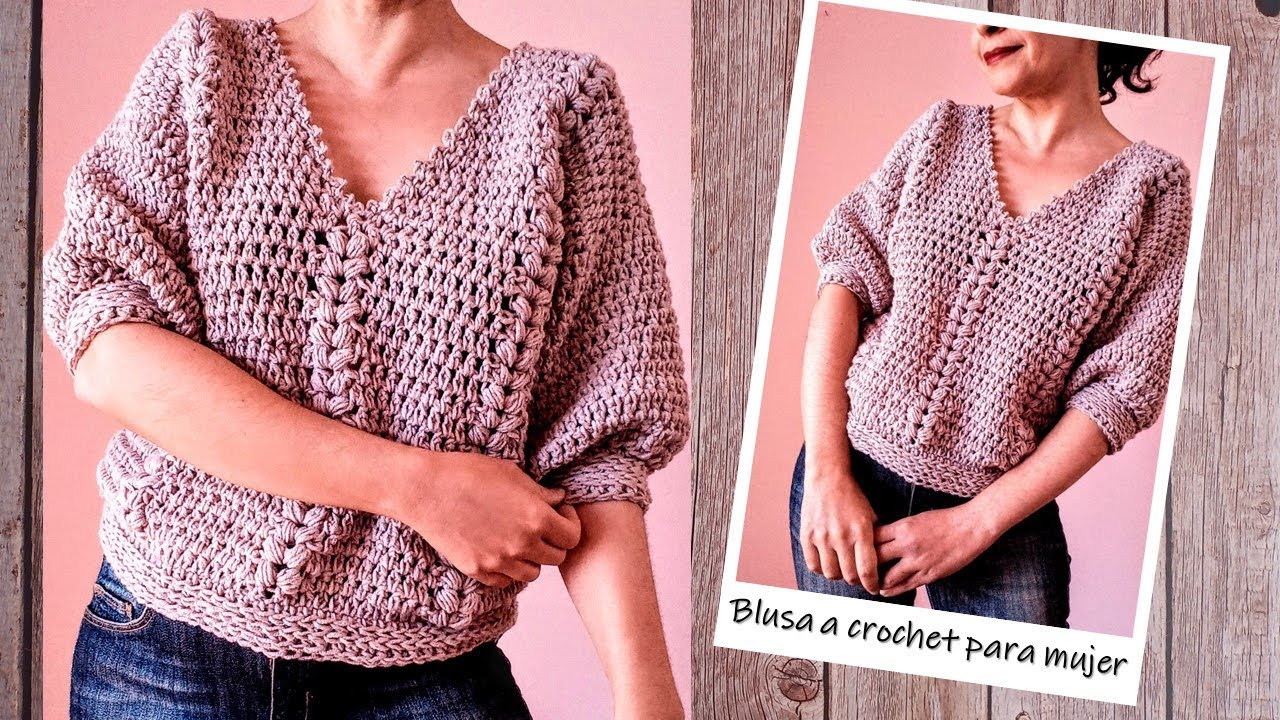
by Stitching Style: A Step-by-Step Guide to Crocheting a V-Neck Blouse for Women

A crocheted V-neck blouse is a timeless and elegant addition to any wardrobe. With its flattering neckline and comfortable fit, it can be dressed up for an evening out or styled casually for a weekend brunch. While it may seem like a complex garment, the construction is often simpler than you think, typically involving two flat panels that are later seamed together. This approach is perfect for crocheters who are ready to tackle their first garment or for those who prefer working with smaller, manageable pieces.
This detailed, step-by-step guide will walk you through the entire process, from choosing your yarn to creating the perfect V-neck shaping, helping you stitch a beautiful and custom-fit blouse.
1. Planning Your Blouse: Key Decisions
Before you pick up your hook, a bit of planning goes a long way to ensure a successful project.
- Choose Your Yarn: The yarn will determine the blouse’s drape and feel.
- For Drape & Breathability: Cotton, rayon, or linen blends are excellent choices for a lightweight summer blouse. Their natural fibers breathe well and create a fluid fabric.
- For Softness & Warmth: Merino wool or high-quality acrylic works well for a cozy, structured blouse.
- Weight: DK (Double Knitting, Category 3) or Sport (Category 2) yarn is ideal for a garment, as it’s not too bulky and drapes nicely.
- Choose Your Stitch Pattern: A simple stitch is often best to let the V-neck shape shine.
- Half Double Crochet (hdc) or Double Crochet (dc): These stitches work up quickly and create a beautiful, dense fabric.
- Moss Stitch (or Linen Stitch): A simple alternating single crochet and chain stitch that creates a lovely woven texture.
- Shell or Mesh Stitch: Great for a lacy, airy blouse, perfect for layering.
- Construction Method: This article focuses on a classic construction: crocheting two flat panels (front and back) and seaming them. This method is straightforward and easy to manage.
2. Essential Materials and Tools
Gather your supplies to ensure a smooth crafting process.
- Yarn: The amount needed will depend on your size and chosen pattern.
- Crochet Hook: The size recommended on your yarn label.
- Stitch Markers: Useful for marking rows and decrease points.
- Tapestry Needle: For seaming your panels and weaving in ends.
- Scissors.
- Measuring Tape: Crucial for checking your gauge and dimensions.
3. The Construction Journey: Step-by-Step
Follow these steps to crochet your blouse panels and assemble the final garment.
Step 1: The Gauge Swatch (Do Not Skip!)
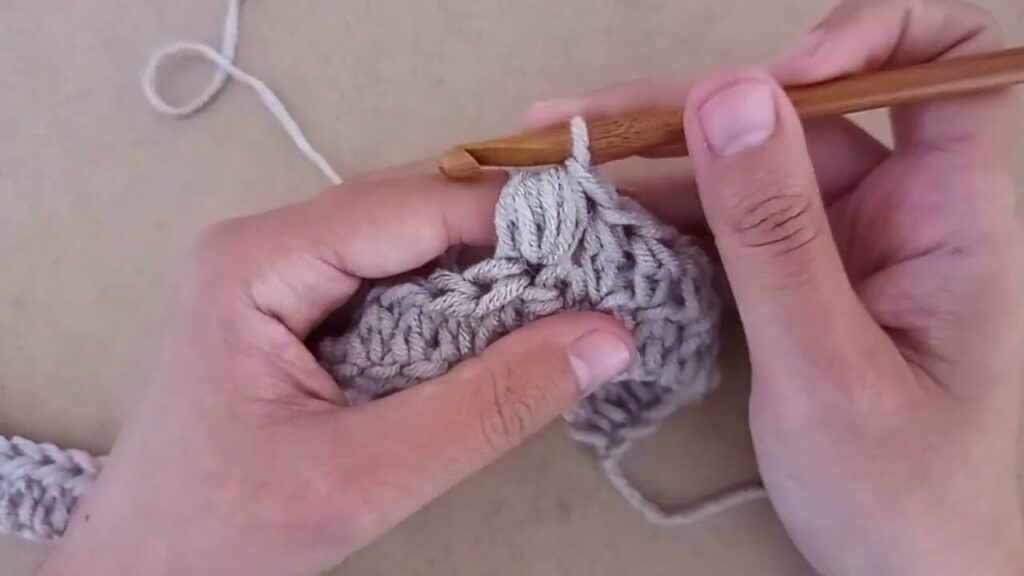
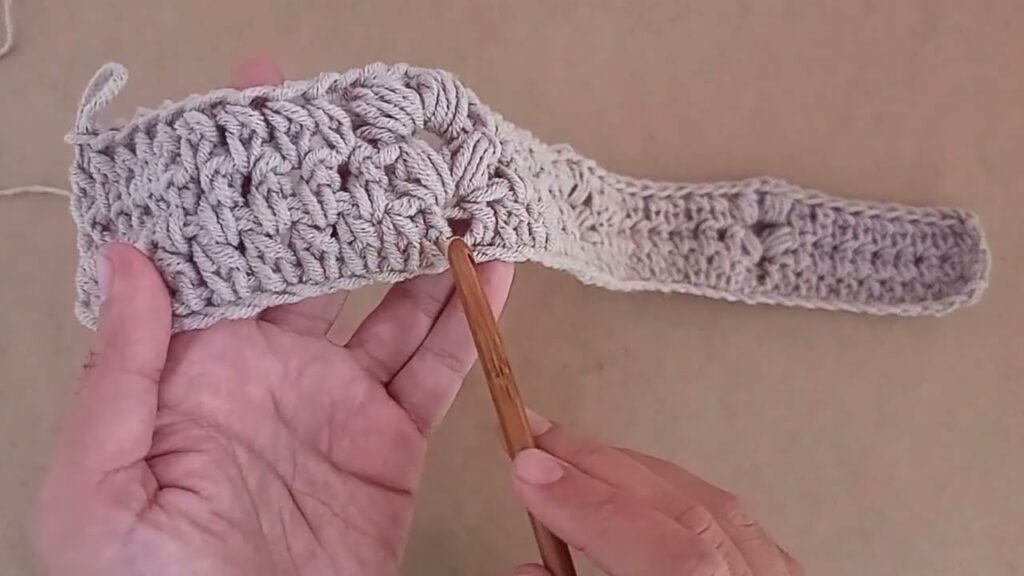
This is the most critical step for any garment. Crochet a swatch (at least 6×6 inches) in your chosen stitch and yarn. Wash and block the swatch according to your yarn’s instructions, as this will show you how the finished fabric will behave. Measure your stitches and rows per inch. Adjust your hook size until your gauge matches your pattern’s recommendation. This ensures your blouse will fit correctly.
Step 2: Crochet the Back Panel
- Start the Foundation: Chain a length that corresponds to the width of the back of your blouse (from side seam to side seam) and your chosen size.
- Work in Rows: Work in rows back and forth using your chosen stitch pattern. Continue crocheting straight up without any shaping until the panel reaches the desired length for the armhole opening (usually up to your armpit).
- Bind Off: Once the back panel reaches the full length of the blouse from the bottom hem to the shoulder, you can bind off your stitches.
Step 3: Crochet the Front Panel and Shape the V-Neck
The front panel is crocheted in a similar way to the back, but with shaping for the V-neck.
- Start the Foundation: Chain the same number of stitches as the back panel.
- Work Straight: Work in straight rows, just as you did for the back, until the panel reaches the point where you want the V-neck to start (this is typically just below your collarbone).
- Create the V-Neck: Now, you will split your work into two halves to form the V-neck.
- Place a stitch marker in the center stitch of your row.
- Work only the stitches on one side of the center marker.
- In each row, decrease one stitch at the center edge to create a straight diagonal line. This is the V shape.
- Continue decreasing at the V-neck edge until the panel reaches the desired height for the shoulder strap.
- Bind off.
- Reattach your yarn to the other side of the center marker and repeat the process, mirroring the decreases to create the other side of the V.
- Finish the Panel: Once both sides of the V are shaped, you should have two straight shoulder straps. Bind off.
Step 4: Seam the Blouse
This is where your two panels become a wearable garment.
- Shoulder Seams: Lay your front and back panels flat with the right sides facing. Seam the shoulder straps together.
- Side Seams: Seam the side edges of the front and back panels together, from the bottom hem up to the armpit.
- Weave in Ends: Use your tapestry needle to meticulously weave in every yarn tail. A neat finish is key to a professional-looking garment.

Step 5: Add Finishing Touches (Optional but Recommended)
- Add a Border: You can add a simple border of single crochet or slip stitches around the neckline and armholes to give them a clean, polished look.
- Blocking: For a beautiful drape and to even out your stitches, block your finished blouse. Gently soak it in cool water, lay it flat on a towel, and pin it to your desired shape and measurements. Let it dry completely.
A crocheted V-neck blouse is a rewarding project that results in a beautiful, handmade piece. With these step-by-step instructions, you have all the tools you need to create a stunning blouse that’s made with love.
Video Tutorial :