 by
by Preparation and Materials
- Yarn: Eight-strand broken-dyed thread (approx. 2 balls needed).
- Tools: Crochet hook, stitch markers, scissors, and a sewing needle.
- Basic Stitches Used: * Double Crochet (DC): Yarn over, insert hook, pull up a loop (3 loops on hook), yarn over, pull through 2, yarn over, pull through remaining 2.
- Single Crochet (SC): Insert hook, pull up a loop, yarn over, pull through both loops.
- Half Double Crochet (HDC): Yarn over, insert hook, pull up a loop, yarn over, pull through all 3 loops.
- Front/Back Post Double Crochet (FPDC/BPDC): Used for the brim.
Phase 1: The Hat Top (Increasing Rounds)
The hat begins with a magic loop. For all sizes, start with 12 double crochets in the first round.
- Round 1: Start with a magic loop. Chain 2 (does not count as a stitch). Work 12 DC into the loop. Pull the tail tight to close the center hole.
- Round 2 (Increase in every stitch): Chain 2. Work 2 DC in every stitch around. Total: 24 stitches.
- Round 3 (Increase every other stitch): Chain 2. 1 DC, 2 DC in next stitch. Repeat around. Total: 36 stitches.
- Round 4 (Increase every 2 stitches): 2 DC, 2 DC in next stitch. Total: 48 stitches. (Tip: Split the first set to keep the circle rounded).
- Round 5 (Increase every 3 stitches): 3 DC, 2 DC in next stitch. Total: 60 stitches. Stop here for children under 2 years old.
- Round 6 (Increase every 4 stitches): 4 DC, 2 DC in next stitch. Total: 72 stitches. Stop here for children aged 3–8 years.
- Round 7 (Increase every 5 stitches): 5 DC, 2 DC in next stitch. Total: 84 stitches. Standard size for older children and adults.
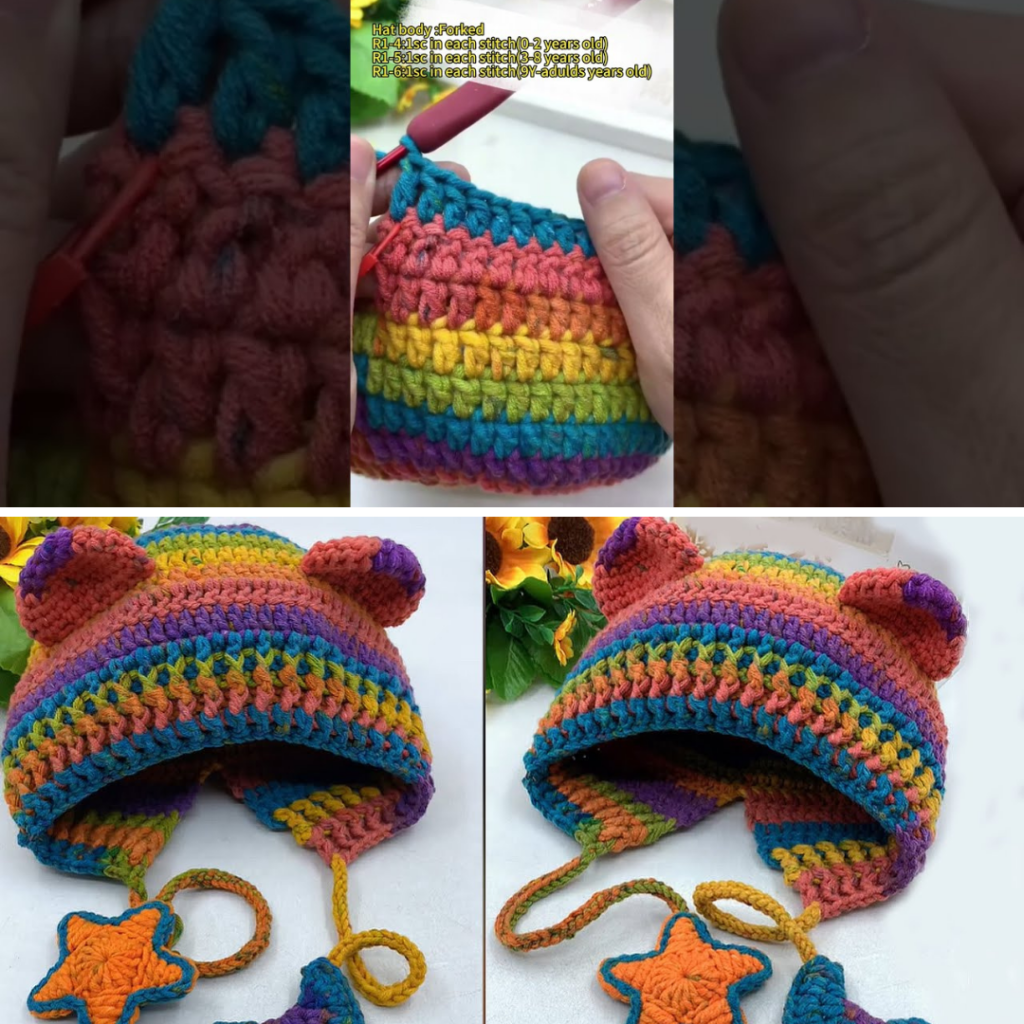
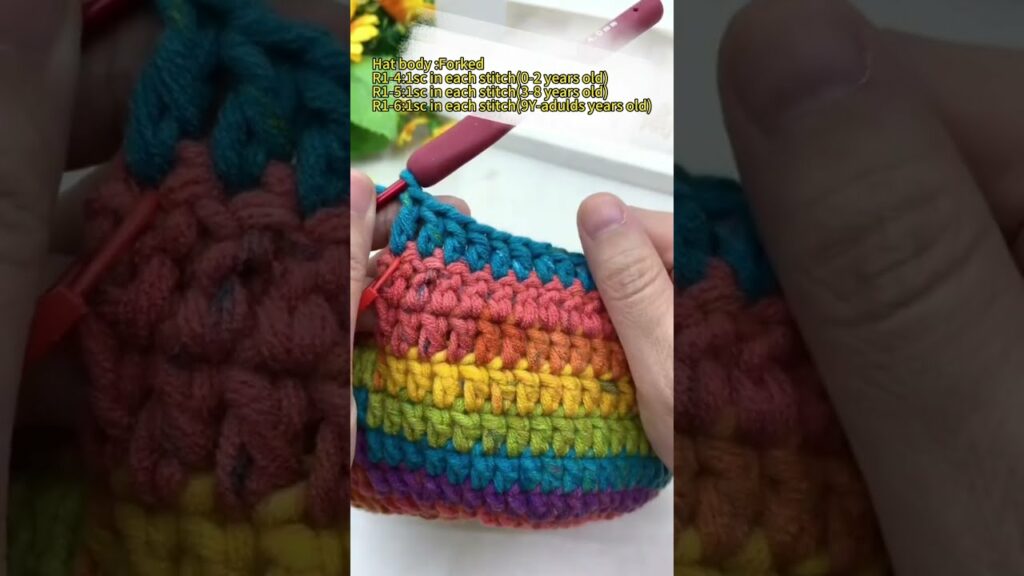
Phase 2: The Hat Body and Split Opening
Once the top reaches the desired diameter, stop increasing and work even (1 DC in each stitch).
- Continuous Rounds: Crochet DC one-by-one without increasing for several rounds to build height.
- Under 2 years: 3 rounds.
- 3–8 years: 3–4 rounds.
- Adults: 4–5 rounds.
- The Back Split: To create the “bonnet” style opening at the back, stop crocheting in a circle. Chain 2 and turn your work. Crochet back and forth (rows) instead of rounds.
- Under 2 years: 3–4 rows.
- 3–8 years/Adults: 5–6 rows.
Phase 3: The Brim (Ribbing)
The brim uses a decorative “Post Stitch” ribbing for a 3D effect.
- Row 1: Chain 2 and turn. Work 1 Front Post Double Crochet (FPDC) followed by 1 Back Post Double Crochet (BPDC). Repeat this “one in, one out” pattern across the edge.
- Subsequent Rows: Work the stitches as they appear (FPDC on FPDC, BPDC on BPDC).
- Children: 4 rows total.
- Adults: 5–6 rows total.
Phase 4: Decorative Ears
Make two. The size of the ear scales with the size of the hat.
- Round 1: Magic loop, 6 SC.
- Round 2: 2 SC in each stitch (12 stitches).
- Round 3: 1 SC, 2 SC in next (18 stitches). Stop here for infants.
- Round 4: 2 SC, 2 SC in next (24 stitches). Stop here for mid-size children.
- Finishing: Work 3–6 rows of “even” SC (no increases) to give the ear height.
- Assembly: Sew the ears between the 3rd and 4th rows of the hat top, ensuring they are symmetrical.
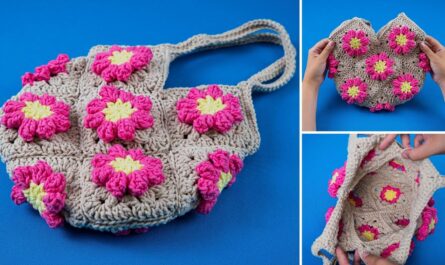
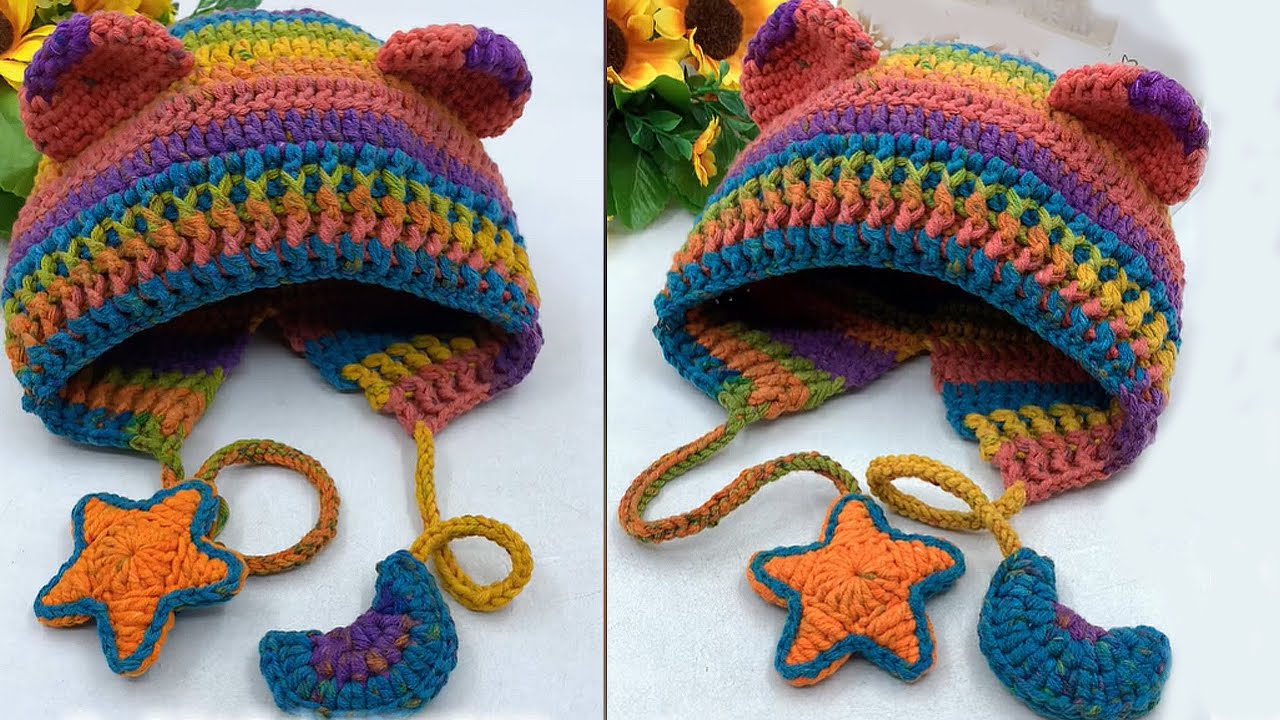
Phase 5: Braids and Charms (Star & Moon)
- Braids: Attach yarn to the bottom corners of the hat. Use a double-sided chain method to create a thick, sturdy strap.
- The Moon: 1. Work 10 HDC into a magic loop. 2. Increase in every stitch for two rounds. 3. Fold the circle in half and slip stitch the edges together to form a crescent moon. Stuff it lightly and sew it to the end of one braid.
- The Star: 1. Work 15 DC into a magic loop. 2. To create the 5 points: Chain 5, then work down the chain with 1 SC, 1 HDC, 1 DC, and 1 Treble Crochet. Slip stitch back into the center circle. 3. Make two stars, sandwich them together (back-to-back), and slip stitch around the edges. Sew to the other braid.

Final Touches
Hide all loose thread ends using a sewing needle or crochet hook by weaving them into the inside of the fabric. Your Easy Crochet Bear Beanie is now complete!
Video Tutorial: