 by
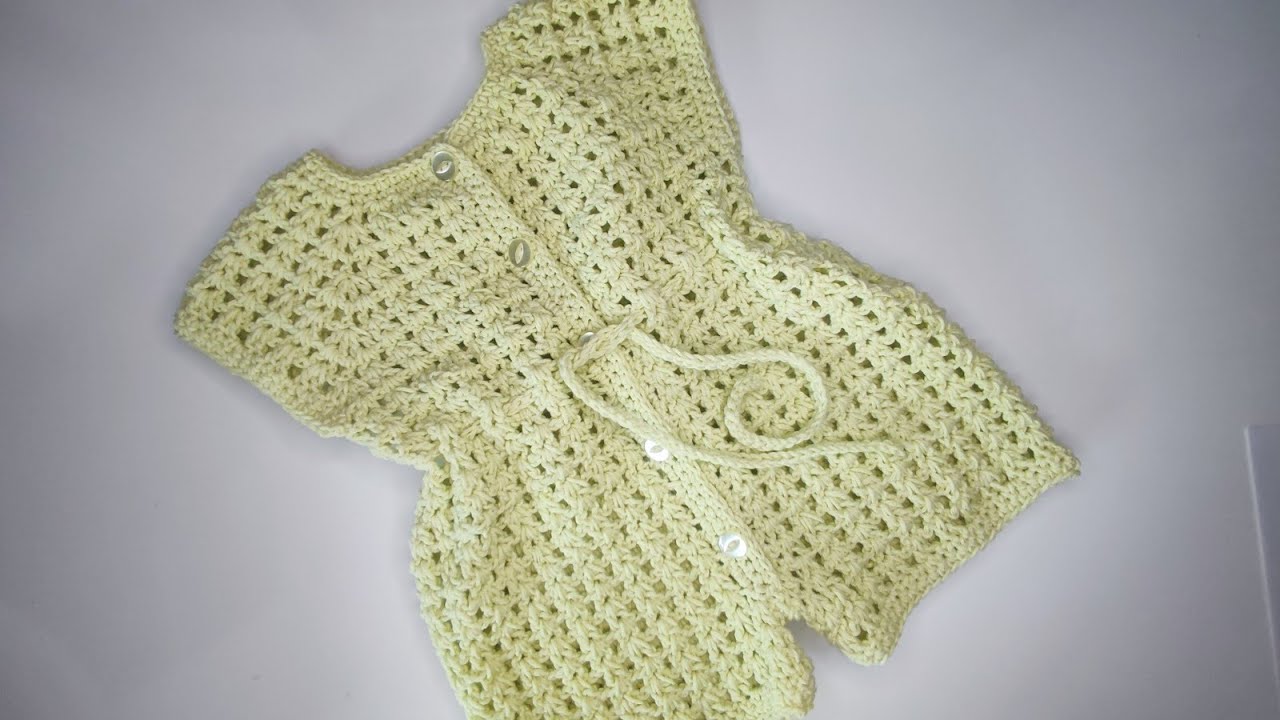
by There’s nothing quite as adorable as a baby romper, and when the temperatures rise, a handmade crocheted version offers unparalleled charm and comfort. Designed for warm weather, a summer baby romper combines lightweight breathability with practical functionality, making it an ideal choice for playful days and cozy naps.
This detailed guide will walk you through the essential steps and considerations for crocheting an adorable, comfortable, and customizable summer baby romper, perfect for capturing those precious warm-weather moments.
Why Crochet a Summer Baby Romper?

- Comfort in the Heat: Unlike heavier fabrics or bulkier knits, crocheted rompers made with appropriate summer yarns and open stitches allow for excellent airflow, keeping baby cool and comfortable.
- Practicality: An all-in-one outfit means no shirts riding up, no lost socks (if integrated), and a secure diaper cover. They simplify dressing and ensure baby stays neat and tidy.
- Ultimate Cut-Factor: Baby rompers are inherently charming. A handmade one, with its unique textures and custom colors, amplifies that cuteness factor tenfold.
- Personalized & Unique: You have complete control over the design, allowing you to choose specific colors, add delicate details, and tailor the fit, creating a truly one-of-a-kind garment.
- Skill Building: Crocheting a romper is a fantastic project to practice various garment construction techniques on a smaller scale, including yokes, shaping for legs, and creating closures.
- Cherished Gift: A handmade summer romper is a thoughtful and practical gift for baby showers, first birthdays, or simply as a special present for a new parent.
Key Elements of a Summer Baby Romper:
Understanding these components will help you visualize and plan your project:
- The Yoke/Bodice: The upper part of the romper. Top-down construction (starting from the neckline and working downwards) is very common and often preferred for minimal seaming. Yokes can be round (circular increases) or raglan (diagonal increase lines).
- Sleeve Options: For summer, think minimalistic: sleeveless, delicate cap sleeves, or short, airy flutter sleeves.
- The Torso/Body: The main section connecting the bodice to the legs, designed to fit comfortably over a diaper.
- Leg Openings: Can be straight, gently gathered, or finished with small cuffs. They often incorporate buttons or snaps for easy diaper changes.
- Bottom/Crotch: This area needs careful design to allow for diaper room and easy access for changes. A gusset or overlapping flaps are common solutions.
- Closure: Typically uses buttons on the shoulders or down the back for the top, and snaps or buttons at the crotch/legs for diaper access.
- “Summer” Aesthetic: Achieved through yarn choice, lighter colors, and openwork stitch patterns that promote airflow and a delicate appearance.
Choosing Your Tools & Materials:
The right supplies are crucial for creating a comfortable, breathable, and durable summer romper.
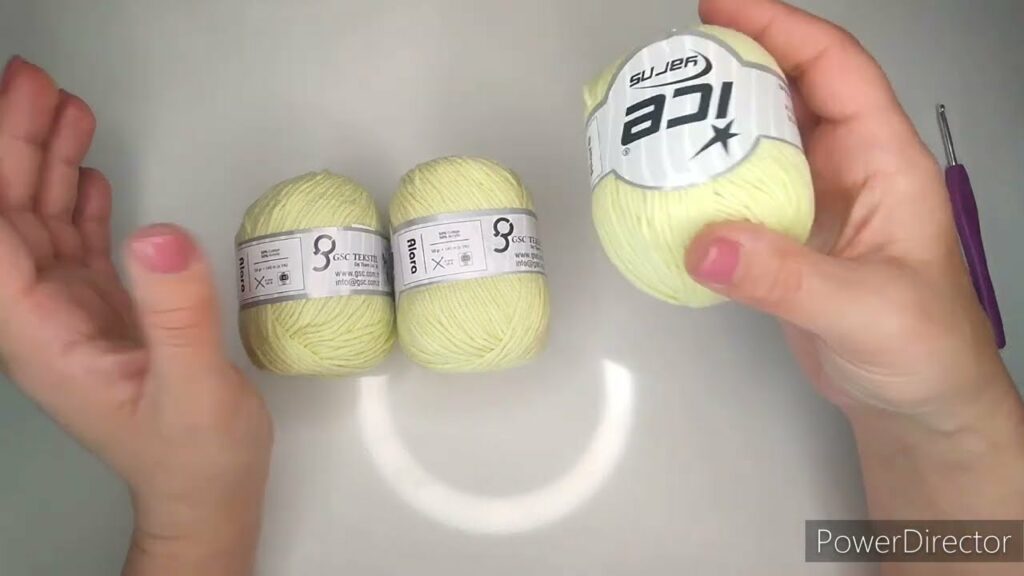
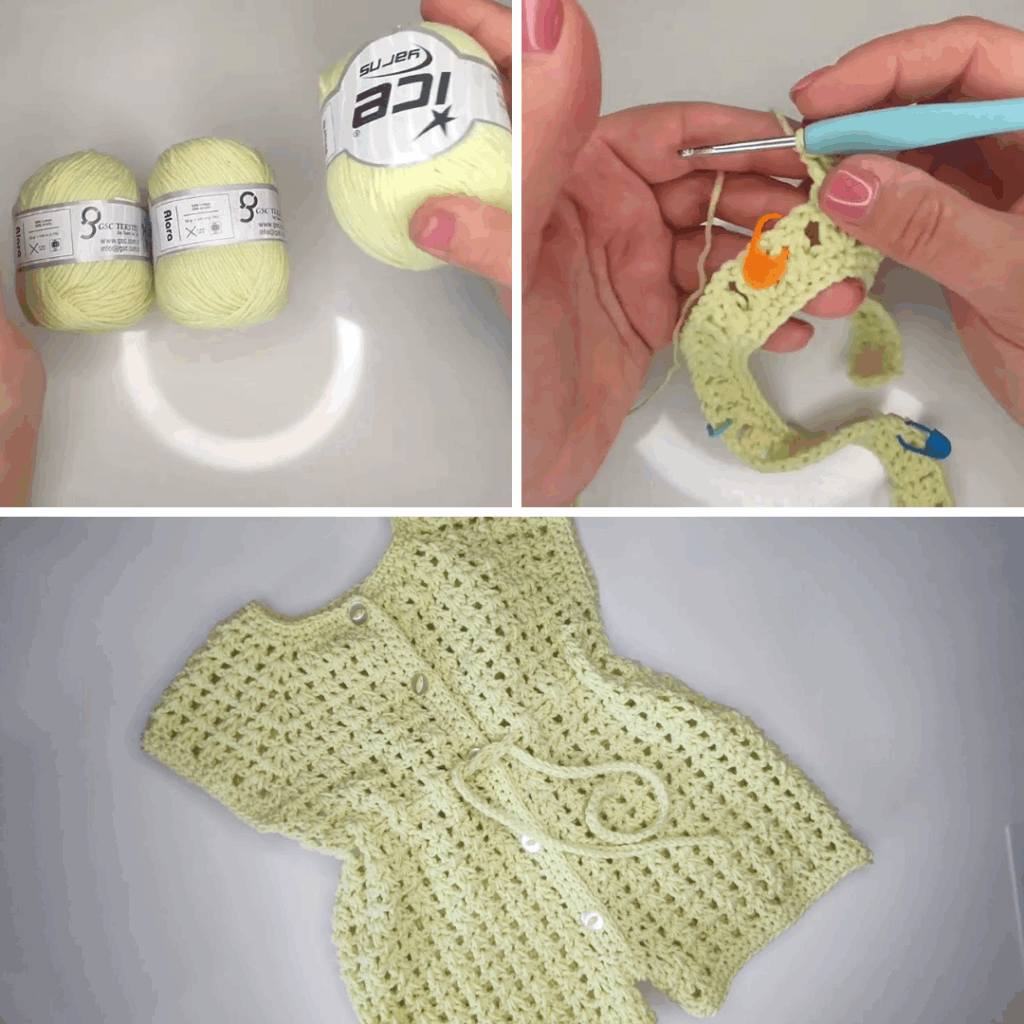
- Yarn: The Heart of Your Summer Romper!
- Fiber:
- 100% Cotton: The gold standard for summer crochet. It’s incredibly breathable, absorbent, soft, and provides excellent stitch definition.
- Cotton/Bamboo Blends: Offer exceptional softness, a beautiful drape, and superior breathability. Bamboo has a slight sheen and coolness.
- Linen/Cotton Blends: Linen provides excellent drape, strength, and a wonderfully cool feel, while cotton softens the blend.
- Avoid: Wool, heavy acrylics, or chunky yarns, as these will be too warm for summer.
- Weight: Sport Weight (often labeled “baby weight”) or DK (Double Knitting) are highly recommended. They create a delicate, lightweight fabric that’s perfect for warm weather. Light Worsted (category 4) can work for a slightly denser fabric, but may be warmer.
- Color Palette: Opt for light, airy, and refreshing colors: classic pastels (pale pink, blue, mint, lavender), crisp white, soft cream, sunny yellow, or gentle variegated yarns.
- Quantity: Varies significantly by size and design. For a 0-6 month romper, expect to need 200-350 yards; for 6-18 months, 350-500+ yards.
- Fiber:
- Crochet Hook:
- Your chosen yarn label will suggest a hook size (e.g., 3.5mm, 4.0mm, 4.5mm).
- Crucial for Garments: The correct hook size for your gauge is more important than the label’s suggestion. You will almost certainly need to adjust your hook size (up or down by half a size) to achieve the exact gauge specified by your pattern for a comfortable fit and proper drape.
- Other Notions:
- Stitch Markers: Essential for marking raglan lines, the beginning of rounds, or specific shaping points.
- Tapestry Needle: For neatly weaving in all yarn ends.
- Scissors.
- Small, Flat Buttons: For shoulder or back closures. Choose flat buttons for baby’s comfort.
- Snaps: For the crotch closure (often preferred for quick diaper changes). Look for “sew-on snaps.”
- Sewing Needle & Thread: To attach buttons and snaps.
Understanding Sizing & Gauge (Essential for Fit!)
Accurate sizing is key for a comfortable and well-fitting romper.
Approximate Baby Romper Measurements (Guidelines):
| Size | Approx. Chest Circ. | Approx. Torso Length (Shoulder to Crotch) | Approx. Thigh Circ. |
|---|---|---|---|
| 0-3 Months | 16-18 inches | 13-14 inches | 7-8 inches |
| 3-6 Months | 18-20 inches | 14-16 inches | 8-9 inches |
| 6-12 Months | 20-22 inches | 16-18 inches | 9-10 inches |
| 12-18 Months | 22-23 inches | 18-20 inches | 10-11 inches |
Export to Sheets
Disclaimer: These are general averages. Always refer to a specific, detailed crochet pattern for precise stitch counts and measurements for your chosen size.
How to Make a Gauge Swatch (Do NOT Skip This Step!):
- Chain: Chain about 20-25 stitches, plus any turning chains (e.g., ch 3 for dc) as per your chosen main stitch.
- Work: Crochet a square of at least 6×6 inches (15×15 cm) in the main stitch pattern you’ll be using for the romper (e.g., double crochet or a chosen openwork stitch). A larger swatch provides a more accurate measurement.
- Wash & Block: Fasten off your swatch. Crucially, wash and block your swatch exactly as you plan to treat the finished romper. This step relaxes the fibers and reveals the true stitch size and drape after washing, which can change significantly.
- Measure: Once dry, lay the swatch flat. Place a ruler over the center. Count how many stitches fit within 4 inches (10 cm) and how many rows fit within 4 inches (10 cm).
- Adjust:
- If you have more stitches per inch than your pattern (or desired gauge) states (your work is too tight), go up half a hook size and re-swatch.
- If you have fewer stitches per inch than your pattern states (your work is too loose), go down half a hook size and re-swatch.
- Repeat until your gauge precisely matches.
General Stitch Patterns for a Summer Romper:
- Main Body (Yoke/Bodice/Legs):
- Double Crochet (dc): A versatile stitch that creates a good drape and works up quickly.
- Half Double Crochet (hdc): Slightly denser than dc but still creates a soft fabric.
- “Summer” Openwork/Lace Stitches (for breathability and delicate look):
- V-Stitch: (dc, ch 1, dc in same st/sp) Creates a lovely airy, lacy effect.
- Mesh Stitch: (dc, ch 1, skip 1 st) Offers maximum breathability and a very open look.
- Shell Stitch/Fan Stitch: (e.g., 5 dc in one st) Can be used for delicate ruffles on sleeve edges, leg openings, or as an all-over texture.
- Simple Eyelet Rows: (ch 1, skip 1 st, dc) can be subtly interspersed for decorative detail.
- Edging/Cuffs:
- Single Crochet (sc): For neat, firm edges on necklines or armholes.
- Single Crochet in Back Loop Only (sc blo): Creates a simple, subtle ribbing for cuffs if desired.
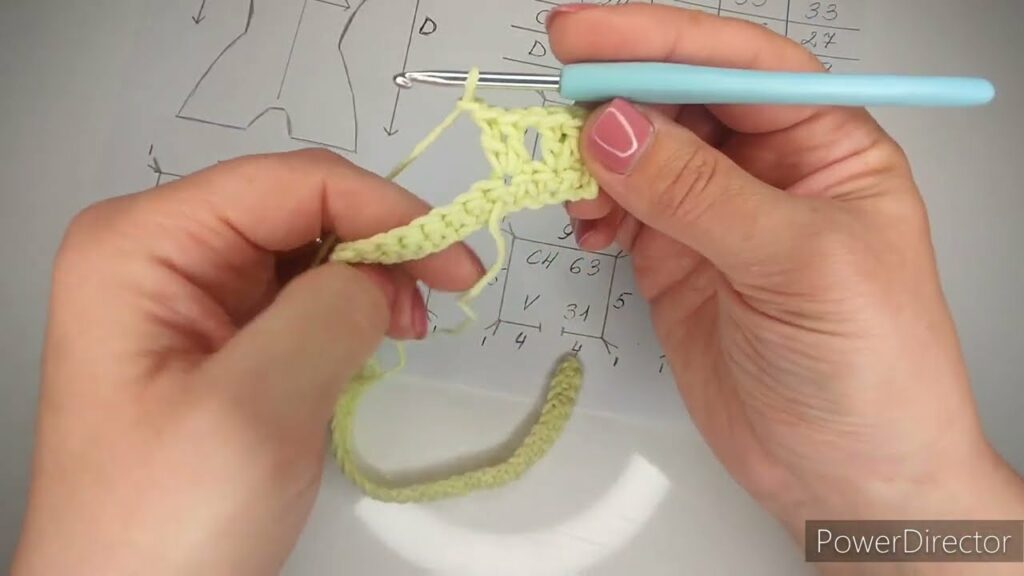
Step-by-Step Construction: The Top-Down Summer Baby Romper (Raglan Yoke Style)
This outline provides a general methodology for a top-down romper with a raglan yoke. For precise stitch counts, specific increase/decrease rates for various sizes, and intricate design elements, you MUST refer to a detailed crochet pattern that matches your desired size and style.
Phase 1: The Yoke (Top-Down, Raglan Shaping, Often with Shoulder Opening)
This forms the upper part of the romper, shaping the neckline and shoulders.
- Step 1.1: Starting Chain & Neckband
- Foundation Chain: Chain the number of stitches specified by your pattern for the neckline circumference.
- Neckband Rows: Ch 1 (or ch 2 for hdc/dc). Work 2-4 rows in sc or hdc for a stable, neat neckband.
- Shoulder Opening (Common for Rompers): For ease of dressing, one shoulder typically remains open for a few rows. Your pattern will instruct you to work flat (back and forth) for these opening rows, adding buttonholes on one side (e.g., ch 2, skip 2 stitches).
- Step 1.2: Establishing Raglan Yoke Divisions
- First Yoke Row (Raglan Setup): This row sets up the distinct front, back, and sleeve sections. Your pattern will divide your total stitches into: Back Panel 1, Sleeve 1, Front, Sleeve 2, and Back Panel 2. You will have 4 raglan corners where increases will occur.
- Work your first yoke row (e.g., dc) across Back Panel 1, then work your increase (e.g., [dc, ch 2, dc] or [2 dc, ch 1, 2 dc]) at the first raglan corner. Place a stitch marker (SM) in the increase space. Continue this pattern for all 4 corners. Turn.
- Continuing Yoke Increases: In subsequent rows, continue working your chosen stitch across, and work your specified increase into each of the 4 raglan spaces from the previous row. Move your stitch markers up to the new increase spaces. Continue working these increase rows until the yoke measures the desired depth from the neckline to the underarm for your chosen size.
- First Yoke Row (Raglan Setup): This row sets up the distinct front, back, and sleeve sections. Your pattern will divide your total stitches into: Back Panel 1, Sleeve 1, Front, Sleeve 2, and Back Panel 2. You will have 4 raglan corners where increases will occur.
Phase 2: Separating for Body & Sleeves
This step creates the armholes and prepares for the main body of the romper.
- Separation Row:
- Work stitches for Back Panel 1.
- Work into Raglan Corner 1.
- Skip Sleeve 1: Place all stitches of Sleeve 1 (the stitches between Raglan Corner 1 and Raglan Corner 2) onto a piece of scrap yarn or a stitch holder.
- Underarm Chain: Chain 2-4 stitches (this creates extra room and a seam at the underarm for comfort).
- Work into Raglan Corner 2.
- Work stitches for the Front Panel.
- Work into Raglan Corner 3.
- Skip Sleeve 2: Place all stitches of Sleeve 2 onto a holder.
- Underarm Chain: Chain 2-4 stitches.
- Work into Raglan Corner 4.
- Work stitches for Back Panel 2.
- Join in the Round: Sl st to join the ends of this row, forming a continuous circle. You will now work the rest of the romper body in seamless rounds.
Phase 3: The Torso/Body of the Romper
This forms the main section of the romper down to where the legs separate.
- Body Rounds: Continue working in rounds (or flat and seam if your pattern dictates) using your chosen main stitch (e.g., dc) or a summer openwork pattern (V-stitch, mesh).
- Shaping (Minimal for Babies): Maintain the width of the body, or add very slight increases/decreases if your pattern calls for subtle shaping for waist/hip.
- Length: Continue working until the body reaches the desired length from the underarm to the crotch separation point (refer to your pattern’s measurements for “torso length” or “body length before leg separation”).
Phase 4: Separating for Legs
At the crotch point, you’ll divide the stitches to create the two leg openings.
- Divide Stitches: Your pattern will instruct you to divide the total body stitches in half (or slightly offset for the front/back) to create two leg openings.
- Place Stitches on Holder: Place all stitches for one leg (e.g., Leg 1) onto a piece of scrap yarn or a stitch holder.
- Continue Working: You will now continue working on the stitches designated for Leg 2 (or vice versa).
Phase 5: Crocheting the Legs (Make 2)
Each leg is worked individually.
- Leg 1:
- Attach yarn to the first stitch of the chosen leg opening.
- Work in continuous rounds (or flat and seam if your pattern dictates) down the length of the leg.
- Shaping: Consider adding gentle increases evenly spaced over a few rounds at the top of the thigh to ensure enough room for baby’s thighs and diaper.
- Length: Continue working until the leg reaches the desired length (often mid-thigh or knee-length for summer rompers).
- Cuff/Edging: Finish the leg opening with a neat edge (e.g., 2-3 rounds of sc) or a delicate ruffle (e.g., using Shell Stitch).
- Fasten off.
- Leg 2: Attach yarn to the other leg opening and repeat all steps for the second leg, ensuring symmetry.
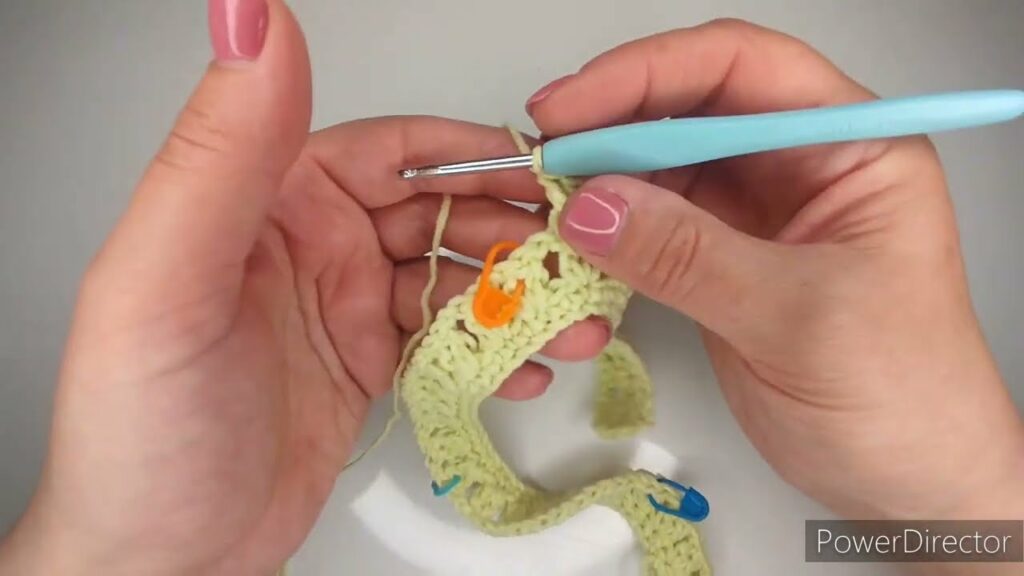
Phase 6: Crotch Gusset / Bottom Closure
This is a crucial step for diaper access and ensuring a good fit.
- Overlapping Flaps (Common): Your pattern will likely instruct you to create small rectangular flaps of fabric (e.g., 5-8 stitches wide, 3-5 rows long in hdc or dc) extending from the crotch of each leg’s inner seam. These flaps will overlap.
- Sew snaps onto these overlapping flaps (one set on the underside of one flap, the corresponding set on the top of the other flap). Snaps are often preferred for quick diaper changes.
- Alternatively, you can create small buttonholes on one flap and sew buttons onto the other.
- Ensure all snaps/buttons are very securely sewn for safety.
Phase 7: Sleeves (Optional – Cap/Flutter Sleeves)
If you chose to add sleeves:

- Attach Yarn: Attach yarn to the bottom of an armhole (where the underarm chain is).
- Pick Up Stitches: Pick up stitches evenly around the armhole opening. Join to work in the round.
- Working the Sleeve:
- Cap Sleeve: Work just 2-4 rounds of your main stitch.
- Flutter Sleeve: Use increases (e.g., 2 dc in every 3rd stitch) and a delicate stitch pattern like V-stitch or Shell Stitch over a few rounds to create a light, flared, “fluttery” look.
- Finish with a neat edge (e.g., 1 round of sc) or a matching delicate shell/picot edge.
- Fasten off. Repeat for the second armhole.
Phase 8: Finishing Touches
These final steps bring your romper to a professional finish.
- Weave in All Ends: Using your tapestry needle, meticulously weave in every single yarn tail. Secure them firmly by weaving into existing stitches in different directions. This is crucial for a neat, durable, and safe finish (no loose ends for baby to pull).
- Attach Buttons & Snaps: Securely sew the small, flat buttons to the shoulders or back of the romper as per your pattern. Attach the snaps to the crotch flap(s) as described in Phase 6. Double-check security.
- Blocking (Crucial for Drape and Finished Look!):
- Gentle Wash: Gently hand wash the finished romper (or machine wash on a delicate cycle if your yarn allows) in cool water with a mild, baby-safe detergent.
- Remove Excess Water: Gently squeeze out excess water (do not wring or twist). Roll the romper in a clean towel and press to absorb moisture.
- Shape & Dry: Lay the romper flat on a clean, dry towel or a blocking mat. Gently shape it to the correct dimensions for its size, smoothing out any unevenness, and opening up any lace or shell patterns. Use rust-proof pins if needed to hold the shape (especially for straps, leg openings, and overall length).
- Air Dry Completely: Allow the romper to air dry completely. Blocking softens the fabric, evens out stitches, enhances drape, and gives your romper a beautifully finished, professional appearance.
Tips for Summer Romper Success:
- Yarn Choice is Paramount: Always prioritize breathable, absorbent, and soft fibers like cotton, bamboo, or linen blends.
- Gauge Precision: It’s the only way to ensure the romper fits correctly and comfortably. Don’t skip the swatch!
- Openwork is Your Friend: Incorporate V-stitches, mesh, or eyelet rows for maximum airflow and a lightweight feel.
- Practical Closures: Strategically placed buttons on shoulders/back and snaps at the crotch make dressing and diaper changes significantly easier.
- Measure Frequently: Babies grow fast! Compare your work to baby’s existing clothes or a sizing chart.
- Safety First: Ensure all buttons and snaps are securely sewn. Avoid any loose threads or small, detachable embellishments that could pose a choking hazard.
Care Instructions for Your Handmade Summer Romper:
- Always follow your yarn label’s care instructions: This will guide you on whether to hand wash or machine wash (gentle cycle recommended).
- Reshape and Lay Flat to Dry: Gently reshape the romper while wet and lay it flat on a clean towel or drying rack to air dry completely. Do not hang, as this can stretch the fabric and distort the romper’s shape.
video tutorial :
Creating a crocheted summer baby romper is a rewarding project that combines functionality with undeniable cuteness. With each stitch, you’re crafting a unique and comfortable garment, ready for sunshine and smiles. Happy hooking!