by
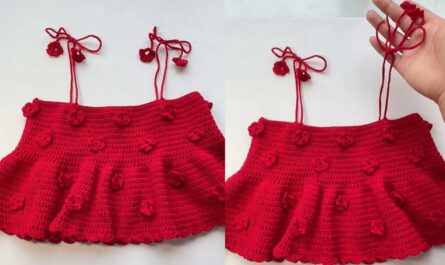
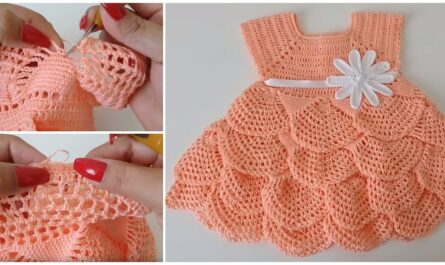
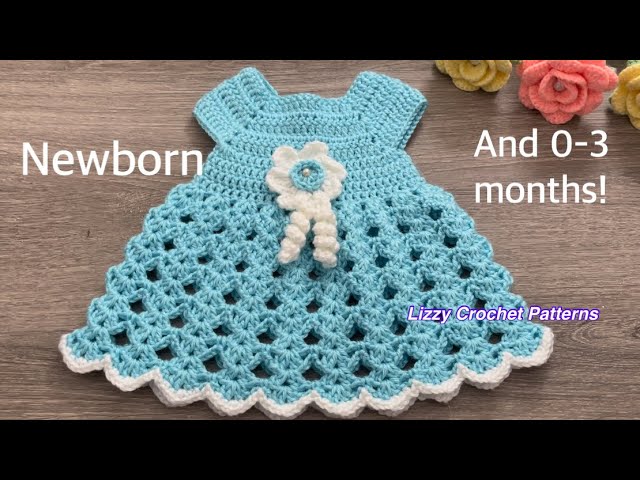
by There’s an extraordinary joy in crafting for the tiniest among us. A handmade crochet dress for a newborn or baby up to three months is more than just an outfit; it’s a soft, tender embrace, a precious keepsake, and often the star of those first memorable photographs. Designed for delicate comfort and undeniable cuteness, this project is a beautiful way to welcome a new arrival.
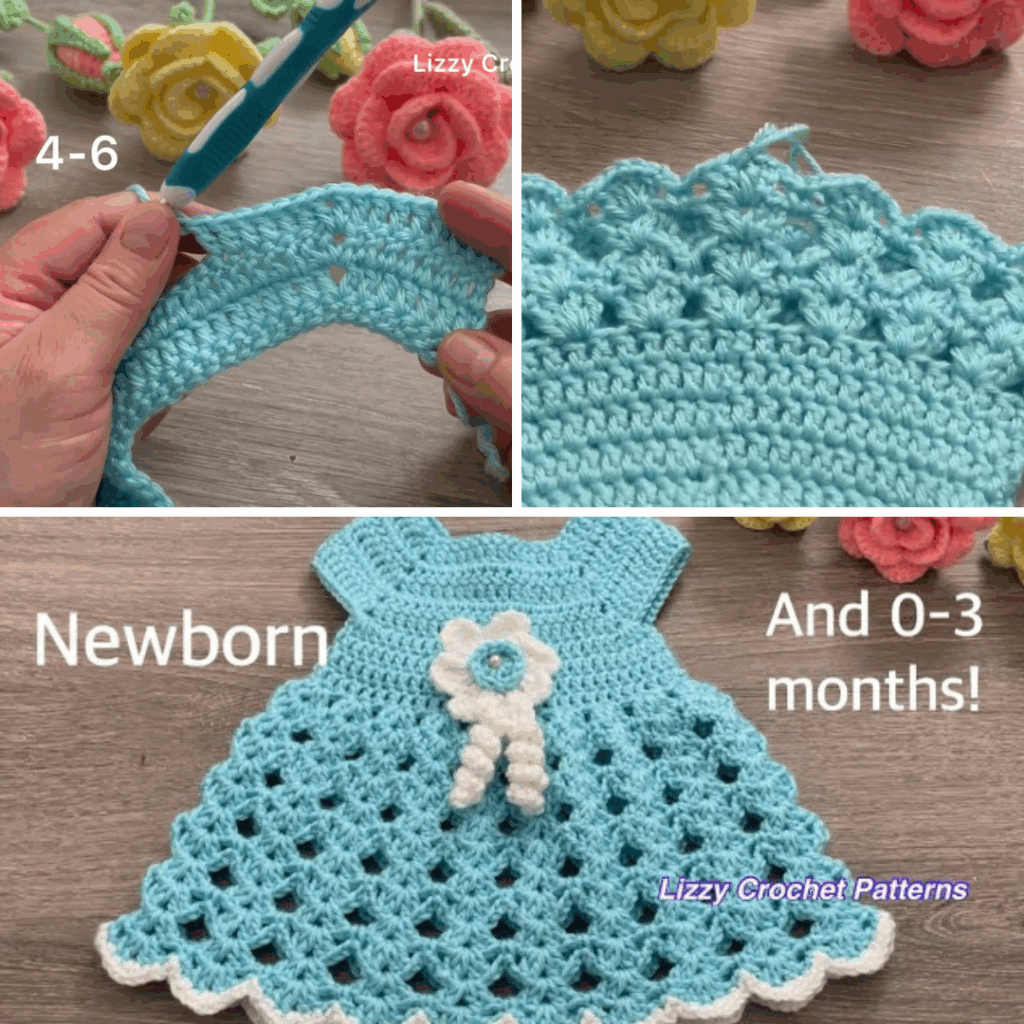
This detailed, step-by-step guide will walk you through crocheting a beautiful and comfortable dress specifically sized for newborns (approx. 7-10 lbs) and babies up to 3 months (approx. 10-14 lbs).
Why Crochet a Newborn Dress (0-3 Months)?
- Perfect Fit: Commercial clothes can sometimes be too big for true newborns. A handmade dress can be tailored for that perfect, tiny fit.
- Ultimate Softness & Comfort: You choose the yarn, ensuring it’s the gentlest fiber against delicate newborn skin, free from irritating tags or harsh seams.
- Heirloom Quality: A handmade dress becomes a cherished first outfit, a memory captured in yarn, and a treasured item to pass down.
- Personalized & Unique: Create a one-of-a-kind garment that reflects your love and unique style, whether as a gift or for your own little one.
- Photography Prop: Its delicate charm makes it ideal for newborn photoshoots, adding an ethereal touch.
- Skill Building: A smaller project is perfect for practicing garment construction techniques like shaping yokes and creating gentle flares.
Key Elements of a Newborn Dress:
Simplicity, softness, and ease of dressing are paramount for newborn garments.
- Yoke/Bodice: The upper part of the dress, often worked top-down for minimal seaming. A raglan yoke (with diagonal shoulder lines) is popular for its comfortable fit.
- Skirt: A gentle A-line flare, keeping it relatively short (above the feet) for safety and comfort.
- Sleeves: Often sleeveless, or tiny cap sleeves/puff sleeves.
- Neckline: Soft, comfortable, and wide enough to easily slip over a newborn’s head.
- Closure: Buttons down the back are essential for effortless dressing and undressing.
- Aesthetic: Focus on delicate stitches, light textures, and soft, soothing colors.
Choosing Your Tools & Materials:
The right supplies are critical for creating a safe, soft, and beautiful newborn garment.
- Yarn (CRUCIAL for Newborns!):
- Fiber:
- 100% Cotton: Highly recommended for its breathability, absorbency, softness, and clear stitch definition. Ideal for any climate.
- Superwash Merino Wool: Incredibly soft, provides warmth without bulk, and is machine washable (check label). A luxurious choice.
- Baby-Specific Acrylic: Many modern acrylic yarns are wonderfully soft, hypoallergenic, durable, and very easy to care for (often machine wash and dry). An excellent, affordable option.
- Weight: Sport Weight (often labeled “baby weight”) or Fine (2) yarns are ideal. They create a delicate, lightweight fabric perfect for newborns. DK (Double Knitting / 3) can work but might be a bit bulkier. Avoid worsted weight unless you’re aiming for a very dense, warm dress.
- Color Palette: Opt for the softest pastels (white, cream, pale pink, sky blue, mint green, lavender, pale yellow). These colors are classic and universally loved for newborns.
- Quantity: You’ll typically need approximately 150-250 yards (approx. 135-225 meters) for a newborn/0-3 month dress, depending on the specific pattern and whether you add sleeves.
- Fiber:
- Crochet Hook:
- Your chosen yarn label will suggest a hook size (e.g., 3.0mm, 3.5mm, 3.75mm).
- Crucial for Newborns: The correct hook size for your gauge is more important than the label’s suggestion. You will likely need to adjust your hook size (up or down by half a size) to achieve the exact gauge specified for a perfect, tiny fit.
- Other Notions:
- Stitch Markers: Essential for marking the beginning of rows/rounds and raglan lines.
- Tapestry Needle: For neatly weaving in all yarn ends.
- Scissors.
- Tiny, Flat Buttons: 3-4 small, flat buttons (approx. 0.4-0.5 inch / 1-1.25 cm diameter) for the dress back closure. Choose ones that are easy to fasten and lie flat for comfort when the baby is lying down.

Understanding Sizing & Gauge (ABSOLUTELY CRITICAL for Newborns!)
For baby garments, precise sizing is paramount. Even a slight deviation in your stitch size can make a big difference in how the dress fits a tiny body.
Approximate Newborn/0-3 Month Dress Measurements:
- Chest Circumference (Finished Dress): 16-18 inches (40.5-45.5 cm)
- Yoke Depth (Neckline to Underarm): 3.5-4 inches (9-10 cm)
- Finished Dress Length (Shoulder to Hem): 12-14 inches (30.5-35.5 cm)
How to Make a Gauge Swatch (DO NOT SKIP THIS STEP!):
- Chain: Chain about 20-25 stitches, plus any turning chains (e.g., ch 3 for dc) as per your chosen main stitch.
- Work: Crochet a square of at least 6×6 inches (15×15 cm) in the main stitch pattern you’ll be using for the dress (e.g., double crochet). A larger swatch provides a more accurate measurement.
- Wash & Block: Fasten off your swatch. Crucially, wash and block your swatch exactly as you plan to treat the finished dress. This step relaxes the fibers and reveals the true stitch size and drape after washing, which can change significantly.
- Measure: Once dry, lay the swatch flat. Place a ruler over the center. Count how many stitches fit within 4 inches (10 cm) and how many rows fit within 4 inches (10 cm).
- Adjust:
- If you have more stitches per inch than your pattern (or desired gauge) states (your work is too tight), go up half a hook size and re-swatch.
- If you have fewer stitches per inch than your pattern states (your work is too loose), go down half a hook size and re-swatch.
- Repeat until your gauge precisely matches.
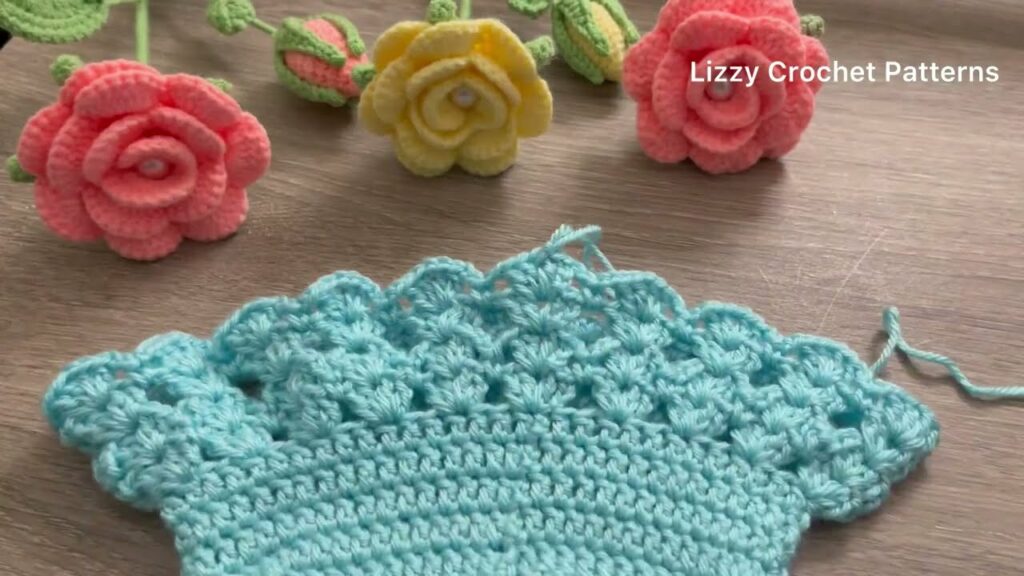
Basic Stitch Patterns for the Dress:
- Main Stitch: Double Crochet (dc) is excellent for a newborn dress. It works up quickly and creates a soft, draped fabric.
- Edging: Shell Stitch (e.g., 5 dc in 1 st, skip 2, sl st) for a pretty scalloped hem, or Picot Stitch (ch 3, sl st in 1st ch) for a dainty touch.
- Neckband: Half Double Crochet (hdc) or Single Crochet (sc) for a firm, neat edge.
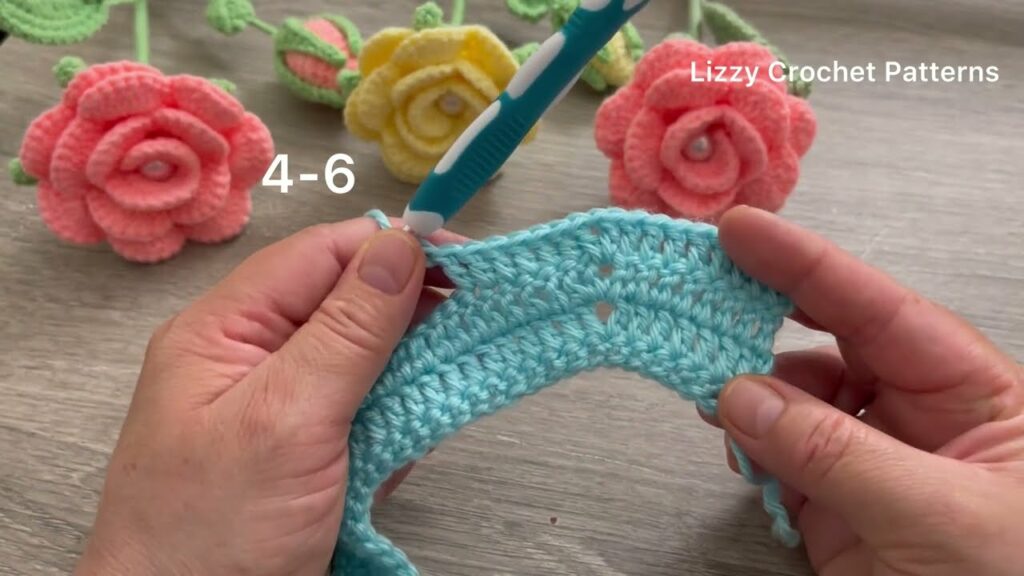
Step-by-Step Tutorial: How to Crochet a Newborn/0-3 Month Baby Dress (Top-Down, Raglan Yoke)
This tutorial provides a general structure for a top-down, raglan yoke dress. Actual stitch counts will vary significantly based on your chosen yarn, hook size, and precise gauge. This is a guide to the methodology; for exact numbers, you should refer to a specific, detailed pattern designed for 0-3 months.
Assumed Gauge for this Guide (for illustration purposes): 4 dc = 1 inch (2.5 cm) using a 3.5mm hook and Sport weight yarn.
Phase 1: The Yoke (Top-Down, Raglan Shaping with Back Opening)
This forms the upper part of the dress, starting at the neckline and creating the shoulders. It’s worked flat initially to allow for a button-up back.
- Step 1.1: Starting Chain & Neckband
- Starting Chain: Chain 48 stitches. (This number is an example for a 0-3 month size with the given gauge. Adjust as needed for your pattern and gauge).
- Row 1 (Neckband): Hdc in the 2nd chain from hook and in each chain across. (47 hdc). Turn.
- Row 2 (Neckband with Buttonhole): Ch 1 (does not count as a stitch). Hdc in the first 2 stitches. Ch 2, skip the next 2 stitches (this creates your first buttonhole). Hdc in each remaining stitch across. Turn. (Your stitch count remains 47, as the ch-2 replaces the 2 skipped hdc).
- Row 3 (Neckband): Ch 1. Hdc in each hdc across, working 2 hdc into the ch-2 space you created for the buttonhole. Turn. (Your stitch count is back to 47).
- Self-check: You should have 3 neat rows of hdc forming the neckband.
- Step 1.2: Setting Up Raglan Yoke Divisions (First Increase Row)
- Row 4 (Raglan Setup): Ch 2 (counts as your first dc).
- Dc in the next 6 stitches (total 7 dc for Back Panel 1).
- Raglan Corner 1: (Dc, Ch 2, Dc) in the next stitch. Place a stitch marker (SM) in the ch-2 space.
- Dc in the next 6 stitches (Sleeve 1).
- Raglan Corner 2: (Dc, Ch 2, Dc) in the next stitch. Place SM in the ch-2 space.
- Dc in the next 13 stitches (Front Panel).
- Raglan Corner 3: (Dc, Ch 2, Dc) in the next stitch. Place SM in the ch-2 space.
- Dc in the next 6 stitches (Sleeve 2).
- Raglan Corner 4: (Dc, Ch 2, Dc) in the next stitch. Place SM in the ch-2 space.
- Dc in the remaining 7 stitches (Back Panel 2). Turn.
- Stitch Count Check: You should now have 47 original stitches + 8 increases (2 at each of 4 corners) = 55 stitches.
- Row 4 (Raglan Setup): Ch 2 (counts as your first dc).
- Step 1.3: Continuing Yoke Increases
- Row 5 (Yoke Increase): Ch 2. Dc in each dc across, working (Dc, Ch 2, Dc) into each of the 4 ch-2 raglan spaces from the previous row. Move your stitch markers up to the new ch-2 spaces as you work. Turn.
- Repeat Row 5 until your yoke measures approximately 3.5-4 inches (9-10 cm) from the top of the neckline to the underarm. This usually takes about 6-8 total increase rows from your raglan setup row (Row 4).
- Important: Add another buttonhole on your back placket (using the Row 2 method) if desired, usually every 1-1.5 inches down the back opening.
Phase 2: Separating for Body & Sleeves
Once the yoke is the correct depth, you’ll separate the main body of the dress from the sleeve sections.
- Row 6 (Body Separation): Ch 2.
- Dc across Back Panel 1 stitches (working to the first raglan corner).
- Dc into Raglan Corner 1.
- Skip all stitches of Sleeve 1 (the stitches between Raglan Corner 1 and Raglan Corner 2).
- Chain 2 (this creates the underarm chain).
- Dc into Raglan Corner 2.
- Dc across Front Panel stitches.
- Dc into Raglan Corner 3.
- Skip all stitches of Sleeve 2.
- Chain 2 (for the underarm).
- Dc into Raglan Corner 4.
- Dc across Back Panel 2 stitches. Turn.
- Self-check: You’ve now formed the armholes. The dress will now work flat, forming the back opening. The sleeve stitches are on hold (if you plan to add cap sleeves later) or simply left if the pattern is sleeveless.
Phase 3: The Dress Bodice & Skirt Transition
This section joins the bodice into a continuous round and sets up the skirt.
- Row 7 (First Body Row): Ch 2. Dc in each dc across the row, including working 1 dc into each of the 2 underarm chains you created. Continue working flat, extending the back opening. Turn.
- Row 8 (Join in Round for Skirt): Ch 2. Dc in each dc across the row. Join with a slip stitch to the first dc of the row to form a continuous round. This closes the back opening for the skirt. From now on, you will work in continuous rounds or join with a sl st at the end of each round.
- Round 9 (First Skirt Flare – Significant Increase): Ch 2.
- Dc in the next 2 stitches, then work 2 dc (inc) in the next stitch. Repeat this pattern (dc 2, inc) around the entire round. (This creates immediate fullness for the skirt).
- Self-check: Your stitch count will have increased significantly.
Phase 4: The Skirt
This is where the dress gains its adorable fullness and length.
- Round 10: Ch 2. Dc in each stitch around (no increases in this round).
- Round 11 (Gradual Increase): Ch 2. Dc in the next 5 stitches, then work 2 dc (inc) in the next stitch. Repeat this pattern (dc 5, inc) around the entire round. (This creates a gentle A-line flare).
- Repeat Rounds 10 & 11 alternately (one round straight, one round with gradual increases) until the skirt reaches approximately 11.5-13.5 inches (29-34 cm) from the top of the shoulder (or your desired length, typically above the feet for newborns).
- Final Skirt Edging (Pretty Touch):
- Shell Stitch Edging: Sl st to join the last round. Ch 1. Skip 2 stitches, work 5 dc (shell) in the next stitch, skip 2 stitches, sl st in the next stitch. Repeat this pattern around the entire hem of the dress. Sl st to join at the end. Fasten off.
Phase 5: Sleeves (Optional – Cap Sleeves)
If you chose to add sleeves:
- Attach Yarn: Attach your yarn to the center underside of one armhole opening.
- Round 1: Ch 1. Sc evenly around the armhole opening (e.g., work 2 sc per dc post where applicable, 1 sc per chain of the underarm chain). Join with a sl st to the first sc.
- Round 2 (Shell Edging): Ch 1. Skip 2 stitches, work 5 dc (shell) in the next stitch, skip 2 stitches, sl st in the next stitch. Repeat this pattern around the entire sleeve opening. Sl st to join. Fasten off.
- Repeat for the other armhole.
Phase 6: Finishing Touches
These steps bring your dress to a professional and comfortable finish.
- Weave in All Ends: Using your tapestry needle, meticulously weave in every single yarn tail. Secure them firmly by weaving them into existing stitches in different directions. This is crucial for a neat, safe, and comfortable finish for baby.
- Attach Buttons: Sew 3-4 tiny, flat buttons to the back opening of the dress, aligning them precisely with the buttonholes you created in the neckband and as you worked the yoke.
- Blocking (ABSOLUTELY CRUCIAL for Newborn Clothes!):
- Gently Hand Wash: Fill a basin with cool water and a small amount of mild, baby-safe detergent (or wool wash if using wool). Gently submerge the dress and let it soak for 15-20 minutes. Do not agitate vigorously.
- Rinse: Gently squeeze out the soapy water (do not wring or twist). Rinse under cool, running water until all soap is gone.
- Remove Excess Water: Gently roll the dress in a clean, dry towel and press to absorb as much water as possible.
- Shape & Dry: Lay the dress flat on a clean, dry towel or a blocking mat. Gently stretch and shape the dress to the correct newborn dimensions (refer to your size chart). Smooth out any unevenness, open up the shell stitches on the hem, and define the armholes. Use rust-proof pins if needed to hold the shape.
- Air Dry Completely: Allow the dress to air dry completely. Blocking truly transforms the fabric, softening it further, evening out your stitches, enhancing the drape of the skirt, and giving your dress a beautifully finished, professional quality.
Tips for Newborn Dress Success:

- Yarn Choice is Paramount: Always prioritize the absolute softest, most breathable, and easily washable yarns. Newborn skin is incredibly delicate.
- Gauge Precision: It’s the only way to ensure the dress fits correctly for that precious tiny size. Take the time to swatch!
- Seamless is Best: Working top-down and in the round minimizes bulky seams that could irritate a baby’s sensitive skin.
- Small, Flat Buttons: Choose buttons that are easy to close and lie flat for comfort when the baby is lying down.
- Safety First: Avoid any small, detachable embellishments (like tiny beads or charms) that could pose a choking hazard. All elements should be securely attached.
- Try It On: If possible, compare your work as you go to a newborn onesie or a newborn-sized doll to gauge the fit.
Care Instructions for Your Handmade Newborn Dress:
- Always follow your yarn label’s care instructions: Some yarns require hand washing, while others are machine washable on a gentle cycle.
- Reshape and Lay Flat to Dry: Gently reshape the dress while wet and lay it flat on a clean towel or drying rack to air dry completely. Do not hang, as this can stretch the fabric and distort the dress’s shape.
VIDEO TUTORIAL ;
Creating a crocheted dress for a newborn is a truly special journey. With each tiny stitch, you’re not just making a garment; you’re infusing it with love and care, creating a precious, unique, and adorable piece that will be cherished long after it’s outgrown. Happy hooking! Sources