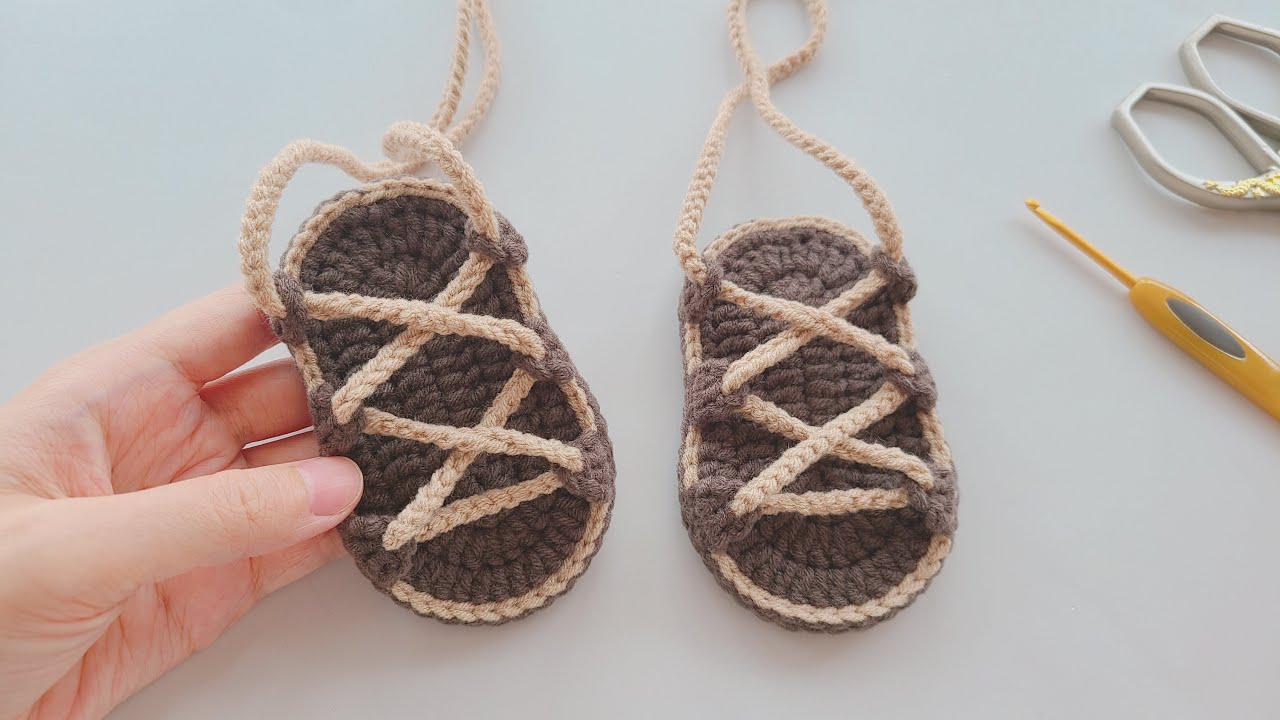
Crochet baby sandals, stylish and soft cross-strap, baby toddler shoes for boys and girls

Baby sandals! That sounds adorable and perfect for warmer weather. I can definitely write a detailed article about crocheting stylish and soft cross-strap baby toddler shoes for both boys and girls.
Here’s a plan for the article:
- Title: Catchy and descriptive. “Tiny Steps, Big Style: Crocheting Soft & Stylish Cross-Strap Baby Sandals for Boys and Girls”
- Introduction:
- Hook: The joy of dressing little ones, especially in adorable, handmade items.
- Introduce the crochet baby sandal as a perfect blend of comfort, style, and practicality for spring/summer.
- Highlight the specific features: “soft cross-strap” design and suitability for both “boys and girls” (gender-neutral appeal or customizable).
- Emphasize the love woven into handmade baby items.
- Why Crochet Baby Sandals? (The Benefits):
- Comfort & Softness: Gentle on delicate baby skin, flexible for developing feet.
- Breathability: Perfect for warmer weather, allows air circulation, prevents overheating.
- Customization: Endless possibilities for colors, embellishments (buttons, appliques), gender-neutral or specific.
- Affordability: More cost-effective than buying multiple pairs.
- Thoughtful Gift: A cherished, handmade present for baby showers or birthdays.
- Photo-Ready: Incredibly photogenic for baby’s milestones.
- Design Deep Dive: The Stylish & Soft Cross-Strap:
- The “Cross-Strap” Design:
- Functionality: Provides a secure fit over the instep, preventing the sandal from slipping off easily. Offers good support for a baby’s foot.
- Aesthetics: Visually appealing, classic sandal look, adds structure and style.
- Comfort (Softness): Emphasize how crochet allows for softness compared to rigid materials.
- Adaptability for Boys & Girls:
- Color Play: Discuss how color choices define gender appeal (pastels, brights, neutrals).
- Embellishments: Buttons, small appliques (stars, hearts, tiny flowers), simple ribbing vs. decorative edging.
- The “Cross-Strap” Design:
- Materials & Tools for Baby Sandal Perfection:
- Yarn (Crucial for softness, durability, and baby safety):
- Fiber:
- Cotton: Highly recommended. Soft, breathable, durable, easy to wash, minimal stretch (good for shape retention). Organic cotton is a plus.
- Bamboo Blends: Exceptionally soft, smooth, good drape, naturally breathable.
- Baby Acrylics: Hypoallergenic, soft, easy care, wide color range.
- Cotton/Acrylic Blends: Combine benefits of both.
- Avoid: Wool (can be too warm or itchy for baby feet), overly textured/fuzzy yarns that might shed or irritate.
- Weight: DK (Double Knitting / Category 3) or Sport (Category 2) are ideal for baby shoes, providing enough substance without being bulky.
- Colors: Discuss choosing appropriate colors for the desired gender or a gender-neutral look.
- Fiber:
- Crochet Hook: Size appropriate for yarn weight. Often a smaller hook than recommended for the yarn will create a denser fabric for structure.
- Notions:
- Stitch markers (useful for keeping track of rounds).
- Tapestry needle (for weaving ends and sewing on embellishments).
- Scissors.
- Small, flat buttons (for strap closure, avoid small choking hazards) or velcro for easy on/off.
- Non-slip fabric or liquid latex (for the sole, crucial for toddlers who are starting to walk).
- Yarn (Crucial for softness, durability, and baby safety):
- Crocheting Your Baby Sandals: Step-by-Step Considerations:
- Phase 1: The Sole (Foundation of the Sandal):
- Shape: Typically starts with a chain, then worked in rounds around the chain to form an oval shape for the sole.
- Stitches: Use dense stitches like single crochet (SC) or half double crochet (HDC) for a firm, flat base.
- Sizing: Emphasize the importance of measuring baby’s foot or referring to standard size charts. Gauge swatch is critical.
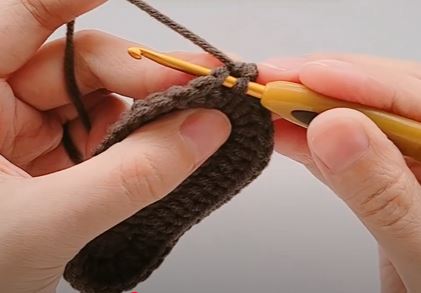
- Phase 2: The Sides (Building the Shoe):
- Once the sole is complete, work a round or two into the back loop only (BLO) or third loop to create a neat edge and define the transition from sole to upper.
- Work a few rounds of SC or HDC without increases to create the vertical side walls of the sandal.
- Phase 3: The Toe & Cross-Straps (The Stylish Design):
- Toe Section: Work stitches across the front part of the sandal, gradually decreasing to shape the toe opening. This might involve skipping stitches or using decrease stitches.
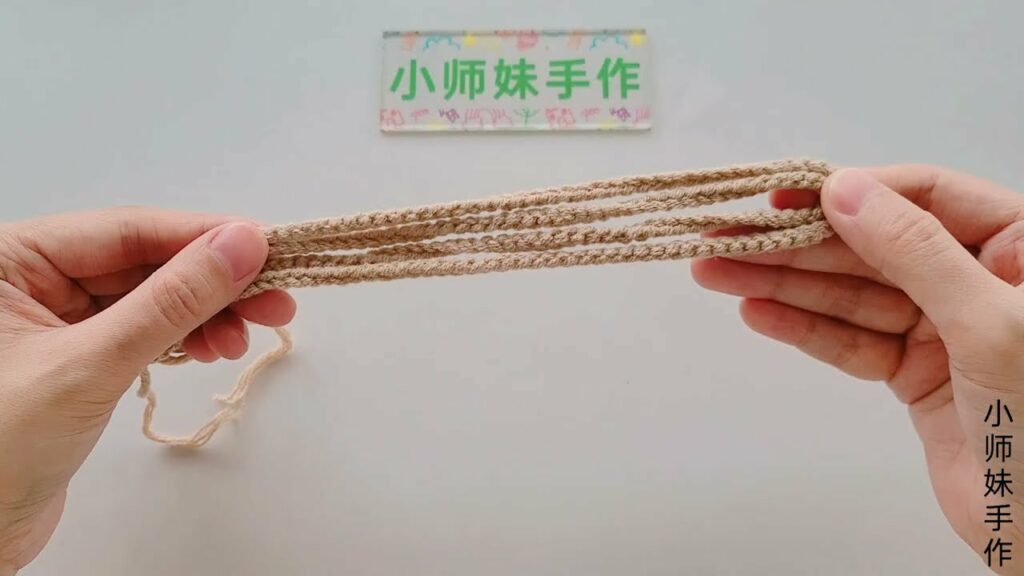
- Cross-Straps:
- From the sides of the toe opening, chain stitches to create one strap that crosses the foot.
- Fasten off and re-attach yarn to create the second strap, crossing over the first.
- Attach these straps to the sides of the sandal near the ankle.
- Alternative Strap Design: Some patterns create a single, longer strap that wraps around the ankle and fastens.
- Closure Loops (if using buttons): Create small chain loops at the end of the straps to accommodate buttons.
- Phase 4: Finishing & Details:
- Button/Velcro Attachment: Securely sew on buttons or velcro tabs. Ensure buttons are firmly attached to prevent choking hazards.
- Weave in All Ends: Meticulously for a clean finish and to prevent unraveling.
- Non-Slip Sole (Crucial for Toddlers):
- Liquid Latex: Apply a thin layer to the bottom of the sole, allow to dry. Repeat for texture.
- Fabric: Cut small pieces of non-slip fabric and stitch securely to the sole.
- Embellishments (Optional): Small crocheted appliques (stars, flowers, leaves), small bows, or embroidered details.
- Phase 1: The Sole (Foundation of the Sandal):
- Sizing & Fit Considerations for Baby Shoes:
- Measure, Measure, Measure! Baby feet grow fast. Measure length and width.
- Growth Room: Allow a little extra room for growth, but not so much that they trip.
- Gauge: Absolutely essential for proper sizing.
- Foot Development: Remind that these are not for serious walking, but for pre-walkers/toddlers for short periods, primarily for comfort and style.
- Care Instructions:
- Match yarn care.
- Gentle washing (hand wash recommended).
- Air dry, reshape.
- Check buttons/embellishments regularly for security.
- Conclusion:
- Reiterate the joy and satisfaction of creating these adorable and practical baby sandals.
- Emphasize their perfect blend of handmade charm, comfort, and style for little feet exploring the world.
This detailed plan covers all aspects of the user’s request, focusing on both the aesthetic and practical elements of crocheted baby sandals.## Tiny Steps, Big Style: Crocheting Soft & Stylish Cross-Strap Baby Sandals for Boys and Girls
There’s an undeniable joy in dressing a little one, and that joy is amplified when their tiny outfits include charming handmade pieces. As the weather warms and little toes yearn for freedom, crocheted baby sandals emerge as the perfect project. Specifically, a stylish and soft cross-strap design offers not just adorable aesthetics but also practical comfort, making them ideal baby toddler shoes for both boys and girls as they prepare to explore the blossoming world around them.
Why Crochet Baby Sandals? The Benefits Beyond Cuteness
While the sheer cuteness of crocheted baby sandals is undeniable, their appeal extends to several practical advantages:
- Supreme Comfort & Softness: Unlike rigid factory-made shoes, crocheted sandals are incredibly gentle and flexible, conforming perfectly to delicate baby feet. The soft yarn prevents chafing and allows for natural foot movement, crucial for developing muscles.
- Breathability for Tiny Toes: Perfect for spring and summer, the open design of sandals allows air to circulate, keeping little feet cool and preventing overheating, which is vital for a baby’s comfort.
- Endless Customization: Crocheting offers unparalleled freedom to personalize. Choose any color scheme – from classic pastels to vibrant brights, or sophisticated neutrals. Add unique embellishments like tiny appliques, decorative buttons, or subtle embroidery to match any outfit or theme.
- Affordable & Sustainable: Handmade baby shoes can be more cost-effective than repeatedly buying new sizes as quickly as babies grow. Plus, they represent a sustainable choice, minimizing waste.
- Heartfelt Gift: A pair of handmade baby sandals, crafted with love and care, makes an exceptionally thoughtful and cherished gift for baby showers, birthdays, or welcoming a new arrival.
- Photo-Ready: Let’s be honest, those tiny feet in adorable handmade sandals are incredibly photogenic, perfect for capturing precious milestone memories!
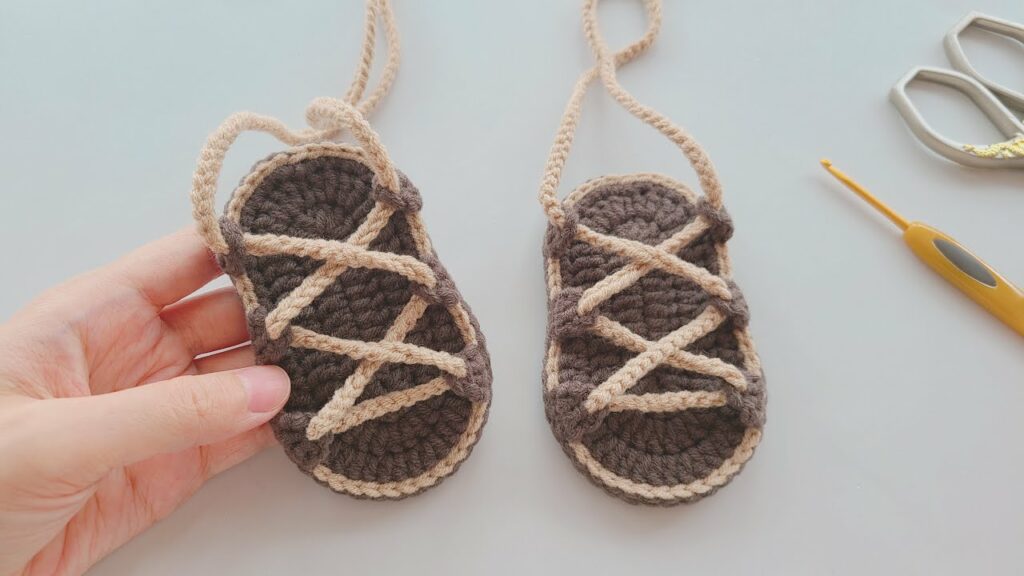
Design Deep Dive: The Stylish & Soft Cross-Strap
The “cross-strap” design is a popular choice for baby sandals due to its blend of form and function:
- Functionality of the Cross-Strap: The straps that cross over the baby’s instep serve a crucial purpose: they provide a secure fit. This prevents the sandal from slipping off easily, a common challenge with active babies and toddlers. The design offers gentle support without being restrictive.
- Aesthetic Appeal: The crossing straps create a classic sandal look that is both timeless and visually appealing. It adds structure and a touch of sophistication to a simple baby shoe.
- Comfort Through Crochet: Unlike sandals made from stiffer materials, the crocheted cross-straps, when worked with soft yarn, will flex and move with the baby’s foot, ensuring continuous comfort and preventing irritation.
- Adaptability for Boys & Girls: The beauty of the cross-strap design is its inherent gender neutrality.
- Color Play: Simply by changing your yarn colors, you can tailor the sandals for boys (e.g., blues, greens, greys, browns, classic white), girls (pinks, purples, yellows, peaches), or keep them beautifully gender-neutral (creams, sages, mustards, or even a rainbow mix).
- Embellishments: Further customize with gender-specific or neutral touches. For boys, consider small star appliques, anchor buttons, or simple textured stitches. For girls, tiny crocheted flowers, hearts, bows, or decorative picot edging can add charm.
Materials & Tools for Baby Sandal Perfection
Selecting the right materials is paramount for creating comfortable, durable, and adorable baby sandals:
- Yarn (Crucial for softness, durability, and baby safety):
- Fiber:
- Cotton: Highly recommended. It’s soft, breathable, incredibly durable, easy to wash, and has minimal stretch, which helps the sandals retain their shape. Organic cotton is an excellent choice for sensitive skin.
- Bamboo Blends: Known for being exceptionally soft, smooth, and having excellent drape, bamboo is naturally breathable and cool to the touch.
- Baby Acrylics: Formulated to be hypoallergenic, wonderfully soft, and easy to care for, baby acrylics come in a vast range of delightful colors.
- Cotton/Acrylic Blends: Offer a combination of benefits from both fibers, often balancing softness with durability.
- Avoid: Wool (can be too warm or potentially itchy for baby feet), and overly textured or fuzzy yarns that might shed fibers or irritate delicate skin.
- Weight: DK (Double Knitting / Category 3) or Sport (Category 2) are ideal. They provide enough substance for a sturdy shoe while remaining lightweight and not bulky.
- Colors: Choose vibrant, pastel, or neutral shades that complement a baby’s wardrobe. Remember, these are small projects, so you can experiment with multiple colors!
- Fiber:
- Crochet Hook: Select a hook size appropriate for your chosen yarn weight. Often, using a hook one size smaller than recommended for the yarn will help create a denser fabric for the sole, ensuring it holds its shape.
- Notions:
- Stitch Markers: Very useful for keeping track of rounds and key stitches, especially on smaller projects.
- Tapestry Needle: For neatly weaving in all yarn ends and sewing on any embellishments or closures.
- Scissors.
- Small, Flat Buttons: If using buttons for closure. Ensure they are securely sewn on to prevent choking hazards. Alternatively, small strips of velcro offer an easy on/off solution.
- Non-Slip Sole Material (Crucial for Toddlers): For babies who are starting to cruise or walk, adding a non-slip bottom is essential. Options include:
- Liquid Latex: Apply a thin layer to the bottom of the sole, allow to dry, and repeat for texture.
- Non-Slip Fabric: Cut small pieces of non-slip grippy fabric and stitch them securely to the sole.
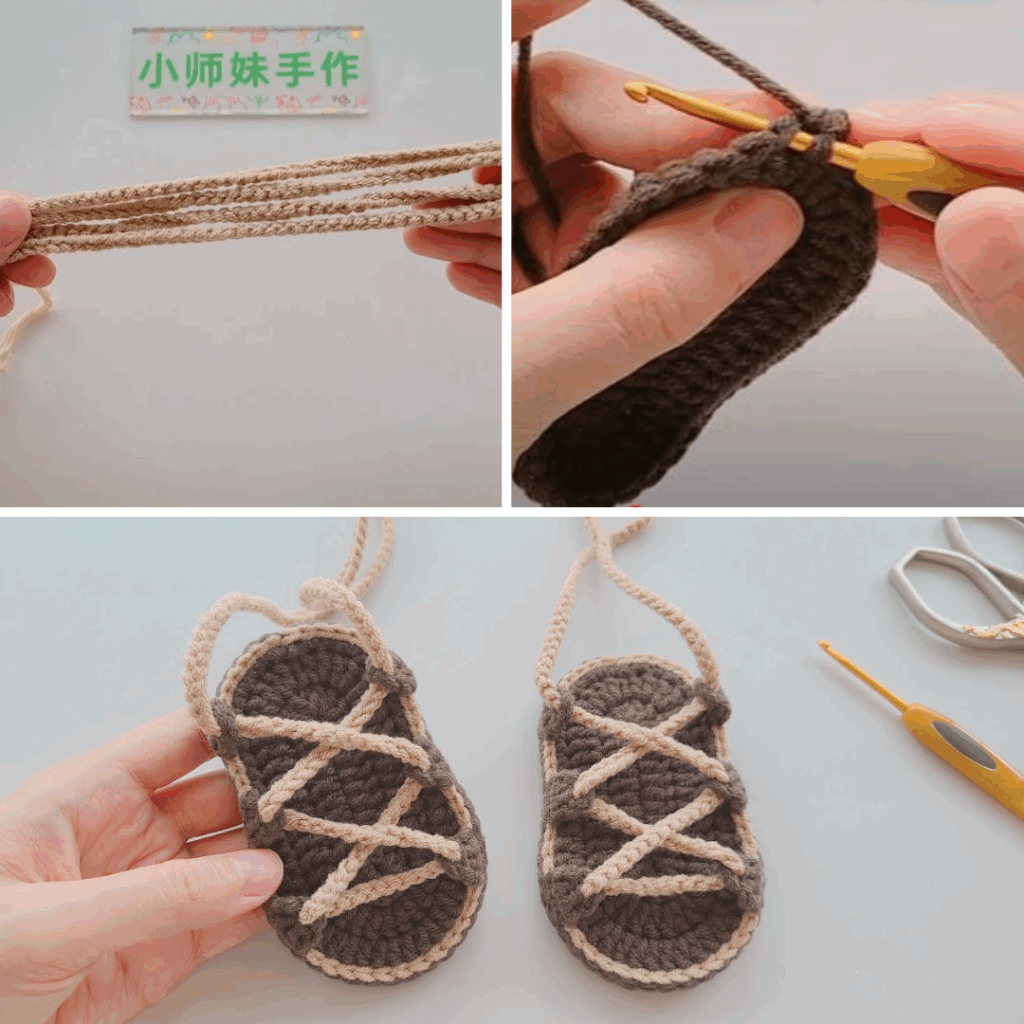
Crocheting Your Baby Sandals: Step-by-Step Considerations
While specific patterns will vary, most crocheted baby sandals follow a similar construction sequence:
Phase 1: The Sole (The Foundation of the Sandal)
- Shape: The sole is almost always crocheted first. You’ll typically start with a small chain, then work in continuous rounds around both sides of the chain to form an oval shape that mirrors a baby’s foot.
- Stitches: Use dense stitches like single crochet (SC) or half double crochet (HDC) worked tightly to create a firm, flat base for the sole.
- Sizing: This is critical. Refer to a baby shoe size chart (by age or foot length) or, ideally, measure the baby’s actual foot length and width. A gauge swatch is essential to ensure your finished sole will be the correct size.
Phase 2: The Sides (Building the Shoe)
- Defining the Edge: Once the sole is complete, you’ll often work a round or two into the back loop only (BLO) or the third loop of the previous round. This creates a neat, defined ridge that separates the sole from the upper part of the sandal and helps the sides stand up vertically.
- Side Walls: Work a few rounds of SC or HDC without increases, creating the vertical side walls of the sandal.
Phase 3: The Toe & Cross-Straps (The Stylish Design)
- Toe Section: This is where the sandal truly takes shape. You’ll work stitches across the front part of the sandal’s opening, often using decrease stitches or skipping stitches in subsequent rows to create the curve of the toe opening.
- Cross-Straps:
- From the sides of the shaped toe opening, you’ll create chains or strips of crochet that will form the cross-straps over the instep.
- Typically, one strap is crocheted and fastened off, then yarn is re-attached to create the second strap that crosses over the first. These straps are then securely attached to the sides of the sandal near the ankle.
- Alternative: Some patterns might feature a single, longer strap that wraps around the back of the ankle before fastening.
- Closure Loops (if using buttons): If you’re using buttons, create small chain loops at the end of your straps to serve as buttonholes.
Phase 4: Finishing & Details
- Button/Velcro Attachment: Carefully and securely sew on your chosen buttons or velcro tabs. For buttons, double-check that they are fastened extremely tightly to prevent choking hazards.
- Weave in All Ends: Meticulously weave in every single yarn tail. This ensures a clean, professional finish and prevents the sandal from unraveling with wear.
- Non-Slip Sole (Crucial for Toddlers): If the sandals are for a baby who is starting to walk or crawl, applying a non-slip sole is vital for safety.
- Liquid Latex: Apply a thin layer to the bottom of the sole, let it dry completely, and apply a second layer if desired for more texture.
- Non-Slip Fabric: Cut small, foot-shaped pieces of non-slip fabric and hand-stitch them securely to the bottom of the sole.
- Embellishments (Optional): Add small crocheted appliques (tiny flowers, leaves, stars, hearts), embroidered details, or small bows for extra charm.
Sizing & Fit Considerations for Baby Shoes
- Measure, Measure, Measure! Baby feet grow incredibly fast. Always measure the length and width of the baby’s foot before starting, if possible.
- Growth Room: Allow a little extra room for growth (about 0.5 inches or 1.25 cm beyond the longest toe) but not so much that the sandal becomes a tripping hazard.
- Gauge is King: For proper sizing, creating a gauge swatch with your chosen yarn and hook is absolutely essential. Don’t skip this step!
- Purpose: Remember that these crocheted sandals are primarily for comfort, warmth (if needed), and style. They are not designed to be supportive walking shoes for prolonged use, especially for toddlers learning to walk independently outdoors.
Care Instructions
- Match Yarn Care: Always follow the specific care instructions for your chosen yarn fiber.
- Gentle Washing: Most crocheted baby items are best hand-washed in cool water with a mild detergent.
- Air Dry: Gently squeeze out excess water (do not wring), reshape the sandals, and lay them flat on a clean towel or mesh rack to air dry completely. Avoid hanging, as this can cause stretching and distortion.
- Regular Checks: Periodically inspect buttons or other embellishments to ensure they remain securely attached.
Video Tutorial ;
Creating a pair of crocheted cross-strap baby sandals is a truly rewarding endeavor. It’s a delightful blend of handmade charm, practical comfort, and undeniable style, ready to adorn the tiny feet of the boys and girls exploring the world, one soft, stylish step at a time.