 by
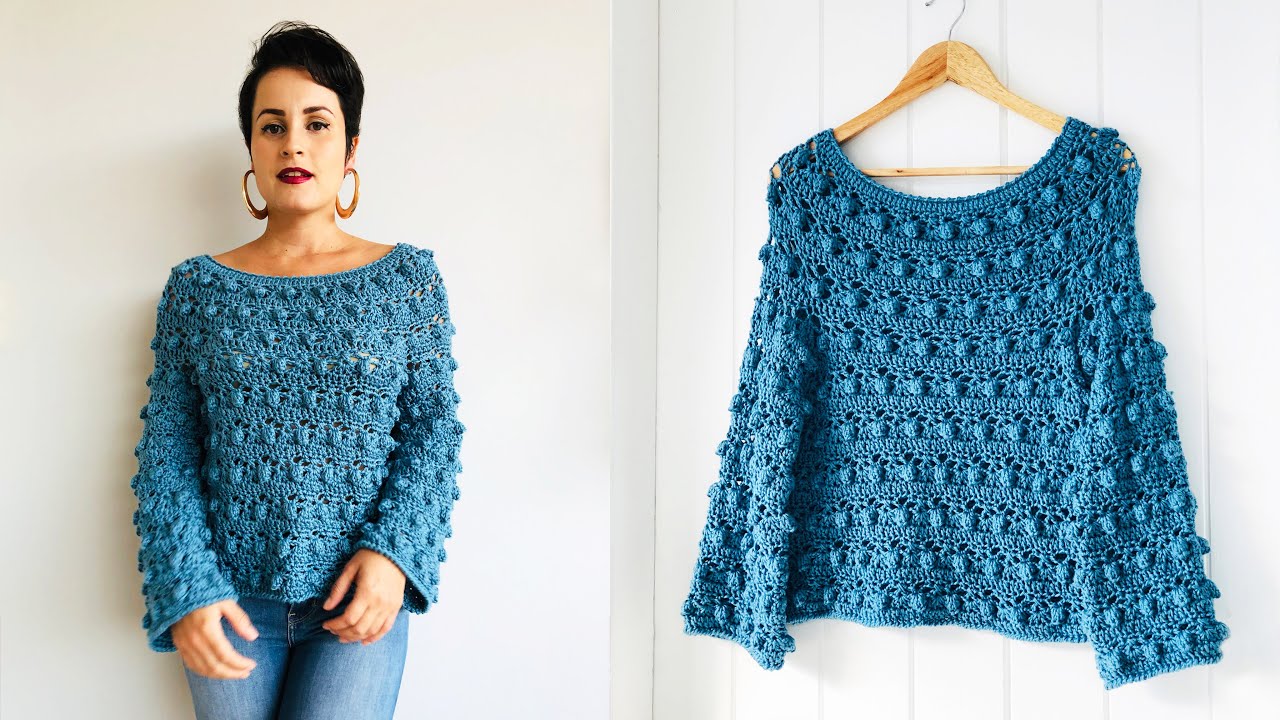
by Why a Round Yoke Blouse is a Crocheter’s Delight
- Flattering Silhouette: The circular design of the yoke provides a gentle slope over the shoulders and chest, complementing various body types without the need for complicated darting or set-in sleeves.
- Seamless Construction (Often Top-Down): Many round yoke blouses are crocheted from the neck down, in a single piece. This eliminates the need for seaming the shoulders and much of the body, resulting in a cleaner finish and often a better drape. It also allows for easy try-on and length adjustments as you go.
- Design Versatility: The yoke itself offers a fantastic opportunity to showcase beautiful stitch patterns, from intricate lace to textured bobbles or simple, elegant repeats. The body and sleeves can then continue in a simpler stitch, letting the yoke be the star.
- Comfort: Without bulky shoulder seams, a round yoke blouse is inherently comfortable and allows for excellent freedom of movement.
- Perfect for Color Play: The circular nature lends itself well to color changes, whether creating concentric rings of different hues or subtle gradients.
Deconstructing the Round Yoke Blouse
Understanding the components of this blouse style is key to its successful creation:
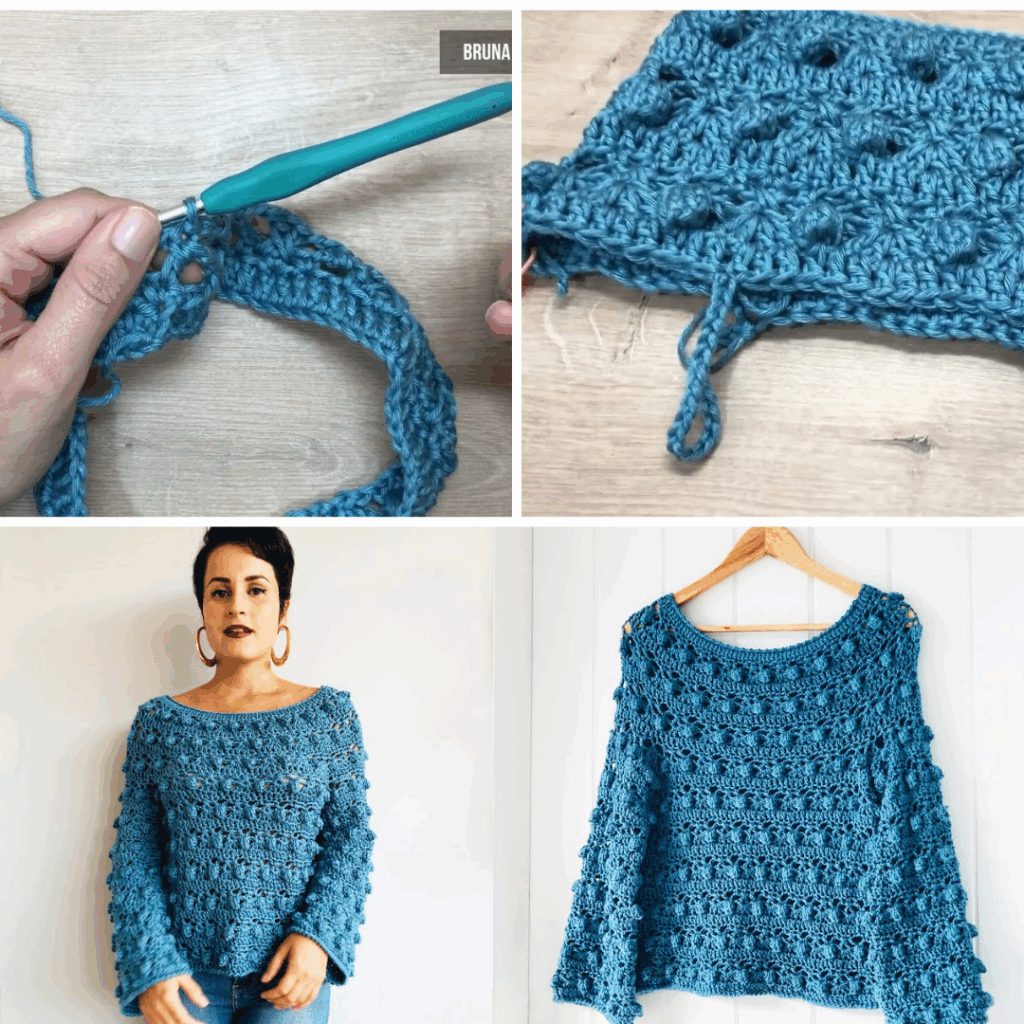
1. The Round Yoke
This is the defining feature. It typically begins with a foundation chain joined into a circle (for a closed neckline) or a straight chain worked in rows (for a back opening). Stitches are then increased evenly in each round or row to create a flat or gently domed circle that will eventually form the shoulders and upper chest.
- Stitch Patterns: The yoke is often where the most interesting stitch patterns reside:
- Lace Stitches: Shells, V-stitches, fan patterns, or open mesh for a delicate, airy look.
- Textured Stitches: Bobbles, puffs, or post stitches for a tactile, dimensional fabric.
- Simple Repeats: Basic stitches like double crochet (dc) or half double crochet (hdc) can be used effectively for a clean, minimalist design, letting the shaping speak for itself.
- Shaping: Regular increases are distributed evenly around the yoke to ensure it lies flat initially and then curves gently to accommodate the shoulders.
2. The Body
Once the yoke reaches the desired circumference (typically around the bust level, accounting for armholes), the work is divided for the body and sleeves.
- Armhole Creation: Stitches are skipped or chained to create openings for the arms. The remaining stitches continue in the round (or rows, if the blouse has a back opening) to form the main body of the blouse.
- Stitch Pattern: The body often continues in a simpler stitch than the yoke to allow the yoke to stand out, or it can maintain the yoke’s pattern for a cohesive look.
- Shaping: Minimal shaping is usually needed for the body, often just continuing straight down or with very subtle decreases/increases for a specific waistline or hip flare.
3. The Sleeves
The sleeves are typically worked directly from the armhole openings once the body is established.
- Length: Can range from cap sleeves, short sleeves, elbow-length, or full-length, depending on the design.
- Shaping: Sleeves are usually worked in the round, with occasional decreases to taper towards the wrist, or simply straight for a wider fit.
- Cuffs: Finished with a neat edging, a ribbed cuff, or a decorative border.
Choosing Your Materials
The right yarn and hook can elevate your round yoke blouse:
- Yarn:
- Fiber:
- Cotton/Cotton Blends: Excellent for a breathable, crisp drape, perfect for warmer weather. Offers great stitch definition for intricate yoke patterns.
- Bamboo/Rayon/Tencel: Known for their beautiful drape, softness, and slight sheen, creating elegant garments.
- Linen/Linen Blends: Offer a lovely drape that softens with wear and washing, with a rustic yet refined feel.
- Lightweight Acrylics: Many modern acrylics are soft, lightweight, and drape well, offering a more affordable and easy-care option with a wide range of colors.
- Lightweight Wool/Merino: For warmer blouses, providing warmth without bulk, and excellent stitch memory.
- Weight: Fingering (Category 1), Sport (Category 2), or DK (Double Knitting, Category 3) are popular choices. They create a delicate, flowing fabric that drapes beautifully over the body. Bulky yarns are less common for this style unless aiming for a very oversized, textured look.
- Fiber:
- Crochet Hook: The size recommended by your pattern for your chosen yarn, to achieve the desired drape and fabric density.
- Stitch Markers: Absolutely essential for marking the beginning of rounds, increase points on the yoke, and separating armholes.
- Tapestry Needle: For weaving in ends and any minimal seaming (e.g., if there’s a back opening).
- Scissors.
- Measuring Tape: Crucial for taking body measurements and checking your gauge.
Essential Crochet Techniques for a Round Yoke Blouse
This garment builds upon core crochet skills:
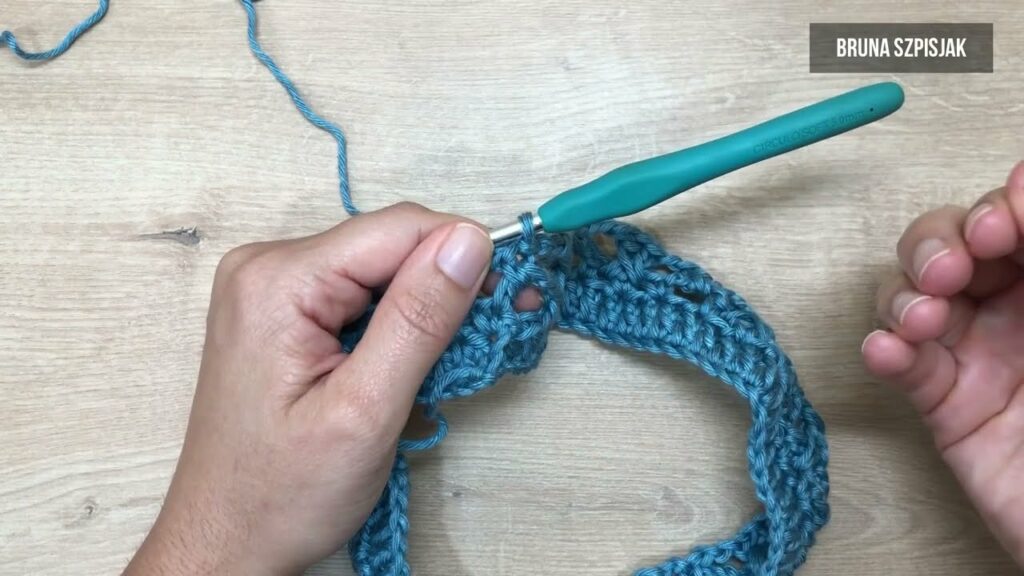
- Foundation Chain & Slip Knot: Your starting point.
- Basic Stitches: Chain (ch), Slip Stitch (sl st), Single Crochet (sc), Half Double Crochet (hdc), Double Crochet (dc) – the building blocks.
- Working in the Round: Essential for the yoke and body.
- Increases: Crucial for shaping the yoke (e.g., dc in same stitch, 2dc in next st, V-stitches, shell stitches). Consistent and even increases are key.
- Decreases (Optional): For subtle shaping on sleeves or body if needed.
- Dividing for Body & Sleeves: A specific technique of skipping stitches and creating chain spaces for armholes.
- Joining Yarn: Seamlessly adding a new skein.
- Weaving in Ends: Meticulously hiding all yarn tails for a clean, professional finish.
- Blocking: Absolutely critical for any crochet garment, especially one designed for drape. It evens out stitches, opens up lace, and sets the final shape and fluid movement of the blouse.
Planning Your Round Yoke Blouse Project
Careful planning ensures a successful and well-fitting garment:
- Sizing & Measurements:
- Take precise body measurements: full bust, upper arm circumference, desired overall length, and desired sleeve length.
- Most patterns will provide sizing charts. Choose the size closest to your actual bust measurement.
- Consider desired “ease” – the amount of extra room beyond your body measurements. For a comfortable blouse, you’ll want a few inches of positive ease.
- Gauge Swatch (Non-Negotiable!):
- Crochet a substantial swatch (at least 4×4 inches / 10×10 cm) in your chosen yarn and hook, using the primary stitch pattern of the yoke.
- Wash and block your swatch exactly as you plan to wash and block the finished blouse. This is absolutely vital, as gauge can change significantly after laundering and blocking, especially with natural fibers.
- Measure your stitches and rows per inch/cm accurately. Adjust your hook size if your gauge doesn’t match the pattern’s recommendation.
- Yarn Quantity: Consult your chosen pattern’s yardage requirements for your specific size. It’s always a good idea to purchase an extra skein just in case.
- Pattern Selection: Choose a well-written pattern specifically for a crochet blouse with a round yoke. Look for clear instructions, sizing options, stitch diagrams, and positive reviews.
Construction Journey: Bringing the Blouse to Life (Conceptual Guide)
- Start the Yoke:
- Begin with the foundation chain for the neckline (joined into a ring for seamless, or left open for a back closure).
- Work in rounds (or rows) following the pattern’s stitch chart or written instructions, evenly distributing increases in each round to create the circular yoke. Use stitch markers to identify increase points.
- Continue until the yoke reaches the specified depth, usually covering the shoulders and upper chest, just before the armpit.
- Divide for Body & Sleeves:
- At the end of the yoke section, the pattern will instruct you to place stitch markers to separate stitches for the two sleeves and the front/back of the body.
- You’ll then typically chain a few stitches under the armpits (the “underarm chain”) to connect the front and back of the body, creating the armholes.
- Crochet the Body:
- Continue working in the round (or rows, if there’s a back opening) on the body stitches, completing the desired length.
- Finish the hem with a neat border or edging.
- Crochet the Sleeves:
- Attach yarn at one of the armhole openings.
- Work in the round, picking up stitches around the armhole and along the underarm chain.
- Continue to the desired sleeve length, incorporating any decreases for tapering.
- Finish the cuffs with a matching border. Repeat for the second sleeve.
- Finishing Touches:
- Weave in All Ends: Meticulously hide every yarn tail. For a garment, neatness and security are paramount.
- Blocking (The Ultimate Transformation): This step is absolutely crucial for a crochet blouse. Gently wet the finished blouse, carefully shape it to its intended dimensions on blocking mats, and pin it securely. Allow it to dry completely. Blocking opens up lace patterns, evens out stitches, and sets the beautiful drape and fit.
- Add Closures (if applicable): If your design has a back opening, sew on buttons, add loops, or create ties.

Tips for a Beautiful Round Yoke Blouse
- Don’t Skip the Gauge Swatch: Seriously, it’s the most important step for garment sizing.
- Use Stitch Markers Liberally: Especially on the yoke, they help keep track of increases and section divisions.
- Choose Yarn Wisely: The yarn’s drape will significantly impact the final look and feel of your blouse.
- Read the Pattern Carefully: Understand the increase pattern for the yoke before you begin.
- Try On As You Go: Since many are top-down, try on the yoke and body sections frequently to ensure the fit is as desired, especially before dividing for the sleeves.
- Embrace Blocking: It truly transforms the fabric and structure of the blouse.
A crochet blouse with a round yoke is a truly rewarding project that combines aesthetic beauty with practical wearability. By mastering its elegant construction, you’ll create a cherished, custom-made garment that showcases both your skill and your unique style.
Video Tutorial :