 by
by Why a Rainbow Baby Sweater is a Pot of Gold
- Symbol of Joy and Hope: The rainbow is universally recognized as a symbol of joy, hope, and new beginnings. What better way to welcome a new life than with a garment that embodies these vibrant sentiments?
- Visually Captivating: For babies, bright colors are stimulating and engaging. A rainbow sweater offers a playful visual feast that stands out.
- Gender-Neutral Appeal: Rainbows transcend traditional gender norms, making a rainbow baby sweater a wonderfully inclusive gift for any little one.
- Stash Busting Potential: This is a fantastic project for using up those smaller balls of colorful yarn you’ve accumulated, turning remnants into a cohesive and beautiful piece.
- Handmade Love: A crocheted baby sweater is a deeply personal and unique gift, carrying the warmth and effort of the maker.
Designing Your Little Rainbow Masterpiece
Creating a baby sweater requires careful thought to ensure it’s both beautiful and practical for the little wearer.
1. The Rainbow Palette
- Classic ROYGBIV: Red, Orange, Yellow, Green, Blue, Indigo, Violet – arranged in traditional order for a vibrant gradient.
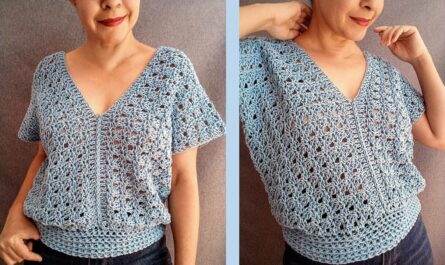
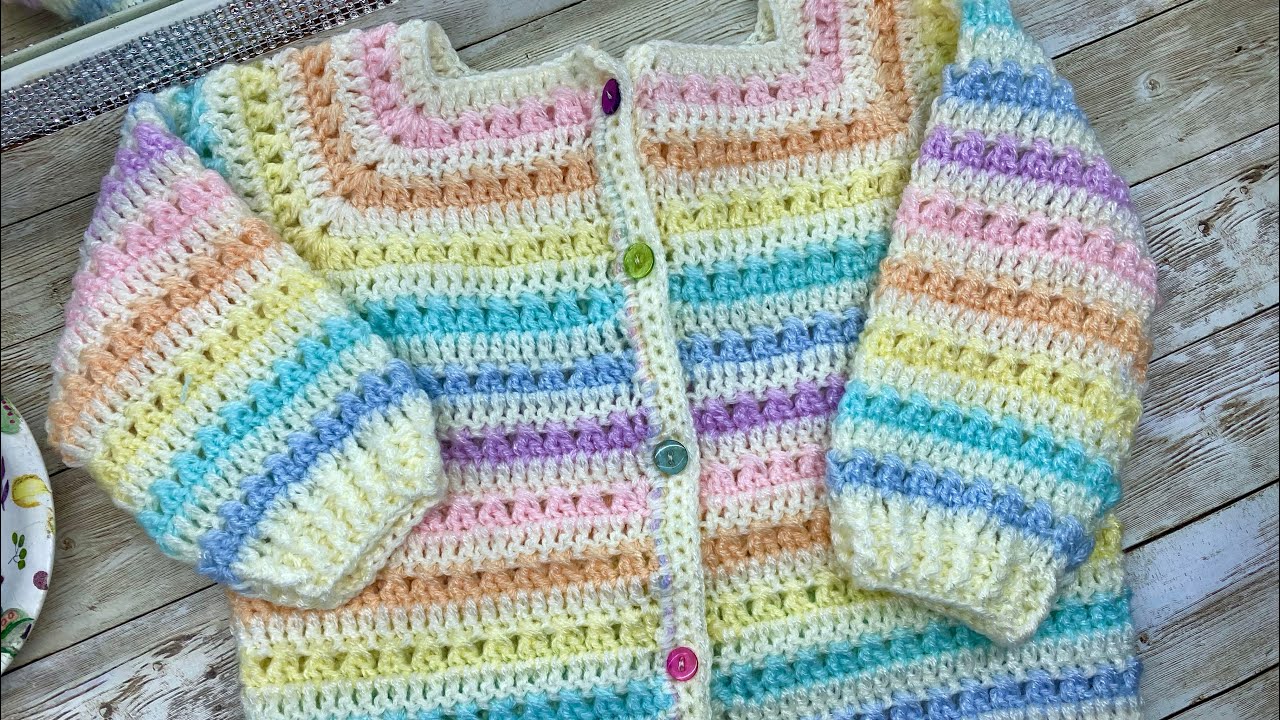
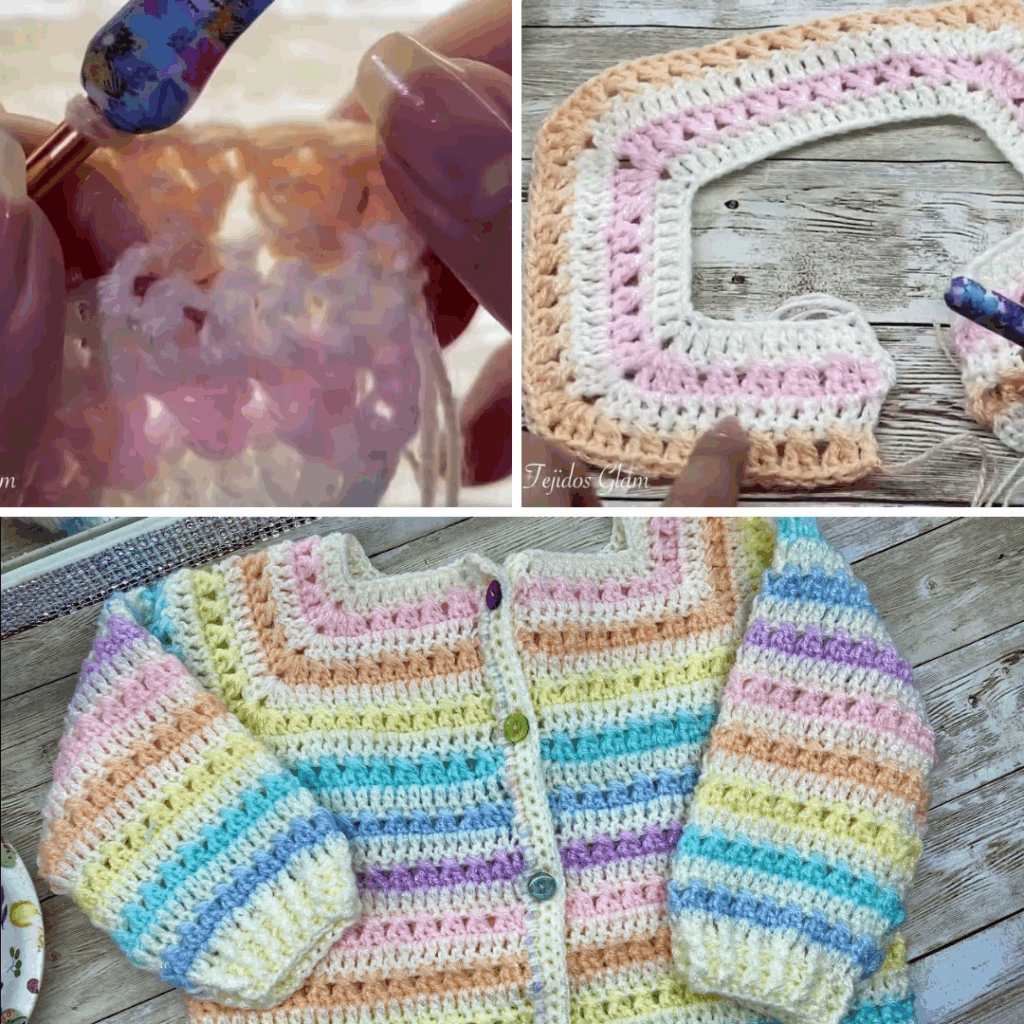
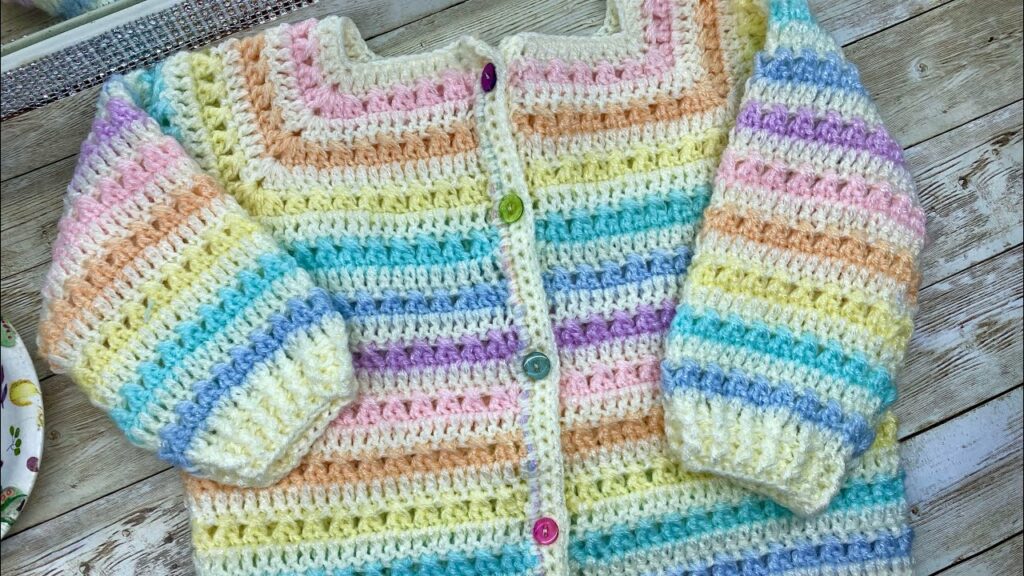
- Pastel Rainbow: Soft shades of pink, peach, mint, baby blue, lavender – for a more subtle and gentle effect.
- Muted Rainbow: Earthy tones, dusty versions of the classic colors, or even a rainbow made of variegated yarn for a unique look.
- Color Transitions:
- Stripes: The simplest method, changing colors every one, two, or more rows/rounds.
- Color Blocking: Larger sections of solid colors.
- Gradient Yarn: Using a single skein of yarn that transitions through the rainbow spectrum itself, minimizing color changes.
- Rainbow Edges/Accents: A solid colored sweater with rainbow cuffs, hem, or collar.
2. Yarn Choice (Paramount for Babies!)
- Fiber:
- Baby Acrylics: The most popular choice for baby garments. They are incredibly soft, durable, hypoallergenic, and most importantly, machine washable and dryable – a huge plus for busy parents.
- Cotton/Cotton Blends: Excellent for breathability, especially in warmer climates. They have good stitch definition and are also usually machine washable. Look for mercerized cotton for a slight sheen.
- Superwash Merino Wool: Offers superior softness and warmth without being itchy, and it’s machine washable. A more luxurious option.
- Durability & Washability: Baby clothes endure frequent spills and washes. Prioritize yarns that can withstand this without losing shape or color.
- Hypoallergenic: Consider if the baby has any known sensitivities. Acrylics are generally a safe bet.
- Weight: DK (Double Knitting, Category 3) or Sport (Category 2) are common choices, providing a good balance of warmth, working speed, and delicate drape.
3. Sweater Construction
- Top-Down (Recommended for Babies):
- You start at the neckline and work outwards, increasing stitches to form the yoke.
- The work is then divided for the body and sleeves.
- Benefits: This method allows you to try the sweater on as you go (if the baby is present!) and easily adjust the length of the body and sleeves. It also results in fewer seams, which means more comfort for the baby.
- Bottom-Up:
- Components (back, front, sleeves) are crocheted separately from the bottom up.
- They are then seamed together at the shoulders and sides.
- Benefits: Can be simpler for beginners who prefer flat pieces.
- Seamless: Many top-down patterns are inherently seamless, offering maximum comfort.
4. Stitch Pattern
- Simple & Soft: Basic stitches like Half Double Crochet (hdc) or Double Crochet (dc) create a soft, flexible fabric that works up quickly.
- Subtle Texture: Using stitches like the granny stitch (clusters of dc) or simple shell stitches can add visual interest without being too intricate or creating too many holes.
- Density: Avoid very open or lacy patterns for a baby sweater unless you intend it as a layering piece over another garment, as they may not provide enough warmth or can snag easily.
5. Features & Fastenings
- Neckline: A wide, stretchy neckline (e.g., using ribbing or a generous opening) is crucial for getting the sweater over a baby’s head.
- Back Opening: For easier dressing, consider a back opening with buttons or ties, especially for smaller sizes.
- Buttons: If using buttons, choose larger ones that are securely sewn and not easily detached to prevent choking hazards.
- Ribbing: Crocheted ribbing (using front post/back post stitches or working in back loops only) at the cuffs, hem, and neckline provides elasticity and a neat finish.
Materials for Your Colorful Creation
- Yarn: Your chosen rainbow colors (at least 6-7 small skeins or a variegated rainbow yarn) in a baby-friendly fiber and weight. Always check your pattern’s recommended yardage for the specific size.
- Crochet Hook: The size recommended by your pattern for your chosen yarn, to achieve the correct gauge and fabric density.
- Stitch Markers: Essential for marking rounds, increase points, and separating sections for the body and sleeves.
- Tapestry Needle (or Yarn Needle): Crucial for weaving in ends and seaming (if applicable).
- Scissors.
- Measuring Tape: Essential for taking baby measurements and checking your gauge.
- Buttons (Optional): If your design includes a back opening or decorative buttons.
Essential Crochet Techniques for a Baby Sweater
You’ll practice and refine several core crochet skills:
- Slip Knot & Foundation Chain: The beginning of every project.
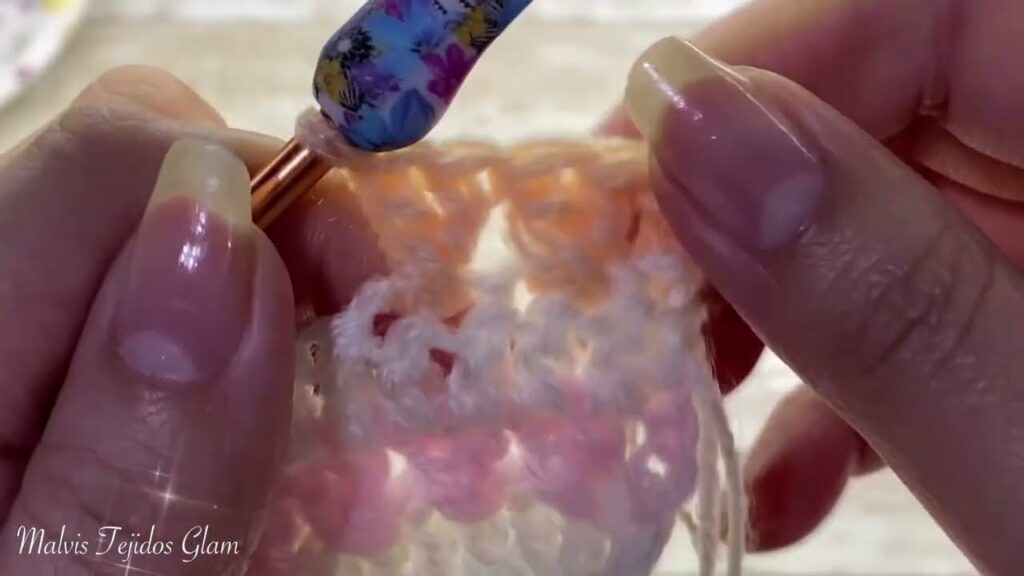
- Basic Stitches: Chain (ch), Slip Stitch (sl st), Single Crochet (sc), Half Double Crochet (hdc), Double Crochet (dc).
- Working in Rounds & Rows: Depending on the construction method.
- Increasing & Decreasing: Crucial for shaping the yoke, body, and sleeves to ensure a good fit.
- Joining Yarn & Color Changes: Mastering neat color changes is vital for a clean striped or color-blocked rainbow effect.
- Dividing for Body & Sleeves: A specific technique used in top-down construction to create armholes.
- Working Ribbing (Optional): Techniques like working into back loops only (BLO) or front post/back post stitches for stretchy ribbing.
- Weaving in Ends: Meticulously hiding all yarn tails. For a multi-colored rainbow, this can be significant!
- Blocking: This is essential for any garment. It evens out stitches, enhances drape, and sets the final shape and size of the sweater.
Planning the Perfect Fit: Laying the Foundation
- Sizing & Measurements:
- Baby sweater patterns are typically given by age (e.g., 0-3 months, 6-12 months).
- If possible, measure the baby’s chest circumference for the best fit. Consider adding a little “positive ease” (extra room) for comfort and growth.
- Gauge Swatch (Non-Negotiable!):
- This is the single most important step for garment making. Crochet a substantial swatch (at least 4×4 inches / 10×10 cm) in your chosen yarn and hook, using the primary stitch pattern of the sweater.
- Wash and block your swatch exactly as you plan to wash and block the finished sweater. This is absolutely vital, as gauge can change significantly after laundering and blocking.
- Measure your stitches and rows per inch/cm accurately. Adjust your hook size until your gauge matches the pattern’s recommendation.
- Yarn Quantity: Consult your chosen pattern’s yardage requirements for your specific size. It’s always wise to purchase a little extra, especially when working with multiple colors.
- Pattern Selection: Choose a well-written pattern specifically for a baby sweater. Look for clear instructions, sizing options, stitch diagrams, and positive reviews.
Construction Journey: Weaving Tiny Dreams into Fabric (Conceptual Guide)
Most rainbow baby sweaters are worked top-down for seamless construction and easy color changes.
- Start the Yoke:
- Begin with a foundation chain (or magic ring, depending on the pattern) for the neckline.
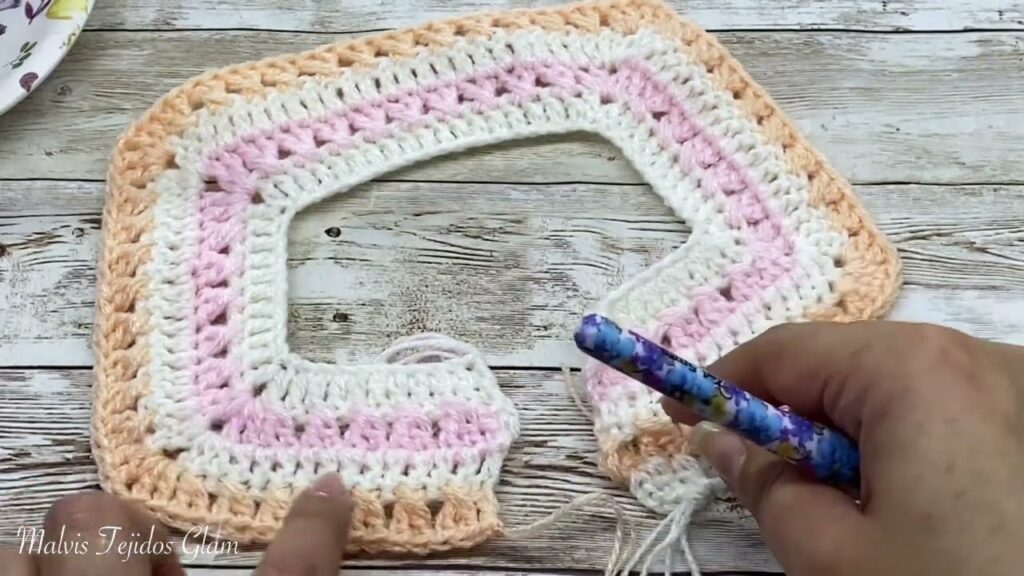
- Work in rounds (or rows, if there’s a back opening), evenly distributing increases in each round to create the circular or square yoke shape.
- Rainbow Strategy: Introduce your first rainbow color here. Change colors at the beginning of designated rounds/rows according to your chosen stripe pattern.
- Divide for Body & Sleeves:
- Once the yoke reaches the specified depth (which should comfortably fit over the baby’s shoulders and chest), the pattern will instruct you to place stitch markers to separate stitches for the two sleeves and the front/back of the body.
- You’ll then typically chain a few stitches under the armpits (the “underarm chain”) to connect the front and back of the body, creating the armholes.
- Crochet the Body:
- Continue working in the round on the body stitches, completing the desired length.
- Continue your rainbow stripe pattern here.
- Finish the hem with a neat border or ribbing.
- Crochet the Sleeves:
- Attach yarn at one of the armhole openings.
- Work in the round, picking up stitches around the armhole and along the underarm chain.
- Continue to the desired sleeve length, incorporating any decreases to taper towards the wrist.
- Continue your rainbow stripe pattern.
- Finish the cuffs with a matching border or ribbing. Repeat for the second sleeve.
- Finishing Touches:
- Weave in All Ends: This is the most time-consuming part of a multi-color project! Meticulously hide every yarn tail. Neatness and security are crucial for baby wear.
- Add Fastenings (if applicable): If your design has a back opening, sew on buttons securely.
- Blocking: Gently wet the finished sweater, carefully shape it to its intended dimensions on blocking mats, and pin it securely. Allow it to dry completely. Blocking makes stitches even, enhances drape, and sets the final beautiful shape and fit.
Tips for a Brilliant Rainbow Baby Sweater
- Soft, Washable Yarn is King: Always prioritize baby-friendly, easy-care yarns.
- Gauge is Everything: Don’t skip the swatch! It ensures the sweater fits the intended size.
- Neat Color Changes: Practice different methods for changing colors to minimize bumps or gaps. Using a standing stitch or securing with a slip knot can help.
- Weave in Ends as You Go: For a rainbow, you’ll have many ends. Weaving them in after every few color changes prevents a daunting task at the end.
- Prioritize Comfort & Safety: Avoid scratchy fibers, bulky seams (hence top-down is great), and small, easily detachable embellishments.
- Size Up (Slightly): Babies grow quickly! A sweater that’s a little roomy often gets more wear.
Crocheting a rainbow baby sweater is a delightful journey, culminating in a vibrant, heartwarming garment that’s sure to bring smiles. It’s a tangible expression of love, stitched with every color of the rainbow for a truly special little one.
Video Tutorial ;