by
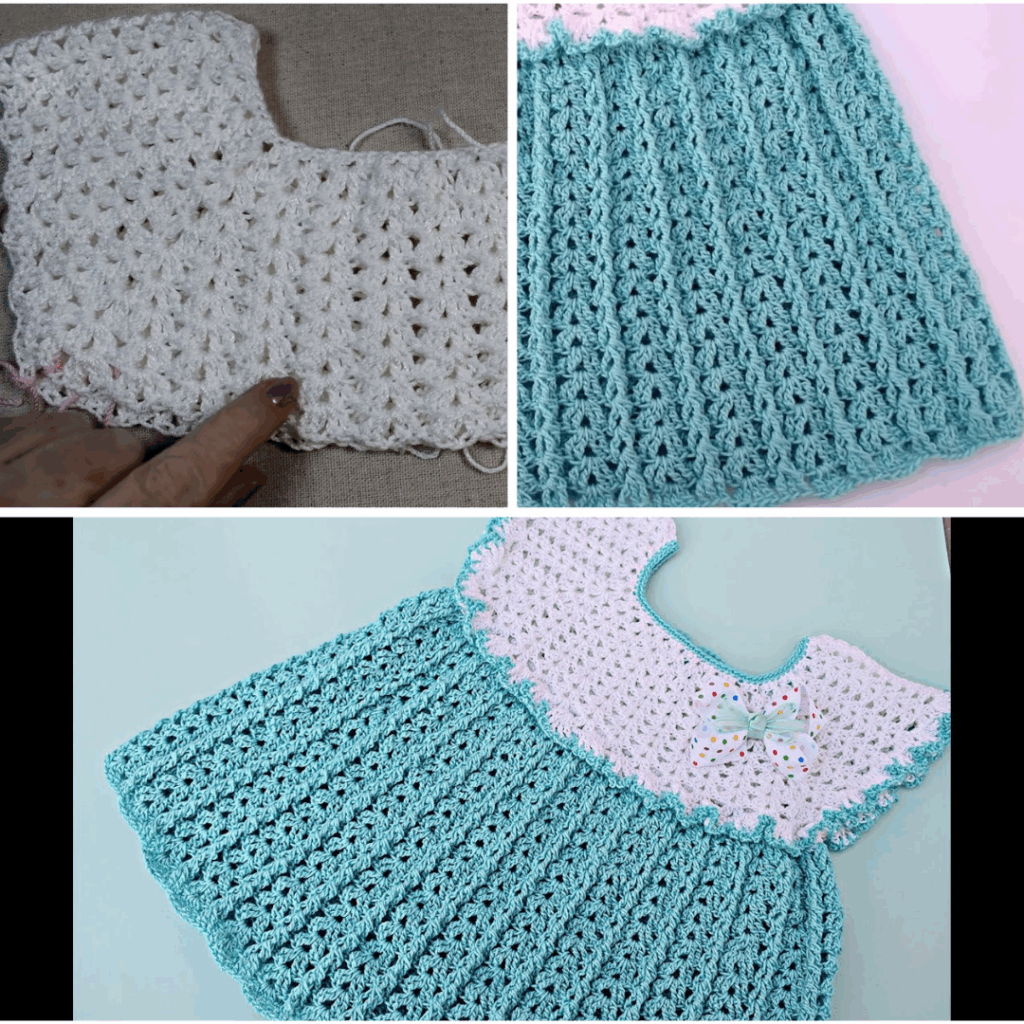
by Crocheting a girl’s dress is one of the most rewarding projects you can undertake. Whether you’re crafting a special outfit for your child, a birthday gift, or a baby shower present, a handmade crochet dress is a beautiful and thoughtful creation.
This article will guide you step by step on how to make a crochet girl dress, from choosing materials to final finishing touches.
🧵 What You’ll Need
Before you start crocheting, gather the following supplies:
✨ Materials
- Yarn: Lightweight yarn like cotton, bamboo, or acrylic blends (DK or sport weight) is ideal. Cotton is breathable and soft—perfect for delicate skin.
- Crochet Hook: Check the yarn label for recommended hook size. Usually between 3.5 mm and 4.5 mm.
- Scissors
- Tapestry Needle: For weaving in loose ends.
- Stitch Markers: Optional but helpful for marking stitch points and rounds.
- Buttons or Ribbons: Optional for closures or decoration.
- Measuring Tape: To get accurate sizing.
🧶 Basic Crochet Stitches You Should Know
To create a crochet dress, you should be familiar with these stitches:
- Chain (ch)
- Slip Stitch (sl st)
- Single Crochet (sc)
- Double Crochet (dc)
- Half Double Crochet (hdc)
- Increase/Decrease Techniques
- Working in the round and in rows
👗 Dress Structure Overview
Most crochet dresses are made in one of two styles:
- Top-down construction (yoke first, then body)
- Bottom-up (start from the hem and work upwards)
In this guide, we’ll use the top-down method, which is more common and easier to size as you go.
✨ Step-by-Step Instructions: Making a Crochet Girl Dress
✅ Step 1: Decide on the Size and Style
Standard sizes for girl dresses range from 0–3 months up to 6 years or more. Choose the size you want, or use a size chart to customize based on the child’s chest measurement.
| Age | Chest Size (inches) | Suggested Starting Chain |
|---|---|---|
| 0–3 months | 16″ | ch 48–52 |
| 6–12 months | 18″ | ch 64–68 |
| 1–2 years | 20″ | ch 72–76 |
| 3–4 years | 22″ | ch 84–88 |
Choose the style: sleeveless summer dress, puff sleeve princess dress, or even a pinafore.
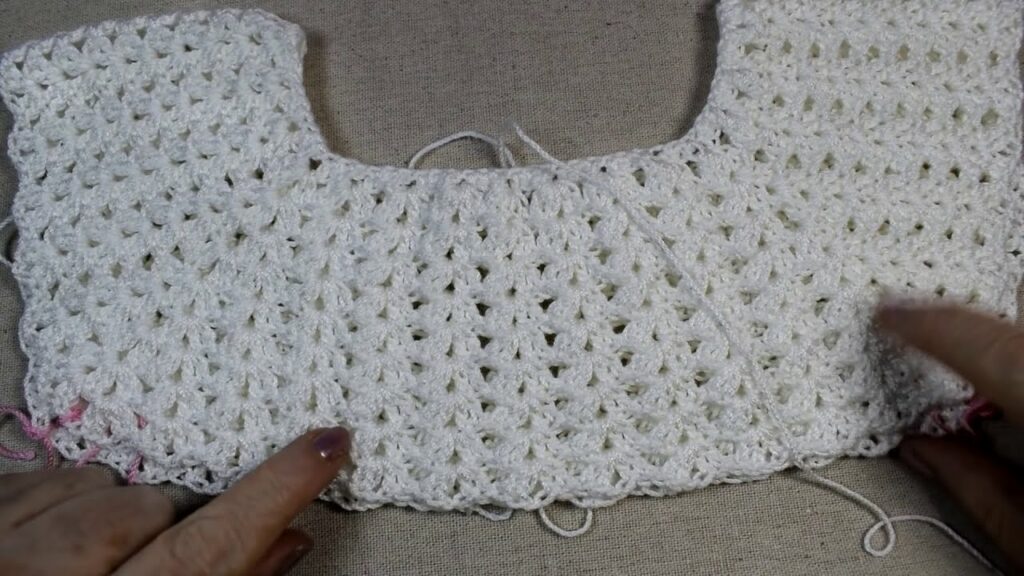
✅ Step 2: Crochet the Yoke (Top of the Dress)
This part fits around the neckline and shoulders.
🧶 Example Yoke for 6–12 Months:
- Foundation Chain: Ch 64, then join to the first ch with a sl st to make a circle.
- Round 1: Ch 2, dc into each stitch around, sl st to join.
- Round 2–5: Create raglan increases at four points to shape the yoke.
- Use stitch markers to place increases at 4 evenly spaced positions.
- Increase by placing 2 dc in the same stitch at each marked spot every round.
Continue until the yoke measures around 4–5 inches deep and fits around the baby’s upper chest.
✅ Step 3: Create the Armholes and Separate the Body
Now separate the yoke into front, back, and armholes.
- Skip the stitches for the sleeves.
- Chain 3–5 stitches under each arm to form armholes.
- Join back and front yoke pieces and begin crocheting the body of the dress in the round.
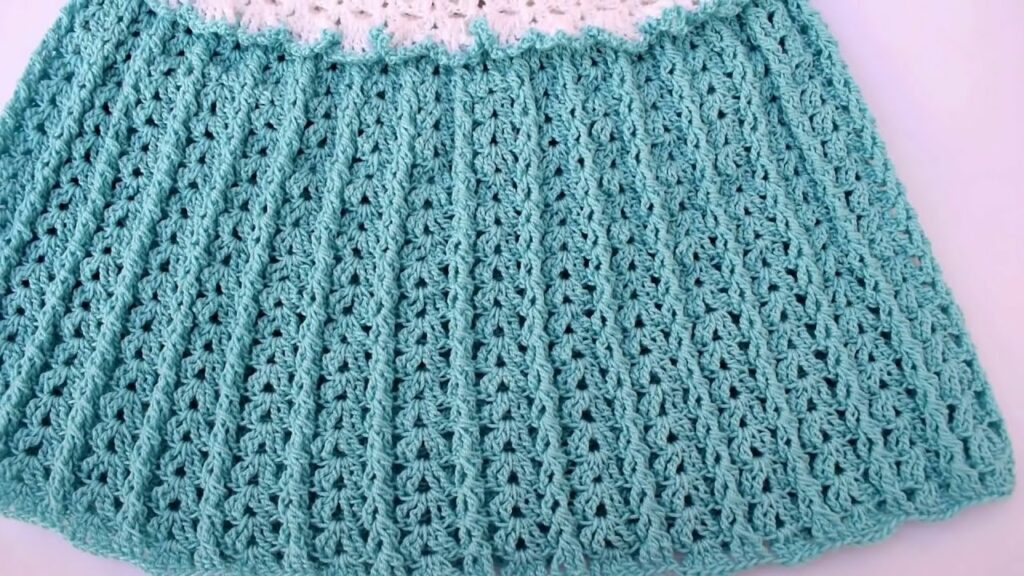
✅ Step 4: Crochet the Skirt (Dress Body)
The skirt can be plain or flared, depending on your stitch pattern.
🌸 Basic Skirt (Flared):
- Round 1: Dc into each stitch around.
- Round 2: (dc in next 3 sts, 2 dc in next st) repeat around to increase fullness.
- Continue: Use decorative stitches like:
- Shell stitch
- Fan stitch
- V-stitch
- Mesh stitch
Work until the skirt is the desired length (e.g., 8–10 inches for babies, longer for toddlers).
You can switch colors or add stripes for extra style.
✅ Step 5: Add Sleeves or Edging (Optional)
Short Sleeves:
- Attach yarn at the armhole.
- Crochet 2–4 rounds of hdc or dc.
- Finish with a shell or picot edge.
Sleeveless:
- Add a simple single crochet border around the armholes for a clean look.
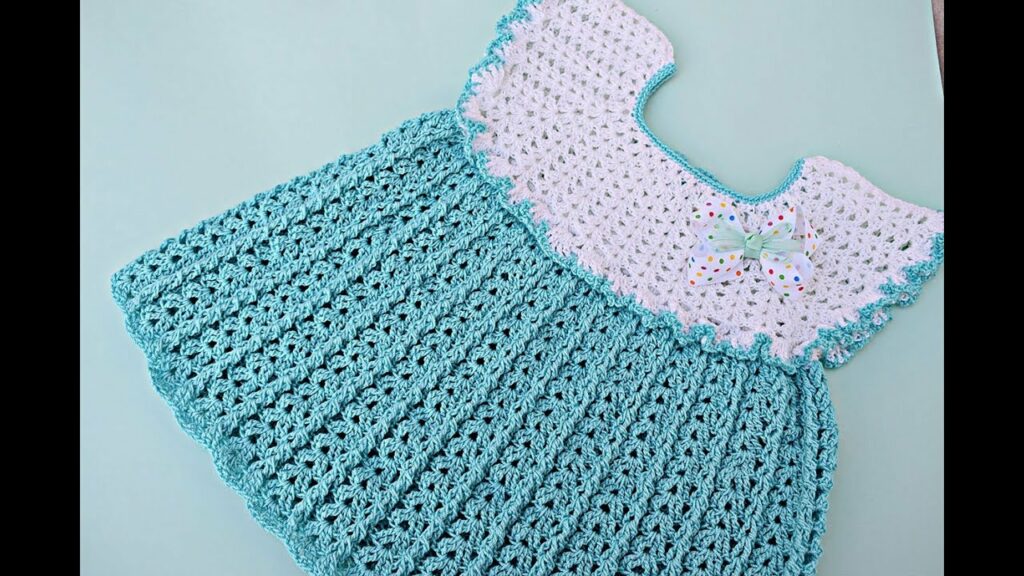
✅ Step 6: Finishing Touches
- Neckline: Add a neat edging (like sc or a picot border).
- Hemline: Use a shell stitch border to add elegance.
- Back Closure: You can make a button loop or a chain-tie closure at the back neckline.
- Weave in all yarn ends with your tapestry needle.
- Block the dress if necessary to shape and smooth it.
🎀 Customization Ideas
Want to make your dress one-of-a-kind? Try these creative additions:
- Crochet flowers, hearts, or bows to sew on the skirt or yoke
- Use gradient or variegated yarn for a color-shifting effect
- Add tulle under the skirt for a “tutu dress”
- Incorporate sparkly or metallic yarn for a party dress feel
📌 Tips for Success
- Check your gauge: Make a small swatch to make sure your tension matches the pattern.
- Measure as you go: Hold the dress up to the child or a sizing chart to ensure a good fit.
- Use soft, washable yarn: Babies and toddlers have sensitive skin. Always choose gentle, machine-washable materials.
- Start simple: If this is your first dress, go for a basic pattern with fewer color changes or embellishments.
Video Tutorial :