by
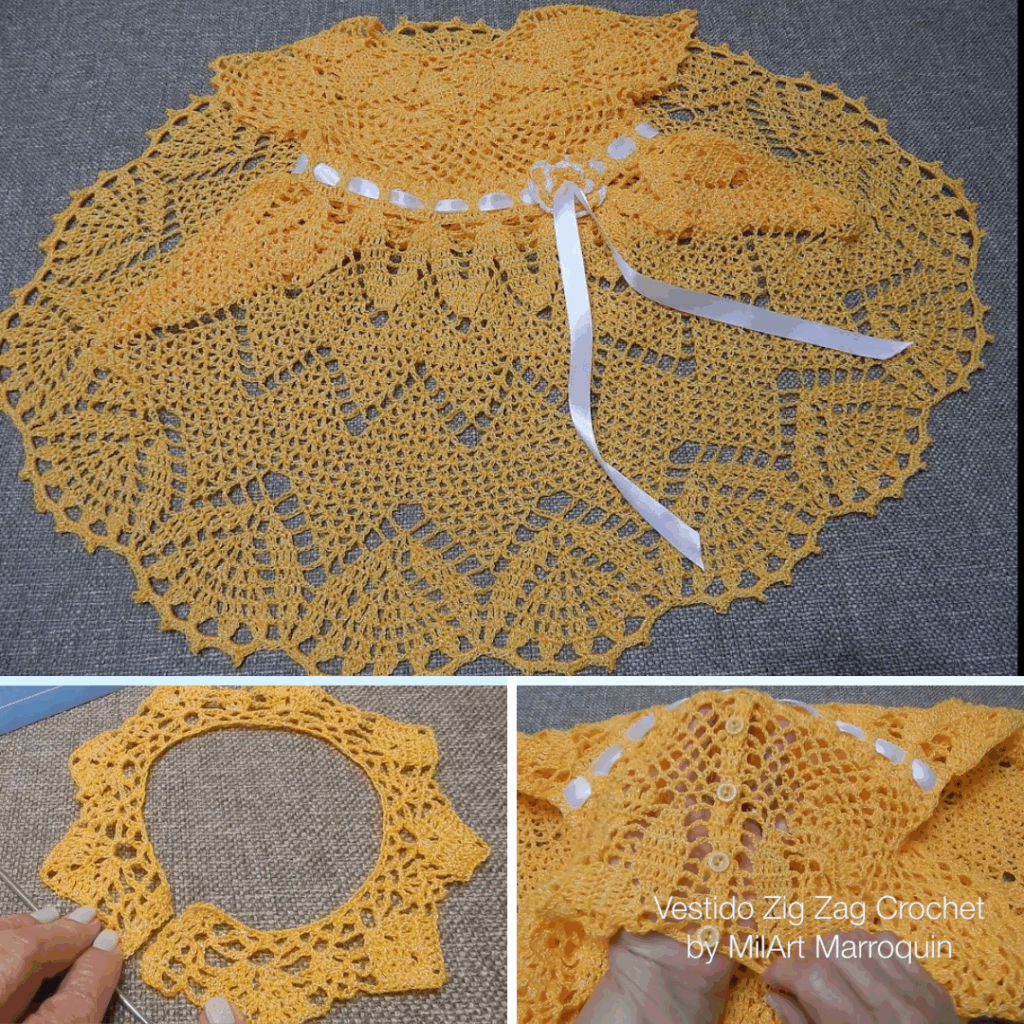
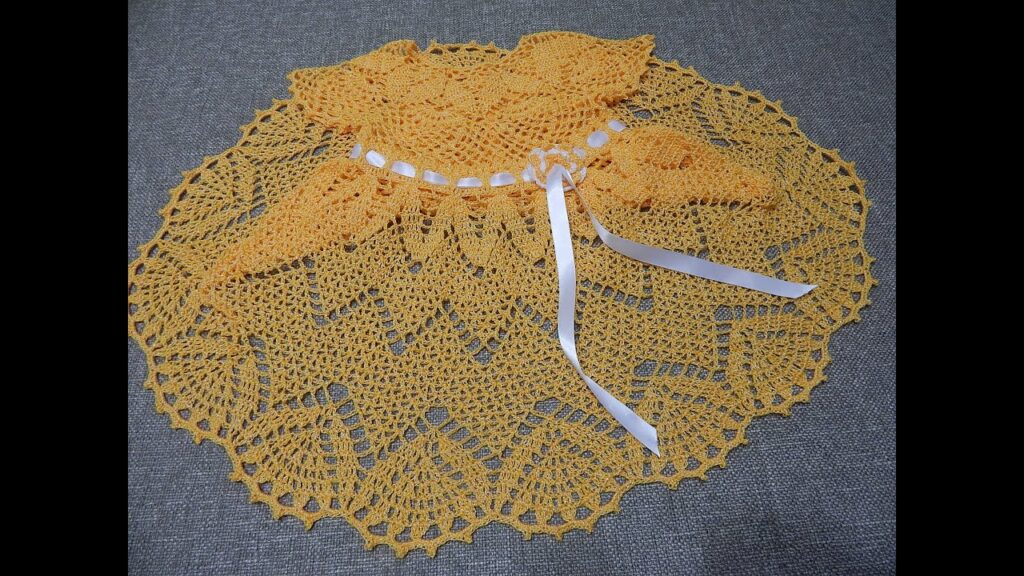
by The crochet zig-zag dress (also known as a chevron dress) is a stylish, flowing garment that features a flattering wavy pattern created with increases and decreases. Whether you want a mini beach dress or a long boho-chic gown, mastering the zig-zag stitch lets you personalize it to your taste.
This tutorial walks you through the materials, measurements, pattern, and construction of a zig-zag crochet dress.
✨ What You’ll Learn:
- Materials and tools needed
- How to crochet the zig-zag (chevron) stitch
- Sizing and shaping the dress
- Assembling and finishing touches
- Customization options
🧶 Materials You’ll Need:
| Item | Description |
|---|---|
| Yarn | Cotton or bamboo blend is best for drape; DK or sport weight |
| Hook | Appropriate size (usually 3.5mm to 4.5mm for dress yarn) |
| Stitch markers | For marking increases/decreases and shaping |
| Measuring tape | To ensure accurate sizing |
| Tapestry needle | For sewing seams and weaving in ends |
| Scissors | For trimming yarn ends |
📝 Tip: Use a yarn with good stitch definition to highlight the zig-zag pattern.
📏 Step 1: Take Measurements
Before you begin, take the following measurements:
- Bust
- Waist
- Hips
- Desired dress length (from shoulder or bust to hem)
You’ll create the dress by working from bottom-up or top-down, depending on preference.
🧵 Step 2: Understand the Zig-Zag Stitch
The chevron (zig-zag) stitch is formed by:
- Increases at peaks (e.g. 3 dc in one stitch)
- Decreases in valleys (e.g. dc3tog)
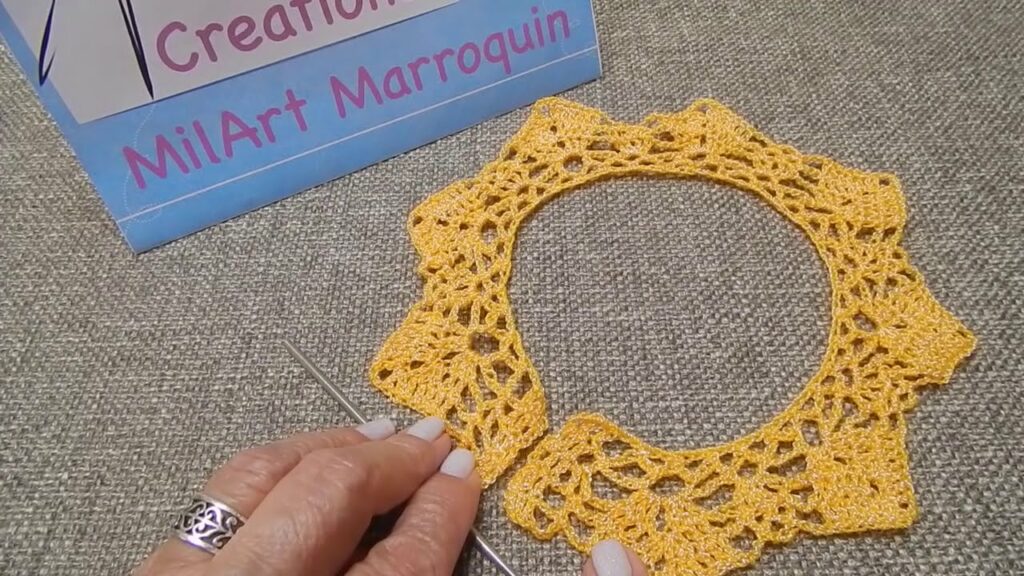
Basic Chevron Pattern (in multiples of 12 + 3):
Row 1: Dc in 4th ch from hook, *dc in next 3 ch, dc3tog, dc in next 3 ch, 3 dc in next ch; repeat from * across, ending with dc in last ch.

Row 2+: Ch 3 (counts as dc), *dc in next 3 sts, dc3tog over next 3 sts, dc in next 3 sts, 3 dc in next st; repeat from * across.
🧶 Modify the number of repeats to match your body circumference.
🧍 Step 3: Construct the Dress
Option 1: Top-Down Construction (Preferred for Fitted Styles)
- Start at Bust
Create a foundation chain using the chevron pattern, long enough to fit around your bust. - Join in the Round
Slip stitch to form a circle. Ensure it’s not twisted. - Work in Zig-Zag Rounds
Continue working the chevron pattern in rounds, maintaining increases at peaks and decreases at valleys. This becomes your bodice. - Shaping the Waist
Optionally switch to a smaller hook or decrease some stitches in the valleys to taper slightly. - Widen for Hips or Flare
For a flared or A-line dress, add extra increases at each peak or insert extra stitches between the zig-zags. - Work to Desired Length
Continue in the established pattern until you reach your desired dress length.
Option 2: Bottom-Up Construction
- Start at Hem
Foundation chain = hip or dress hem circumference. - Work Zig-Zag Pattern in Rounds
Maintain the chevron stitch, gradually decreasing to shape the waist and then bust. - Finish Bodice/Straps
Work straps separately using rows of double crochet or chevrons, then sew or crochet them onto the bodice.
🔄 Step 4: Try On & Adjust
It’s important to try on the dress as you go, especially if working top-down. Use stitch markers to shape armholes or create slits on the sides.
You can also add:
- Elastic at the waist
- Side slits
- Lining (optional for coverage)
🪡 Step 5: Assemble and Finish
- Weave in all ends with a tapestry needle.
- Block the dress by soaking and shaping it to even out the chevrons.
- Add edging if desired: picot, scallop, or simple single crochet.
🎨 Customization Ideas
| Feature | Ideas |
|---|---|
| Color | Use self-striping yarn or color changes at rows |
| Straps | Spaghetti, halter, or racerback |
| Length | Mini, midi, or maxi |
| Sleeves | Add bell sleeves or cap sleeves |
| Yarn Choice | Use sparkly or variegated yarn |
🧼 Care Tips
- Hand wash or use delicate cycle
- Lay flat to dry to prevent stretching
- Avoid hanging, especially with cotton yarn
🧶 Final Thoughts
Making a crochet zig-zag dress combines beauty, creativity, and function. Once you’ve mastered the chevron stitch, the rest is all about shaping and style. Don’t be afraid to tweak the pattern to fit your body type and fashion taste.
Video Tutorial: