 by
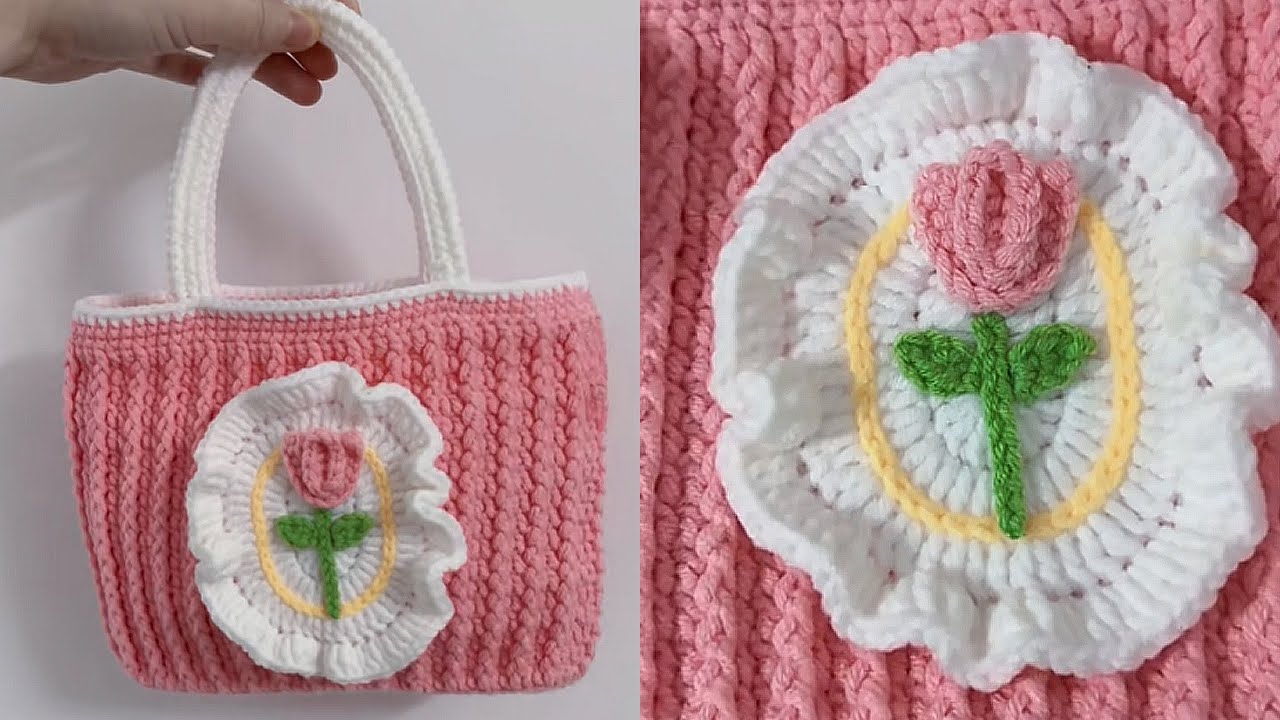
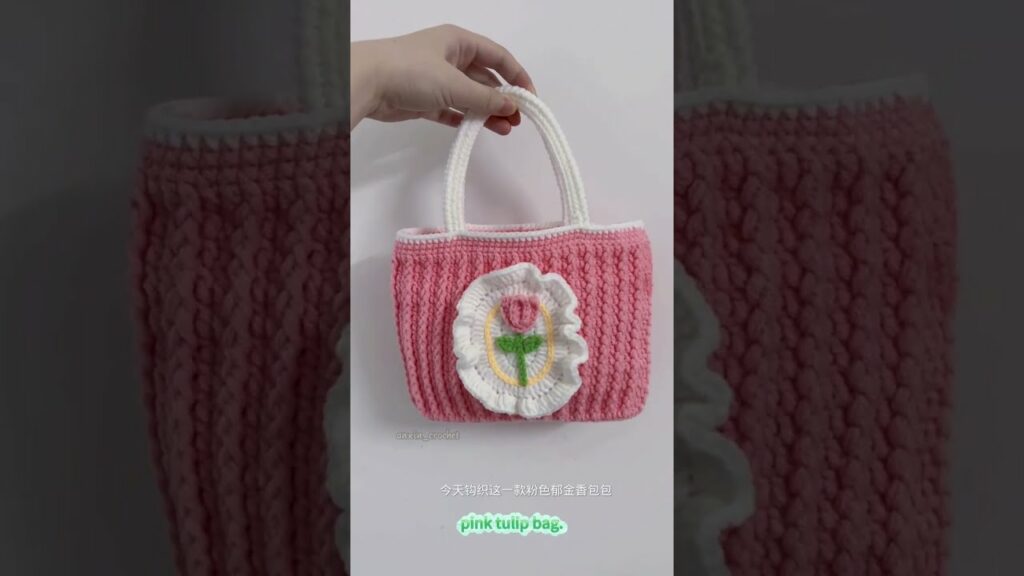
by Crocheting a tulip flower bag is a lovely way to combine color, texture, and floral charm into a fashionable accessory. This tutorial is designed for beginners, with clear steps and techniques to help you create a beautiful and functional crochet tulip bag — even if you’re just starting out!
🧶 What You’ll Need (Materials & Tools)
✨ Yarns:
- Worsted weight (medium #4) cotton yarn
- Green (for stems and leaves)
- Pink, red, or yellow (for tulip flowers)
- Cream or beige (for the bag base)
- Optional: Use gradient yarn for a creative touch
🧵 Crochet Hook:
- Size 4.0 mm (G-6) or as recommended by your yarn label
🧰 Other Supplies:
- Yarn needle (for weaving in ends)
- Stitch markers
- Scissors
- Lining fabric (optional, for a polished interior)
- Magnetic snap or button (optional closure)
🧵 Crochet Skills You’ll Learn (or Use)
This pattern uses basic stitches — great for beginners!
- Chain stitch (ch)
- Slip stitch (sl st)
- Single crochet (sc)
- Half double crochet (hdc)
- Double crochet (dc)
- Crochet in the round
- Changing yarn colors
If you’re unfamiliar with these stitches, check out some beginner YouTube tutorials or diagrams — they’re very easy to pick up.
🌷 Step-by-Step: How to Crochet a Tulip Flower Bag
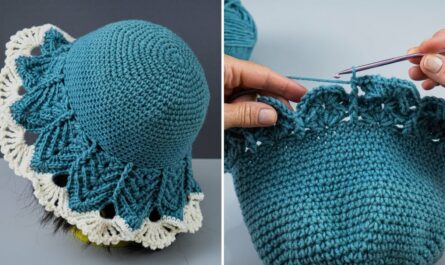
🪡 Part 1: Crochet the Tulip Stitch Panel

The tulip stitch is a beautiful and simple way to create flowers directly into the fabric. Here’s how:
🌸 Tulip Stitch Pattern (Worked in rows):
- Row 1 (foundation):
- Chain a multiple of 4 + 1 (e.g., 41 chains for 10 tulips).
- Sc in second chain from hook and across. Turn.
- Row 2 (Green – stem & leaves):
- Ch 3 (counts as 1 dc), skip next 3 sts, (dc, ch 1, dc) in next stitch (tulip stem), skip 3 sts, repeat across, dc in last stitch.
- Row 3 (Tulip flower – pink/red/yellow):
- Change color.
- In each ch-1 space from previous row, work: (dc, hdc, dc) — this forms the flower.
- Row 4 (Green – base row for next tulip):
- Change to green yarn.
- Sc across, placing 1 sc in each dc and 1 sc in between each tulip cluster.
📝 Tip: Repeat Rows 2–4 to make more tulip rows.
Crochet until your panel measures the width and height you desire for the bag (e.g., 30 cm x 20 cm).
🧺 Part 2: Make the Back Panel and Base
- You can either:
- Repeat the tulip pattern for the back (for double-sided tulips)
- Or make a plain single crochet rectangle using your base color for contrast
🔹 Base (optional flat bottom):
- Ch 21, sc across for ~8–10 rows to form a rectangular base.
- Single crochet around to create a foundation for working the sides.
🪡 Part 3: Assemble the Bag
- Sew the base and panels together using slip stitch or whip stitch.
- Align the bottom and sides carefully.
- You can also crochet around the edges for a seamless join.
- Create side gussets (optional):
- Crochet two narrow rectangles to add depth to the bag.
- Attach between the front and back panels.
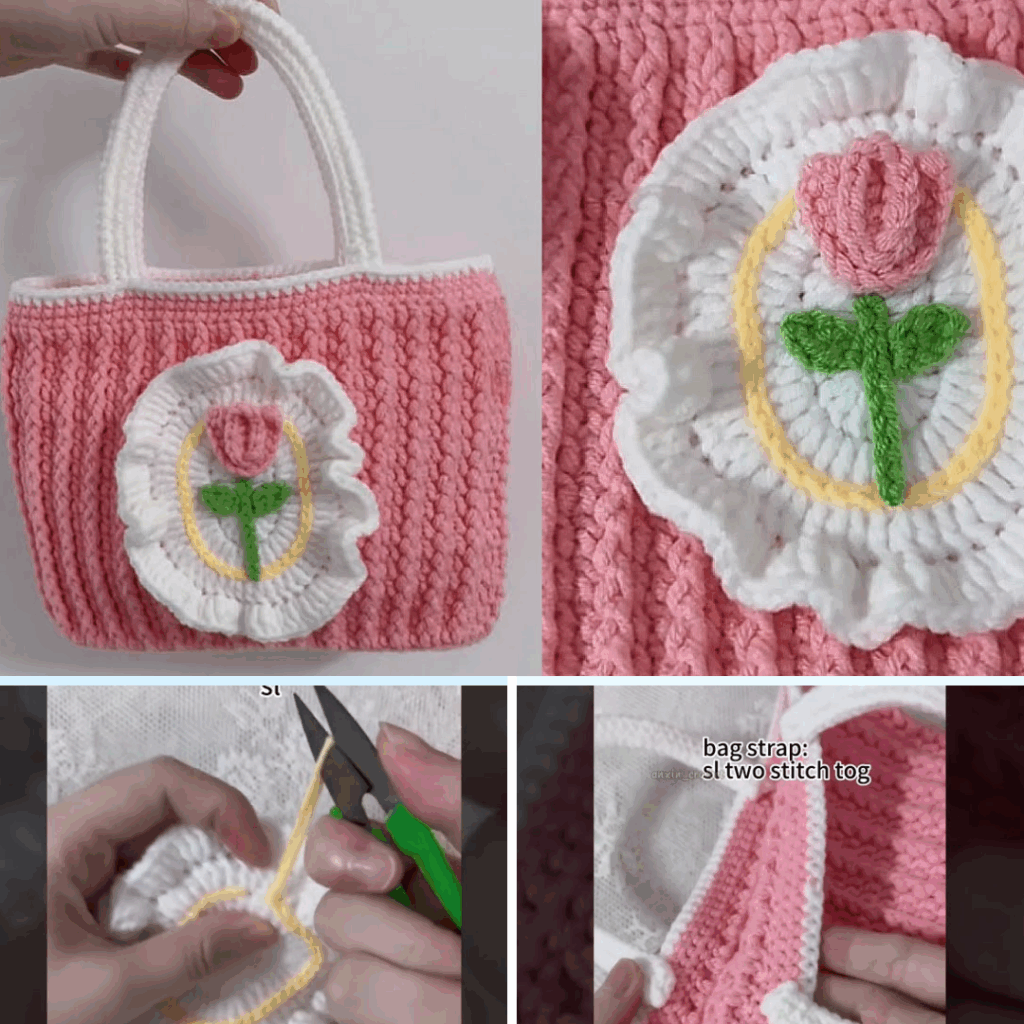
🎒 Part 4: Make the Handles or Strap
Option 1: Simple Crochet Strap
- Chain to desired length (e.g., 80–100 cm)
- Sc in each chain across, turn and sc 1–2 more rows for durability
Option 2: Braided Straps
- Make 3 long chains, braid them, and sew ends into the bag.
Option 3: Use Pre-made Handles
- Attach wooden, leather, or rope handles for a stylish finish.
🧵 Part 5: Finishing Touches
- Weave in all yarn ends using a yarn needle.
- Block the bag if necessary to straighten edges.
- Add a lining for structure (optional but recommended):
- Cut fabric to size.
- Hand-stitch or machine-sew it inside the bag.
- Attach closure: Use a magnetic snap, button loop, or zipper if desired.
🧼 Care Tips
- Hand wash your crochet bag with cold water and mild detergent.
- Lay flat to dry.
- Avoid heavy stretching to preserve the flower shapes.
💡 Pro Tips for Beginners
- Use stitch markers to help you count rows and stitches.
- Start with a small prototype if you’re unsure of the size.
- Choose cotton yarn — it’s durable and shows stitch definition well.
- Don’t worry about perfection. Handmade items have character!
🌼 Final Thoughts
Crocheting your own tulip flower bag is a fun and rewarding project — perfect for spring or gifting! This beginner-friendly pattern combines basic stitches with creative flair, giving you a unique accessory that’s as charming as it is practical.
You can personalize your bag with different tulip colors, sizes, or embellishments like beads, tags, or lace trim.