 by
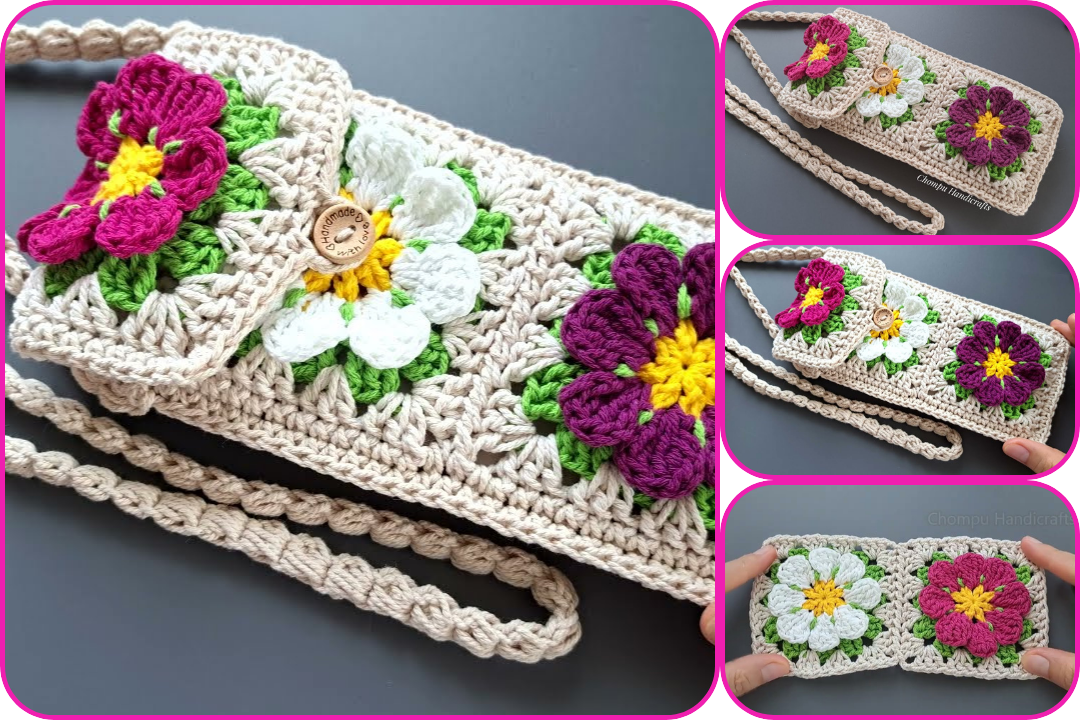
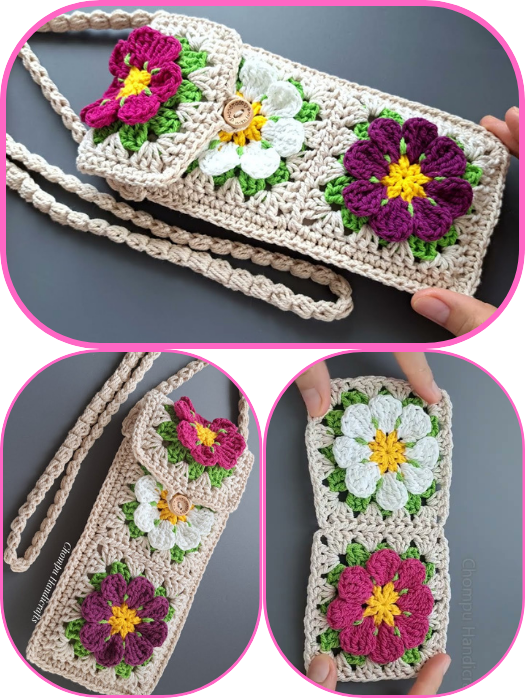
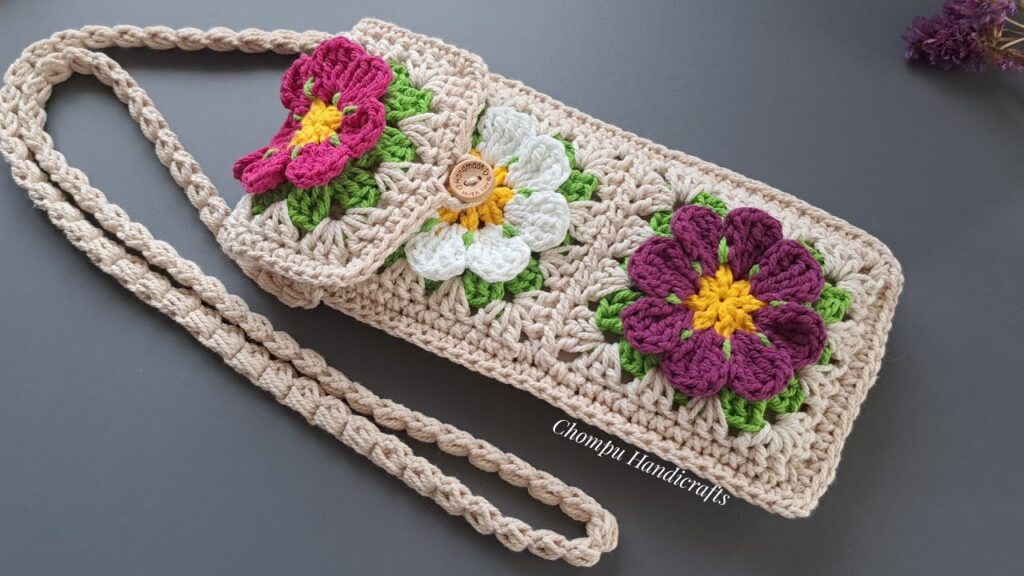
by Here’s a detailed step-by-step guide on How to Make a Crochet Flower Granny Square Phone Bag. This DIY project is perfect for beginner to intermediate crocheters and creates a cute, stylish, and functional accessory.
- Yarn: Worsted weight cotton or acrylic yarn in 2-3 colors (e.g., one for the flower, one for the square, one for border/strap)
- Hook: 4.0 mm or 4.5 mm crochet hook
- Scissors
- Tapestry needle
- Stitch marker (optional)
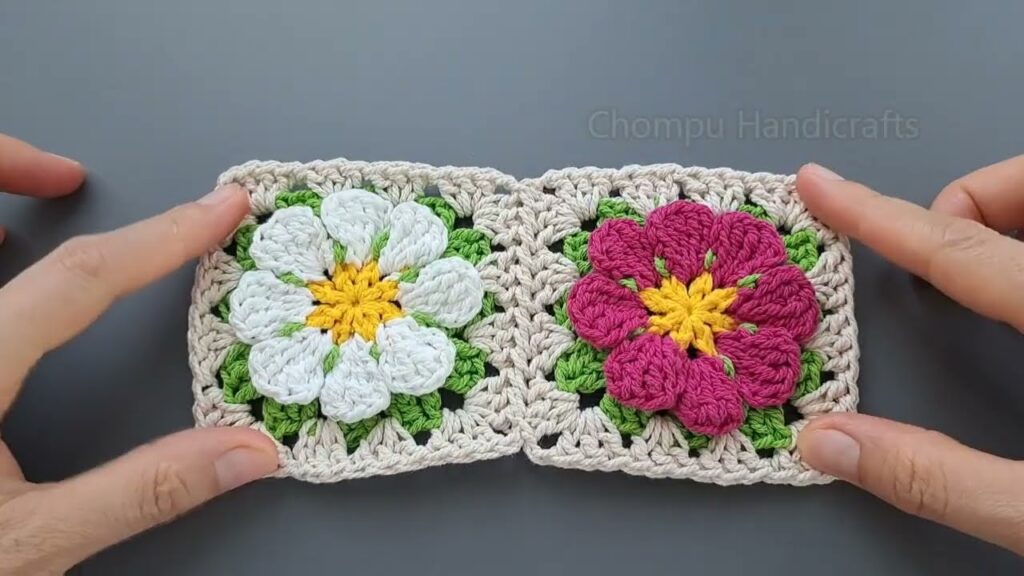
1. Crochet the Flower Granny Squares
You’ll need to crochet two identical flower granny squares — one for the front and one for the back.
- Make a magic ring.
- Ch 2 (counts as first dc), then work 11 dc into the ring.
- Join with a sl st into the top of the beginning ch-2.
- (12 dc total)
- Ch 2, 2 dc in same st, ch 2, sl st in same st (first petal made).
- Repeat in each dc around to make 12 petals.
- Fasten off the flower color.
- Join square color yarn in any ch-2 space behind a petal.
- Ch 3 (counts as dc), 2 dc in same sp.
- In the next 2 spaces, work 3 dc each.
- In the 4th space (corner), work 3 dc, ch 2, 3 dc.
- Repeat pattern around to make a square.
- Join with sl st and fasten off or continue for another round to enlarge.
Optional: Add more rounds for a bigger bag — just continue granny square-style, adding dc clusters and corners.
2. Assemble the Bag
- Lay the two granny squares wrong sides facing in.
- With a contrasting or matching yarn, sc (or sl st) around three sides of the squares to join them.
- Leave the top side open.
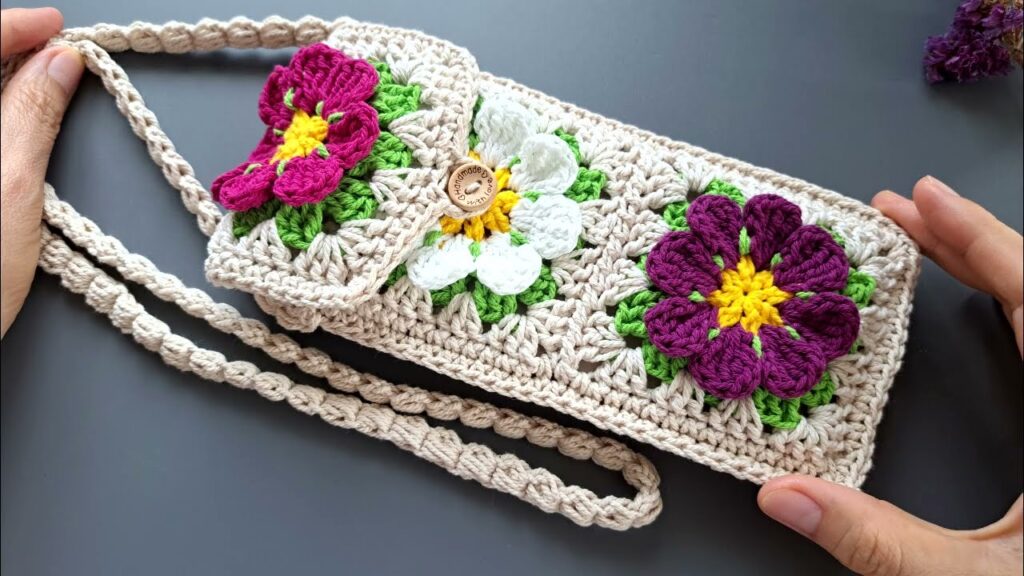
3. Add the Strap
You have a few strap options:
- Ch a long chain to your desired length (e.g., 100–120 chains for a crossbody).
- Sc or sl st in each chain across for a thicker strap.
- Sew each end of the strap securely to the inside top corners of the bag.
- Cut 3 long yarn strands (3 times the desired finished length).
- Knot and braid them.
- Attach each end to the bag securely.
4. Finishing Touches
- Weave in all ends using a tapestry needle.
- Block the bag if needed for a neater shape.
- To fit larger phones, make the granny squares bigger or add a few plain dc rows around the square before assembling.
- For a mini bag, reduce the number of rounds.
- Hand wash or use a gentle cycle with cold water if using washable yarn.
- Lay flat to dry.
- Add a zipper or button closure.
- Line the bag with fabric for extra sturdiness.
- Embellish with beads, tassels, or appliqué.