 by
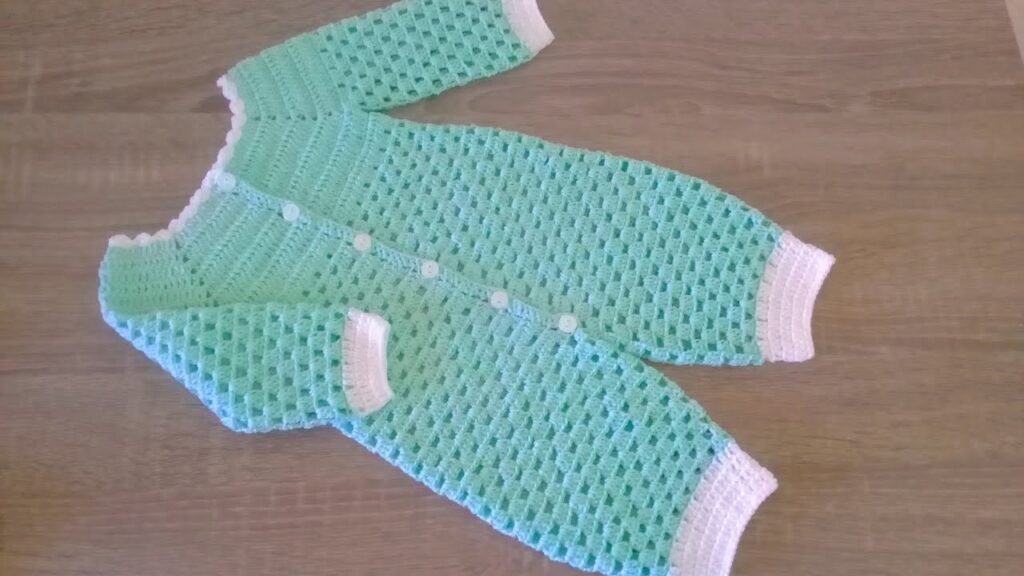
by Wrap your little one in comfort and style with this delightful crochet sleepsuit! Inspired by the charming design in the picture, this pattern features a lovely lacy openwork body and sleeves, a cozy ribbed yoke, and contrasting white trim for a polished finish. With a convenient button-up front, it’s perfect for keeping baby snug and making diaper changes a breeze.
Skill Level: Intermediate (familiarity with basic stitches, working top-down, joining in the round, and understanding basic lace/shell patterns is helpful).

Materials:
- Yarn: DK (Light Worsted) weight yarn. A soft acrylic, cotton, or blend is highly recommended for baby comfort.
- Main Color (MC): Light Teal/Mint Green (or your chosen primary color) – approx. 250-400 yards, depending on size.
- Contrast Color (CC): White (for edging) – small amount.
- Crochet Hook: Size G/6 (4.0 mm) or size needed to obtain gauge.
- Yarn Needle: For weaving in ends and attaching buttons.
- Scissors
- Stitch Markers: Very helpful for marking increase points, armholes, and the beginning of rounds.
- Small Buttons: 5-7, for the front closure.
Gauge (Crucial!):
Achieving the correct gauge is essential for the sleepsuit to fit properly.
- Yoke Gauge: 4 rows of hdc should measure approximately 1 inch.
- Lace/Shell Stitch Gauge: A 4-stitch pattern repeat should measure approximately 1 inch.
- Adjust your hook size if necessary to meet these gauges.
Finished Size (Approximate, 6-12 Months):
- Chest Circumference: 19-20 inches
- Yoke Depth (from neckline to underarm): 4-5 inches
- Inseam (Crotch to Ankle): 8-9 inches
- Sleeve Length (Underarm to Cuff): 7-8 inches
- Adjustments for other sizes: Guidance will be provided.
Abbreviations (US Crochet Terms):
- ch: chain
- sl st: slip stitch
- sc: single crochet
- hdc: half double crochet
- dc: double crochet
- sk: skip
- sp: space
- st(s): stitch(es)
- beg: beginning
- rep: repeat
- inc: increase (work 2 sts in the same st)
- dec: decrease (work 2 sts together)
- Shell: (dc 2, ch 1, dc 2) in same st/sp (adjust for desired density)
- FPhdc: Front Post Half Double Crochet
- BPhdc: Back Post Half Double Crochet
- MC: Main Color
- CC: Contrast Color
- ( ): repeat instructions in parentheses a specified number of times
- [ ]: total stitches in a round/row
Special Stitches (for Ribbing):
- Front Post Half Double Crochet (FPhdc): YO, insert hook from front to back around the post of the indicated hdc stitch from the previous round, YO, pull up a loop. YO, pull through all 3 loops on hook.
- Back Post Half Double Crochet (BPhdc): YO, insert hook from back to front around the post of the indicated hdc stitch from the previous round, YO, pull up a loop. YO, pull through all 3 loops on hook.
Video Tutorial
Pattern for Cozy & Charming Lacy Baby Sleepsuit
This sleepsuit is worked from the top down, starting with the yoke, then dividing for sleeves and body.
Part 1: The Yoke (Top Down, Worked in Rows)
Using Main Color (MC – Light Teal/Mint Green):
Initial Chain: Ch 76 (for 6-12 months). This chain count should allow for 4 even sections and enough room for increases.
Row 1 (Foundation): Hdc in 3rd ch from hook and in each ch across. [74 hdc] Do NOT join. You’ll work in rows for the front opening. Ch 2 (counts as hdc), turn.
Row 2 (First Yoke Increase Row): Hdc in first st. Hdc in next 10 sts (Right Front Panel). (Hdc 2 in next st, ch 1, Hdc 2 in next st) in next st (Corner 1). Place stitch marker in ch-1 sp. Hdc in next 15 sts (Right Sleeve). (Hdc 2 in next st, ch 1, Hdc 2 in next st) in next st (Corner 2). Place stitch marker in ch-1 sp. Hdc in next 20 sts (Back Panel). (Hdc 2 in next st, ch 1, Hdc 2 in next st) in next st (Corner 3). Place stitch marker in ch-1 sp. Hdc in next 15 sts (Left Sleeve). (Hdc 2 in next st, ch 1, Hdc 2 in next st) in next st (Corner 4). Place stitch marker in ch-1 sp. Hdc in next 10 sts. Hdc 2 in last st (Left Front Panel). [86 hdc, 4 ch-1 sps] Ch 2, turn.
Row 3 (Yoke Increase Row): Hdc in first st. Hdc in each hdc until you reach the first ch-1 sp. (Hdc 2 in ch-1 sp, ch 1, Hdc 2 in ch-1 sp) in ch-1 sp (Corner 1). Hdc in each hdc until you reach the next ch-1 sp. (Hdc 2 in ch-1 sp, ch 1, Hdc 2 in ch-1 sp) in ch-1 sp (Corner 2). Hdc in each hdc until you reach the next ch-1 sp. (Hdc 2 in ch-1 sp, ch 1, Hdc 2 in ch-1 sp) in ch-1 sp (Corner 3). Hdc in each hdc until you reach the next ch-1 sp. (Hdc 2 in ch-1 sp, ch 1, Hdc 2 in ch-1 sp) in ch-1 sp (Corner 4). Hdc in each hdc until last st. Hdc 2 in last st. Ch 2, turn.
Repeat Row 3 for a total of 5-7 yoke rows (including Row 2). The picture shows a relatively deep yoke, approximately 6-7 rows. Measure the yoke depth to ensure it’s about 4-5 inches from the neckline to the corner point.
Part 2: Dividing for Sleeves and Body
Next Row (Divide for Body): Ch 2. Hdc in each hdc until you reach the first corner ch-1 sp. Hdc 1 in corner ch-1 sp. Ch 4 (this creates the armhole space for the sleeve seam). Sk ALL sts between this corner and the next corner (Sleeve 1 sts). Hdc 1 in the next corner ch-1 sp. Hdc in each hdc across the Back Panel until you reach the next corner ch-1 sp. Hdc 1 in corner ch-1 sp. Ch 4 (this creates the second armhole space). Sk ALL sts between this corner and the next corner (Sleeve 2 sts). Hdc 1 in the next corner ch-1 sp. Hdc in each hdc until the end of the row. Do NOT join. You will continue to work the body in rows for the front opening.
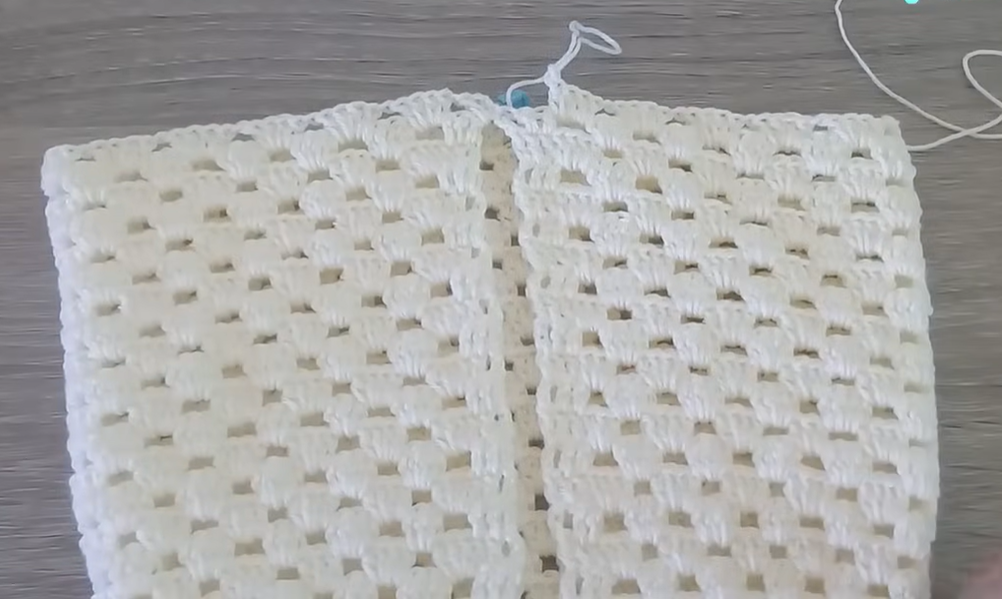
Part 3: The Body (Worked in Rows)
The body has a shell-like lace pattern.
Next Row (Lace Pattern – Shells): Ch 3 (counts as dc). Dc in same st. *Sk 3 sts, (dc 2, ch 1, dc 2) in next st (Shell made).* Repeat from * to * across the row, working into the armhole chains as part of the count. Adjust spacing to fit the pattern evenly. End with dc 2 in the last st. Ch 3, turn.
Next Row (Lace Pattern – Shells, Offset): Dc in first dc. *Shell (dc 2, ch 1, dc 2) in the ch-1 sp of the next Shell.* Repeat from * to * across. End with dc in last 2 dc. Ch 3, turn.
Repeat the last two Shell Pattern Rows alternately until the body of the sleepsuit reaches approximately 10-12 inches from the underarm, or just past the crotch area.

Part 4: Dividing for Legs & Finishing Body
Next Row (Divide for Legs): Work in pattern across half of the stitches for the first leg. At the center of the body, join with a sl st to the opposite side to form the crotch. This will create a large loop for the first leg. Fasten off MC. Join MC yarn to the remaining stitches to form the second leg. Work in pattern across the remaining stitches. Sl st to join the loop. Fasten off MC.
Part 5: The Legs (Worked in Rounds)
Join MC yarn to the crotch seam of one leg.
Round 1 (Leg Base): Ch 3 (counts as dc). Dc in each st around the leg opening, working into the ch-sps or spaces to ensure even spacing. Sl st to join. Ensure your stitch count is a multiple suitable for the lace pattern or for ribbing.
Round 2 (Lace Pattern – Shells): Ch 3 (counts as dc). (Dc 1, ch 1, dc 2) in same st (first Shell made). *Sk 3 sts, (dc 2, ch 1, dc 2) in next st (Shell made).* Repeat from * to * around. Sl st to 3rd ch of beg ch-3 to join. Adjust spacing to fit the pattern evenly.
Repeat Round 2 of Lace Pattern for approximately 7-9 more rounds, or until the leg reaches your desired length from the crotch, leaving about 1-1.5 inches for the cuff.
Leg Cuff (Ribbed): Ch 2 (does not count as st). *FPhdc around next st, BPhdc around next st.* Repeat from * to * around. Sl st to the first FPhdc to join. Repeat Ribbing Round for 2-3 more rounds.
Final Cuff Edge (using CC): Join CC yarn. Ch 1. Sc in each st around. Sl st to join. Fasten off CC and weave in ends. Repeat for the second leg.
Part 6: The Long Sleeves (Worked in Rounds)
Join MC yarn to the center of the underarm ch-4 space.
Round 1 (Sleeve Base): Ch 3 (counts as dc). Dc in each st around the armhole opening and into the 4 ch-sp. Sl st to join. [Approx. 30-36 dc]
Round 2 (Lace Pattern – Shells): Ch 3 (counts as dc). (Dc 1, ch 1, dc 2) in same st (first Shell made). *Sk 3 sts, (dc 2, ch 1, dc 2) in next st (Shell made).* Repeat from * to * around. Sl st to 3rd ch of beg ch-3 to join. Adjust spacing to fit the pattern evenly.
Repeat Round 2 of Lace Pattern until the sleeve reaches your desired length from underarm, leaving about 1-1.5 inches for the cuff.
Sleeve Cuff (Ribbed): Ch 2 (does not count as st). *FPhdc around next st, BPhdc around next st.* Repeat from * to * around. Sl st to the first FPhdc to join. Repeat Ribbing Round for 2-3 more rounds.
Final Cuff Edge (using CC): Join CC yarn. Ch 1. Sc in each st around. Sl st to join. Fasten off CC and weave in ends. Repeat for the second sleeve.

Part 7: Edging & Finishing Touches
Neckline Edging (using CC): Join CC yarn to the top right corner of the front opening. Row 1: Ch 1. Sc evenly around the entire neckline opening. Join with sl st to first sc. Fasten off CC and weave in ends.
Front Opening Bands (using MC): Join MC yarn to the bottom right corner of the front opening. Row 1: Ch 1. Sc evenly up the front opening edge to the neckline. Fasten off. Join MC yarn to the bottom left corner of the front opening. Row 2 (Buttonholes): Ch 1. Sc in first few stitches. *Ch 2 (sk 2 sts for buttonhole), sc in next few sts.* Repeat for 5-7 buttonholes, evenly spaced along the front opening. Sc to end. Fasten off.
Assembly:
- Weave in all remaining yarn ends securely.
- Sew the 5-7 small buttons onto the solid front band (opposite the buttonhole band), aligning them perfectly.
Blocking (Recommended!): Gently block your sleepsuit to open up the lace pattern, even out your tension, and enhance drape. Wet the sleepsuit thoroughly, gently squeeze out excess water, lay flat, and shape it to the correct dimensions. Let it dry completely.
Adjusting for Different Sizes:
- Initial Chain: Adjust the initial chain to fit the head circumference, ensuring it works with your yoke increase formula.
- Yoke Rows: Add or subtract yoke increase rows to achieve the desired chest circumference and armhole depth. Measure regularly!
- Armhole Chain: For larger sizes, you might need to chain more stitches for the armhole bridge.
- Body Length: Add or subtract repeats of the lace pattern rounds to achieve the desired length from underarm to crotch.
- Leg/Sleeve Length: Add or subtract repeats of the lace pattern rounds to achieve the desired length before the cuffs.
- Gauge Swatch: ALWAYS make a gauge swatch for garments to ensure the correct fit!
Enjoy crocheting this sweet and practical sleepsuit for your little one!