 by
by The bucket hat is more than just a fleeting trend; it’s a timeless, practical, and undeniably cute accessory that offers both sun protection and a touch of effortless style. And what could be better than a handmade one, crafted with your own hands and customized to your exact preferences? Crocheting a bucket hat is a surprisingly easy and quick project, perfect for honing your skills in working in the round and shaping.
This detailed tutorial will guide you through creating an adorable and functional bucket hat, designed to be accessible for crocheters of all levels.
Why Crochet a Bucket Hat?

- Fashion Forward: Bucket hats are incredibly popular and add a trendy touch to any outfit.
- Ultimate Customization: Choose your favorite colors, add stripes, experiment with textures, or even embroider small details.
- Practicality: Excellent for sun protection on sunny days, or simply for those “bad hair days.”
- Quick Project: For experienced crocheters, a bucket hat can often be completed in just a few hours. For beginners, it’s a satisfying weekend project.
- Skill Building: You’ll master working in the round, increasing stitches for shaping, and creating a sturdy fabric.
- Great Gift: A thoughtful and personalized present for friends and family.
Key Elements of a Crochet Bucket Hat:
Understanding these three main parts will help you visualize the construction:
- The Crown: The flat or slightly domed top of the hat. This is where you’ll start and build your increases to create a flat circle.
- The Sides/Body: The vertical part of the hat that sits snugly around your head. Here, you’ll work even rounds with no increases.
- The Brim: The outward-flaring edge that gives the bucket hat its distinctive shape. This section involves increasing stitches again to create the flare.
Choosing Your Tools & Materials:
The right materials are crucial for achieving that classic bucket hat shape.
- Yarn: The Key to Structure!
- Cotton (Recommended!): 100% cotton yarn (worsted or DK weight) is ideal. It’s breathable, holds its shape well, has minimal stretch, and provides excellent stitch definition.
- Cotton Blends: (e.g., cotton/linen, cotton/bamboo) – Also good choices for their breathability and structure.
- Raffia/Paper Yarn: Perfect for a stiffer, summery, beachy look. It might be a bit rough on the hands, but creates a fantastic shape.
- Sturdy Acrylic: While not as breathable as cotton, a good quality, non-stretchy acrylic yarn can work if crocheted densely. Avoid very soft, drapey acrylics or wool, as they tend to stretch out and lose the bucket hat shape.
- Yarn Weight: Worsted (Aran in UK/AU) is the most common and versatile choice. DK (Double Knitting) can create a lighter hat, while Bulky yarn will result in a quicker, chunkier hat.
- Yarn Amount: For an average adult hat, you’ll typically need 100-200 yards (approx. 90-180 meters), depending on yarn weight and brim size.
- Crochet Hook:
- Choose a hook size appropriate for your chosen yarn weight.
- Crucial Tip for Bags & Hats: To achieve the necessary dense, sturdy fabric that holds its shape, it’s often best to use a hook size one size smaller than what is recommended on your yarn label. For example, if the label suggests 5.0mm (H), try a 4.0mm (G) or 4.5mm (G/7) hook.
- Other Notions:
- Stitch Marker: Absolutely essential for working in the round and keeping track of your rounds.
- Tapestry Needle: For neatly weaving in ends.
- Scissors.
Understanding Sizing & Gauge:
A bucket hat needs to fit well to look good. Gauge is critical!
Approximate Head Circumference (Finished Hat Size):
| Size | Head Circumference (Approx.) |
|---|---|
| Baby (0-6M) | 14-16 inches (35.5-40.5 cm) |
| Toddler (1-3Y) | 18-20 inches (45.5-51 cm) |
| Child (3-10Y) | 20-21 inches (51-53.5 cm) |
| Teen/Adult S | 21-22 inches (53.5-56 cm) |
| Adult M/L | 22-24 inches (56-61 cm) |
Export to Sheets
How to Make a Gauge Swatch (Do NOT Skip This!):
- Cast On: Chain about 20-25 stitches.
- Work: Crochet a square of at least 4×4 inches (10×10 cm) in your main stitch (e.g., single crochet).
- Measure: Count how many stitches fit within 4 inches (10 cm) and how many rows fit within 4 inches (10 cm).
- Adjust: If you have more stitches, your work is too tight – go up half a hook size. If you have fewer stitches, your work is too loose – go down half a hook size.
- Crucial for Hats: Your fabric should feel firm and dense, not loose or floppy.
General Stitch Patterns for Bucket Hats:
- Single Crochet (sc): The workhorse stitch for bucket hats! It creates a tight, sturdy fabric that holds shape beautifully. Highly recommended for the entire hat.
- Half Double Crochet (hdc): Slightly taller than sc, works up a bit faster, and still provides good density.
- Moss Stitch (or Seed Stitch): (alternating sc and ch 1) – Creates a lovely, subtle textured fabric that is also quite dense and holds shape well.
- Avoid: Very open or lacy stitches unless you’re specifically going for a very floppy, decorative hat that doesn’t need to hold shape.
Easy & Cute Crochet Bucket Hat Tutorial (Top-Down Construction)
This tutorial uses the Single Crochet (sc) stitch for simplicity and excellent structure. We’ll work in continuous spirals for a seamless look, using a stitch marker to denote the start of each new round.
Materials for an Adult S/M Hat (approx. 22-inch circumference):
- Worsted weight cotton yarn (approx. 150-200 yards)
- Crochet hook (e.g., G/4.0mm or H/5.0mm, chosen based on your gauge swatch)
- Stitch marker, tapestry needle, scissors
Abbreviations Used:
- ch: chain
- sc: single crochet
- sl st: slip stitch (only for finishing)
- st(s): stitch(es)
- inc: increase (work 2 sc in the same stitch)
- BLO: back loop only
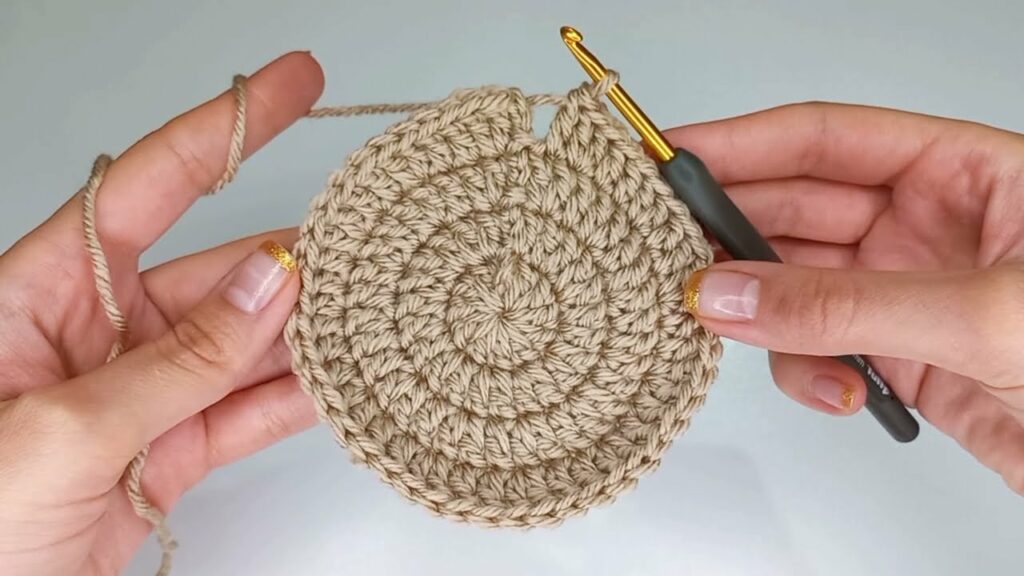
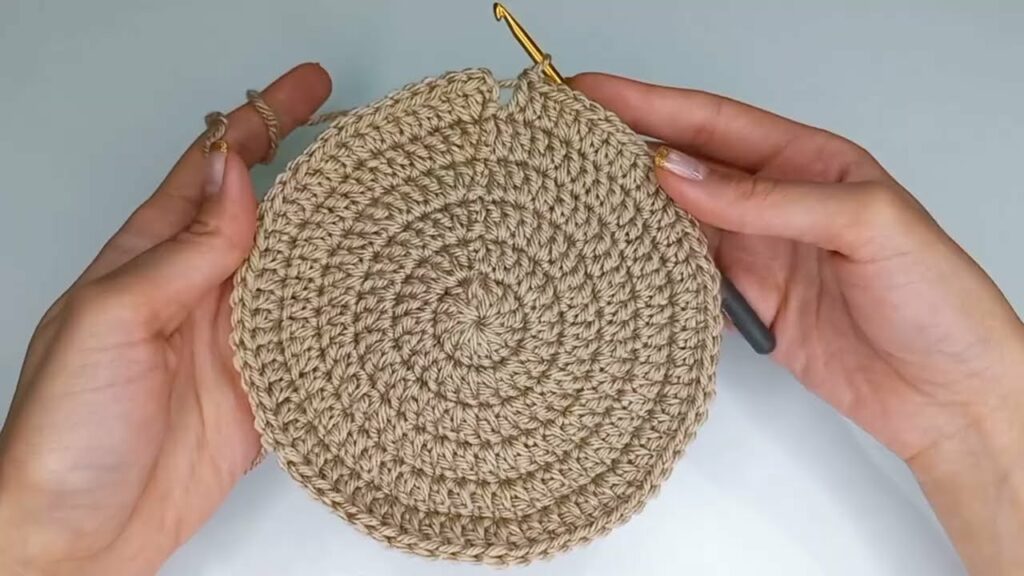
Phase 1: The Crown (Building a Flat Circle)
This section forms the top of your hat. We’ll use the classic flat circle increase method.
- Starting (Magic Ring Preferred):
- Magic Ring (MR): Create a magic ring.
- Alternatively (Ch 2 method): Ch 2.
- Round 1: Work 6 sc into the MR (or into the 2nd ch from hook if using ch 2 method). (6 sts). Place your stitch marker in the first sc of this round. You will not sl st to join, just keep working in a spiral.
- Round 2: Inc in each st around. (12 sts). Move stitch marker up to the first sc of the new round.
- Round 3: Sc in next st, inc in next st repeat 6 times. (18 sts). Move SM.
- Round 4: Sc in next 2 sts, inc in next st repeat 6 times. (24 sts). Move SM.
- Round 5:Sc in next 3 sts, inc in next st repeat 6 times. (30 sts). Move SM.
- Continue this pattern: In each subsequent round, you will increase by 6 stitches. The number of ‘sc’ stitches between increases will increase by one in each round (e.g., Round 6: Sc in next 4 sts, inc repeat, etc.).
- Crown Diameter Check: Keep working increase rounds until the diameter of your flat circle (measure across the center) reaches approximately 6.5 to 7.5 inches (16.5 to 19 cm) for an adult head (refer to the sizing chart above). For a 22-inch head circumference, your crown should ideally be about 7 inches in diameter (Head Circ / 3.14). Stop increasing when your crown is just under this target diameter.

Phase 2: The Sides/Body (Working Straight Up)
This forms the vertical part of the hat that sits around your head.
- Transition Round (Optional, but Recommended for a Crisp Edge):
- Work 1 sc in the BLO (Back Loop Only) of each stitch around. This creates a subtle ridge that helps the sides of the hat stand up nicely.
- Straight Rounds:
- Continue working in sc (in both loops again) in each stitch around, with no increases.
- Continue working these rounds until your hat body reaches the desired height (e.g., 3.5 to 4.5 inches / 9 to 11.5 cm from the BLO ridge down to just above your ears for an adult hat).
- Try it on! This is a good point to try on the hat to ensure it fits comfortably around your head before you start the brim.
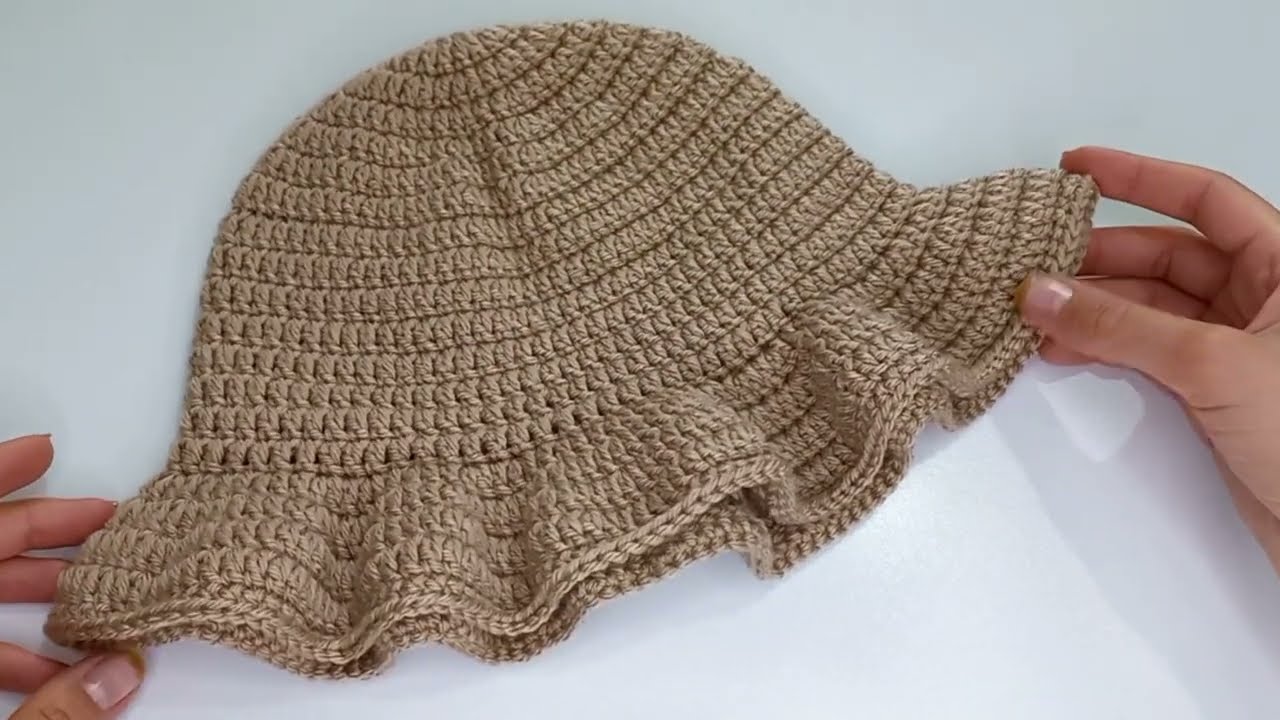
Phase 3: The Brim (Flaring Outward)
This is where the hat gets its bucket shape.
- Brim Start (Increase Round 1):
- Begin increasing again to create the outward flare of the brim.
- Sc in next 4 sts, inc in next st repeat around. (Adjust the ‘Sc X’ number to distribute increases evenly based on your total stitch count at the end of the body section. Aim to increase by approximately 8-12 stitches in this first brim round).
- Brim Rounds (Continuing Flare):
- Continue working in sc, increasing evenly in subsequent rounds to widen the brim.
- Round 2 (Brim): Sc in next 5 sts, inc in next st repeat around.
- Round 3 (Brim): Sc in next 6 sts, inc in next st repeat around.
- Continue for desired brim width (e.g., 2 to 3 inches / 5 to 7.5 cm for a typical bucket hat brim).
- To create a stiffer brim: You can work the last 1-2 rounds of the brim into the BLO (Back Loop Only) or even use a slightly smaller hook for these final rounds.
- Final Edging (Optional, but Recommended):
- Work a round of sl st (slip stitch) in each stitch around for a very neat, firm edge.
- Alternatively, Crab Stitch (Reverse Single Crochet): Creates a beautiful, rope-like edge that adds stiffness.
Phase 4: Finishing Touches
- Weave in All Ends: Using your tapestry needle, meticulously weave in every single yarn tail. Secure them firmly to prevent unraveling.
- Blocking (Important for Shape!):
- Dampen: Lightly dampen your finished hat with water (you can use a spray bottle).
- Shape: Place the hat over a round form that is slightly larger than your head (e.g., a large bowl, a balloon inflated to the correct size, or a Styrofoam wig head). Shape the crown and sides to your liking.
- Brim: Carefully flatten and smooth the brim evenly around the form. You can use pins to hold it in place if needed.
- Dry: Allow the hat to air dry completely. Blocking is crucial for setting the shape of a bucket hat and evening out your stitches.

Tips for an “Easy & Cute” Success:
- Yarn is King: Seriously, don’t skimp on a good cotton or sturdy blend. It makes all the difference in shape retention.
- Tight Gauge: It’s worth repeating: a dense fabric will give you that structured bucket hat look.
- Stitch Marker Discipline: Always move your stitch marker at the beginning of each new round. This prevents counting errors.
- Count Your Stitches: Especially in the increase rounds, a quick count at the end of each round ensures your hat grows evenly.
- Try On as You Go: Particularly when working the body, regularly try on the hat to check the fit and height.
- Customization is Fun! Add stripes every few rounds, use a variegated yarn, or embroider small motifs once the hat is finished.
Care Instructions for Your Crocheted Bucket Hat:
- Hand Wash Preferred: Gently hand wash in cool water with a mild detergent.
- Machine Wash (if yarn allows): If your yarn is machine washable, use a gentle cycle with cold water. Place the hat in a mesh laundry bag for protection.
- Reshape and Air Dry Flat: Gently squeeze out excess water (do not wring). Reshape the hat while wet and lay it flat on a clean towel or drying rack to air dry completely. Do not hang, as this can stretch the fabric.
Video tutorial :
Crocheting a bucket hat is a rewarding experience that results in a fashionable and practical accessory. With these steps, you’ll be able to create your own custom-made, effortlessly cool bucket hat in no time! Happy hooking!