 by
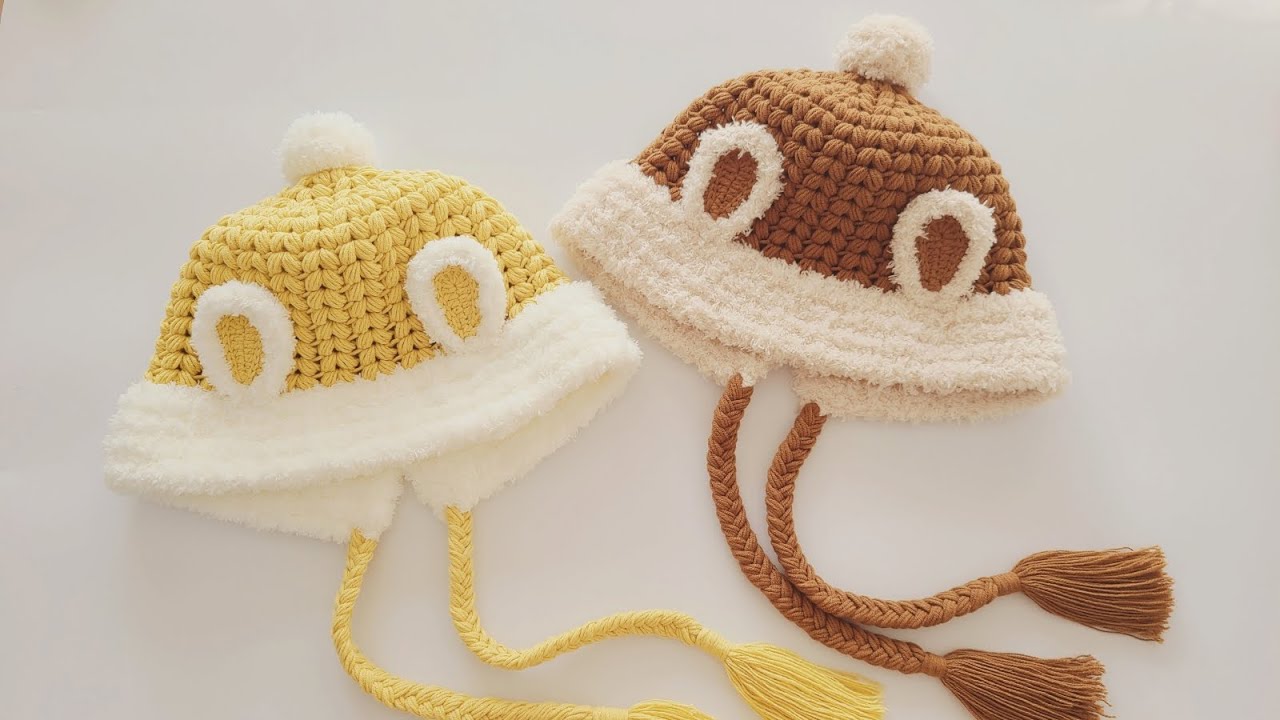
by There’s something universally heartwarming about a little one (or even a playful adult!) donning a hat adorned with charming animal ears. Among these, the classic rabbit ear hat reigns supreme, offering a delightful blend of practical warmth and whimsical cuteness. This project combines the foundational skills of crocheting a cozy hat with the art of creating perfectly soft and adorable rabbit ears, resulting in a cherished handmade accessory.
This detailed guide will walk you through crocheting a comfortable hat base and then seamlessly attaching those beloved, characterful rabbit ears.
The Allure of the Rabbit Ear Hat: Beyond Basic Headwear

A crochet hat with rabbit ears is more than just a means to keep warm; it’s a statement of joy and playfulness:
- Instant Cuteness Factor: The addition of ears immediately transforms a simple beanie into an irresistibly charming accessory, guaranteed to elicit smiles.
- Whimsical & Playful: Perfect for photo props, dress-up, themed events, or simply adding a touch of fun to an everyday outfit.
- Dual Purpose: It provides essential warmth and comfort, while also offering a unique and adorable aesthetic.
- Customization Galore: Endless possibilities for color combinations, ear sizes, and subtle embellishments allow for truly personalized creations.
Key Elements for “Soft and Adorable”: Yarn & Stitch Choices
The secret to a truly soft and adorable rabbit ear hat lies in the materials and fundamental stitches you choose for both the hat and the ears:
- Yarn Choice: The Foundation of Softness
- Plush/Chenille Yarns: For an ultra-soft, fuzzy, and instantly huggable texture, these polyester-based yarns are ideal. They create a very “cute” aesthetic.
- Velvet Yarns: Similar to chenille but with a luxurious sheen, offering a sophisticated kind of softness.
- Superwash Merino Wool (DK/Worsted Weight): A fantastic natural fiber option. It’s incredibly soft, breathable, provides excellent stitch definition, and is often machine washable for easy care.
- Baby Acrylics: Specially formulated to be hypoallergenic, easy to care for, and exceptionally soft, making them perfect for children’s wear.
- Consistency is Key: Use the same type of yarn for both the hat and the ears (or very similar weights and textures) to ensure a cohesive and harmonious look.
- Hook Size: Creating a Dense, Plush Fabric
- For both the hat body and the ears, it’s generally recommended to use a crochet hook that is one size smaller than what is typically suggested for your chosen yarn. This technique creates a denser, tighter fabric that is:
- Warmer: Minimizes gaps where cold air can penetrate.
- Structured: Helps the hat and ears hold their shape better, preventing sagging.
- Plush: Creates a wonderfully squishy, soft texture, especially important for the ears.
- For both the hat body and the ears, it’s generally recommended to use a crochet hook that is one size smaller than what is typically suggested for your chosen yarn. This technique creates a denser, tighter fabric that is:
- Stitch Choice: The Building Blocks of Comfort & Cuteness
- Single Crochet (SC): This is the ultimate stitch for creating dense, sturdy, and neat fabric. It’s perfect for both the hat body (for warmth and shape) and the ears (for structure and plushness).
- Half Double Crochet (HDC): A good alternative for the hat body if you want it to work up a bit faster while still maintaining reasonable density and warmth.

Part 1: Crocheting the Soft and Cozy Hat Base
We’ll focus on a classic top-down beanie construction, which is versatile and provides a great base for ears.
Materials Needed for the Hat Base:
- Main Yarn (as chosen above, sufficient quantity for a hat)
- Crochet Hook (one size down from recommended)
- Stitch Marker
- Tapestry Needle
- Scissors
Sizing (Crucial for a Good Fit):
Before you begin, determine the head circumference and hat height for your desired size.
- Head Circumference: Measure the widest part of the head.
- Hat Height: Measure from the crown of the head to the bottom of the earlobe (for a beanie).
- Crown Diameter Calculation: To find the diameter of the flat circle you’ll crochet for the crown, use the formula:
Head Circumference / 3.14 (Pi). - Gauge Swatch: Do not skip this! Crochet a small 4×4 inch (10×10 cm) square using your chosen yarn and hook. Measure your stitches and rows to ensure your hat will be the correct size. Adjust hook size if necessary.
General Beanie Construction (Top-Down Method):
- Start the Crown:
- Make a Magic Ring (preferred for a neat center) or chain 2, then work X single crochet (sc) stitches into the ring/2nd chain from hook. (Typically 6-10 sc depending on yarn weight). Place a stitch marker in the last stitch to mark the end of the round.
- Increase Rounds (Building the Crown):
- Work in continuous rounds. Increase stitches evenly in each round to create a flat circle. Common increase patterns:
- Round 2: 2 sc in each stitch around.
- Round 3: (1 sc, 2 sc in next stitch) repeat around.
- Round 4: (2 sc, 2 sc in next stitch) repeat around.
- Continue this increasing pattern until your flat circle reaches the calculated Crown Diameter. The number of stitches will grow rapidly.
- Work in continuous rounds. Increase stitches evenly in each round to create a flat circle. Common increase patterns:
- Hat Body (Straight Rounds):
- Once your crown is the correct diameter, stop increasing. Work 1 sc (or hdc) in each stitch around for subsequent rounds.
- Continue working these straight rounds until the hat reaches the desired height (from the center of the crown down to the bottom of the earlobe, or slightly past for extra coverage).
- Hat Band/Edging (Optional):
- For a neat finish, you can work 1-2 final rounds of single crochet, or for a bit of stretch, work 2-3 rounds of single crochet in the back loop only (sc blo) to create a subtle ribbed band.
- Fasten Off: Cut the yarn, leaving a short tail. Yarn over and pull the tail completely through the loop on your hook to secure.
Part 2: Crocheting the Soft and Adorable Rabbit Ears
You will need to make two identical ears. Refer to the detailed guide for “How to Crochet Soft and Cute Rabbit Ears” for comprehensive instructions. Here’s a summarized approach:
For Each Ear (Outer Ear):
- Start: Make a Magic Ring (or chain 2), work 6 sc into the ring/2nd chain from hook.
- Increase Rounds: Work several rounds with evenly spaced increases to create a wider base for the ear (e.g., increase to 24-30 stitches around).
- Straight Rounds: Work several rounds (e.g., 10-15 rounds) of 1 sc in each stitch around to build the main length of the ear.
- Decrease Rounds: Begin decreasing stitches gradually (using invisible decrease for a neat finish) to taper the ear towards the tip.
- Stuffing: As the opening gets smaller during decreasing, lightly stuff the ear with fiberfill. Don’t overstuff; keep it squishy and soft.
- Close: Continue decreasing until the opening is very small. Thread your tapestry needle through the front loops of the remaining stitches and pull tight to close. Fasten off, leaving a long tail (12-18 inches) for sewing.
For Each Ear (Optional Inner Ear – contrasting color):
- Create a Flat Oval/Teardrop: Chain a starting length (e.g., ch 8). Work sc around the chain, increasing at the ends, to create a flat, elongated oval or teardrop shape that will fit inside the outer ear.
- Fasten Off: Leave a long tail for sewing.
- Attach Inner Ear: Position the contrasting inner ear onto the corresponding outer ear and sew securely in place with the tapestry needle.

Part 3: Seamlessly Attaching the Rabbit Ears to the Hat
This is where your hat truly comes to life! Careful placement and secure stitching are key.
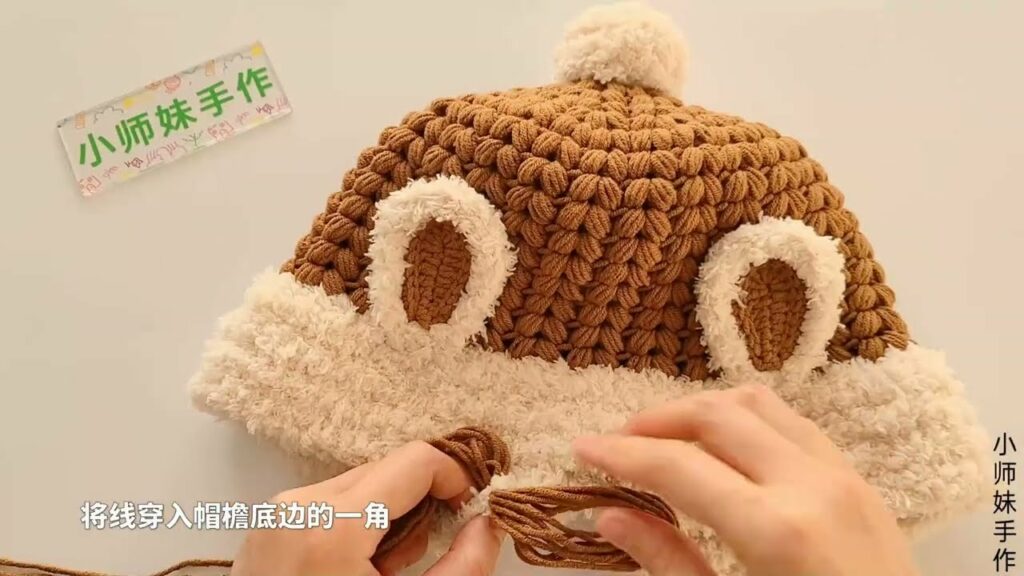
- Prepare the Ears: Gently flatten the bottom opening of each ear. You can fold the raw edges inward slightly and stitch a few times across the bottom to create a neat, flat base that will be easy to sew onto the hat.
- Strategic Placement:
- Lay the completed hat base flat.
- Identify the center top of the crown.
- Position the first ear slightly forward from the top/side of the crown, about 1-2 inches from the center line of the hat (adjust this distance based on the hat’s size and the desired “spread” of the ears).
- Use stitch markers or pins to temporarily hold the ear in place.
- Position the second ear symmetrically opposite the first. Step back and look at it from different angles to ensure both ears are even and angled correctly.
- Secure Sewing Method:
- Using the long yarn tail left from the ear and your tapestry needle, begin sewing the ear to the hat.
- Strong Attachment: Stitch through both the dense base of the ear and several layers of the hat fabric. Work all around the entire base of the ear, using small, neat stitches (like a whip stitch or mattress stitch) that are not easily visible.
- Reinforce: Go over the attachment area a second time if necessary to ensure maximum security, especially if the hat is for a child.
- Finish: When finished, weave the remaining yarn tail securely into the hat fabric, burying it completely. Double knot the tail before burying for extra security.
- Angling for Expression:
- The angle at which you sew the ears can change the hat’s “personality”:
- Straight Up: For an alert, classic bunny look.
- Slightly Outward: For a relaxed, playful vibe.
- One Floppy: For a mischievous or sleepy appearance (achieve this by sewing one ear fully upright and the other slightly forward or backward at its base).
- The angle at which you sew the ears can change the hat’s “personality”:
Finishing Touches & Extra Charm:
- Weave in All Ends: Thoroughly weave in any remaining yarn tails on the hat base and from the ears. This prevents unraveling and creates a polished finish.
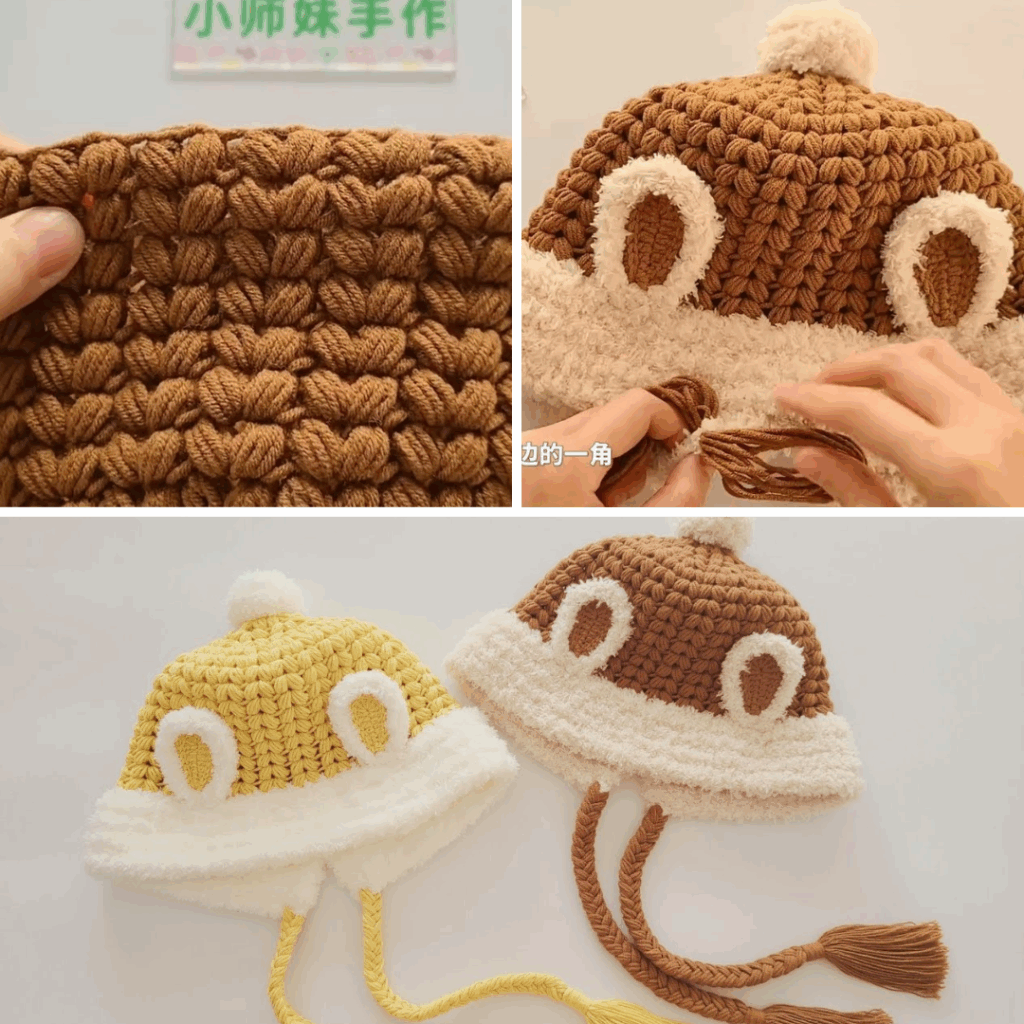
- Chin Ties (for babies/toddlers): If your hat design includes earflaps on the hat base, braid two long lengths of yarn and attach one to the end of each earflap for ties.
- Pom-Poms or Bows: Add a fluffy yarn pom-pom to the very top of the hat, or a small, crocheted bow tied beneath one ear for an extra touch of cuteness.
- Cheek Blushing (Optional): For an even more adorable animal face, use a small amount of non-toxic fabric blush or even a little pink yarn to lightly embroider small “blush” circles on the hat’s “cheeks” below the ears.
- Blocking (Optional but Recommended): Gently wash the finished hat according to your yarn’s care instructions. Gently reshape the hat and ears while wet, then lay flat to dry. This helps to even out stitches and set the overall shape beautifully.
Video Tutorial ;
Creating a crochet hat with soft and adorable rabbit ears is a joyful project that results in a unique, functional, and utterly charming accessory. With each stitch, you’re not just making a hat; you’re crafting a little piece of happiness that will bring smiles wherever it goes!