by
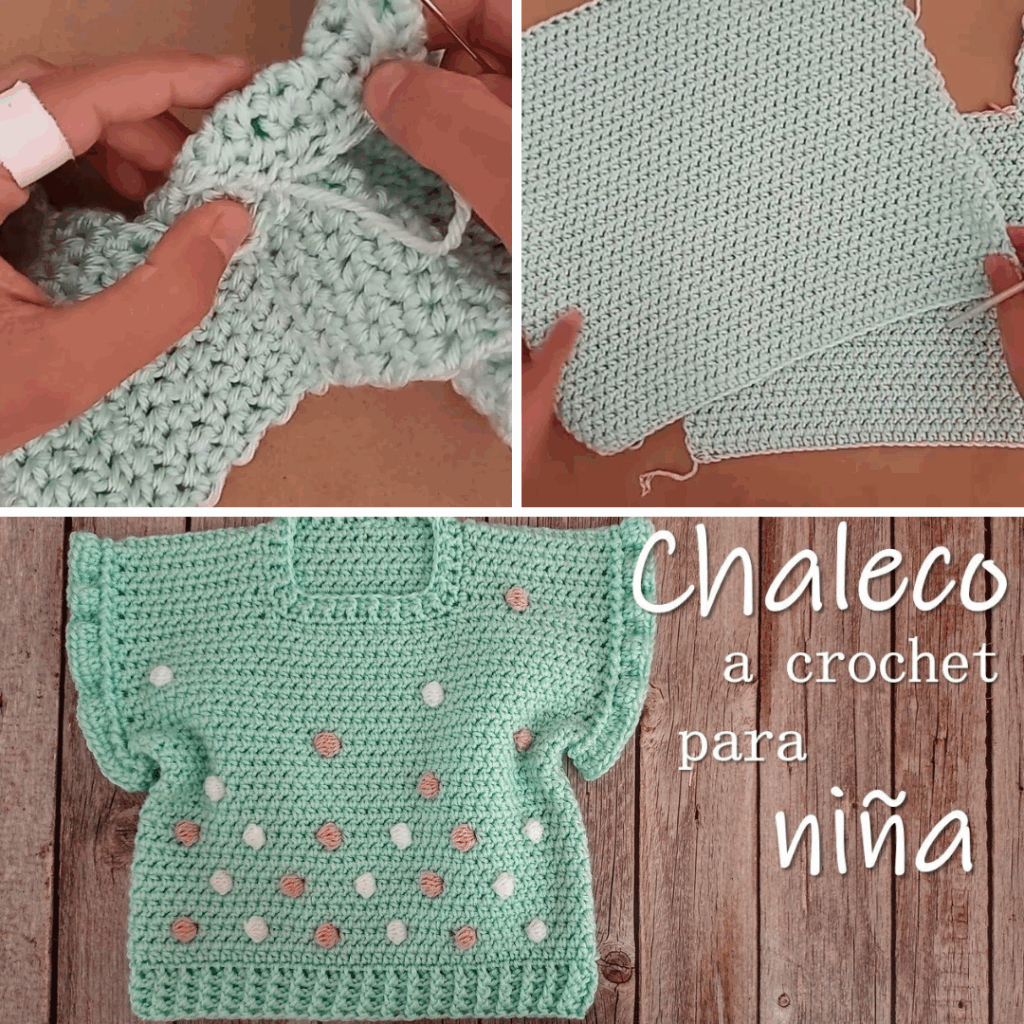
by A crocheted vest is the perfect layering piece for any young girl. It adds a touch of style and warmth without the bulk of sleeves, making it ideal for transitioning seasons, adding flair to an outfit, or simply providing a cozy embrace. If you’re looking for a rewarding project that’s achievable even for beginners, an “EASY” crochet girl’s vest is your ideal choice.
This detailed guide will walk you through the conceptual steps of creating a charming and practical vest, focusing on straightforward techniques and simple construction. You’ll learn how to approach the project from planning to the final stitch, ensuring a satisfying outcome that’s both beautiful and handmade with love.
Why Crochet an Easy Girl’s Vest?
Opting for a simplified vest pattern offers numerous benefits for both the crafter and the little wearer:
- Perfect Layering Piece: Vests are incredibly versatile. They can be worn over long-sleeved shirts, blouses, or dresses, providing an extra layer of warmth without restricting movement, making them ideal for active kids.
- Beginner-Friendly Garment: Unlike full sweaters or cardigans, vests eliminate the complexity of sleeve shaping and attachment, making them an excellent first venture into garment construction for those new to crochet.
- Quick & Gratifying: Because they’re smaller than adult garments and have no sleeves, easy girl’s vests work up relatively quickly. You’ll see tangible progress, leading to a satisfying sense of accomplishment in a shorter timeframe.
- Customizable Cuteness: Even with simple stitches, you have endless possibilities for personalization. Choose her favorite colors, add charming borders, or create subtle textures to make it uniquely hers.
- Practicality & Comfort: You control the yarn choice, allowing you to select super-soft, durable, and machine-washable fibers that stand up to active play and frequent laundering – a must for children’s clothing!
- Personalized Gift: A handmade vest is a thoughtful, unique, and deeply appreciated gift for birthdays, holidays, or any special occasion.
- Skill Building: This project helps solidify basic crochet stitches and introduces fundamental garment construction techniques like panel creation, seaming, and basic armhole/neckline shaping.
Understanding the “Easy” Vest Aesthetic: Yarn & Stitch Choices
The key to a truly “easy” vest lies in selecting appropriate materials and simple stitch patterns that yield a comfortable and attractive fabric without unnecessary complexity.
Simplicity in Design
Focus on straightforward shapes, such as simple rectangular panels that are joined, or a gentle A-line silhouette that flares slightly from the chest. Minimal shaping is involved, particularly for armholes and necklines.
Yarn Selection: Comfort, Durability & Washability
For a girl’s vest, prioritize yarns that are soft against the skin, durable enough for active wear, and, ideally, machine washable for easy care.
- Weight:
- DK (Double Knitting, Category 3) or Worsted (Category 4): These are ideal choices. They are easy to handle, work up at a good pace, provide a nice balance of warmth and fabric density, and are suitable for most simple stitch patterns.
- Fiber:
- Acrylics (good quality): Highly recommended for children’s clothing. Modern acrylics are very soft, durable, widely available in a vast array of colors, often anti-pilling, and most importantly, machine washable and dryable.
- Cotton/Cotton Blends: Excellent for breathability, natural feel, and clear stitch definition. Cotton is generally washable and a good choice for warmer climates or sensitive skin.
- Superwash Merino Wool: Offers superior softness, warmth, and breathability. The “superwash” treatment makes it machine washable, a convenient feature for kids’ garments.
- Avoid: Very delicate fibers that require meticulous hand-washing, non-superwash wool (unless you’re prepared for hand-washing and careful drying), scratchy yarns, or novelty yarns with small elements (like sequins) that could detach.
- Color: Let the recipient’s preferences guide you, or choose cheerful brights, soft pastels, or fun variegated yarns.
Stitch Patterns: Focus on Simplicity & Flow
The main goal is to choose stitches that are easy to master, work up quickly, and create a soft, flexible fabric that drapes well.
- Recommended Easy Stitches:
- Half Double Crochet (HDC): A fantastic choice for the main body. It works up quickly, creates a lovely drape, and provides good fabric density without being too stiff.
- Double Crochet (DC): Even faster than HDC, creating a soft, slightly more open fabric. Great for quick projects.
- Single Crochet (SC): Excellent for dense, sturdy areas like borders, edgings, or straps. If used for the entire vest, consider using a slightly larger hook to prevent stiffness.
- Moss Stitch (Granite Stitch): A simple alternation of SC and chain stitches, creating a lovely textured fabric that lies flat and has good drape.
- Simple V-stitch or Shell Stitch: These patterns, often created by working multiple stitches into a single stitch or chain space, add a touch of decorative flair without adding significant complexity.
- Avoid: Complex cable patterns, intricate lace patterns requiring many special stitch manipulations, or very dense stitches that would make the vest stiff and uncomfortable.
Design Elements: Keep it Functional & Pretty!
- Shape: Simple rectangular panels are easiest. A gentle A-line (flaring slightly from the chest) can be achieved with minimal increases.
- Opening: Most vests have an open front, which is the easiest design to execute.
- Neckline: A simple V-neck or a gently rounded crew neck is easy to shape with basic decreases.
- Armholes: For an easy vest, armholes can be straight-cut (simply leaving an opening) or have very minimal, gradual shaping.
- Length: Hip-length or slightly longer is versatile and comfortable.
Planning Your Easy Girl’s Vest Project
Even for an “easy” project, a little planning ensures a well-fitting and satisfying result.
- Size Selection:
- Crucial: Children vary greatly in size. While patterns are often categorized by age, it’s most accurate to use the girl’s actual chest measurement (around the fullest part, under the arms).
- Key Measurements: Get the girl’s chest circumference and the desired vest length (from the top of the shoulder to where you want the hem to fall).
- Ease: Choose a pattern that specifies comfortable positive ease (meaning the finished garment will be 2-4 inches larger than the chest measurement) to allow for layering and movement.
- Pattern Selection (ESSENTIAL!):
- Look specifically for patterns clearly labeled “beginner,” “easy,” or “simple girl’s vest.” Websites like Ravelry, Yarnspirations, and many crochet blogs offer excellent free and paid options.
- Look for: Clear, step-by-step instructions, minimal complex shaping, straightforward stitch repeats, CRITICALLY, comprehensive gauge information, and helpful photos or diagrams.
- Common Easy Construction Method:
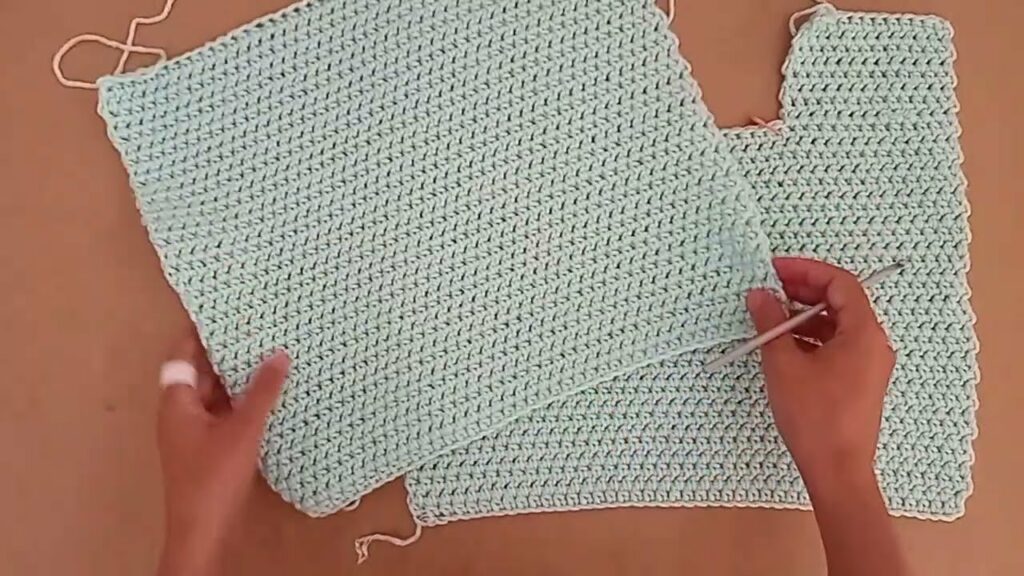
- Two-Panel (Seamed): This is the most common and recommended method for “easy” vests. You crochet a front panel and a back panel separately, then seam them together at the shoulders and sides. This is straightforward and allows for precise shaping.
- Gauge Swatch (NON-NEGOTIABLE!):
- This is the single most critical step in garment crocheting! For children’s sizes, even a slight difference in gauge can lead to a significant difference in the final fit.
- Crochet a large swatch (at least 4×4 inches / 10×10 cm) using your chosen yarn and hook in the main stitch pattern of the vest.
- Wash and block your swatch exactly as you intend to wash and block the finished vest. This is vital to see how the yarn behaves (e.g., stretches, blooms, or slightly shrinks) after laundering, as this will affect the final fit and drape.
- Measure your stitches and rows per inch/cm accurately. If your gauge doesn’t match the pattern’s, adjust your hook size (go up for fewer stitches per inch, down for more stitches per inch) until it matches. A small gauge error will result in a large sizing error for the vest.
Materials You’ll Need
- Yarn: (As detailed in the “Aesthetic” section). The quantity will depend on the girl’s size, the vest’s length, and the yarn weight (typically 2-5 skeins for a girl’s vest). Always check your pattern’s yarn requirements.
- Crochet Hook(s): The size recommended by your pattern, adjusted based on your gauge swatch.
- Notions:
- Stitch Markers: Useful for marking the beginning of rows/rounds, and especially to highlight specific shaping points (like the start of an armhole decrease).
- Tapestry Needle: For neatly weaving in all yarn ends and for seaming your panels.
- Scissors.
- Measuring Tape: Crucial for checking your gauge and ensuring your vest is the correct dimensions as you work.
- Blocking Mats & T-pins (Highly Recommended): For professional shaping and setting of your finished garment.
Key Crochet Techniques for an Easy Girl’s Vest
You’ll primarily use basic stitches and straightforward shaping methods:
- Basic Stitches: Chain (ch), Slip Stitch (sl st), Single Crochet (sc), Half Double Crochet (hdc), Double Crochet (dc). These are the fundamental building blocks.
- Working in Rows: Most vest panels are worked flat in rows, turning your work at the end of each row.
- Simple Increases/Decreases: If any shaping is needed (e.g., for a gentle V-neck or slight armhole curve), this is usually achieved by working two stitches into one stitch (increase) or
sc2tog,hdc2tog, ordc2tog(decrease). - Basic Edging: A simple border of single crochet (SC) around the edges of the vest provides a neat, polished finish and helps maintain shape.
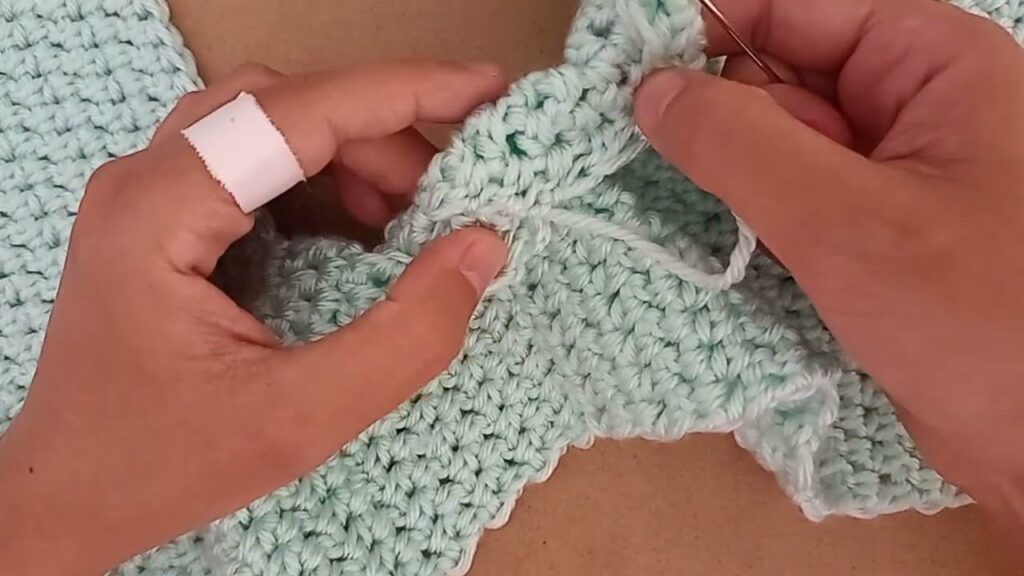
- Seaming: The Mattress Stitch is highly recommended for joining panels. It creates neat, almost invisible vertical seams, which are ideal for garments.
Step-by-Step Construction (Conceptual Guide – Focus on Two-Panel Seamed)
This two-panel, seamed method is the most common and straightforward approach for an “easy” girl’s vest.
- Preparation: Read your chosen pattern thoroughly. Make your gauge swatch (and wash/block it!). Gather all your yarn, hooks, and notions.
- Crochet the Back Panel:
- Begin by casting on the specified number of stitches (often with a foundation chain) for the lower back hem of the vest.
- Work upwards in your chosen main stitch pattern until the panel reaches the desired length before the armholes begin. Use your measuring tape to check regularly.
- Armhole Shaping (Minimal): For an easy vest, armholes can be very simple. Your pattern might instruct you to:
- Straight Cut: Simply bind off or skip a few stitches at the beginning and end of one row, creating a simple straight opening for the armhole.
- Very Gentle Curve: Make a few gradual decreases over a couple of rows at each side.
- Continue working straight up from the armhole shaping until the panel reaches the desired total shoulder height. Bind off all stitches.
- Crochet the Front Panels (Two):
- Cast on the specified number of stitches for one of the lower front hems (this is typically about half the width of the back panel, plus any extra stitches if the pattern calls for an overlapping front edge).
- Work upwards in your chosen main stitch pattern until the panel reaches the same length as the back panel before the armholes.
- Armhole Shaping (Minimal): Shape the armholes identically to the back panel.
- Neckline Shaping (Simple V-Neck or Straight):
- For V-Neck: Begin making symmetrical decreases at the front opening edge. This creates the “V” shape.
- For Straight Open Front: Simply continue working straight up from the armhole shaping on each side, with no neck shaping needed.
- Continue working each front shoulder section until it reaches the same height as the back shoulder. Bind off all stitches for this panel.
- Repeat all steps for the second front panel, ensuring it mirrors the first (if there’s a V-neck, the decreases should be on the opposite side).
- Seaming:
- Lay all finished panels flat (block them if your pattern recommends blocking before seaming).
- Shoulder Seams: Join the front and back panels together at the shoulders using the Mattress Stitch for a neat, almost invisible seam.
- Side Seams: Join the front and back panels along the sides, leaving open the sections designated for the armholes. Use the Mattress Stitch.
- Add Edging:
- Work a continuous border (e.g., 1-2 rows of single crochet or a simple shell stitch border) around the entire front opening, neckline, and both armholes. This provides a neat, polished finish and helps the vest hold its shape.
- Weave in Ends & Block:
- Meticulously weave in all loose yarn ends using your tapestry needle. For children’s garments, ensure ends are very secure to prevent unraveling.
- Gently wash/wet and block the finished vest according to your yarn’s care instructions. This helps to square up the panels, even out your stitches, enhance drape, and set the final shape of the vest, giving it a professional look.

Tips for Success
- Read the Pattern Meticulously: Even for “easy” patterns, read through all instructions from start to finish before you pick up your hook. Understanding the flow prevents mistakes.
- Don’t Skip the Gauge Swatch! (This is paramount for achieving the correct fit for your girl’s vest).
- Use Stitch Markers! They are incredibly helpful for marking the beginning of rows, the exact points where you start increases or decreases, or to keep track of specific stitch counts.
- Count Your Stitches! Make it a habit to regularly verify your stitch counts at the end of each row, especially after increases or decreases. Catching errors early saves immense frustration later.
- Choose Child-Friendly Yarn: Prioritize softness, durability, and washability.
- Weave in Ends Meticulously: Loose yarn ends are untidy and can unravel during wear or washing. Take your time to weave them in securely and neatly.
- Blocking is Your Friend: It transforms crochet fabric. Blocking evens out stitches, enhances drape, and sets the final shape, giving your vest a professional and polished appearance.
Caring for Your Crocheted Vest
Proper care will ensure your handmade vest remains beautiful and comfortable for years to come:
- Follow Yarn Label Care Instructions Strictly: This is your primary guide for appropriate washing and drying methods for your specific yarn.
- Gentle Washing: Most crochet garments made with acrylic or superwash wool can be machine washed on a gentle or delicate cycle with cool water. For more delicate yarns, hand wash gently in cool water with a mild detergent.
- Reshape and Lay Flat to Dry: Gently squeeze out excess water (never wring or twist the garment!). Reshape the vest back to its original dimensions and lay it flat on a clean towel or a mesh drying rack to air dry completely.
- Never Hang Wet: The weight of a wet crocheted garment will cause it to stretch and distort significantly if hung to dry.
Conclusion
Crocheting an “EASY” girl’s vest is a wonderfully satisfying project, perfectly suited for those new to garment making or anyone looking for a quick and rewarding craft. It’s a chance to create something truly beautiful and unique, offering comfort, style, and a personal touch to the special girl who wears it. Embrace the simplicity, enjoy the process, and delight in the charming result of your handmade artistry!
Video Tutorial ;