 by
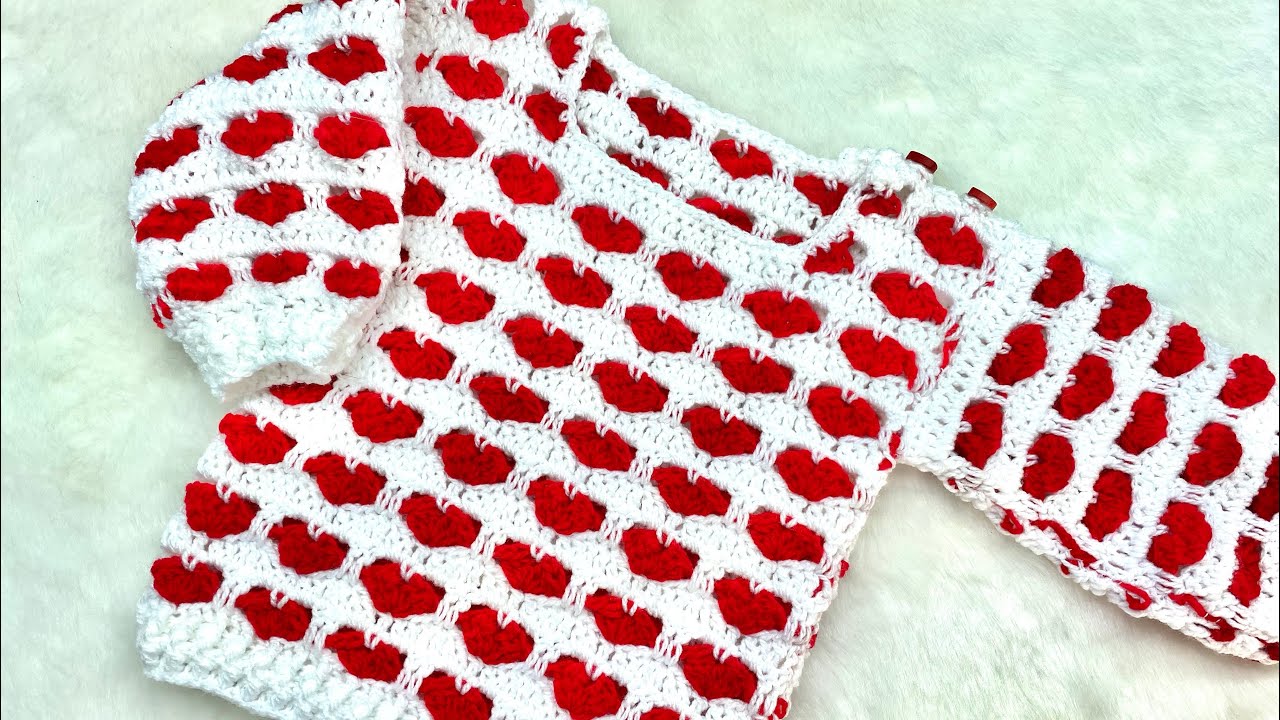
by Valentine’s Day is a celebration of love, affection, and all things heartfelt. While chocolates and flowers are classic gestures, there’s something uniquely special about a handmade gift – especially one you can wear! A crocheted Valentine’s Day Heart Sweater transforms cozy comfort into a festive, personalized statement, allowing you to quite literally wear your heart, or many hearts, on your sleeve. This detailed guide will explore everything you need to know about crafting this charming garment, from design choices to essential techniques.
The Allure of the Valentine’s Day Heart Sweater
This isn’t just any sweater; it’s a garment infused with warmth and sentiment.
- Celebrating Love Creatively: It’s a tangible expression of affection, whether for a romantic partner, a cherished friend, or simply to celebrate self-love.
- Personalized Expression: Unlike mass-produced items, you dictate the colors, the style, the placement of the hearts, and the fit, ensuring a truly unique piece.
- Cozy & Festive: It combines the comfort and warmth of a handmade sweater with the joyful, romantic spirit of Valentine’s Day.
- Skill Showcasing: Depending on your chosen technique for the hearts, this project can be an excellent opportunity to expand your crochet repertoire, from simple appliqués to intricate colorwork.
Designing Your Heart-Filled Masterpiece: Key Considerations
Before you begin, dreaming up your perfect sweater is the first, crucial step.
- Sweater Style:
- Pullover vs. Cardigan: Will it be a classic crew-neck pullover or an open-front cardigan? This choice impacts construction and closure needs.
- Fit: Do you prefer a fitted silhouette, a relaxed and oversized feel, or a trendy cropped length?
- Neckline: Crew, V-neck, boat neck, or even a cozy turtleneck?
- Sleeves: Standard long sleeves, a puff sleeve, or a tapered look?
- Heart Motif Integration (The Core!): This is where your sweater truly becomes a Valentine’s Day statement.
- Appliqué Hearts:
- Method: Crocheting individual hearts in various sizes and then securely sewing them onto the finished sweater.
- Pros: Most beginner-friendly, allows for flexible placement, can add texture, great for using up scraps.
- Cons: Can sometimes feel slightly bulky if many layers are applied.
- Tapestry Crochet Hearts:
- Method: Working multiple colors within the same row/round by carrying unused yarn discreetly inside the stitches. Ideal for smaller, repeating heart patterns.
- Pros: Creates a dense, sturdy fabric with clean color changes, pattern is reversible (or nearly so).
- Cons: Requires managing multiple yarn strands, can make fabric stiffer if tension isn’t relaxed.
- Intarsia Crochet Hearts:
- Method: Working with separate bobbins of yarn for each color block. Unused colors are dropped and picked up only when needed, creating distinct blocks of color. Ideal for larger, isolated heart motifs.
- Pros: Creates a clean, single-layer fabric without color showing through from the back.
- Cons: Requires managing many bobbins, can create holes if tension isn’t consistent at color changes. More advanced technique.
- Textured Stitch Hearts:
- Method: Arranging textured stitches like bobbles, puff stitches, or cluster stitches to form a heart outline or filled shape.
- Pros: Adds delightful tactile dimension, works well in a single color for subtle design.
- Cons: Can consume more yarn and time than basic stitches.
- Lace/Openwork Hearts:
- Method: Using specific stitch patterns that inherently create heart-shaped negative space or openwork designs.
- Pros: Elegant, airy, romantic feel.
- Cons: Can be more complex to execute, may require a lining depending on the openness.
- Appliqué Hearts:
- Color Palette:
- Classic Valentine’s: Deep reds, blush pinks, crisp whites, and creamy off-whites.
- Modern Twists: Incorporate purples, burgundy, soft grays, black with red hearts, or even a touch of metallic yarn for sparkle. Contrasting colors will make your hearts pop.
- Yarn Choice:
- Fiber: Prioritize comfort and drape. Soft acrylics, merino wool, cotton blends, or a luxurious alpaca blend would be lovely.
- Weight: DK (Double Knitting) or Worsted weight are common, offering a good balance of warmth and working speed.
- Construction Method: The standard sweater construction methods apply (panels, top-down, bottom-up), but your chosen heart motif method might influence the best approach. For example, charted colorwork is easiest to manage if working flat in panels or in seamless top-down where you can clearly read the chart.
Materials: Your Valentine’s Day Toolkit
- Yarn: In your chosen colors and fiber. Ensure you have enough for the main color and any contrasting heart colors.
- Crochet Hooks: The size(s) recommended by your pattern.
- Stitch Markers: Indispensable for marking the beginning of rounds, stitch counts, and shaping points.
- Tapestry Needle (or Blunt Yarn Needle): For weaving in ends and seaming. Crucial for appliqué.
- Scissors.
- Measuring Tape: Crucial for gauge swatching and checking garment dimensions.
- Blocking Mats & T-pins: Essential for shaping and finishing, especially important for evening out tension in colorwork.
- Bobbins (Optional): If planning intarsia crochet, small bobbins help manage multiple strands of yarn.
- Small Beads/Buttons/Sequins (Optional): For extra embellishment on or around the hearts.
Essential Crochet Techniques for a Heart Sweater
Beyond basic stitches, you’ll likely delve into techniques specific to garment making and colorwork:
- Foundation Chains/Foundation Single Crochet (FSC): For starting edges that are elastic and neat.
- Basic Stitches: Chain (ch), Slip Stitch (sl st), Single Crochet (sc), Half Double Crochet (hdc), Double Crochet (dc).
- Working in Rounds vs. Rows: Depending on your construction method.
- Increasing/Decreasing Stitches: For shaping the body, sleeves, neckline, and shoulders.
- Ribbing/Edging: For hems, cuffs, and necklines, providing structure and a neat finish.
- Color Changes:
- Clean Color Changes: Learning to switch colors smoothly without jarring lines.
- Carrying Yarn: For tapestry crochet, learning to carry the unused color snugly within your stitches.
- Managing Bobbins: For intarsia, knowing how to wind and manage multiple small balls of yarn.
- Appliqué Attachment: If going the appliqué route, mastering invisible stitching to secure hearts neatly.
- Reading Charts (for Tapestry/Intarsia): Following a grid chart where each square represents a stitch and its color.
- Blocking: Absolutely crucial for evening out tension, especially in colorwork, and for setting the final shape and drape of your sweater.
Planning Your Project: Laying the Foundation
- Sizing & Measurements: Decide who the sweater is for and their measurements (bust/chest, length, sleeve length). Determine the amount of “ease” (extra room) you want for the intended fit.
- Gauge Swatch (The Golden Rule!):
- Crochet a swatch at least 6×6 inches (15×15 cm) using your chosen yarn and hook in the main stitch pattern of your sweater.
- Crucial Tip for Colorwork: If you’re doing tapestry or intarsia, make sure your swatch includes color changes, as this can affect your gauge.
- Wash and block your swatch exactly as you plan to wash and block the finished sweater. Measure accurately to ensure your finished sweater will be the correct size.
- Yarn Calculation: Based on your gauge and chosen size, calculate the necessary yardage for both main and contrast colors. Always buy an extra skein, especially for specific dye lots.
Construction Journey: Bringing Your Heart Sweater to Life (Conceptual Guides)
The actual construction will largely depend on your chosen sweater style and heart integration method.
Common Approaches for Heart Motifs:
- Appliqué Method:
- First, crochet the entire sweater (front, back, sleeves) in your main color(s) using your preferred construction method (top-down, bottom-up, or panels).
- Separately, crochet your desired number of heart appliqués. There are many free patterns available for various heart sizes.
- Once the sweater is complete and blocked, strategically place the hearts onto the fabric. Pin them in place and then securely stitch them down using your tapestry needle and a matching yarn.
- Charted Colorwork (Tapestry/Intarsia):
- Obtain a heart chart (either from a pattern or create your own). Each square on the chart represents one stitch.
- As you crochet the relevant panels (front, back, sleeves), follow the chart, changing colors according to the design. For tapestry, carry the unused yarn; for intarsia, use separate bobbins.
- Continue with your chosen sweater construction method (e.g., working panels flat, then seaming; or working a seamless yoke for top-down).
- Integrated Stitch Patterns:
- Select a pattern that uses bobble, puff, or lace stitches to form hearts.
- Work the pattern directly into your sweater panels or seamless body as you go.
General Sweater Construction Steps:
(Whether top-down, bottom-up, or panels – refer to general sweater construction articles for detailed steps on shaping body, sleeves, etc.)
- Body Section: Work the main body of the sweater, incorporating your heart motifs.
- Sleeves: Crochet the sleeves, adding heart motifs if desired.
- Assembly: Seam panels if applicable, or join body/sleeves for seamless constructions.
- Ribbing/Edgings: Add ribbed bands to the cuffs, hem, and neckline for a neat finish.
Finishing Touches: The Declaration of Love
- Weave in All Ends: This is especially crucial with color changes. Secure every yarn tail neatly to prevent unraveling and a messy appearance. For colorwork, weave ends in discreetly within stitches of the same color.
- Edgings: Ensure all cuffs, hems, and necklines are neatly finished.
- Blocking (Critical!): This step is truly transformative, especially for colorwork.
- Gently wet your finished sweater (or steam it).
- Carefully lay it out flat on blocking mats, shaping it to the correct dimensions. Pin firmly with T-pins, paying extra attention to flat seams and crisp color transitions.
- Allow to dry completely. Blocking evens out stitches, relaxes the fabric, helps “bloom” the yarn, and ensures your hearts lie flat and beautifully defined.
- Add Embellishments: Securely attach any optional buttons, beads, or embroidered details.
Tips for Valentine’s Sweater Success
- Practice Color Changes: If new to tapestry or intarsia, practice on a small swatch until your tension is even and your color changes are clean.
- Choose Yarn with Good Stitch Definition: This helps your heart motifs stand out clearly.
- Read Charts Carefully: If using a chart, use a highlighter or ruler to keep track of your row as you work.
- Weave in Ends As You Go: For colorwork, weaving in ends after every few rows of a new color can prevent a daunting task at the end.
- Try It On: If working a top-down or bottom-up seamless sweater, try it on frequently to check the fit and adjust if needed.
- Embrace the Love: Remember the joy and thoughtfulness behind your project.

Caring for Your Crocheted Love Story
- Follow Yarn Label Instructions: Always refer to your specific yarn’s care guidelines for washing and drying.
- Gentle Wash Recommended: For most handmade crochet sweaters, especially with colorwork, gentle hand washing in cool water with a mild detergent is safest.
- Reshape and Lay Flat to Dry: Never wring, twist, or hang a wet crocheted sweater, as this will stretch and distort its shape. Gently squeeze out excess water, reshape the sweater to its original dimensions, and lay it flat on a clean towel or a mesh drying rack to air dry completely.
A crocheted Valentine’s Day Heart Sweater is more than just a piece of clothing; it’s a labor of love, a cozy hug, and a festive expression of affection. Wear it with pride, or gift it to someone special, knowing it carries a truly unique and heartfelt message.
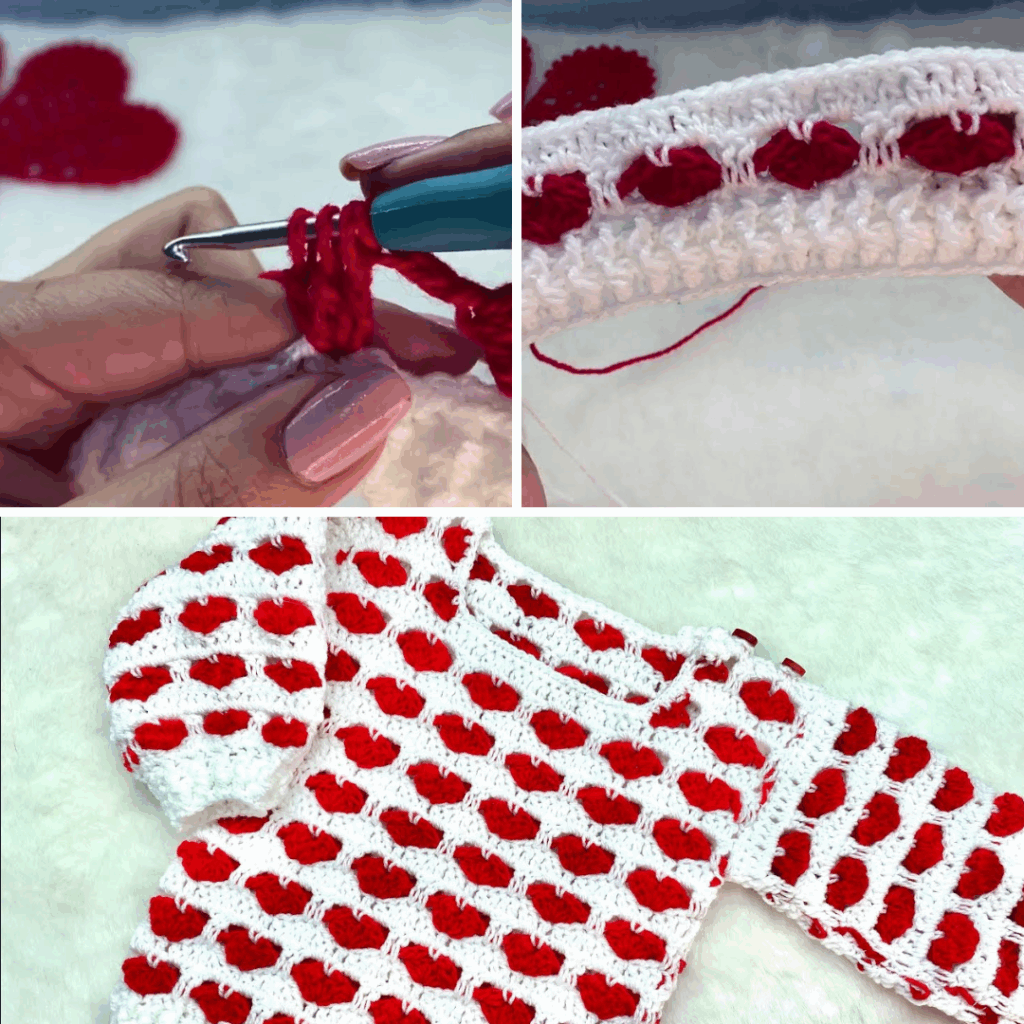
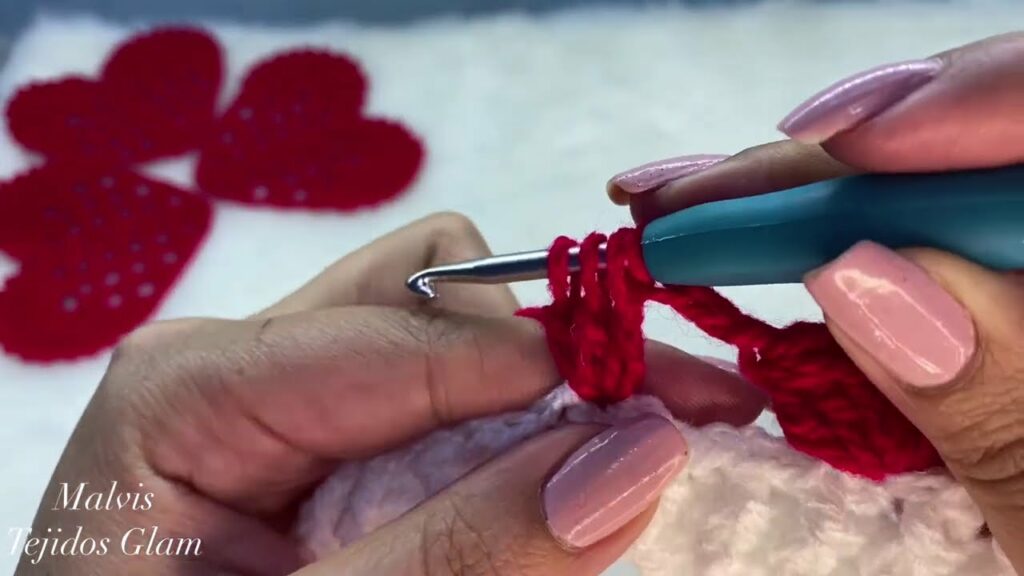
Video Tutorial ;