 by
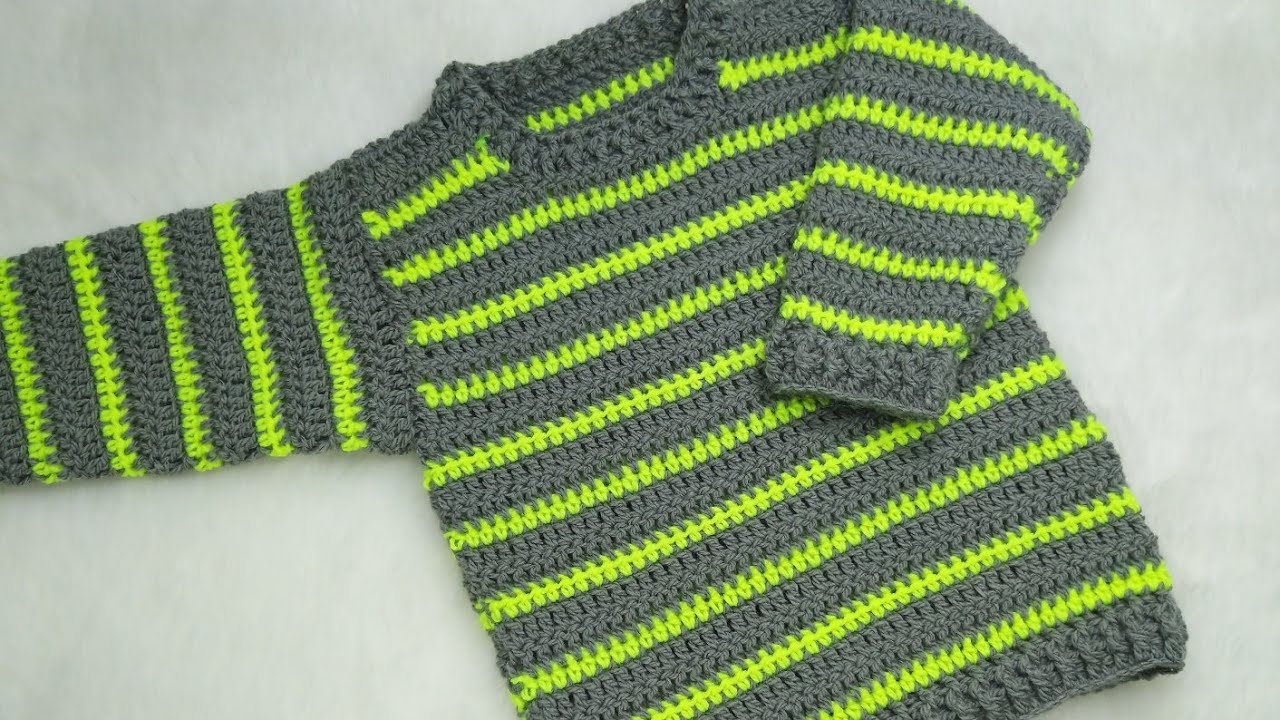
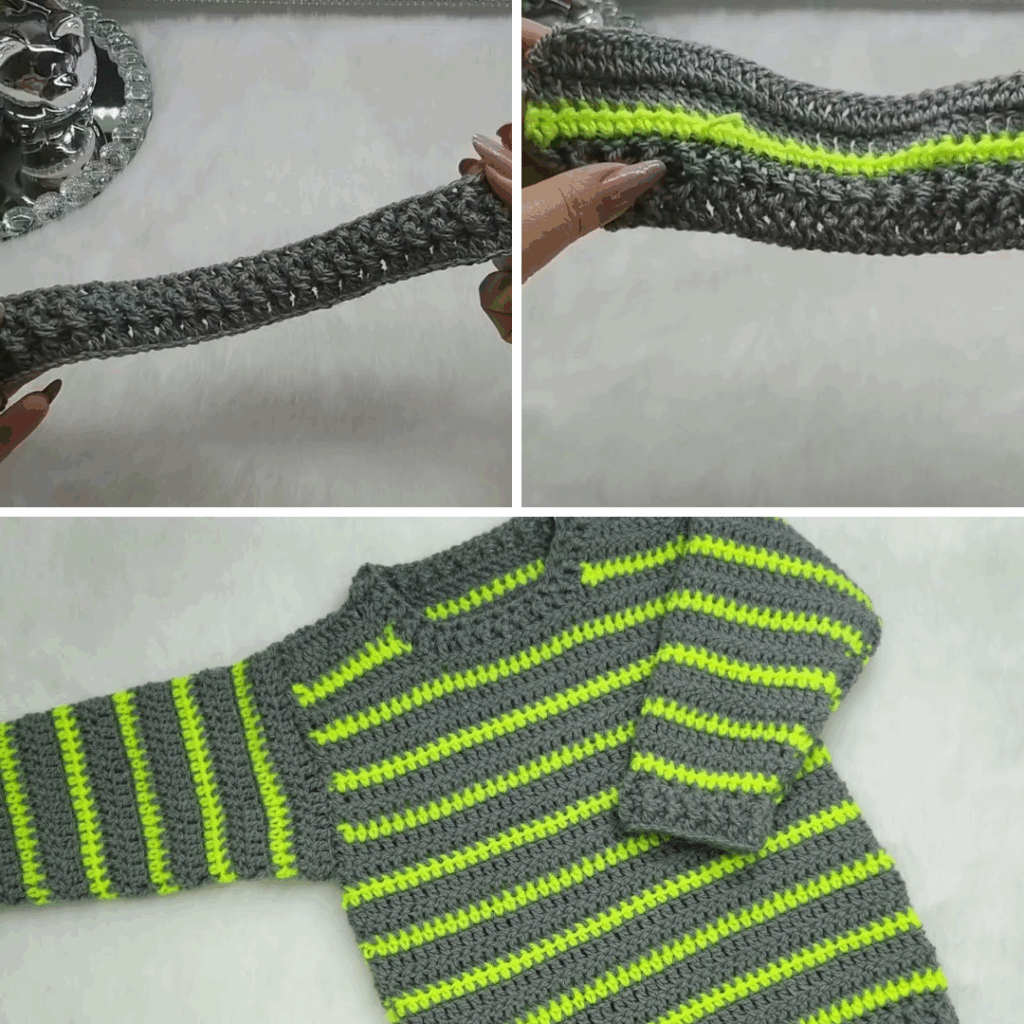
by In the spectrum of fashion, some colors whisper, others speak, and then there are neons – they shout. A Crochet Neon Sweater is a bold, electrifying statement piece that combines the cozy comfort of handmade warmth with an unmistakable burst of vibrant energy. It’s a testament to the power of color and a daring choice for those who love to stand out. Moving beyond subtle hues, a neon sweater harnesses fluorescent brights like shocking pink, electric blue, radiant yellow, and searing lime green to create a truly unforgettable garment.
This detailed article will explore the thrilling world of crocheting with neon, from selecting the perfect glowing yarn to mastering the techniques that bring a vibrant and stylish sweater to life.
The Electrifying Appeal of the Crochet Neon Sweater
- Bold Fashion Statement: Neon isn’t for the faint of heart. A crocheted neon sweater instantly positions you as a trendsetter, unafraid to embrace vibrant style and stand out in any crowd.
- Energy & Playfulness: These colors are inherently cheerful and mood-boosting. Wearing a neon sweater can inject a sense of fun and dynamism into your day and your look.
- Modern & Retro Vibes: Neon effortlessly straddles eras, evoking the energetic spirit of the 80s and 90s while remaining fiercely contemporary in current fashion trends, especially in streetwear and festival wear.
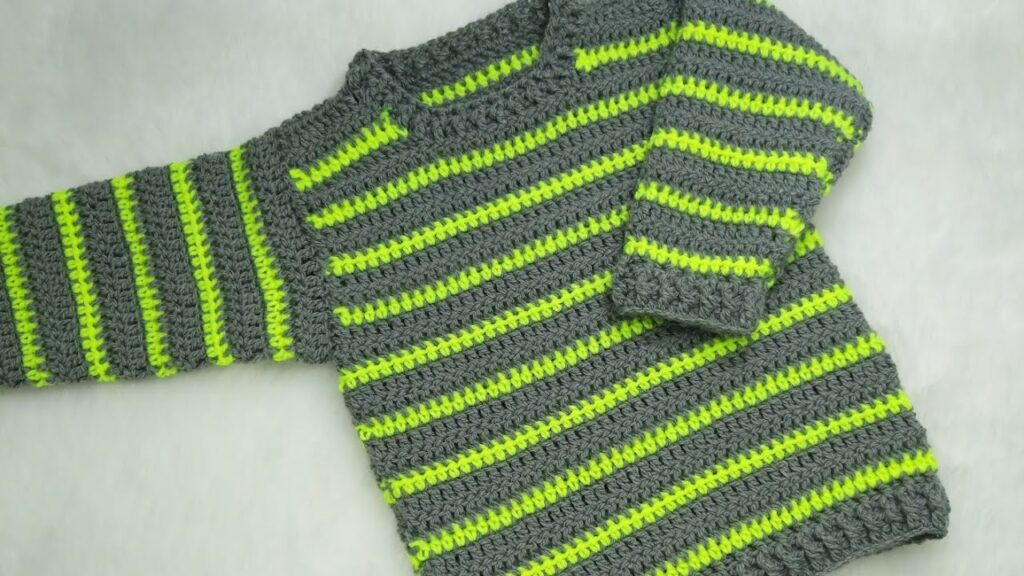
- Customization is Key: Whether it’s a solid block of electric color, playful stripes, bold color-blocking, or subtle neon accents on a neutral base, the ways to integrate neon are limitless.
- Showcase for Crochet: Sometimes, the most eye-catching crochet pieces are those where the yarn color takes center stage, allowing simpler stitches to form a beautiful, textured canvas for the vibrant hue.
Designing Your Luminous Layer: Key Considerations
Before you cast on, a strategic approach to your neon project will ensure dazzling results:
- Shade of Neon: Not all neons are created equal. Do you gravitate towards:
- Hot Pink/Fuchsia?
- Electric Blue/Cyan?
- Lime Green/Chartreuse?
- Blazing Orange?
- Shocking Yellow?
- Or a Multi-Neon yarn that blends several vibrant hues?
- Integration Level:
- Full Neon: The entire sweater in a single, unadulterated neon shade for maximum impact.
- Color-Blocking: Combining large sections of neon with other brights, neutrals (black, white, grey), or even pastels for dynamic visual interest.
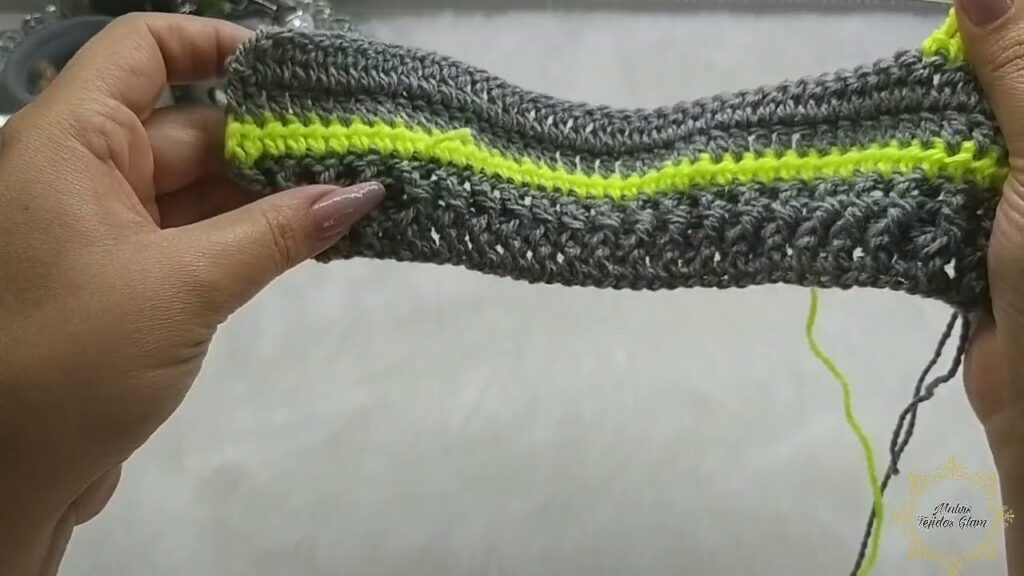
- Stripes: Using neon as an accent in bold stripes or thin pinstripes against a contrasting color.
- Neon Accents: A neutral sweater (black, white) with neon ribbing, cuffs, neckband, or subtle embroidered details.
- Yarn Choice (The Foundation of Vibrancy & Comfort):
- Fiber:
- Acrylic: Often the best choice for truly vivid, consistent neon dyes, excellent color retention, durability, and affordability. Look for soft, high-quality acrylics.
- Cotton/Cotton Blends: Can produce beautiful brights, are breathable, and offer good stitch definition. Less elasticity than acrylic/wool.
- Wool/Merino Blends: While some superwash wools take bright dyes, pure neons are less common and may be more muted than in acrylic.
- Weight: Worsted (Category 4) or Bulky (Category 5) are popular for quicker projects and substantial sweaters. DK (Category 3) can work for a finer fabric.
- Colorfastness: Especially with intense dyes, always check the yarn label or do a small test swatch to ensure the color won’t bleed during washing.
- Fiber:
- Stitch Pattern:
- For a solid neon sweater, simpler stitches like Single Crochet (SC), Half Double Crochet (HDC), or Double Crochet (DC) often work best, allowing the intensity of the color to shine without being overwhelmed by complex texture.
- If you want texture, consider subtle raised stitches (e.g., camel stitch for a knit-look rib, linked stitches for density) or simple bobbles/puffs that don’t detract from the color.
- For a lighter sweater, openwork or mesh stitches can create a breathable fabric, perfect for a summer or festival vibe.
- Silhouette & Fit:
- Oversized/Relaxed: Enhances the playful, casual vibe often associated with neon.
- Fitted/Cropped: For a more intentional, fashion-forward look.
- Neckline: Crew neck, V-neck, mock neck, or a wide boat neck can all work.
- Sleeves: Classic long sleeves, balloon sleeves, or relaxed drop shoulders.
Materials: Your Toolkit for Vibrant Creation
- Yarn: Your chosen neon color(s) and any accompanying neutrals or contrasting brights. A full adult sweater will require a significant amount, so consult your pattern for yardage.
- Crochet Hooks: The size(s) recommended by your pattern to achieve the correct gauge and fabric density.
- Stitch Markers: Indispensable for marking rounds, shaping points, and stitch counts.
- Tapestry Needle (or Blunt Yarn Needle): Crucial for weaving in ends neatly and seaming.
- Scissors.
- Measuring Tape: Essential for detailed body measurements, gauge swatching, and checking garment dimensions.
- Blocking Mats & T-pins: Highly recommended for shaping, setting the final dimensions, and improving the drape of your sweater.
Essential Crochet Techniques for a Neon Sweater
Crocheting a garment involves a comprehensive set of skills:
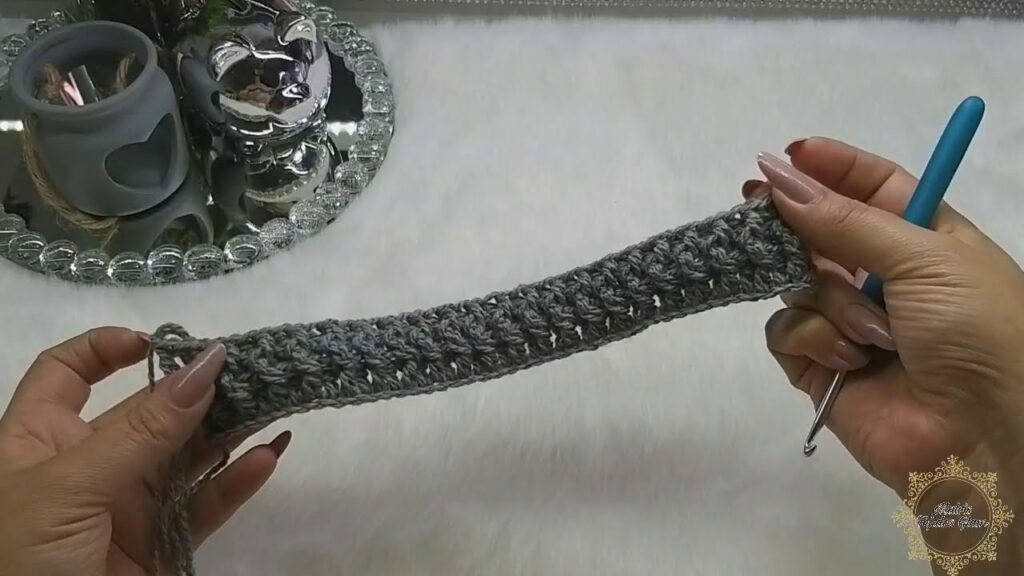
- Foundation Chains / Foundation Single Crochet (FSCs): For a flexible and neat starting edge.
- Basic Stitches: Chain (ch), Slip Stitch (sl st), Single Crochet (sc), Half Double Crochet (hdc), Double Crochet (dc) – these are the building blocks.
- Working in Rounds vs. Rows: Depending on whether your sweater is seamless or constructed from panels.
- Garment Shaping (Increases & Decreases):
- Bust Darts (for fitted designs): To accommodate curves.
- Waist Shaping: To create a flattering silhouette.
- Armhole & Neckline Shaping: Creating smooth, even openings.
- Sleeve Shaping: Tapering sleeves to the wrist.
- Ribbing: For cuffs, hem, and neckline. Often achieved by working in the back loop only (BLO) or using front post/back post stitches for elasticity.
- Color Changes (If Applicable): Techniques for smoothly changing colors without messy joins or visible bumps (e.g., standing stitches, invisible joins, carrying yarn).
- Seaming (If Applicable): If your sweater is worked in panels, mastering invisible seaming techniques (like mattress stitch) is crucial for a professional finish.
- Blocking: This transforms your crochet fabric, evens out stitches, enhances drape, and sets the final shape and dimensions of your sweater. It’s especially beneficial for a garment like a sweater.
Planning Your Project: Laying the Foundation for a Dazzling Fit
- Sizing & Measurements:
- Take precise body measurements: full bust, waist, hips, shoulder width, desired sweater length (shoulder to hem), arm length, and armhole depth.
- Determine the amount of “ease” (extra room) you want beyond body measurements. A relaxed fit will have more positive ease, while a fitted sweater will have less.
- Gauge Swatch (The Golden Rule!):
- Crochet a substantial swatch (at least 6×6 inches / 15×15 cm) in your main stitch pattern with your chosen yarn and hook.
- Crucial Step: Wash and block your swatch exactly as you plan to wash and block the finished sweater. This is paramount for fit and ensuring your final garment is the correct size and has the desired drape.
- Measure your stitches and rows per inch/cm accurately. Adjust your hook size if your gauge doesn’t match the pattern’s.
- Yarn Quantity: A full-sized sweater requires a significant amount of yarn. Always consult your chosen pattern’s yardage requirements and consider buying an extra skein (or two) to ensure you don’t run out mid-project, especially with specific dye lots.
- Pattern Selection: For garment construction, especially a sweater, using a well-written pattern is highly recommended. Look for patterns with clear instructions, sizing options, and helpful diagrams.
Construction Journey: Bringing the Glow to Life (Conceptual Guides)
The construction method will depend on your chosen pattern:
- Top-Down Seamless:
- Begin at the neckline, working increases to shape the yoke.
- Divide for armholes, then join to work the body in the round.
- Continue working the body, then return to the armholes to add sleeves. This method is excellent for trying on as you go and for seamless color changes.
- Bottom-Up Seamless:
- Start at the hem, working in rounds for the body up to the armholes.
- Divide the work into front and back panels, shaping armholes and neckline.
- Join shoulders.
- Crochet sleeves separately and seam them in, or pick up stitches around the armholes and work sleeves downwards.
- Panels & Seams:
- Crochet front, back, and two sleeve panels flat in rows, shaping as needed.
- Meticulously seam the panels together using an invisible seaming technique (like mattress stitch) for a smooth finish.
Finishing Touches: The Radiant Reveal
- Weaving in All Ends: Meticulously weave in every single yarn tail. With vibrant colors, stray ends can be particularly noticeable, so take your time for a professional finish.
- Edging & Ribbing: Complete all cuffs, hems, and the neckline with your chosen ribbing or edging.
- Blocking (The Ultimate Transformation!):
- Gently wet your finished sweater (or steam it).
- Carefully lay it out flat on blocking mats, shaping it precisely to its intended dimensions. Pin firmly with T-pins.
- Allow to dry completely (this can take significant time for a full sweater). Blocking dramatically improves stitch definition, evens out tension, enhances drape, and sets the final elegant shape of your sweater.
Styling Your Neon Masterpiece
A neon crochet sweater is a focal point. Let it shine by pairing it with:
- Neutrals: Black jeans, white trousers, grey skirts.
- Denim: Classic blue jeans or denim shorts.
- Other Bold Colors: For intentional, fashion-forward color-blocking (e.g., neon pink with a deep teal, or lime green with royal blue).
- Simple Accessories: Let the sweater be the star; subtle jewelry and footwear.
Tips for Neon Sweater Success
- Swatching is Non-Negotiable: For a garment, especially one with precise sizing, always swatch and block to get accurate measurements.
- Yarn Quality Matters: Invest in a good quality yarn that will hold its color and shape.
- Plan Color Placement: If working with multiple colors or color blocks, map out your design before you start.
- Embrace Simplicity: Sometimes, a basic stitch in a vibrant neon is more impactful than a complex pattern that gets lost in the color.
- Don’t Fear the Fade: While modern dyes are much better, all bright colors can eventually soften. Follow care instructions to prolong vibrancy.
- Block for Brilliance: Blocking truly elevates a hand-crocheted garment, making it look professional and enhancing its drape.
Caring for Your Vibrant Creation
- Follow Yarn Label Instructions: Always refer to your specific yarn’s care guidelines for washing and drying. Neon dyes can sometimes be more prone to bleeding if not handled correctly.
- Gentle Wash Recommended: Most crocheted sweaters benefit from gentle hand washing in cool water with a mild detergent. If your yarn is machine washable, use a gentle cycle and a mesh laundry bag to prevent stretching.
- Reshape and Lay Flat to Dry: Never wring, twist, or hang a wet crocheted sweater, as this will cause stretching and distortion. Gently squeeze out excess water (rolling in a clean towel helps), reshape the sweater to its original dimensions, and lay it flat on a clean towel or a mesh drying rack to air dry completely.
Crocheting a neon sweater is a fun, bold, and incredibly rewarding project. It’s a statement of personal style, a celebration of color, and a testament to the warmth and artistry of crochet.
Video Tutorial ;