 by
by There’s something irresistibly charming about a classic sailor outfit, and when it’s shrunk down to fit a tiny baby, it’s pure magic. A crochet sailor costume is a fantastic project for celebrating a new arrival, creating a memorable photo prop, or making a cherished gift. This detailed article will guide you through crocheting a super easy sailor costume, complete with a striped top and matching socks, perfect for baby boys and girls.
This project is a great way for beginners to tackle their first garment set and for intermediate crocheters to create a quick and adorable outfit.
1. Why a Crocheted Sailor Costume is the Perfect Project
- Timeless Appeal: The sailor theme, with its classic stripes and nautical details, never goes out of style. It’s a clean, crisp, and universally loved look.
- Beginner-Friendly: This pattern is designed with simplicity in mind, using basic stitches like single crochet (SC) and half double crochet (HDC). The pieces are worked as simple panels, which are then sewn together, making it a great introduction to garment construction.
- Unisex Design: The classic sailor style is perfect for both baby boys and girls. You can simply change the color of the bow or add a little extra ruffle for a girl’s touch.
- Photo-Ready: This costume makes for an adorable photo prop that will be treasured for years to come.
2. Planning and Materials
Before you begin, gather your supplies and plan your project.
- Pattern: You will need a pattern for a baby sailor costume. Look for a simple, striped top with matching socks. A good pattern will include a size chart for newborns to toddlers.
- Yarn: A DK (light worsted) or worsted weight yarn is an excellent choice. You will need two colors: a main color (white) and a contrasting color (navy blue or red are classic choices). Soft acrylic or cotton yarn is recommended for baby items as it is durable, easy to wash, and hypoallergenic.
- Crochet Hook: The pattern will specify the hook size. Make sure you use the recommended size to achieve the correct gauge.
- Gauge Swatch: Making a gauge swatch is crucial for any garment project. This ensures your finished costume will be the correct size.
- Other Supplies: You will also need scissors, a tapestry needle for weaving in ends and seaming, and stitch markers.
3. The Step-by-Step Construction
This costume is typically made from a few simple panels that are then sewn together, along with the socks.
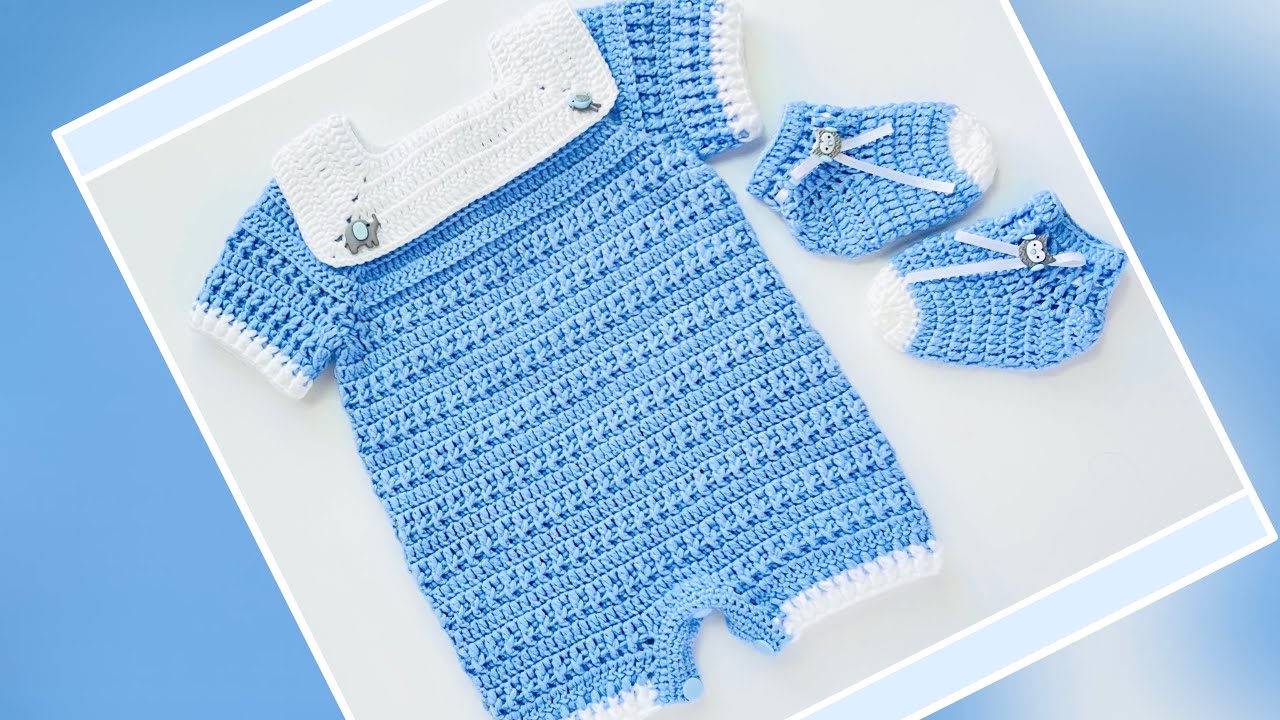
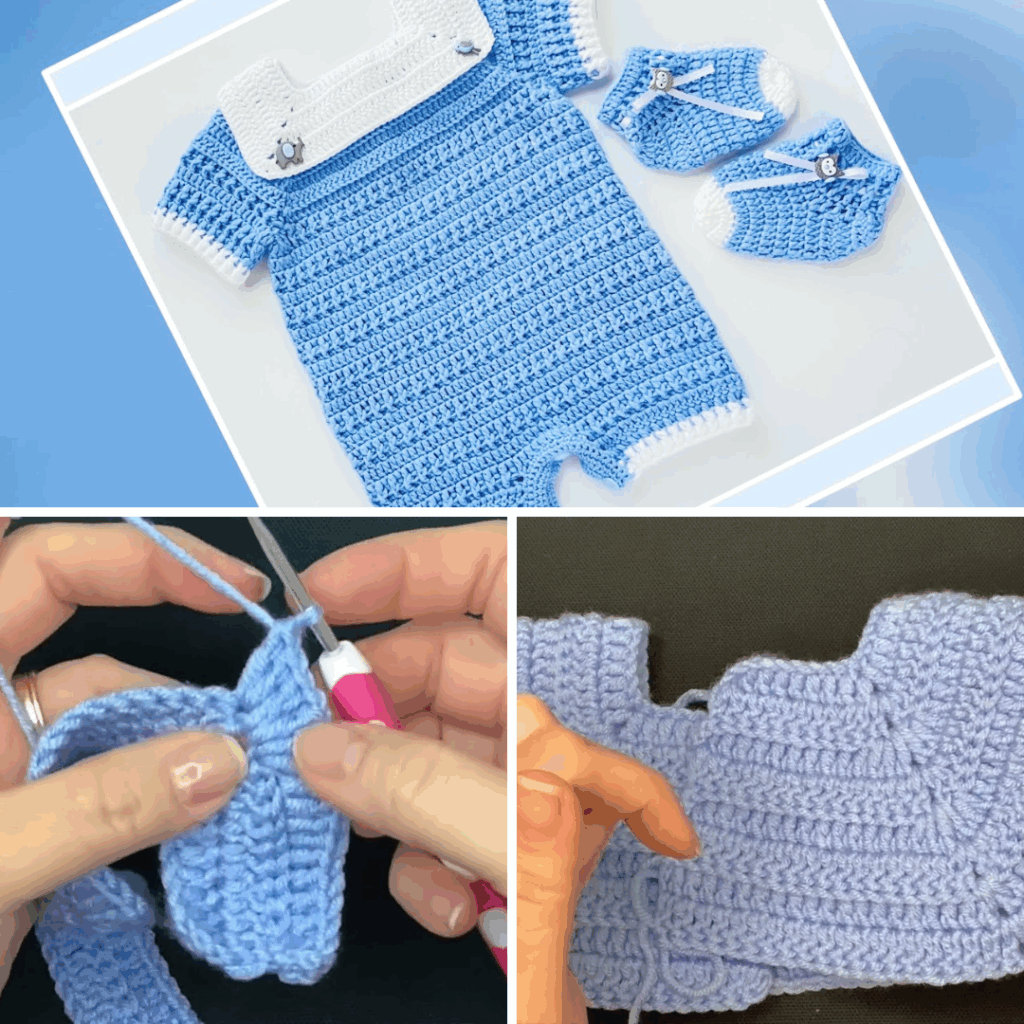
Part 1: The Sailor Top
The top is made from three panels: a front panel and two sleeves.
- Front Panel:
- Foundation Chain: Begin by chaining the number of stitches required for the width of the front panel.
- Stitch Pattern: Work in rows using a simple stitch like half double crochet (HDC) or a combination of single and double crochet.
- Stripes: Create the stripes by changing colors every few rows. To make a clean change, pull through with the new color on the final yarn-over of the last stitch of a row.
- Repeat: Continue working in rows until the panel reaches the required length.
- Sleeves:
- Foundation Chain: You will work two identical sleeve panels. Begin by chaining the number of stitches for the width of the sleeve cuff.
- Increases: To create the arm shape, the pattern may have you increase a few stitches at the beginning or end of each row, or every few rows. This gradually widens the sleeve as you work up the arm.
- Stripe Pattern: Follow the same stripe pattern you used for the front panel.
- Repeat: Work until the sleeve reaches the required length.
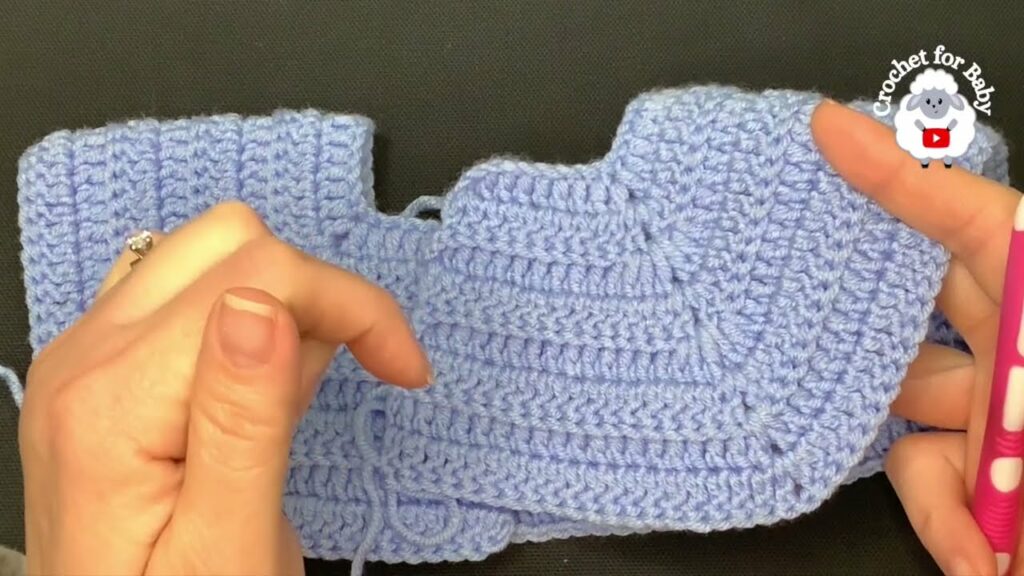
- Assembly:
- Sew Shoulder Seams: Lay the front panel flat. Place the sleeves on top, aligning the armhole openings. Sew the shoulder seams together.
- Sew Side and Sleeve Seams: Fold the entire top in half. Sew the long side seams from the bottom hem up to the armpit. Continue sewing from the armpit down the sleeve seam.
Video Part 1
Part 2: The Sailor Collar
The collar is a simple addition that gives the costume its signature look.
- Chain: Begin by chaining the number of stitches required for the length of the back of the neckline.
- Stitch Pattern: Work in rows, increasing a few stitches in the corners to create a pointed, sailor-style collar.
- Attach: Once the collar is the correct size, you will sew it to the back of the neckline.
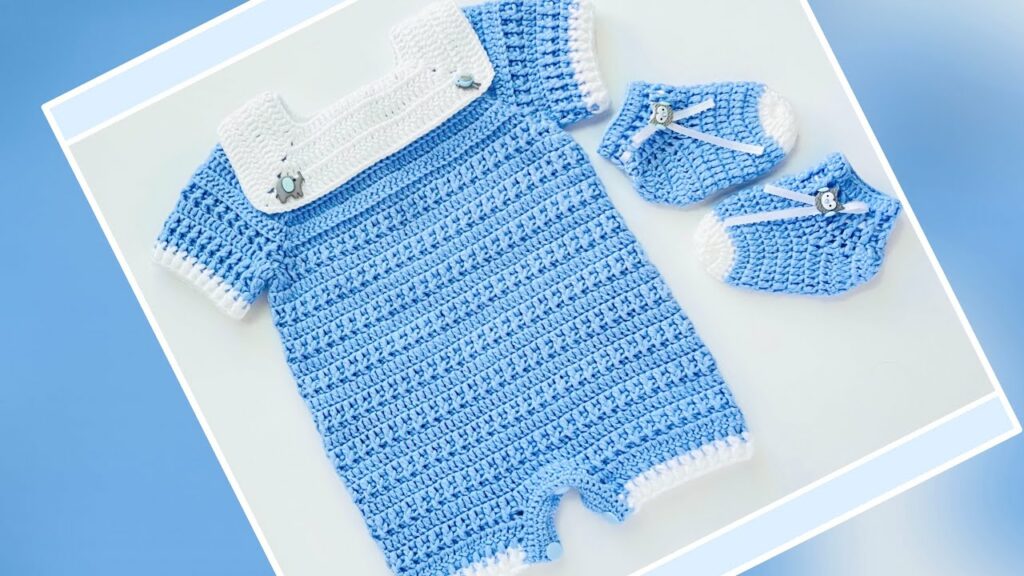
Part 3: The Sailor Socks
The socks are a fun and easy addition to the costume.
- Work the Sole: Start by chaining a small number of stitches. You will work in a circle, increasing at both ends to create an oval sole for the sock.
- Work the Foot: Once the sole is the correct size, you will begin working in rounds, without increasing, to create the sides of the foot.
- Create the Cuff: When the foot reaches the desired length, you will begin creating the striped cuff. Work in rounds, alternating colors to create the stripes.
- Repeat: Repeat all steps for the second sock.
Part 4: Finishing Touches
- Weave in All Ends: Use your tapestry needle to carefully weave in every single loose end.
- Add a Bow: A small, crocheted bow can be added to the front of the sailor collar for a final touch.
- Blocking: Blocking is highly recommended. It will even out your stitches, help the fabric drape beautifully, and give the costume a professional finish.
4. Final Thoughts
Crocheting a baby sailor costume is a delightful project that results in a gorgeous, one-of-a-kind outfit. By breaking the process down into manageable parts and choosing a pattern that suits your skill level, you can create a treasured piece that is both beautiful and a testament to your hard work.
Video Part 2