by
by Project Overview and Materials
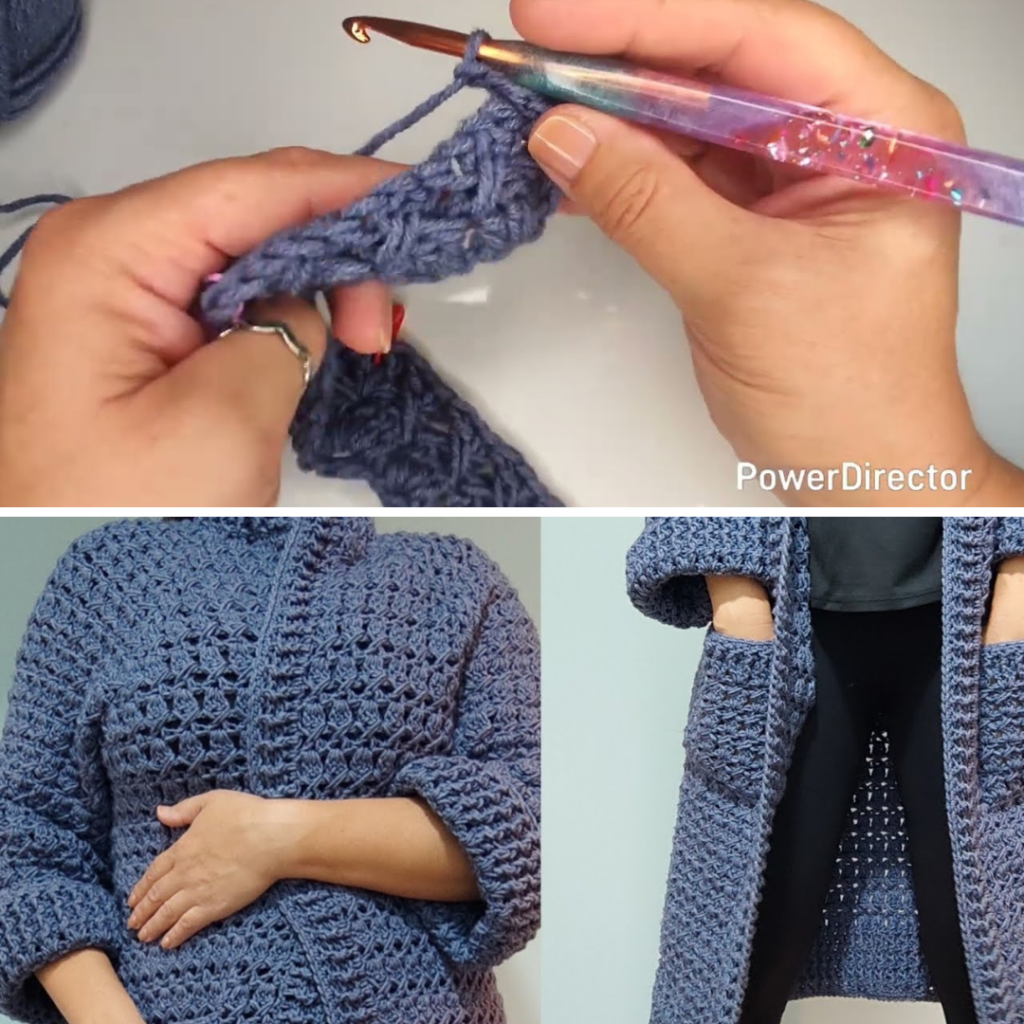
The cardigan is designed for adult sizes ranging from Small to XXL. It features wide, chunky sleeves (full or 3/4 length), a simple ribbed neckline, and optional pockets.
- Yarn: Approximately 10 skins (100g each) of medium-weight (Aran/Worsted) yarn. The example uses Alize Lana Gold Classic (wool/acrylic blend, ~240m per 100g).
- Hook: 5.5 mm crochet hook.
- Notions: At least 5 stitch markers, scissors, and a yarn needle.
- Estimated Dimensions: For a medium/large, the back panel is ~54 cm, sleeves are ~43 cm, and total length is ~106 cm [04:47].
Step 1: The Foundation and Setup
The project begins with a “loop foundation” instead of a traditional chain, which provides more flexibility.
- Create Loops: Chain 3, then double crochet (DC) into the first chain to form a loop. Repeat this until you have 21 loops [08:27].
- Place Markers: Mark the increase points (corners) to define the fronts, shoulders, and back:
- Skip 2 loops (Front), mark the 3rd.
- Skip 3 loops (Shoulder), mark the next.
- Skip 5 loops (Back), mark the next.
- Skip 3 loops (Shoulder), mark the next.
- You should have 2 loops left for the other Front [09:32].
Step 2: The Two-Row Pattern Repeat
The body and sleeves use a specific two-row sequence.
Row 1: The Triple DC Row [10:13]
- Work 3 DCs into every loop.
- At Stitch Markers (Corners): Work 3 DCs, chain 1, and 3 more DCs into the same loop. Move the marker to the new chain-1 space.
Row 2: The Cross Stitch Row [13:25]
- Skip 3 DCs. Work 1 DC behind the cluster (pulling the loop long for height), chain 1, then work 1 DC into the space before the cluster to create a “cross.”
- At Corners: Work a V-stitch (1 DC, chain 1, 1 DC) into the chain-1 space [16:04].
Repeat these two rows until the yoke fits comfortably around your shoulders and reaches your underarms. A typical yoke for this size is about 15 rows [24:47].
Step 3: Connecting the Yoke (Armholes)
Once the yoke is large enough, you will connect the front and back panels to create armholes.
- On a Cross Stitch row, work across the front to the first corner marker.
- Work 2 DCs into the corner space, chain 2, and work 2 DCs into the next corner space (skipping the shoulder section entirely) [29:17].
- Continue across the back to the next markers and repeat the process for the second armhole.
Step 4: The Body and Length
Continue the two-row repeat (Triple DC and Cross Stitch) down the length of the body.
- Adding Width: If you want a slight A-line shape for wider hips, you can add an extra 3-DC cluster under each armhole [35:13].
- The Hem: Stop crocheting the main pattern about 10–15 cm before your desired total length [37:09].
- Ribbed Edging: Finish the bottom with 7–8 rows of Front Post/Back Post Double Crochet (FPDC/BPDC) to create a textured ribbing [42:48].
Step 5: The Sleeves
Sleeves are worked in rounds directly into the armholes.
- Connection: Join yarn at the bottom of the armhole. Use slip stitches to narrow the opening if you prefer a less “chunky” fit [48:58].
- Rounds: Work the same two-row repeat in a circle. Turn your work after every round to maintain the texture [52:05].
- Cuffs: Finish with 6 rows of FPDC/BPDC ribbing.
- Final Edge: Work one round of Single Crochet, skipping every 4th stitch to slightly tighten the cuff [57:30].
Step 6: Neckline and Front Edging
- Neckline: Join yarn at the top edge. Work a row of DCs (alternating 3 DCs and 2 DCs in the foundation loops) to slightly pull the neck in [59:45]. Add 3–4 rows of FPDC/BPDC ribbing [01:04:33].
- Front Edging: Work 2 rows of FPDC/BPDC ribbing down each front opening to give the cardigan structure and a finished look [01:11:06].
- Clean Up: Finish the entire perimeter (neck, fronts, and bottom) with a single crochet border for a neat edge [01:13:22].
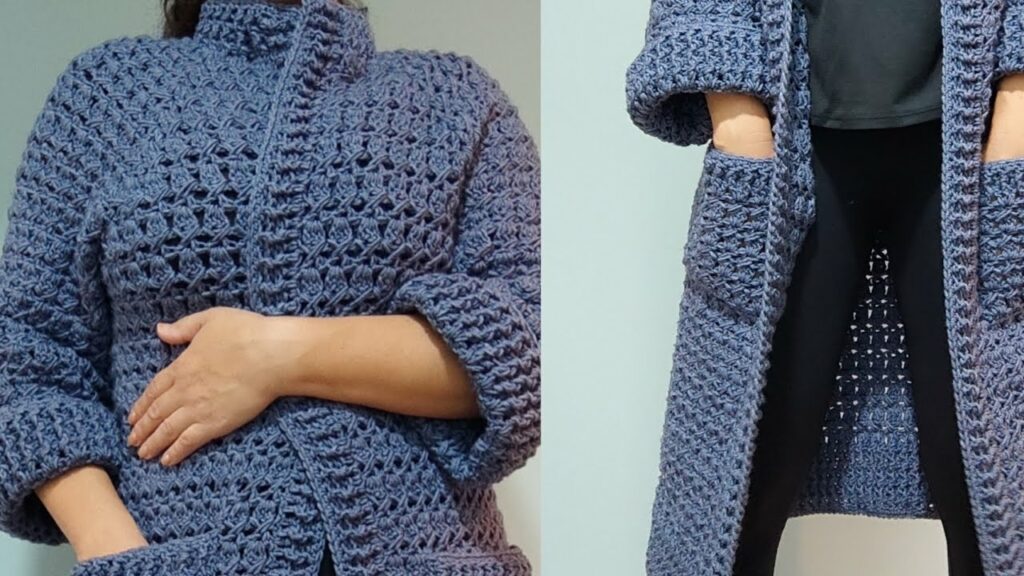
Step 7: Pockets (Optional)
If you have leftover yarn, you can add large pockets.
- Chain 24 and work 1 row of single crochet.
- Follow the main body pattern (3-DC and Cross Stitch) for about 9 rows [01:18:33].
- Top Ribbing: Use FPDC and Half Double Crochet for the top edge to keep the pocket flat against the garment [01:20:30].
- Assembly: Sew the pockets onto the front panels using a whip stitch [01:25:12].
Once you have woven in all your yarn tails, your long Fall cardigan is ready to wear!
Video Tutorial;