 by
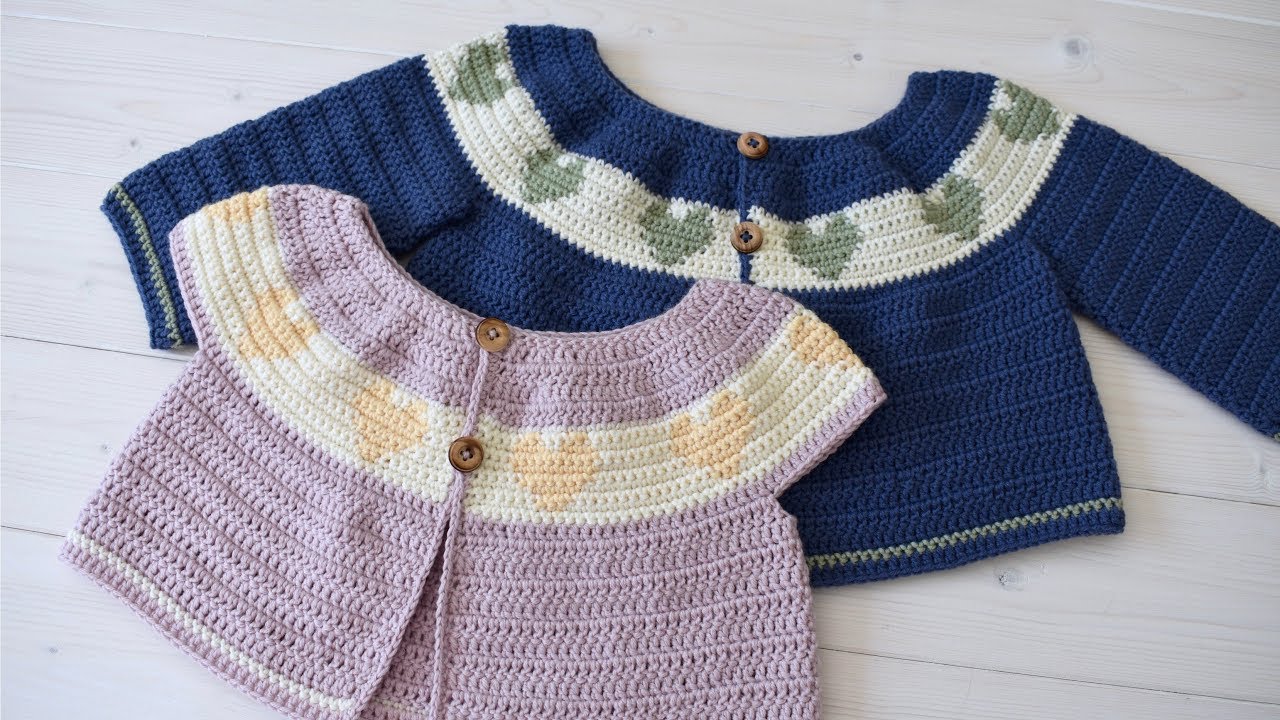
by Crocheting a children’s cardigan is a wonderful project for both beginner and experienced crafters. Whether you’re making it for your child, a gift, or even to sell, a handmade cardigan adds warmth, style, and love to any little wardrobe. With the right yarn and a little patience, you can create a charming, cozy cardigan that fits perfectly and stands up to everyday play.
This guide will walk you through everything you need to know to crochet a children’s cardigan, from choosing materials to finishing with flair.
✨ Why Crochet a Children’s Cardigan?
- Custom Fit: Tailor it to the child’s size and style.
- Creative Freedom: Choose colors, patterns, buttons, and embellishments.
- Great Gift: Ideal for birthdays, holidays, or back-to-school.
- Eco-Friendly & Personal: Handmade items are more sustainable and meaningful than store-bought fast fashion.
🧵 Materials & Tools You’ll Need
| Item | Recommendation |
|---|---|
| Yarn | Medium weight (#4 worsted), cotton or acrylic |
| Crochet Hook | Size 5.0 mm (H/8) or as per yarn label |
| Stitch Markers | Optional but helpful for shaping |
| Yarn Needle | For weaving in ends |
| Scissors | For trimming |
| Buttons | 3–5, child-safe and durable |
| Tape Measure | To check size and gauge |
📝 Tip: Always check the yarn label for hook size and washing instructions.
📐 Sizing Guide for Children’s Cardigans
Use these general measurements as a guide, or take exact measurements of the child you’re making it for.
| Age | Chest Circumference | Cardigan Length | Sleeve Length |
|---|---|---|---|
| 2-3 yrs | 22–23” | 14–15” | 10–11” |
| 4-5 yrs | 24–25” | 16–17” | 12–13” |
| 6-7 yrs | 26–27” | 18–19” | 14–15” |
| 8-10 yrs | 28–30” | 20–21” | 16–17” |
🔤 Basic Crochet Stitches Used
- ch – Chain
- sl st – Slip Stitch
- sc – Single Crochet
- hdc – Half Double Crochet
- dc – Double Crochet
- fpdc / bpdc – Front/Back Post Double Crochet (for ribbing)
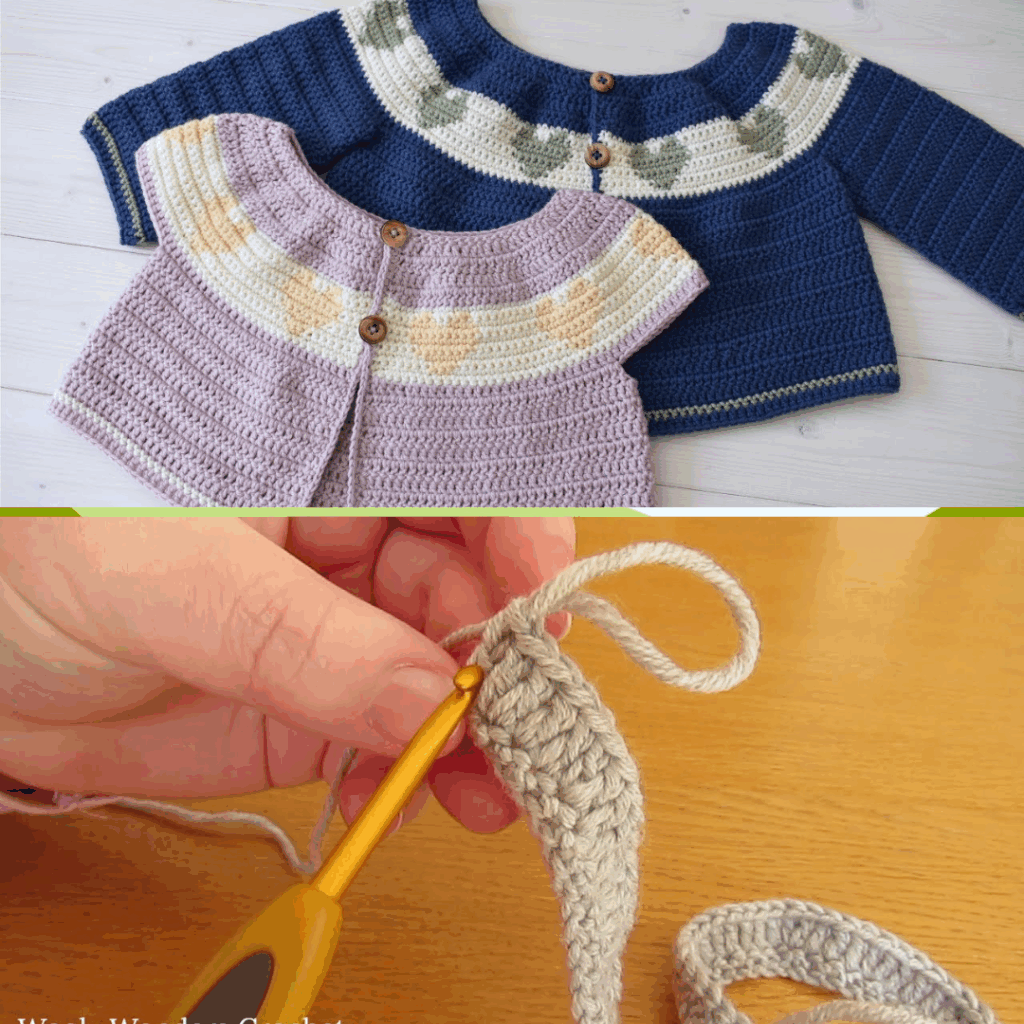
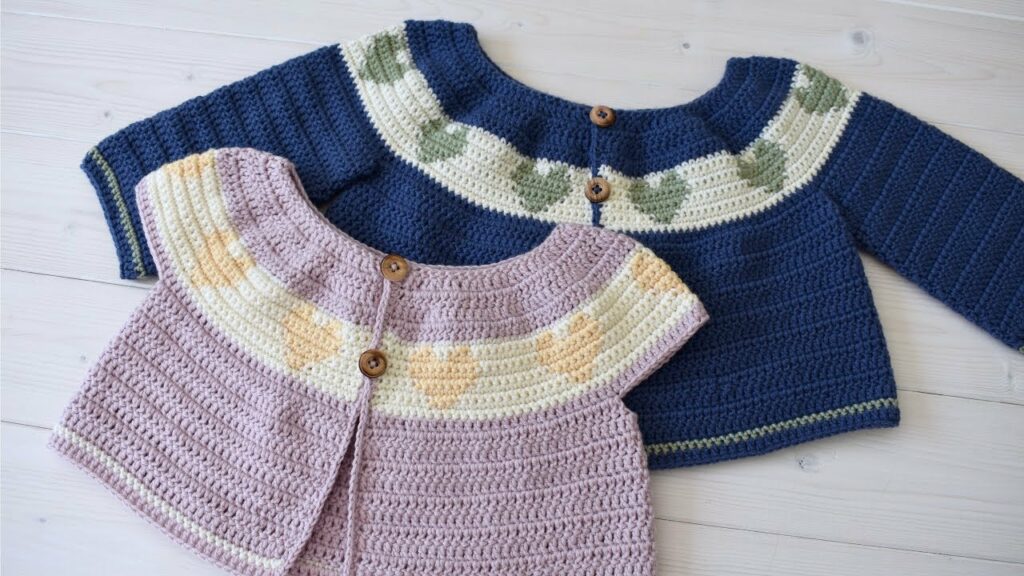
🧶 Pattern Overview: Classic Raglan Children’s Cardigan (Top-Down)
We’ll use a raglan-style construction, which means the cardigan is crocheted from the neck downward, with increases shaping the shoulders and sleeves. This method is easy to adjust for different sizes and requires minimal sewing.
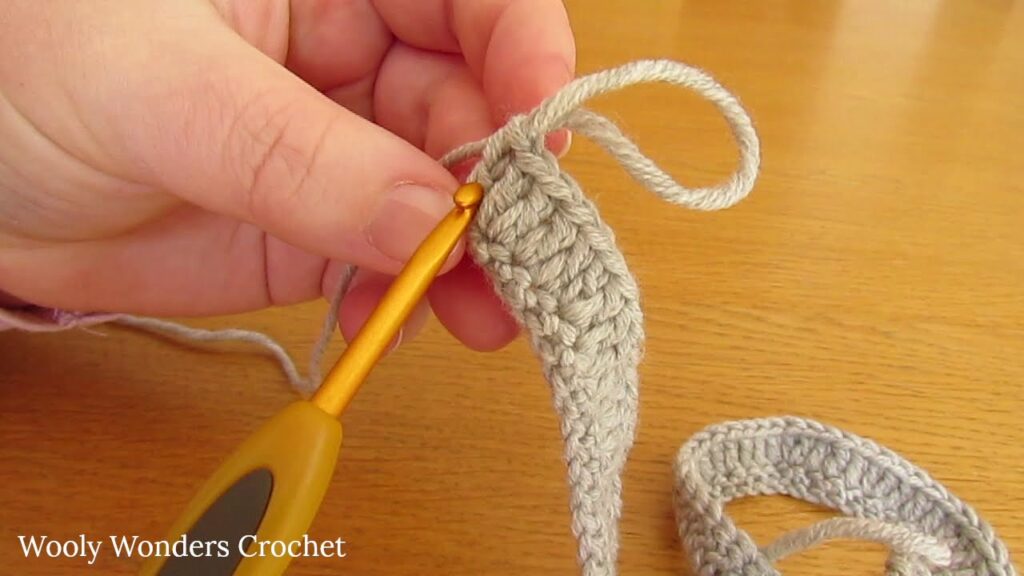
🔹 Step 1: Start the Yoke
- Foundation Chain:
Chain 60 (for approx. 4-6 years; adjust for other sizes). - Row 1:
Dc in 4th chain from hook and in each across. (57 dc) - Row 2 (Divide for Raglan):
Use stitch markers to separate yoke into 5 parts:- 10 dc (Left front)
- 1 (marker)
- 10 dc (Sleeve)
- 1 (marker)
- 15 dc (Back)
- 1 (marker)
- 10 dc (Sleeve)
- 1 (marker)
- 10 dc (Right front)
- Rows 3–10:
Work dc in each stitch. At every marker, increase:- Dc, ch 1, dc in the same stitch (raglan increase)
Continue until the yoke reaches underarm depth (try it on if possible).
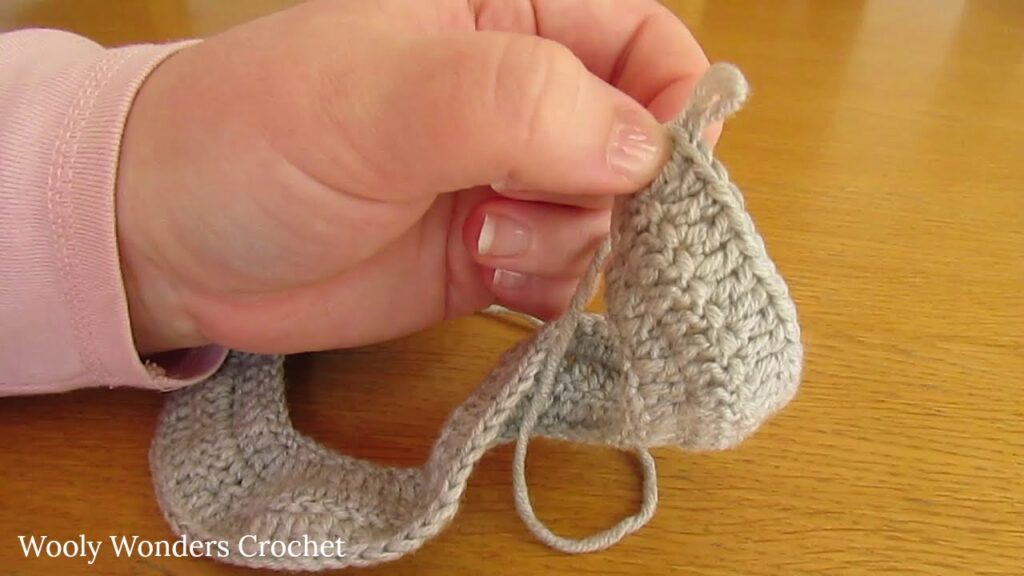
🔹 Step 2: Divide for Body and Sleeves
- Work across the left front.
- Skip sleeve stitches; chain 4–6 for the underarm.
- Work across the back.
- Skip the second sleeve; chain 4–6 again.
- Work across the right front.
Now you’ve separated the body and sleeves.
🔹 Step 3: Crochet the Body
- Continue working dc (or hdc for tighter fabric) rows back and forth across the body section only.
- Work until the cardigan reaches desired length (e.g., 16″ for ages 4–5).
- Finish with 2–3 rows of fpdc/bpdc ribbing for a professional hem.
🔹 Step 4: Add the Sleeves
- Attach yarn at the underarm.
- Work in rounds around the armhole using dc or hdc.
- Decrease every few rounds for a tapered sleeve, or keep straight for a loose fit.
- Finish with fpdc/bpdc ribbing on cuffs.
Repeat for the second sleeve.
🔹 Step 5: Front Edging and Button Band
- Attach yarn at the bottom front corner.
- Work sc evenly up the front edge, around the neckline, and down the other side.
- Do 2–3 rows of sc for a neat finish.
- On one side, create buttonholes every 2–3 inches:
- Example: ch 2, skip 2 sts for each buttonhole.
Sew buttons on the opposite side.
🔹 Step 6: Final Touches
- Weave in ends with a yarn needle.
- Block the cardigan by steaming or laying flat slightly damp to shape.
- Test the buttons to ensure they are child-safe (no sharp edges, securely sewn).
🌸 Optional Variations and Embellishments
- Add striped rows or contrasting cuffs
- Use variegated yarn for fun color changes
- Sew on crochet appliqués (hearts, stars, animals)
- Make it a hooded cardigan by crocheting a rectangular hood and sewing it to the neckline
- Add pockets using small rectangles of matching or contrasting yarn
🧼 Washing and Care
Children’s clothing should be easy to wash. Choose machine-washable yarn and include care instructions if you’re gifting the cardigan.
- Wash cold, gentle cycle
- Lay flat to dry
- Avoid harsh detergents or bleach
📌 Tips for Success
- Always check your gauge before beginning (e.g., 4” = 12 dc and 7 rows).
- Try the cardigan on as you go (or use a child-size dress form).
- Keep notes so you can recreate or size up your cardigan later.
- Use bright, fun colors that children will love wearing.
🧥 Final Thoughts
Crocheting a children’s cardigan is a rewarding project that balances creativity with practicality. With a simple top-down raglan method, even beginners can create a beautiful, functional piece that fits well and lasts. Plus, every stitch you make becomes a memory, wrapped around someone you love.
Video Tutorial: