by
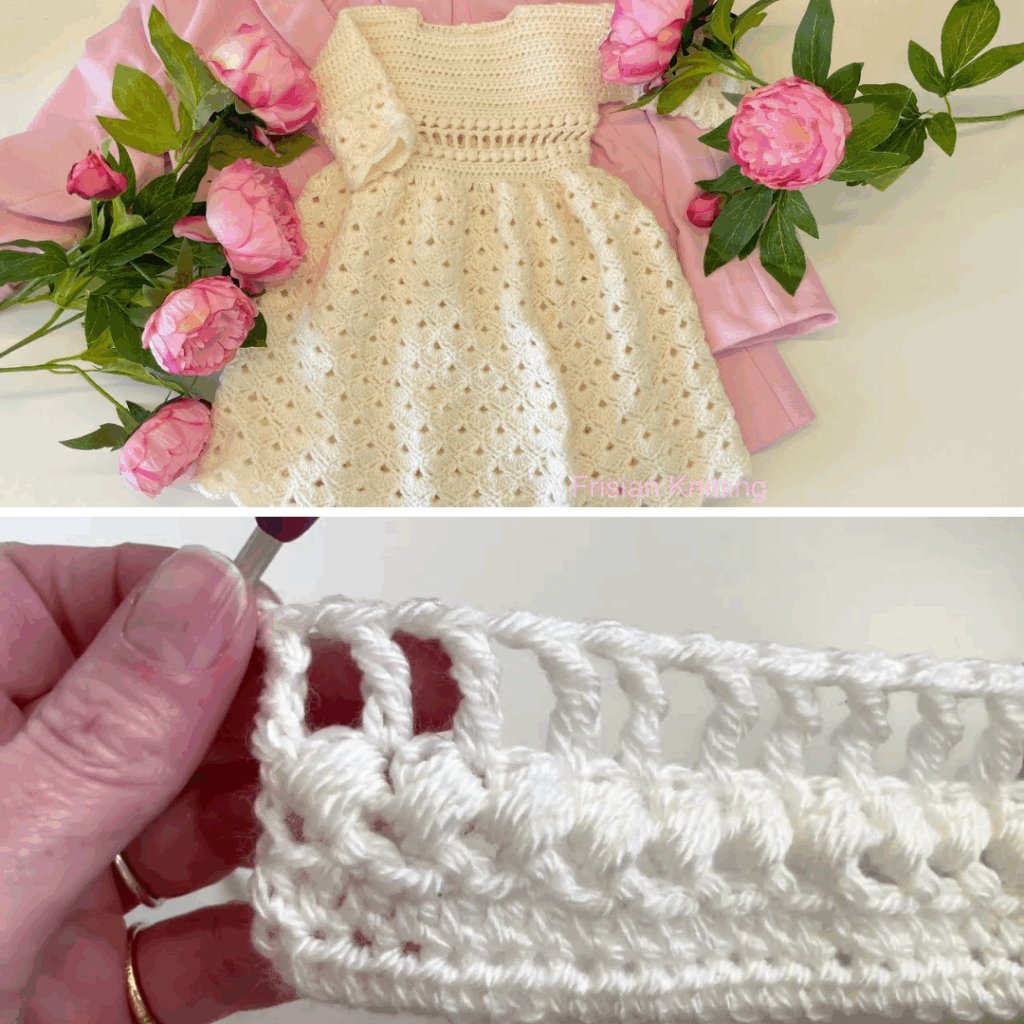
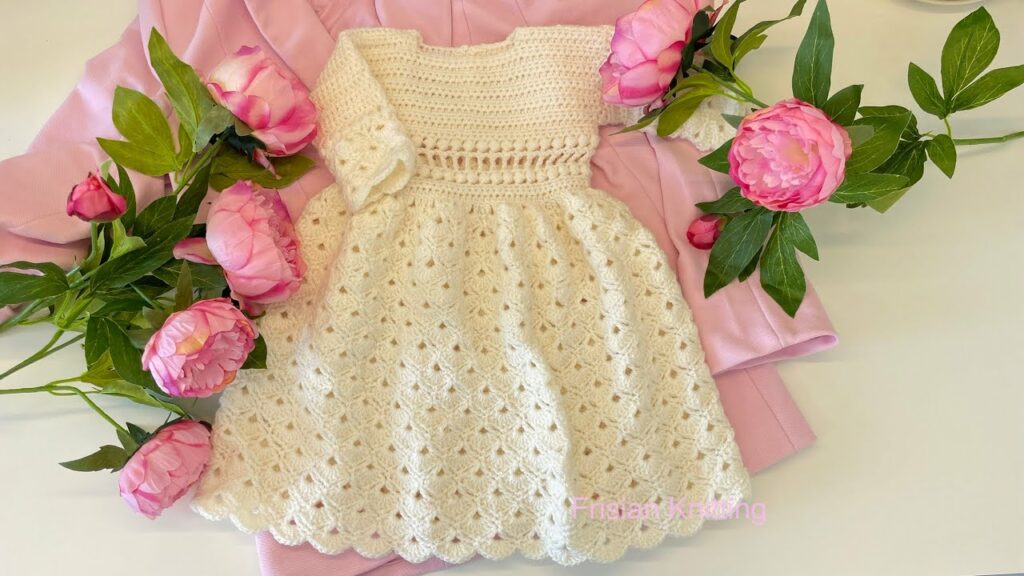
by A crochet Christening dress is one of the most meaningful handmade garments you can create. Traditionally white or ivory, this heirloom piece is designed for special occasions like baptisms, naming ceremonies, and church dedications. Whether you’re crafting it for your own baby, a grandchild, or as a cherished gift, this guide will walk you through how to crochet a beautiful Christening dress, step-by-step.
🧶 What You’ll Need
Before starting, gather the following materials:
✨ Materials:
- Yarn: Lightweight, soft baby yarn (cotton or cotton-blend recommended)
- Category 2 (Fine) or 3 (Light DK)
- Traditional color: White or ivory
- Crochet Hook: 3.0 mm to 4.0 mm (check yarn label)
- Yarn Needle: For sewing and weaving in ends
- Buttons or Ribbon: For back closure
- Scissors
- Measuring Tape
- Stitch Markers (optional but helpful)
📏 Size Guide
This dress can be adapted to any baby size. Below is an estimate for 0–6 months:
| Measurement | Approx. Size |
|---|---|
| Chest | 16–17 inches (41–43 cm) |
| Dress Length | 18–20 inches (46–51 cm) |
| Sleeve Length | 3–4 inches (7.5–10 cm) |
🧵 Stitches Used
This pattern uses simple and elegant stitches:
- Ch – Chain
- Sl st – Slip Stitch
- Sc – Single Crochet
- Hdc – Half Double Crochet
- Dc – Double Crochet
- Shell Stitch – (5 dc in the same stitch)
- Picot – (ch 3, sl st into first ch)
👗 Construction Overview
We’ll construct the dress in five parts:
- Yoke (worked flat or in rounds)
- Body (worked in rounds with lace pattern)
- Sleeves (optional: short, cap, or long)
- Edging and embellishments
- Button closure and finishing
🪡 Step-by-Step Instructions
🔹 Step 1: Create the Yoke
The yoke is the top part of the dress, worked in rounds or rows. We’ll work in rounds for a seamless look.
Round 1:
- Ch 54 (adjust for other sizes in multiples of 6)
- Join with sl st to form a ring, ch 2 (counts as first dc)
- Dc in each chain around. Join with sl st. (54 dc)
Rounds 2–6:
- Continue in dc, increasing at 4 evenly spaced points (front, back, and both shoulders) to shape the yoke.
- Ex: dc in next 12, 2 dc in next st (increase), repeat.
- After Round 6, you should have around 80–90 dc depending on increases.
🔹 Step 2: Form Armholes
Now we’ll separate the stitches for sleeves and body.
Round 7:
- Dc in next 15 sts (front)
- Ch 10 (sleeve gap)
- Skip 20 sts (first sleeve)
- Dc in next 30 sts (back)
- Ch 10 (sleeve gap)
- Skip 20 sts (second sleeve)
- Dc in last 15 sts (front)
Round 8:
- Dc in all dc and chains (70 dc + 20 ch = 90 total)
- Join with sl st.
Now you’re working in one large round for the skirt.
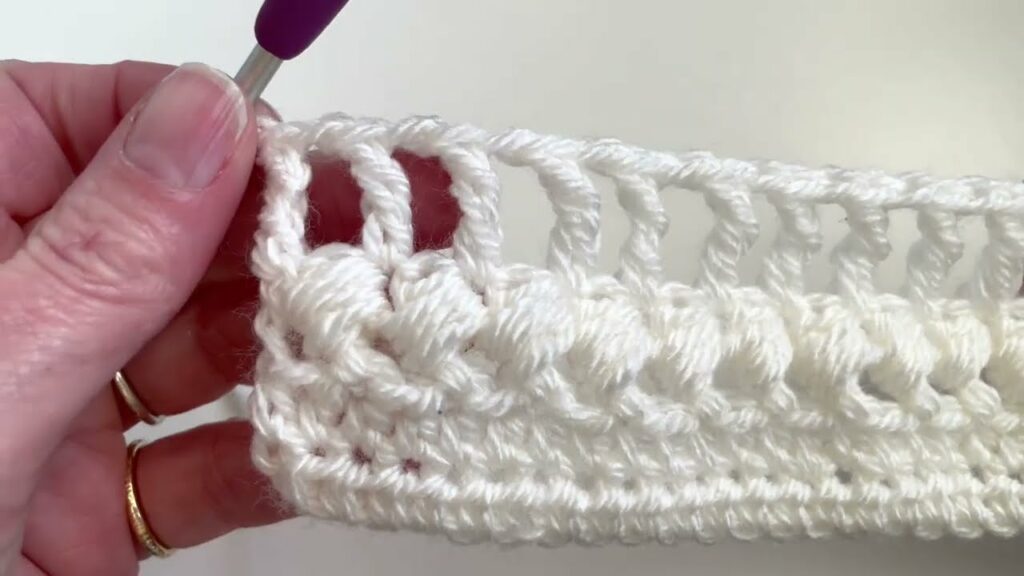
🔹 Step 3: Start the Skirt (Lacy Shells)
This is where the beauty of the Christening dress really begins to shine.
Round 9 (Start Shell Pattern):
- Ch 3 (counts as dc), skip 2 sts, 5 dc in next st (shell), skip 2 sts, sc in next st, repeat around.
- End with sl st into top of ch 3.
Rounds 10–30 (or desired length):
- Work shell pattern continuously:
- Sl st into center of next shell.
- Ch 3, 4 dc into same space.
- Sc in next shell’s sc, shell in next shell, repeat around.
➡️ You can change the shell stitch to puff or v-stitch if desired for variety.
🔹 Step 4: Add Sleeves (Optional)
Join yarn at the underarm.
Row 1:
- Dc or hdc evenly around the armhole.
- Join with sl st.
Rows 2–5 (Short Sleeve):
- Continue in dc or shell pattern for a few rows.
- Add picot edging or lace border to finish.
For long sleeves, continue rows until desired length is achieved.
🔹 Step 5: Edging and Neckline
- Work 1 round of sc around neckline and back opening.
- Add picot edging or shell border for elegance.
- Around skirt hem: Add 2–3 rounds of picot, shell, or lace stitch for a stunning finish.
🔹 Step 6: Add Back Closure
Most Christening dresses have an open back to help put them on easily.
- Leave a 1.5–2 inch gap at the back of the yoke when joining rounds.
- Add 2–3 small buttons or ribbon ties for closure.
- Crochet a small loop (ch 5–6) as a buttonhole if needed.
🌼 Optional Embellishments

- Ribbon: Thread satin ribbon through the waistline or sleeves.
- Appliqués: Add a small crocheted cross, rose, or heart to the front.
- Pearl buttons: For a classic, timeless look.
- Matching bonnet: Crochet a simple lace bonnet to complete the outfit.
💡 Tips for Success
- Use high-quality, soft yarn suitable for baby skin.
- Steam block your dress to open up lace patterns.
- If making as a keepsake, consider using heirloom yarn or fine thread (size 10 cotton).
- For photography purposes, you can starch the hem for a firm, flared look.
📸 Christening Dress Ideas
| Style | Details |
|---|---|
| Vintage Lace | Fine thread, shell or pineapple lace |
| Simple & Sweet | Basic dc with ribbon trim |
| Gown Style | Extended length with lace edging |
| Dress with Cape | Add a short cape or bolero |
🎁 Final Thoughts
A crochet Christening dress is more than a garment—it’s a labor of love. With just some yarn, a hook, and a bit of time, you can create a keepsake that may be passed down through generations. Whether you go with a vintage lace design or a modern minimalist version, your handmade touch will make this dress incredibly special.
So take your time, enjoy the process, and be proud of what you create. The memories this dress will help create are priceless.
Video Tutorial;