 by
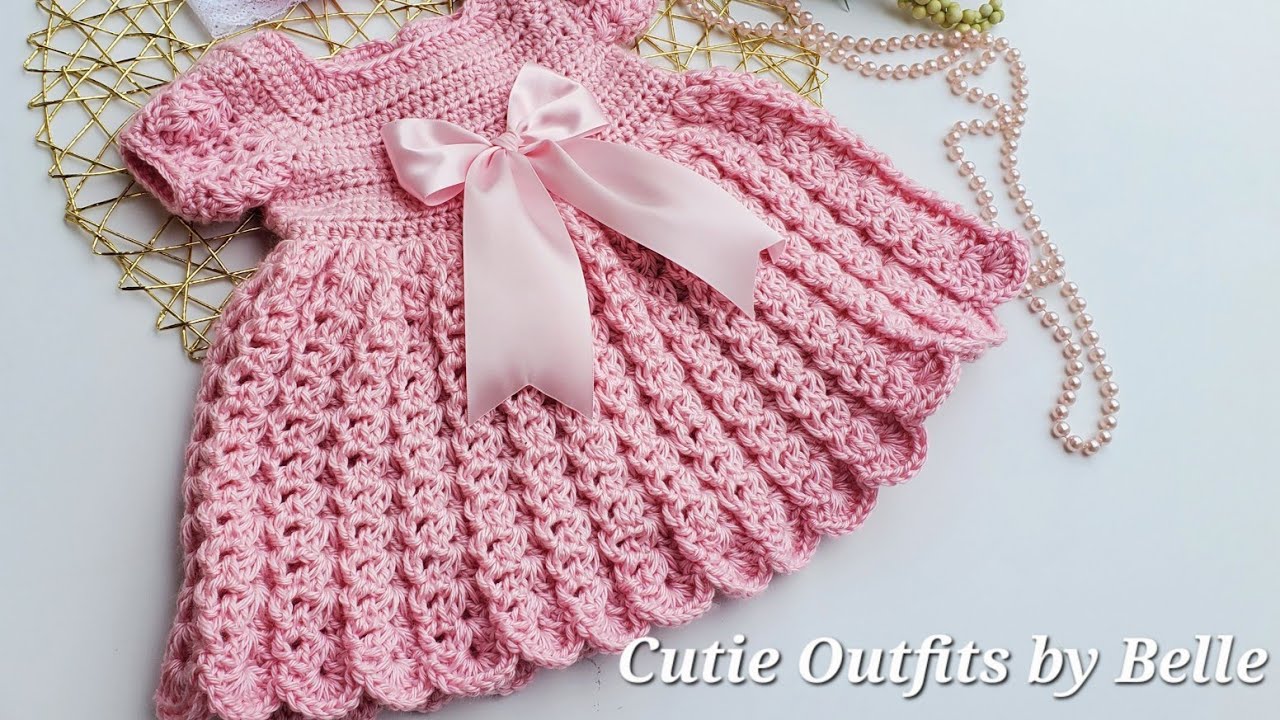
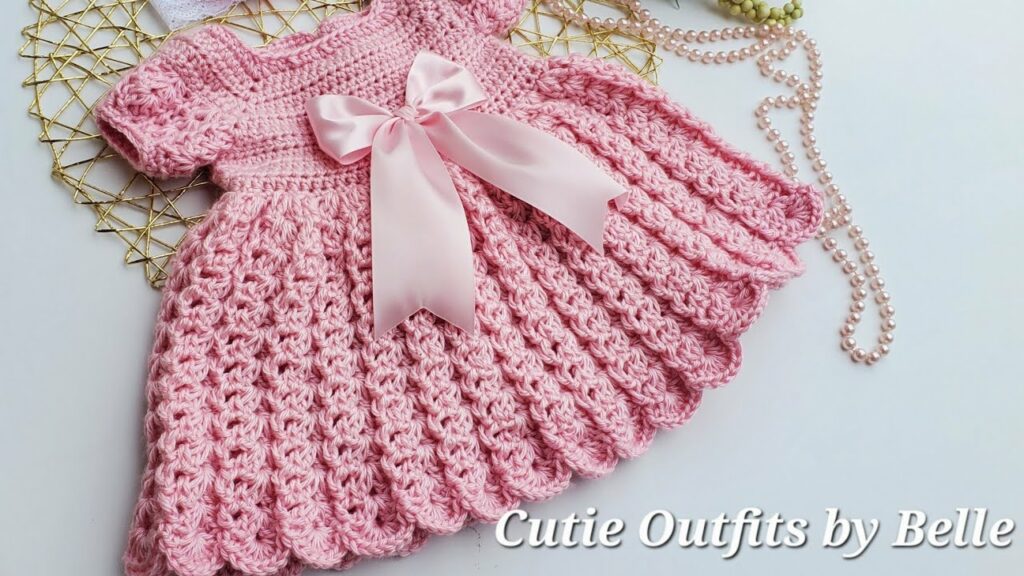
by Creating a crochet baby dress is a rewarding project that combines creativity, care, and craftsmanship. Whether you’re making it for your own baby, a gift, or a baby shower, this 0–6 month crochet baby dress tutorial will guide you through every step with clear instructions and helpful tips.
Let’s get started on making a soft, beautiful, and easy-to-wear baby dress!
🧶 Materials You’ll Need

Before we dive into crocheting, gather these materials:
| Item | Details |
|---|---|
| Yarn | Soft, baby-friendly yarn (DK/Light Worsted – Category 3) |
| Hook Size | 4.0 mm (G-6) crochet hook |
| Stitch Markers | Optional but helpful |
| Buttons | 2–3 small (for back closure or decoration) |
| Yarn Needle | For weaving in ends |
| Scissors | Self-explanatory |
| Measuring Tape | To ensure proper sizing |
📏 Size Chart (0–6 Months)
| Measurement | Approximate |
|---|---|
| Chest | 16–17 in (40–43 cm) |
| Dress Length | 12–14 in (30–35 cm) |
| Armhole | 3.5–4 in (9–10 cm) |
Adjust as needed based on yarn thickness and your tension (gauge).
🧵 Stitches Used
This pattern uses basic crochet stitches:
- ch – chain
- sl st – slip stitch
- sc – single crochet
- hdc – half double crochet
- dc – double crochet
- shell stitch – 5 dc in the same stitch (for decorative skirt)
If you’re familiar with these stitches, this dress will be simple and fun to make!
👗 Dress Construction Overview
The dress is worked in two main parts:
- Top Yoke – Worked in rows or rounds to form the upper body
- Skirt Body – Worked in rounds from the yoke downward, using shell stitches for flare and style
Then we finish it off with sleeves, edging, and button closure.
🪡 Crochet Baby Dress Pattern (0–6 Months)
🔷 STEP 1: Crochet the Yoke (Top Part)
Foundation:
- Ch 52
- Join with sl st to form a ring (make sure it’s not twisted)
- Ch 2 (counts as first dc)
Round 1:
- Dc in each stitch around (52 dc total)
- Join with sl st, ch 2
Rounds 2–5:
- Increase for raglan shaping:
- Work dc in each stitch, increasing 1 stitch at 4 evenly spaced points (front, back, and shoulders)
- For example:
- Dc 12, 2 dc in next st (increase), dc 13, 2 dc, dc 12, 2 dc, dc 13, 2 dc
- Continue in this manner each round
By Round 5, you should have approx. 76–80 dc.
🔷 STEP 2: Separate for Armholes
In this round, you’ll skip stitches for sleeves and work only on the body.
Round 6:
- Dc across the front (approx. 18–20 dc)
- Ch 6–8 (creates the armhole)
- Skip 16–18 stitches (sleeve area)
- Dc across the back (approx. 20 dc)
- Ch 6–8, skip next 16–18 stitches (2nd sleeve)
- Dc to end
- Join with sl st
Now your yoke is transformed into a sleeveless bodice, and we’re ready to begin the skirt.
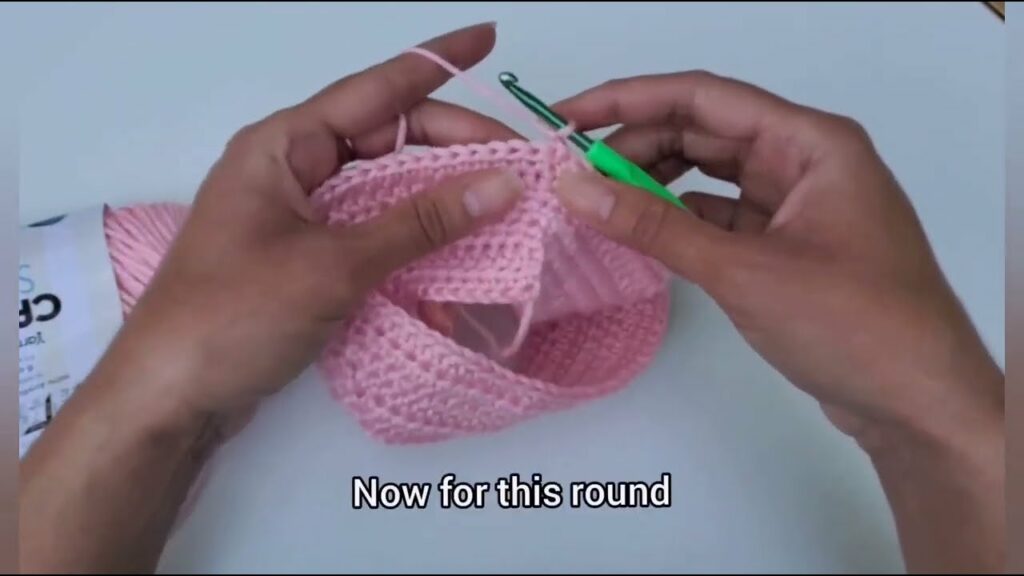
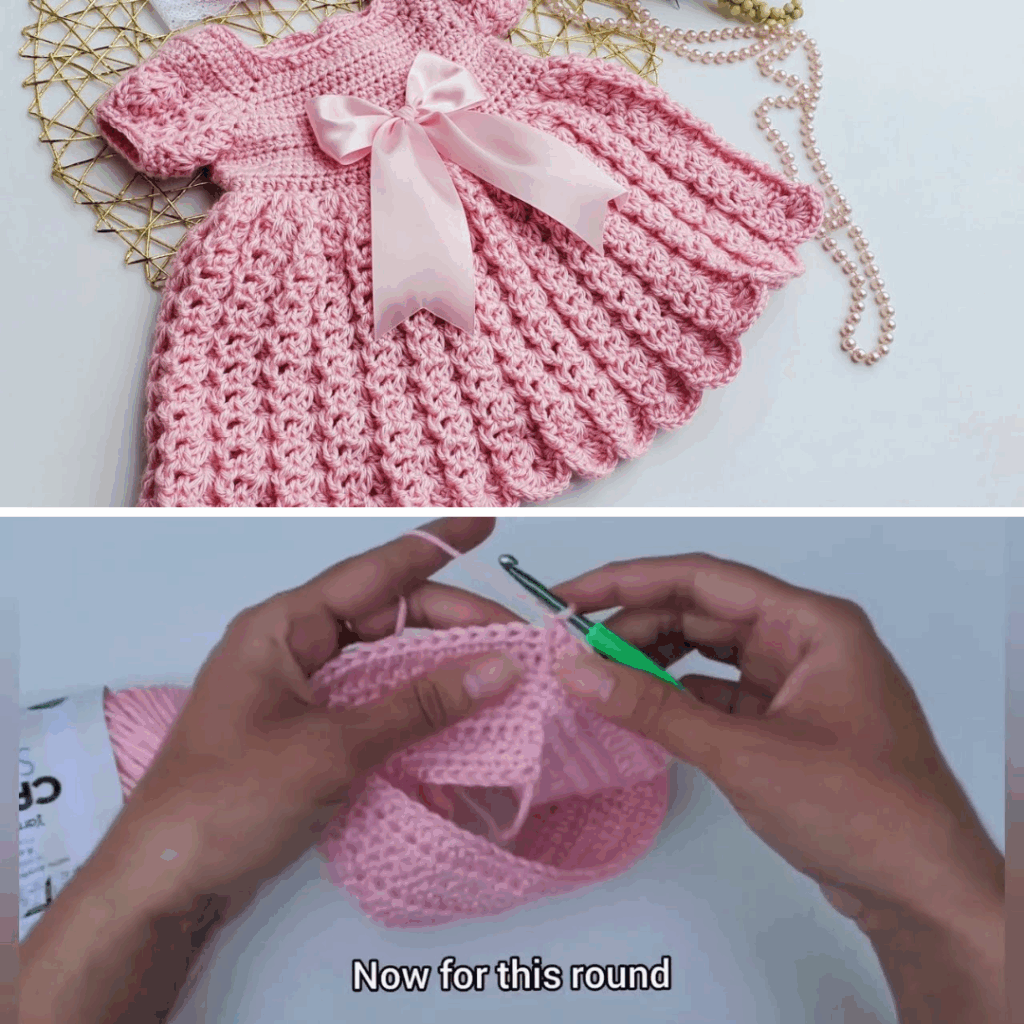
🔷 STEP 3: Begin the Skirt (Shell Stitch)
Now we work in rounds from the bottom of the yoke down.
Round 7 (Establish Shell Pattern):
- Ch 3 (counts as dc), skip 2 sts, 5 dc in next st (shell), skip 2 sts, sc in next st
- Repeat around
- Join with sl st
Rounds 8–20 (or desired length):
- Sl st into center of next shell
- Ch 3, 4 dc into same stitch (completes shell)
- Sc into next sc space, repeat shell pattern around
Continue until the dress reaches your desired length (approx. 12–14 inches from shoulder).
🔷 STEP 4: Add Sleeves (Optional)
You can leave the armholes sleeveless or add small cap sleeves.
To Add Cap Sleeves:
- Attach yarn to the armhole
- Work 2–3 rounds of sc or dc evenly around
- Optional: Finish with picot edge or shell trim
🔷 STEP 5: Neckline & Hem Edging
Add final details to polish the look.
Neckline:
- Work 1 round of sc around neckline
- Optional: Add a row of picot stitch (sc, ch 3, sl st into first ch)
Skirt Hem:
- Add 2–3 rounds of shell stitch or scalloped border to flare the skirt
🔷 STEP 6: Back Opening & Buttons
To make it easier to dress the baby, create a small back opening.
Back Opening:
- Don’t fully join the first 3–4 rows of the yoke—work flat instead
- After Round 5, join into a circle
Closure:
- Crochet 1–2 button loops on one side (ch 6, sl st back)
- Sew matching buttons on the opposite side
🌸 Customization Ideas
- Ribbon Waistband: Thread satin ribbon around the waist
- Colorwork: Use two-tone color (e.g., white top, pastel skirt)
- Appliqué: Add a crocheted flower or bow
- Matching Headband: Use leftover yarn to make a bow or band
💡 Tips for Success
- Always check your gauge to ensure correct size
- Stitch markers help track increases and round beginnings
- Use soft, washable yarn—babies have delicate skin
- Weave in ends securely and check for loose yarn
- Block the dress gently to open up the lacework and give it shape
🍼 Why Crochet a Baby Dress?
- Handmade keepsake: Perfect for baby showers or first photos
- Customizable: Choose your own colors, yarn, and embellishments
- Timeless and practical: Soft, breathable, and easy to wear
📸 Dress Styling Ideas
| Style | Description |
|---|---|
| Classic White | Perfect for Christening or Dedication |
| Pastel Princess | Pink, blue, mint, or lavender shades |
| Floral Accents | Add flower appliqués for spring charm |
| Sleeveless Summer | Light and breathable for warm days |
🎀 Final Thoughts
Making a crochet baby dress for 0–6 months is a heartfelt and fulfilling project. Whether you’re crafting a classic white Christening gown or a playful summer dress, this tutorial gives you the tools and confidence to create something truly special.
With just a hook, some yarn, and your love, you’re stitching together more than a garment—you’re creating memories.
Video Tutorial: