 by
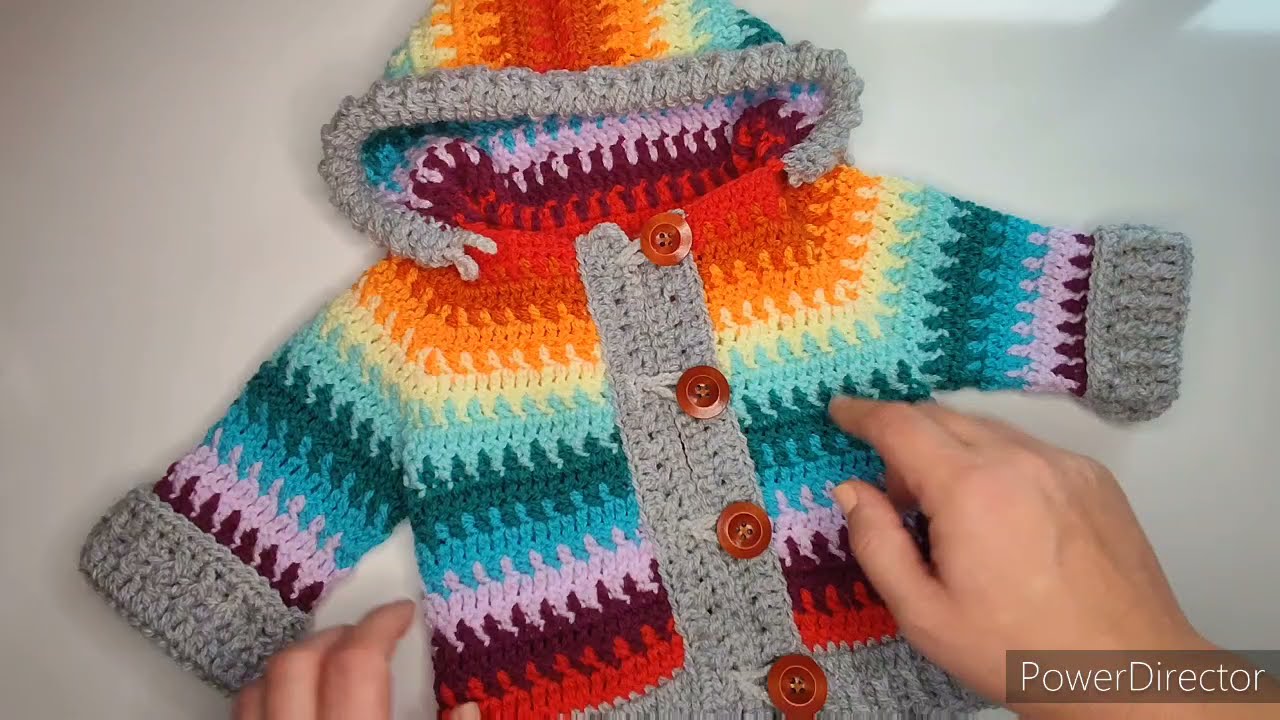
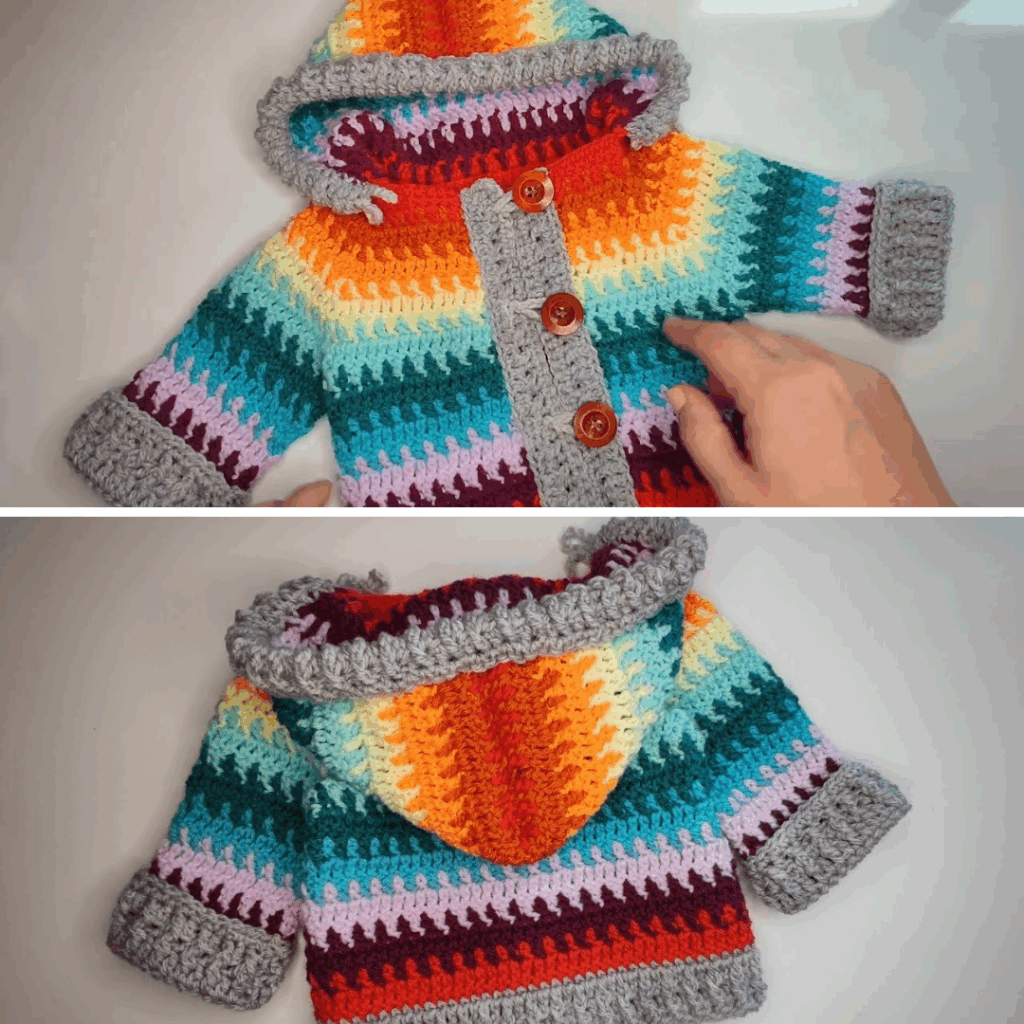
by Crocheting a baby hoodie is the perfect blend of cozy and cute. Whether you’re making a thoughtful baby shower gift, a first winter outfit, or simply want a heartfelt handmade project, this crochet baby hoodie will be your new favorite pattern.
This article breaks down everything you need to know to crochet a baby hoodie from scratch—even if you’re still new to garment making.
🌟 Why Make a Baby Hoodie?
- ✅ Practical: Keeps baby warm in colder months
- 💖 Adorable: Looks cute in photos and everyday wear
- 🧵 Handmade Love: A personalized, keepsake-quality gift
- 🔁 Reusable Pattern: Easily sized up for toddlers or bigger kids
🧵 What You’ll Need
| Item | Description |
|---|---|
| Yarn | Worsted weight (4) baby-safe yarn, approx. 300–400 yards |
| Crochet hook | 4.0 mm (G) or 4.5 mm (7), depending on yarn and gauge |
| Stitch markers | Optional but helpful |
| Yarn needle | For seaming and weaving ends |
| Scissors | For trimming yarn |
| Buttons or toggles (optional) | For closure or decoration |
| Measuring tape | To check sizing as you go |
📏 Sizing
This pattern fits babies 0–12 months.
To make it larger, you can:
- Use a larger hook
- Add more stitches to the body and sleeves
- Add rows to the hood
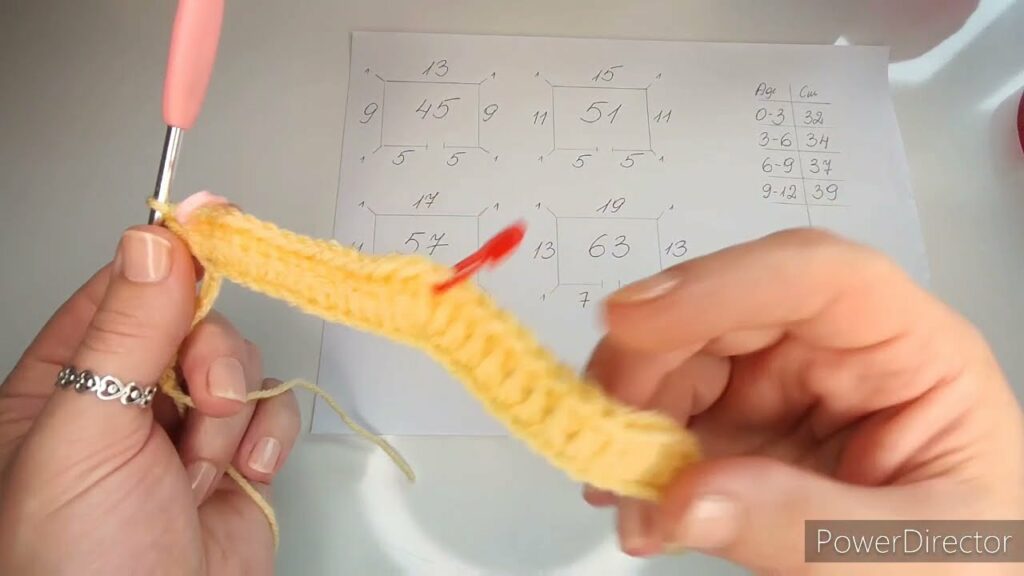
| Age | Chest Width | Hoodie Length | Sleeve Length |
|---|---|---|---|
| 0–6 mo | 16″ | 10″ | 5.5″ |
| 6–12 mo | 18″ | 11.5″ | 6.5″ |
🔁 Basic Stitches Used
- ch – Chain
- sc – Single Crochet
- hdc – Half Double Crochet
- dc – Double Crochet
- sl st – Slip Stitch
- inc – Increase (2 stitches in one stitch)
- dec – Decrease (sc2tog or dc2tog)
👕 Construction Overview
This hoodie is made in five parts:
- Back panel
- Front panels (left & right)
- Sleeves (worked flat or in the round)
- Hood (attached later)
- Seaming & edging
You can also crochet it all in one piece top-down using a raglan method, but this pattern keeps it simple with flat panels for easier seaming and shaping.
🧣 Step-by-Step: Crochet Baby Hoodie (Flat Panel Version)
🔹 Step 1: Back Panel
Foundation Row:
Ch 41 (or adjust based on desired width)
Row 1:
Dc in 3rd ch from hook and across (39 dc)
Ch 2, turn.
Rows 2–20 (or until length = 10″)
Dc in each st across.
Fasten off.
✨ Optional: Switch to hdc or sc for bottom ribbing.
🔹 Step 2: Front Panels (Make 2)
Foundation Row:
Ch 21
Row 1:
Dc in 3rd ch from hook and across (19 dc)
Ch 2, turn.
Rows 2–20:
Dc in each stitch across.
Fasten off.
✅ Leave room for the neckline by decreasing a few rows short (optional).
🔹 Step 3: Sleeves
Foundation Row:
Ch 26
Row 1:
Dc in 3rd ch from hook and across (24 dc)
Ch 2, turn.
Rows 2–12:
Dc in each st.
(Optional: Increase by 1 dc on each side every 2 rows for a roomier sleeve.)
Fasten off.
Make 2 sleeves.
🔹 Step 4: Seaming the Body
- Lay back panel flat.
- Align front panels on top (left and right).
- Seam shoulders using whip stitch or sl st.
- Seam sides, leaving 5–6″ armhole openings.
🔹 Step 5: Attach Sleeves
- Fold each sleeve in half lengthwise to find the center.
- Match center of sleeve to shoulder seam.
- Pin and seam sleeves into armhole openings.
- Seam sleeve sides closed.
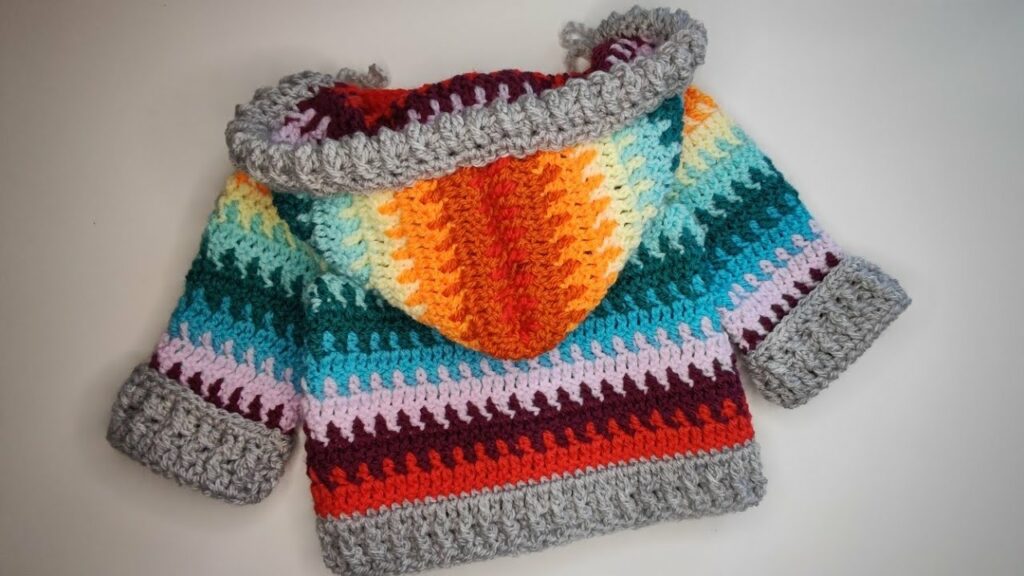
🔹 Step 6: Create the Hood
Attach yarn to the neckline.
Row 1:
Sc or dc evenly across the neck opening (approx. 32–36 sts).
Ch 2, turn.
Rows 2–12:
Dc across.
Ch 2, turn.
Finish:
Fold the hood in half and sew the top closed to form the hood shape.
Fasten off.
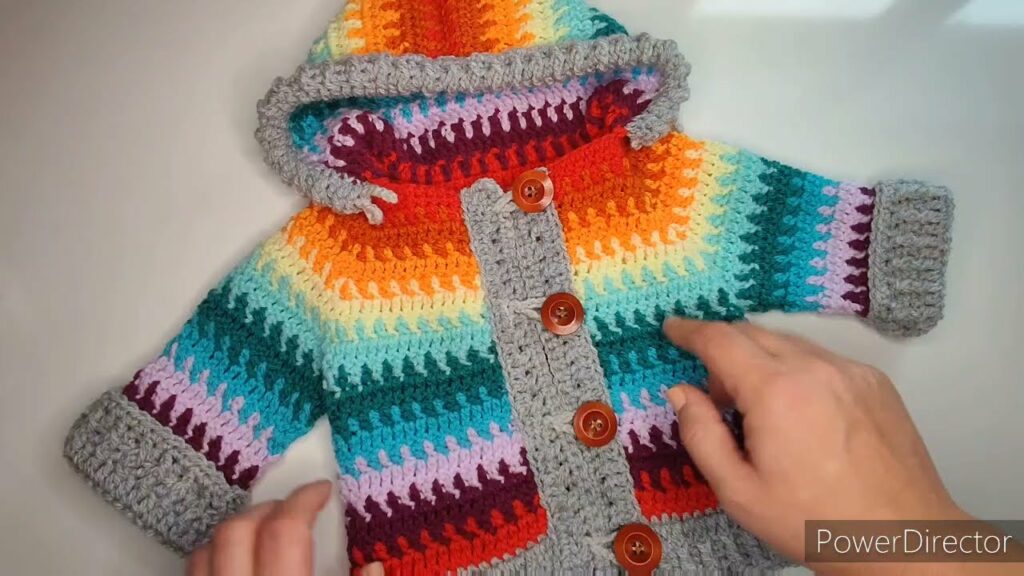
🔹 Step 7: Edging & Button Band (Optional)
Front Edge Border:
Attach yarn at bottom right corner.
- Sc evenly up the front, around the hood opening, and down the other front panel.
- You can do 2–3 rounds for a thicker trim.
- Optional: Work buttonholes every few stitches on one side for closures.
Bottom Hem & Cuffs:
You can add ribbing using:
- Back-loop-only sc or hdc rows (attached as you go), or
- A round or two of sc around the edges.
Video Tutorial Part1:
🎀 Optional Embellishments
| Add-On | Description |
|---|---|
| 🐻 Ears | Crochet two circles, sew on top of hood |
| 🎀 Pockets | Small squares or mini granny squares |
| 🧵 Appliqués | Stars, hearts, or animal patches |
| 🧷 Zipper | Sew in for a jacket-style finish |
🧼 Care Instructions
- Use soft machine-washable yarn (cotton blends or baby acrylic yarn)
- Wash on gentle or cold setting
- Tumble dry low or lay flat to dry
- Avoid bleach or hot water
🎁 Bonus Idea: Make a Matching Set
Pair this hoodie with:
- 👣 Crochet baby booties
- 🧤 Mittens
- 🧢 A beanie or pom-pom hat
- 🧺 Baby blanket
Bundle it in a gift basket for the ultimate handmade baby gift!
🧶 Final Thoughts
Making a crochet baby hoodie is a fun, rewarding project that combines function with style. It’s a perfect way to create something cozy, personal, and full of love for a little one in your life. Whether you’re a beginner or an experienced crocheter, this hoodie pattern offers lots of flexibility, room for creativity, and best of all — it works up quickly.
Video Tutorial Part2 :