 by
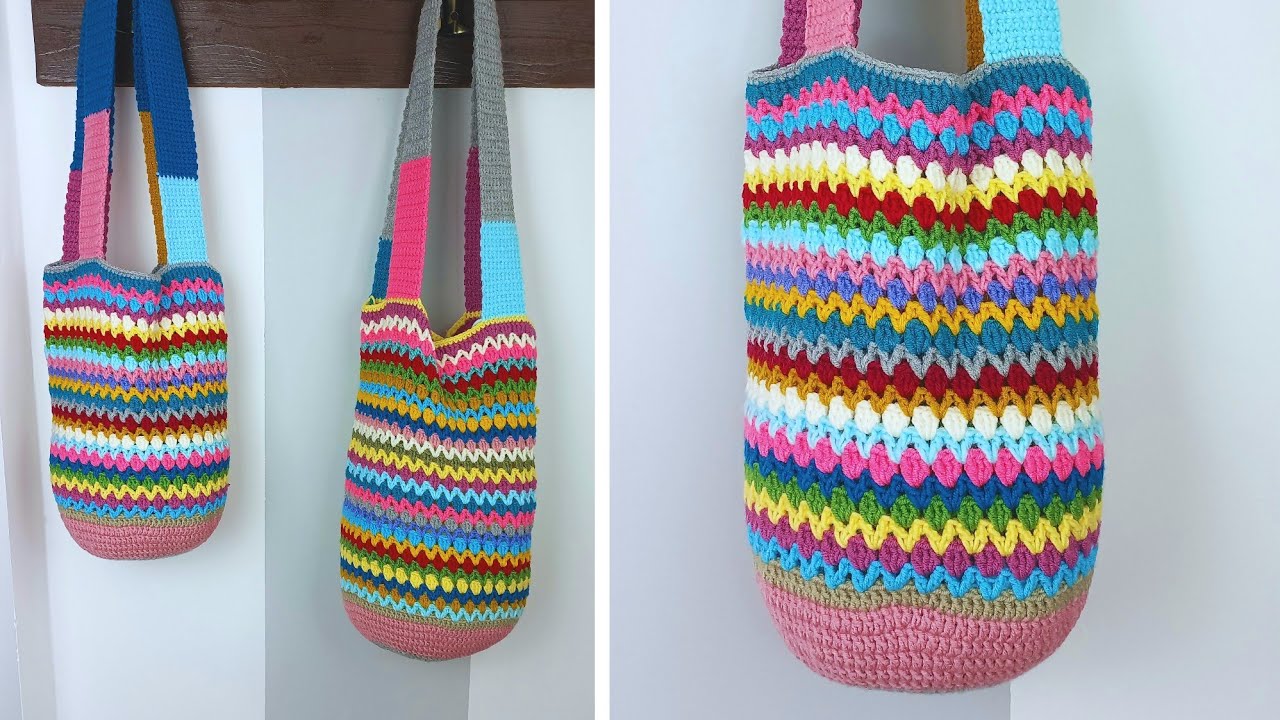
by There’s something uniquely satisfying about carrying a bag that you’ve made yourself. A crocheted bag isn’t just a practical accessory; it’s a statement piece, a testament to your creativity, and a project that offers endless possibilities for customization. Whether you envision a sturdy market tote, a chic clutch, or a versatile everyday carry-all, this detailed tutorial will guide you through the essential techniques and considerations for crocheting a beautiful and functional bag.
Why Crochet a Bag?
- Ultimate Customization: Choose your exact yarn type, color palette, stitch pattern, size, and hardware to match your personal style perfectly.
- Practicality & Durability: Depending on your yarn choice, crocheted bags can be incredibly sturdy, washable, and long-lasting.
- Unique & Handmade: Stand out from the crowd with an accessory no one else has.
- Skill Building: A fantastic project for practicing new stitches, mastering shaping techniques, and learning assembly methods.
Choosing Your Tools & Materials: The Foundation of Your Bag
The materials you choose will significantly impact your bag’s final look, feel, and durability.
- Yarn: The Heart of Your Bag
- Cotton: (Worsted, DK, or even chunky cotton cord) – Highly recommended. It’s durable, holds its shape well, has minimal stretch, and takes dye beautifully. Great for everyday bags, market bags, and structured designs.
- Acrylic: (Worsted, Chunky) – Wide color range, often more affordable, lightweight. Can stretch more over time, so choose a denser stitch. Good for fashion bags or those not carrying heavy loads.
- T-shirt Yarn: (Bulky to Super Bulky) – Made from recycled fabric strips. Creates very chunky, quick-to-make bags with a modern, relaxed vibe. Very sturdy.
- Raffia/Paper Yarn: (Light Worsted to DK) – Perfect for summery bags, beach totes, and structured clutches. Has a unique texture and excellent shape retention. Not ideal for heavy items.
- Jute/Hemp: (Worsted to Bulky) – Rustic, incredibly strong, and very stiff. Best for market bags or home decor bags. Can be rough on the hands.
- Macrame Cord: (Various thicknesses) – Provides excellent stitch definition and creates very sturdy, modern bags.
- Yarn Amount: This varies wildly by bag size and yarn weight. For a small clutch, you might need 100-200 yards; for a medium tote, 300-600 yards; for a large market bag, 600-1000+ yards.
- Crochet Hook:
- Choose a hook size appropriate for your chosen yarn weight.
- Tip for Bags: Often, using a hook one size smaller than recommended on your yarn label will create a denser, firmer fabric that helps your bag hold its shape better and prevents items from poking through.
- Other Notions:
- Stitch Markers: Essential for keeping track of rounds and shaping.
- Tapestry Needle: For weaving in ends.
- Scissors.
- Optional Bag Hardware:
- D-rings or O-rings: For attaching straps.
- Swivel Clasps: For detachable straps.
- Magnetic Snaps or Sew-in Magnets: For closures.
- Zipper: For secure closures (requires sewing).
- Bag Feet/Purse Feet: To protect the bottom of your bag.
- Purchased Handles: Leather, bamboo, plastic, or metal handles can elevate your bag’s look.
- Lining Fabric: (Cotton, canvas, or repurposed sturdy fabric) – Highly recommended for most bags.
- Sewing Needle & Thread: For attaching lining, zippers, and hardware.
Understanding Bag Construction Basics: The Anatomy of Your Creation
Most crocheted bags follow a similar structural pattern:
- The Base/Bottom: This determines the bag’s footprint. Common shapes include:
- Oval: (Most common for totes/shoulder bags) – Created by crocheting around a starting chain.
- Rectangle/Square: (For boxier bags or clutches) – Worked flat in rows.
- Circle: (For round bags or poufs) – Worked in increasing rounds from a magic ring.
- The Body: The main part of the bag, usually worked in continuous rounds directly from the base. It can be straight, tapered, or have shaping for unique designs.
- Handles/Straps: Can be crocheted directly onto the bag, attached with hardware, or purchased and sewn on.
- Closure: How the bag closes – often a simple magnetic snap, a zipper, a button loop, or a drawstring.
General Stitch Patterns for Bags (Emphasize Density!):
For durability and shape retention, aim for dense stitches.
- Single Crochet (sc): Your best friend for bags! Creates a dense, sturdy fabric that holds shape well.
- Half Double Crochet (hdc): Slightly taller than sc, works up faster, still offers good density.
- Moss Stitch (or Seed Stitch): (alternating sc and ch 1) – Creates a beautiful texture, lays flat, and is quite dense.
- Basketweave Stitch: Uses front post and back post stitches to create a woven texture, excellent for structure.
- Star Stitch or Puff Stitch: Creates a textured, sturdy fabric, good for more decorative bags.
- Mesh/Openwork: While less dense, specific mesh patterns with sturdy yarn can work for market bags.
Basic Bag Tutorial: The Simple Tote (Beginner-Friendly Example)
This tutorial will guide you through a classic oval-bottom tote bag, which is a fantastic starter project.
Materials for a Medium Tote (approx. 12″ wide x 14″ tall):
- Worsted weight cotton yarn (approx. 400-500 yards)
- Crochet hook (e.g., H/5.0mm or G/4.0mm, depending on desired density)
- Stitch marker, tapestry needle, scissors
- Optional: Lining fabric, magnetic snap
Abbreviations Used:
- ch: chain
- sc: single crochet
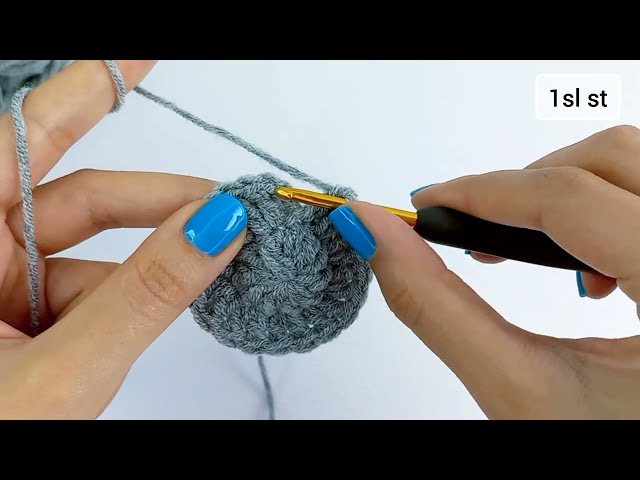
- sl st: slip stitch
- st(s): stitch(es)
- inc: increase (work 2 sc in one stitch)
- BLO: back loop only
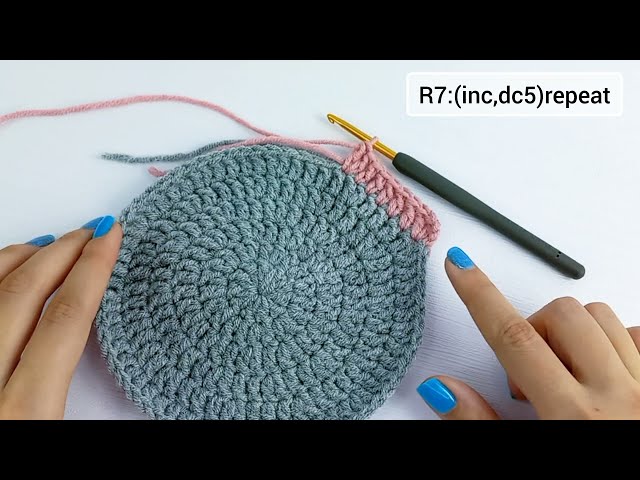
Phase 1: The Base (Oval Bottom)
This creates a sturdy, flat bottom for your bag.
- Starting Chain: Ch 21.
- Round 1: Sc in 2nd ch from hook. Sc in next 18 ch. Work 3 sc in the last ch (this turns the corner). Now work along the other side of the starting chain: Sc in next 18 ch. Work 2 sc in the very first ch you made (completing the oval). (42 sc). Place a stitch marker in the first sc of the round.
- Round 2: 2 sc in first st (inc). Sc in next 18 sts. 2 sc in next 3 sts (3 incs for the curve). Sc in next 18 sts. 2 sc in next 2 sts (2 incs for the curve). (48 sc). SM.
- Round 3: [1 sc, 2 sc in next st] (inc) once. Sc in next 18 sts. [1 sc, 2 sc in next st] (inc) 3 times. Sc in next 18 sts. [1 sc, 2 sc in next st] (inc) 2 times. (54 sc). SM.
- Continue increasing in this manner for 2-3 more rounds if you want a wider base. The pattern is usually to work 1 more sc between the increases on the straight sides each round. Always end with an even number of stitches if you’re planning specific stitch patterns. For an 8-inch wide base, you might do 5-6 increase rounds.
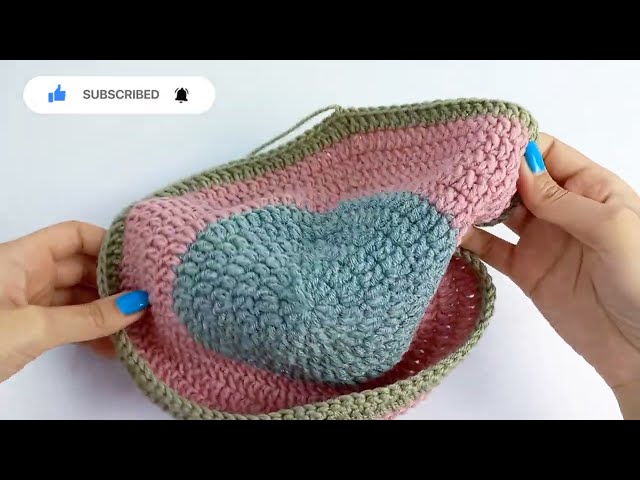
Phase 2: The Body (Working in the Round)
This creates the main walls of your bag.
- Establishing Sides: After completing your base rounds, you’ll transition to working straight up.
- Round 1 (Transition Round): Ch 1. Sc in the BLO (Back Loop Only) of each stitch around. Sl st to first sc. (This creates a neat edge and helps the base stand up).
- Round 2 onwards: Ch 1. Sc in both loops of each stitch around. Sl st to first sc.
- Or, for a seamless look, you can work in continuous spirals without joining. Simply move your stitch marker up at the start of each new spiral.
- Building Height: Continue working rounds of sc (or your chosen dense stitch like hdc, moss stitch, etc.) until your bag reaches the desired height, leaving enough room for the handles.
- For a 14-inch tall bag, you might work approximately 40-50 rounds of sc.
Phase 3: The Handles (Integrated Crocheted Handles)
This method creates sturdy handles directly from the bag body.
- Handle Placement (Example for a 12″ wide bag with 54 sts total at top):
- Work sc until you are at the point where you want the start of your first handle. (e.g., sc 10 sts for front panel).
- First Handle Opening: Ch 20 (for handle length). Sk next 10 sts (for handle opening).
- Work sc across the remaining stitches of the back panel. (e.g., sc 14 sts).
- Second Handle Opening: Ch 20. Sk next 10 sts.
- Work sc across the remaining stitches of the front panel. (e.g., sc 10 sts). Sl st to first sc.
- Handle Reinforcement (Next 2-3 Rounds):
- Next Round: Ch 1. Sc in each sc around. When you reach a chain handle, sc evenly into each chain of the handle (e.g., 1 sc per chain). Continue sc around the bag body. Sl st to first sc.
- Repeat this round 1-2 more times to strengthen the handles and integrate them smoothly into the bag.
- Final Edging (Optional): You can work a round of sl st or crab stitch around the top edge of the bag and handles for a very neat finish.

Phase 4: Finishing Touches & Optional Lining
- Weave in All Ends: Use your tapestry needle to meticulously weave in every loose yarn tail, hiding them securely within the stitches on the inside of the bag.
- Blocking (Recommended):
- Gently hand wash your bag (or machine wash if yarn allows).
- Gently squeeze out excess water (do not wring).
- Stuff the bag loosely with plastic bags or towels to help it hold its shape while drying. Lay flat to air dry completely. Blocking helps to set the stitches and give your bag a polished look.
- Lining (Highly Recommended for Most Bags!):
- Why Line? A lining prevents your bag from stretching out, keeps small items from slipping through stitches, and gives your bag a professional, finished look.
- Material: Choose a sturdy fabric like cotton, canvas, or a repurposed denim.
- Cutting: Lay your crocheted bag flat. Measure the width and height of the finished bag. Cut your fabric panels slightly larger than the bag dimensions (e.g., add 0.5-1 inch seam allowance on all sides). For an oval bottom, cut an oval fabric piece matching your bag’s base size.
- Sewing:
- Sew the side seams of your fabric panels to create the bag body.
- Attach the bottom fabric piece to the body.
- Press down the top edge of the lining by about 1 inch to create a hem.
- Insert the fabric lining into your crocheted bag.
- Hand-stitch: Carefully hand-stitch the top edge of the lining to the inside top edge of your crocheted bag using a matching thread and a whip stitch or slip stitch, ensuring your stitches are invisible from the outside.
- Machine Stitch (if comfortable): You can machine stitch the top of the lining if you prefer, but hand-stitching generally gives a cleaner finish.
- Attaching Closures (Optional):
- Magnetic Snap: Sew securely onto the inside top edge of the bag (and through the lining if you’ve added it).
- Zipper: This is more advanced. You’ll need to sew the zipper to the top edge of the lining, then secure the lining into the bag.
- Toggles/Buttons: Create a simple chain loop on one side and sew a button/toggle on the other.
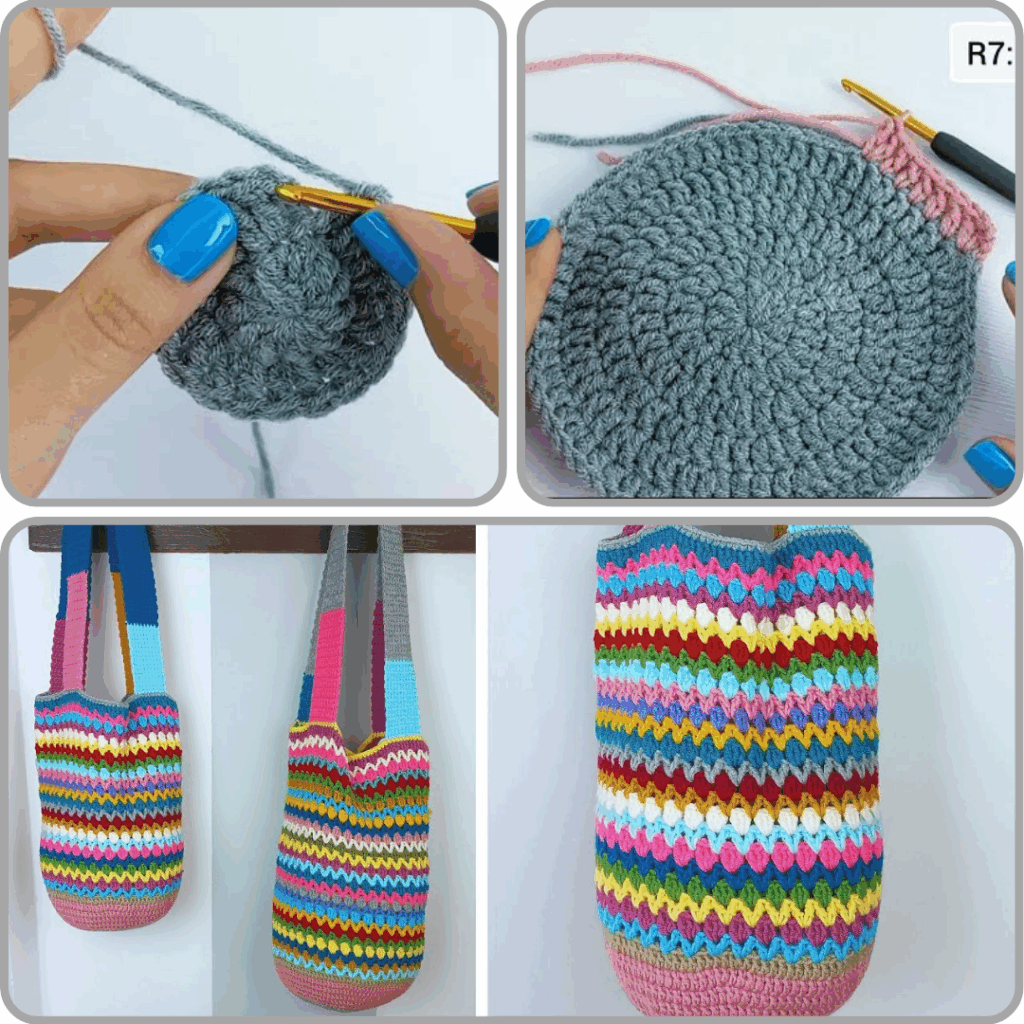
Explore Different Bag Styles:
Once you master the basics, endless possibilities await!
- Market Bag: Focus on open mesh stitches and strong handles.
- Clutch: Knit flat, fold, and seam sides. Often features highly textured stitches or surface embellishments, with a magnetic snap or zipper closure.
- Backpack: More complex, often involves shaping for the main compartment, a flap, and adjustable straps.
- Crossbody/Shoulder Bag: Medium size, typically has one long strap.
- Granny Square Bag: Modular construction where you crochet individual granny squares (or other motifs) and then join them.
- Basket Bag: Uses very stiff yarn (jute, macrame cord) and simple stitches to create a rigid structure.
Tips for Crochet Bag Success:
- Swatch for Density: Even for a bag, a swatch helps you determine if your fabric is dense enough to hold its shape and prevent items from falling out.
- Stitch Markers Are Your Allies: Especially when working in the round and for marking increases/decreases.
- Consistent Tension: This will make your bag look professional and hold its shape better.
- Follow a Pattern: While this guide provides principles, using a specific, well-written pattern (from Ravelry, Etsy, or yarn company websites) for your desired bag style is highly recommended, especially for shaping and stitch counts.
- Don’t Fear the Lining: It truly elevates a handmade bag from “crafty” to “professional.”
Care Instructions for Your Crocheted Bag:
- Depends on Yarn:
- Cotton/Acrylic: Hand wash in cool water with mild detergent, or gentle cycle in a mesh bag.
- Raffia/Jute/Specialty Yarns: Spot clean only. Do not immerse in water.
- Air Dry Flat: Always lay your bag flat on a clean towel or drying rack. Stuff loosely to maintain shape. Avoid direct sunlight or high heat.
video tutorial :
Crocheting a bag is a rewarding journey that blends creativity with practicality. With each stitch, you’re not just making an accessory; you’re crafting a unique extension of your style, ready to accompany you on all your adventures! Happy hooking!