 by
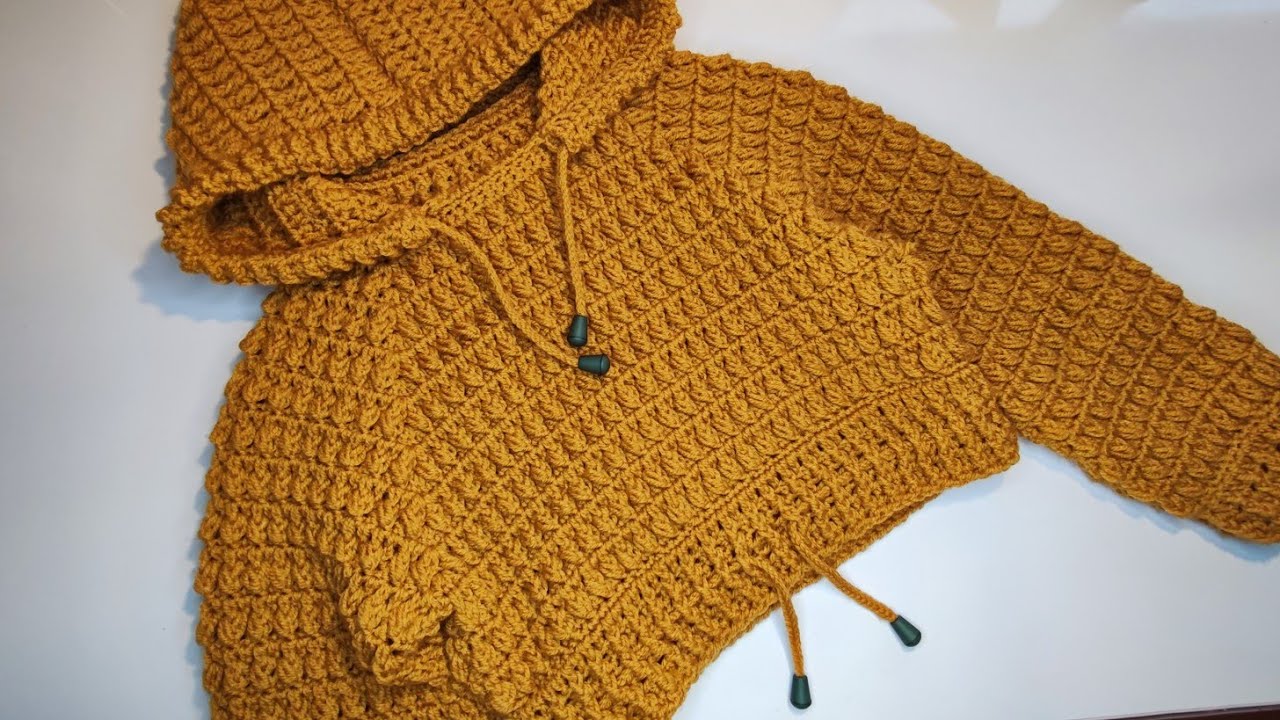
by November arrives with a unique palette – crisp air, skies painted in charcoal and sapphire, trees ablaze with rust and gold, and the earthy scent of fallen leaves. It’s a month that ushers in true coziness, and for children, it’s a call for snug, warm layers that invite outdoor adventures and comfortable indoor play. What better way to embrace this season than by crocheting a “November” hooded sweater – a garment designed to capture the essence of autumn’s tender embrace and winter’s coming chill?
This detailed guide will lead you through the creative process of crafting a hooded sweater that embodies the spirit of November, ensuring it’s both a practical staple for your child’s wardrobe and a cherished symbol of handmade warmth.
Embracing the “November” Aesthetic
The key to this sweater lies in translating the sensory experience of November into stitches and yarn:
- The Color Palette: Earth & Jewel Tones:
- Think of the deep, rich hues of the changing landscape: forest green, cranberry red, sapphire blue, deep plum, and earthy rusts, burnt oranges, and mustard yellows.
- Ground these with classic charcoal grey, rich brown, warm cream, or oatmeal, like the muted tones of late autumn light.
- Strategy: You can opt for a single, profound shade, combine a few complementary solids in color-blocked sections, or choose a variegated yarn that artfully blends several of these “November” tones for a natural, painterly effect.
- Yarn Texture & Weight: Cozy & Substantial:
- Weight: For genuine warmth, prioritize medium to heavier weights. Worsted (Category 4) is a versatile choice, offering a good balance of warmth and stitch definition. For extra bulk and speed, Bulky (Category 5) yarn creates a wonderfully chunky, cozy fabric.
- Fiber:
- Wool (especially Superwash Merino or Alpaca blends): Excellent for warmth, breathability, and natural elasticity. Superwash wool is a practical choice as it’s machine washable – a huge plus for children’s clothes.
- High-Quality Acrylic (Anti-pilling): Modern acrylics are incredibly soft, hypoallergenic, durable, and very easy to care for, making them a fantastic option for active children. Look for “anti-pilling” varieties for longevity.
- Wool/Acrylic Blends: Offer the best of both worlds – the warmth and drape of natural fibers combined with the durability and washability of acrylic.
- Avoid: Open, lacy, or very airy stitch patterns that would let cold air through. The aim is a dense, warm fabric.
- Stitch Patterns: Dense & Textured:
- Focus on stitches that build a solid, insulating fabric:
- Half Double Crochet (HDC) or Double Crochet (DC): Work up quickly and create a satisfyingly dense base.
- Moss Stitch (Linen Stitch): Creates a beautiful, subtle, woven texture that feels wonderfully squishy and warm.
- Puff Stitch or Bobble Stitch: Interspersed strategically, these add warmth, texture, and a charming nubbly surface, reminiscent of berries or acorns.
- Post Stitches (FPDC/BPDC): Can be used to create defined vertical lines, subtle ribbing, or a textured panel without the complexity of full cables.
- Focus on stitches that build a solid, insulating fabric:
- Design Elements (Subtle Nods):
- Ribbing: Essential for cuffs, hem, and the neckline to ensure a snug fit that keeps the cold out.
- Color Blocking: Simple blocks of rich “November” colors.
- Optional Applique: A small crocheted leaf, an acorn, or a tiny mushroom could add a touch of whimsy and thematic charm.
- Buttons: If your design includes a front opening, choose buttons made from wood, natural coconut shell, or simple, earthy-toned plastic for a cohesive look.
Why a Hooded Sweater for Children?
This garment is a perfect blend of practicality and undeniable cuteness for any child:
- Ultimate Warmth & Protection: The hood is a game-changer, providing extra warmth for the head and neck without the fuss of a separate hat. Paired with the cozy body, it offers comprehensive insulation against the November chill.
- Practicality for Play: Ideal for layering over long-sleeved tops for outdoor play, school, or trips to the park. It’s easy to pull on and off as temperatures fluctuate.
- Comfort & Durability: Crocheted garments are wonderfully flexible, allowing active children to move freely. With the right yarn, they are also incredibly durable and can withstand the rigors of childhood adventures.
- Adorable Style: There’s an inherent charm to a child bundled up in a warm, handmade hooded sweater.
Planning Your “November” Hooded Sweater Project
Careful planning is the secret to a well-fitting and satisfying finished garment:
- Size Selection: Children’s sizes vary by age (e.g., 2T, 4T, Kids’ S/M/L). Always refer to a reliable pattern’s sizing chart and, if possible, take actual measurements of the child’s chest circumference, arm length, overall body length, and head circumference (for the hood) to choose the best fit. Remember children grow quickly, so consider sizing up slightly for longevity.
- Pattern Selection (Essential!):You absolutely need a well-written crochet pattern designed specifically for a child’s hooded sweater. Look for patterns that include:
- Clear schematics and detailed sizing information.
- Precise stitch counts and row numbers.
- Comprehensive instructions for all stitch patterns, especially the hood shaping.
- Crucially, gauge information (and how to achieve it).
- Photos of the finished garment to guide your vision.
- Construction Method:
- Top-Down (Seamless Raglan): This is highly popular for children’s garments as it minimizes seaming. You start at the neckline and work downwards, increasing stitches along “raglan lines” to form the shoulders and body in one piece. Sleeves are then worked directly from the armholes.
- Bottom-Up (Panels): You crochet the back panel, two front panels (if it has an opening), and two sleeves flat. These individual pieces are then meticulously seamed together. This method often produces a more structured look.
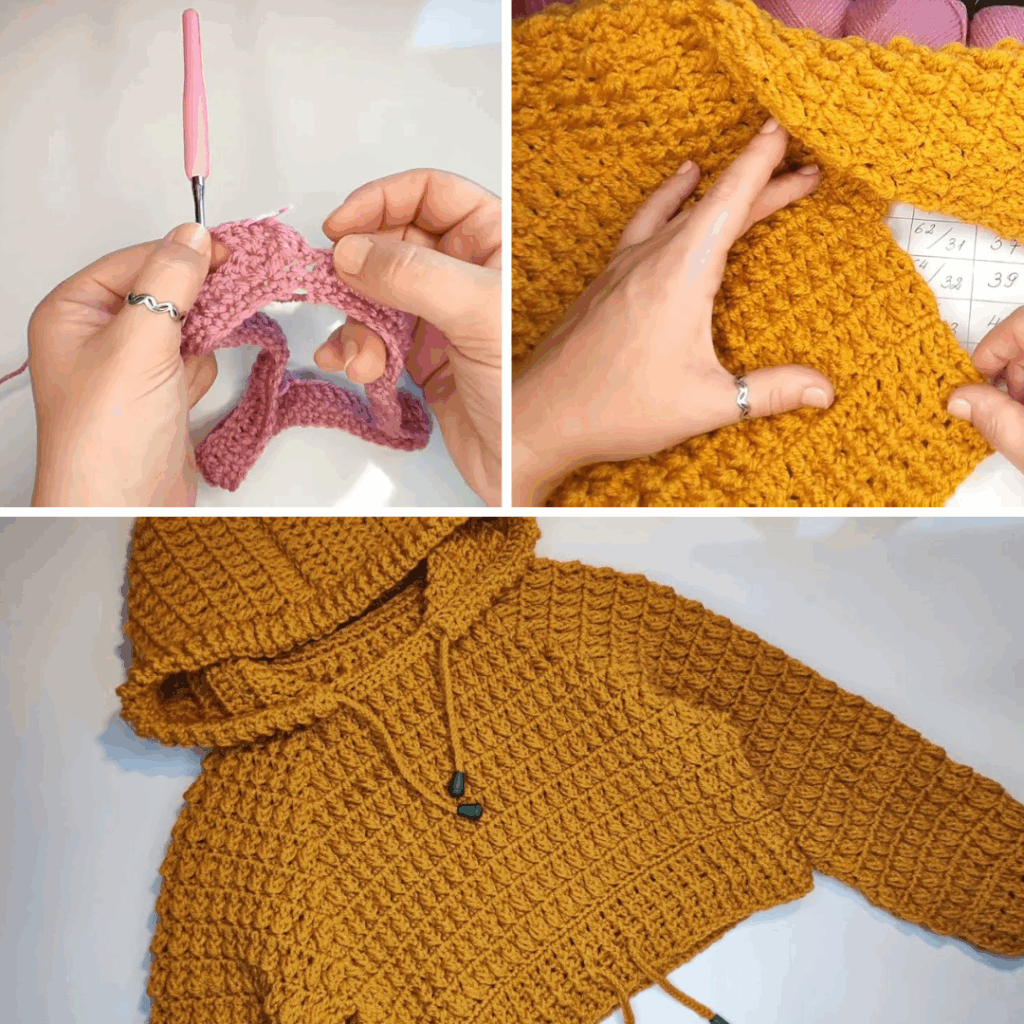
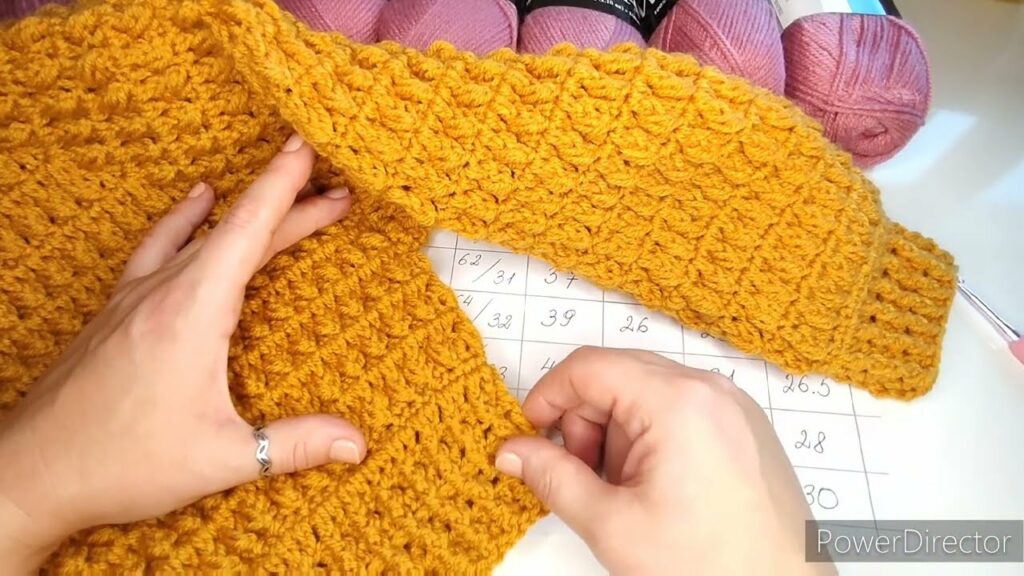
- The Gauge Swatch (Non-Negotiable!): This step is paramount for any garment. Crochet a substantial swatch (e.g., 6×6 inches / 15×15 cm) using your chosen yarn and hook, working in the main stitch pattern of the sweater. Wash and block it as you would the finished garment, then measure it precisely. If your stitch count or row count per inch/cm doesn’t match the pattern’s gauge, adjust your hook size (go up for fewer stitches, down for more) until it does. Skipping this step is the most common reason for a garment not fitting correctly.
Materials You’ll Need
- Yarn: (As detailed in the “November Aesthetic” section) The quantity will vary significantly based on the chosen size and yarn weight, but typically 4-10 skeins.
- Crochet Hook: The size recommended in your pattern, adjusted based on your gauge swatch results.
- Notions:
- Stitch Markers: Absolutely essential for marking raglan lines (if top-down), the beginning of rounds/rows, and key shaping points on the hood.
- Tapestry Needle: For neatly weaving in yarn ends and seaming (if applicable).
- Scissors: Sharp and dedicated for yarn.
- Measuring Tape: For checking gauge and garment dimensions as you progress.
- Buttons (if applicable): If your sweater has a front opening or a partial placket at the neckline.
- Blocking Mats and T-pins: Highly recommended for shaping and finishing your garment beautifully.
Understanding Hooded Sweater Construction (General Approaches)
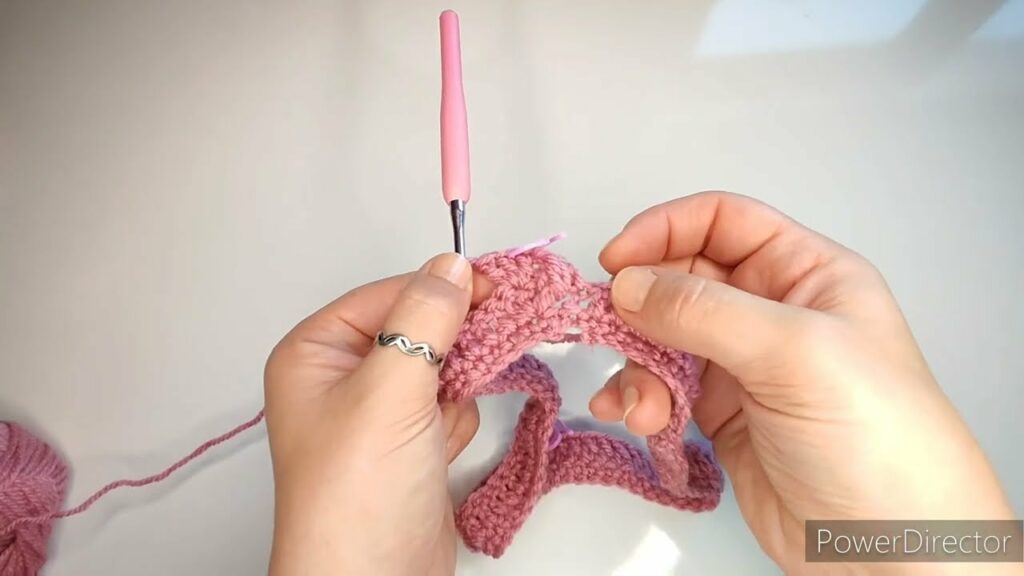
Video Tutorial Part 1 ;
Most crocheted hooded sweaters follow these common steps:
- The Body:
- Top-Down: You begin with the yoke (the upper part of the sweater over the shoulders and chest) and work downwards, dividing for the body and sleeves after the yoke is complete.
- Panel Construction: The front and back main body pieces are crocheted flat as separate panels.
- The Sleeves: These can be worked in the round directly from the armhole openings for a seamless finish, or crocheted flat as separate pieces and then seamed.
- The Hood: The hood is typically crocheted as a separate piece. It can be two flat panels seamed together at the top and back, or one large piece folded and seamed. It is then attached to the neckline of the finished sweater body.
- Ribbing: Cuffs, the bottom hem of the sweater, and often the neckline are finished with a crocheted ribbing. This provides a neat, snug fit and a polished look.
- Optional Closures: While many children’s hooded sweaters are pullovers, some patterns include a partial button placket at the neckline for easier dressing, or a full front opening with buttons.
Key Crochet Techniques for a Hooded Sweater
You’ll utilize a combination of fundamental and garment-specific techniques:
- Basic Stitches: Chain (ch), Slip Stitch (sl st), Single Crochet (sc), Half Double Crochet (hdc), Double Crochet (dc). These are the building blocks for the main fabric.
- Increasing & Decreasing: Essential for shaping the body, sleeves (tapering), neckline (scoop/shaping), and the hood’s curve and depth.
- Working in Rows & Rounds: Depending on your chosen construction method.
- Ribbing Techniques:
- Front Post/Back Post Stitches (FPDC/BPDC or FPHDC/BPHDC): These stitches create a wonderfully elastic, raised ribbing that mimics knitting, perfect for cuffs, hems, and necklines.
- Single Crochet in the Back Loop Only (SC in BLO): This simpler method creates a dense, horizontal ribbing with a clean edge.
- Seaming (if applicable): For assembling panels, the Mattress Stitch is highly recommended as it creates an almost invisible, flat, and very sturdy join.
- Attaching the Hood: Once the hood is complete, it’s carefully aligned and securely sewn or slip-stitched onto the neckline of the sweater body.
- Buttonholes (if applicable): If your sweater has a front opening or placket, you’ll need to create simple chain-space buttonholes within the band.

Step-by-Step Flow (Conceptual Guide – assuming Top-Down Raglan)
- Prepare: Choose your pattern, make that gauge swatch, and gather all your materials.
- Crochet the Yoke: Begin at the neckline with a foundation chain. Follow your pattern’s instructions for working rows/rounds and placing increases at the “raglan lines” to form the shoulders and upper body. Use stitch markers to clearly mark these points.
- Divide for Body & Sleeves: Once the yoke reaches the correct size, you’ll chain a few stitches for the underarms, skip the stitches designated for the sleeves, and join the front and back sections to continue working the main body of the sweater.
- Crochet the Body: Continue working the body in the round (for a pullover) or in rows (if it has a full front opening) until the desired length. Finish with a ribbing band.
- Crochet the Sleeves: Join yarn at one armhole opening. Work the sleeve in the round, decreasing stitches as instructed to taper it down to the cuff. Finish with ribbing. Repeat for the second sleeve.
- Crochet the Hood: Work the hood as a separate piece, shaping it with increases and decreases as the pattern directs to ensure a comfortable fit over the child’s head.
- Attach the Hood: Carefully pin the finished hood to the neckline of the sweater, ensuring it’s centered and evenly distributed. Securely seam or slip stitch the hood to the neckline.
- Finishing Touches: Weave in all remaining yarn ends meticulously with a tapestry needle. If applicable, add any front bands or button bands, create buttonholes, and sew on buttons.
- Blocking: This final, crucial step transforms your handmade garment. Gently wet or steam the finished sweater, carefully reshape it to the pattern’s exact dimensions, and pin it flat on blocking mats. Allow it to dry completely. Blocking evens out stitches, relaxes the fabric, enhances drape, and sets the final shape, giving your “November” hooded sweater a truly professional finish.
Tips for Success
- Read the Pattern Thoroughly: Understand the entire construction process before you begin, especially for a garment.
- Don’t Skip the Gauge Swatch! (Seriously, it’s the most common reason for garments not fitting).
- Use Plenty of Stitch Markers: They are invaluable for tracking increases, raglan lines, and the beginning/end of rounds/rows.
- Count Your Stitches Regularly: This simple habit helps catch errors early, saving you frustration later.
- Patience is a Virtue: Garments take time. Embrace the process and enjoy the creation.
- Watch Tutorials: If any stitch or technique is new to you, search for video tutorials online.
- Weave in Ends Meticulously: Loose ends can unravel, especially on active children’s clothes.
- Blocking is Your Best Friend: It truly elevates a handmade garment.
Video Tutorial Part 2 ;
Caring for Your “November” Hooded Sweater
To ensure your cozy creation remains beautiful and well-loved:
- Follow Yarn Label Instructions: Always refer to the specific care instructions on your yarn skein.
- Gentle Washing: Hand wash in cool water with a mild, baby-safe detergent, or use your machine’s gentle/delicate cycle (for superwash wools or acrylics).
- Reshape and Dry Flat: Gently squeeze out excess water (do not wring!). Reshape the sweater to its original dimensions and lay it flat on a clean towel or a mesh drying rack to air dry completely.
- Avoid Hanging: Never hang a wet crocheted garment, as it will stretch and distort under its own weight.
- Avoid Harsh Chemicals/High Heat: These can damage fibers and alter the garment’s shape.
Crocheting a “November” hooded sweater for a child is a deeply rewarding project. It’s a blend of practical warmth, adorable style, and the profound satisfaction of creating a garment infused with the spirit of the season. As you work each stitch, imagine your little one snuggled inside, warm and cherished, a testament to your craft and the love you’ve woven into every fiber. Sources