by
by There’s a unique, bittersweet beauty to the “end of summer.” It’s a time when the sun still casts a warm, golden glow, but the air carries a new crispness, a gentle whisper of change. Days remain long, yet the evenings hint at cozy gatherings and the nearing embrace of autumn. To capture this ephemeral magic for a beloved little one, a handmade “End of Summer” baby cardigan is the perfect project – a garment that offers comfort, style, and a touch of seasonal nostalgia.
This detailed guide will help you weave the essence of late summer into a practical, adorable, and truly special baby cardigan.
Embracing the “End of Summer” Aesthetic
The key to this cardigan’s charm lies in its ability to evoke the specific mood of the season’s close:
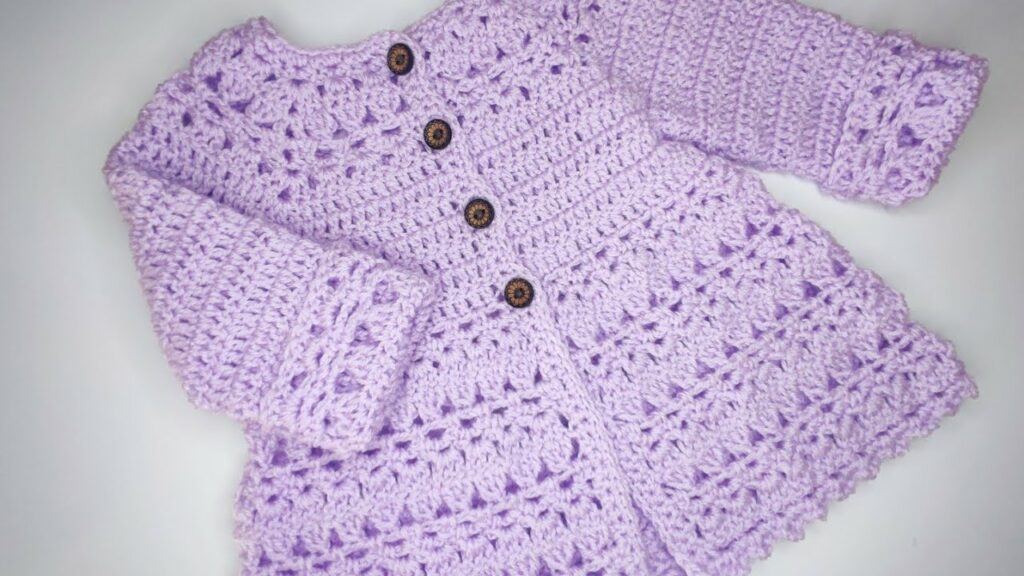
- The Color Palette: Fading Daylight & Harvest Hues
- Think of the sky as day turns to dusk: soft greys, dusty blues, muted lavenders, creamy off-whites.
- Imagine the last burst of vibrant flowers and ripening fruits: subtle golds, muted oranges, terracotta, dusty rose, deep burgundies, rich plums.
- Reflect the changing foliage: fading greens, deep teals, olive, and mossy browns.
- Strategy: You can use a single, nuanced color, or blend these tones through gentle stripes, subtle color blocking, or even a variegated yarn that naturally transitions between these hues. The goal is depth without harshness.
- Yarn Texture & Weight: Transitional Comfort
- Weight: The cardigan should be a transitional piece – not too heavy for a cool summer evening, but warm enough for an early autumn chill. DK (Double Knitting / Category 3) or Sport (Category 2) weights are ideal. Worsted (Category 4) can also work for a slightly cozier, chunkier feel.
- Fiber: Choose yarns that are breathable yet offer warmth:
- Superwash Merino Wool: Excellent for softness, warmth, and easy care (a must for baby items).
- Cotton/Linen Blends: Offer a beautiful drape and natural breathability, perfect for fluctuating temperatures.
- Bamboo Blends: Incredibly soft with a lovely sheen, ideal for a delicate touch.
- Soft Acrylics: Hypoallergenic, durable, and highly washable, many modern acrylics mimic natural fibers beautifully.
- Texture: Look for yarns with a slight natural slub, a gentle fuzz, or a smooth, even ply. Avoid anything overly bulky, stiff, or overly fuzzy, as these can obscure stitch definition and might not feel as comfortable against baby skin.
- Stitch Patterns: Subtle & Supple
- Focus on stitches that create a relaxed, comfortable fabric with subtle texture, rather than heavy, dense cables or very open lace.
- Suggestions: Moss stitch (linen stitch), half double crochet (hdc) in the back loop only for a gentle rib, simple V-stitch, or a delicate shell stitch pattern. These stitches provide visual interest without being overwhelming.
- Drape: Choose stitches that create a supple, draped fabric, allowing the cardigan to fall naturally and comfortably over the baby’s clothing.
- Design & Embellishments: A Nod to Nature
- Keep the overall design clean and classic, allowing the chosen color and texture to speak for themselves.
- Embellishments: Small, thoughtfully placed details can enhance the “End of Summer” theme:
- Tiny crocheted leaf motifs subtly attached.
- A delicate embroidered flower.
- Wooden buttons, pearlized buttons, or buttons in earthy, muted tones.
- A simple ribbon tie in a complementary “end of summer” shade.
Why a Baby Cardigan? Practicality Meets Poignancy
The cardigan is an undisputed wardrobe essential, especially for babies during transitional seasons:
- The Perfect Layer: Weather at the end of summer can be unpredictable – warm afternoons turning into chilly evenings. A cardigan is easy to put on and take off as temperatures fluctuate.
- Comfort & Warmth: It provides just the right amount of warmth without overheating, making it ideal for layering over onesies, t-shirts, or dresses.
- Versatile Style: A well-designed cardigan can be dressed up for a family gathering or dressed down for a playdate in the park.
- Ease of Dressing: The front opening of a cardigan makes it incredibly easy to dress and undress a baby, a huge plus for parents!
Planning Your Project: The Blueprint for Success
- Size Selection: Refer to a standard baby clothing size chart (e.g., Newborn, 0-3 months, 3-6 months, etc.). If possible, measure the baby’s chest circumference for the best fit.
- Choose a Pattern: While this guide provides general advice, it is highly recommended to select a well-written crochet pattern specifically for a baby cardigan. Look for patterns that match your chosen construction method (top-down or seamed), skill level, and desired aesthetic.
- Construction Method:
- Top-Down (Seamless Raglan): This is a very popular method for baby garments. You start at the neckline and work downwards, increasing stitches along specific “raglan lines” to form the shoulders and sleeves seamlessly. No seaming required for the body/sleeves!
- Bottom-Up (Panels): You crochet the back panel, two front panels, and two sleeves separately, then seam them together. This method can be easier for managing stitch patterns.
- Gauge is Gold: This cannot be stressed enough! Always make a gauge swatch using your chosen yarn and hook, working in the pattern stitch. Measure your swatch carefully to ensure it matches the pattern’s gauge. An incorrect gauge will result in a cardigan that’s too big, too small, or has the wrong drape.
Materials You’ll Need
- Yarn: (As discussed in “End of Summer Aesthetic”) Choose 1-3 skeins depending on size and yarn weight.
- Crochet Hook: The size recommended by your pattern, adjusted based on your gauge swatch.
- Notions:
- Stitch Markers: Essential for marking raglan lines (for top-down), beginning of rows/rounds, and important points.
- Tapestry Needle: For weaving in yarn ends and seaming (if applicable).
- Scissors: Sharp and dedicated for yarn.
- Measuring Tape: For checking gauge and garment dimensions.
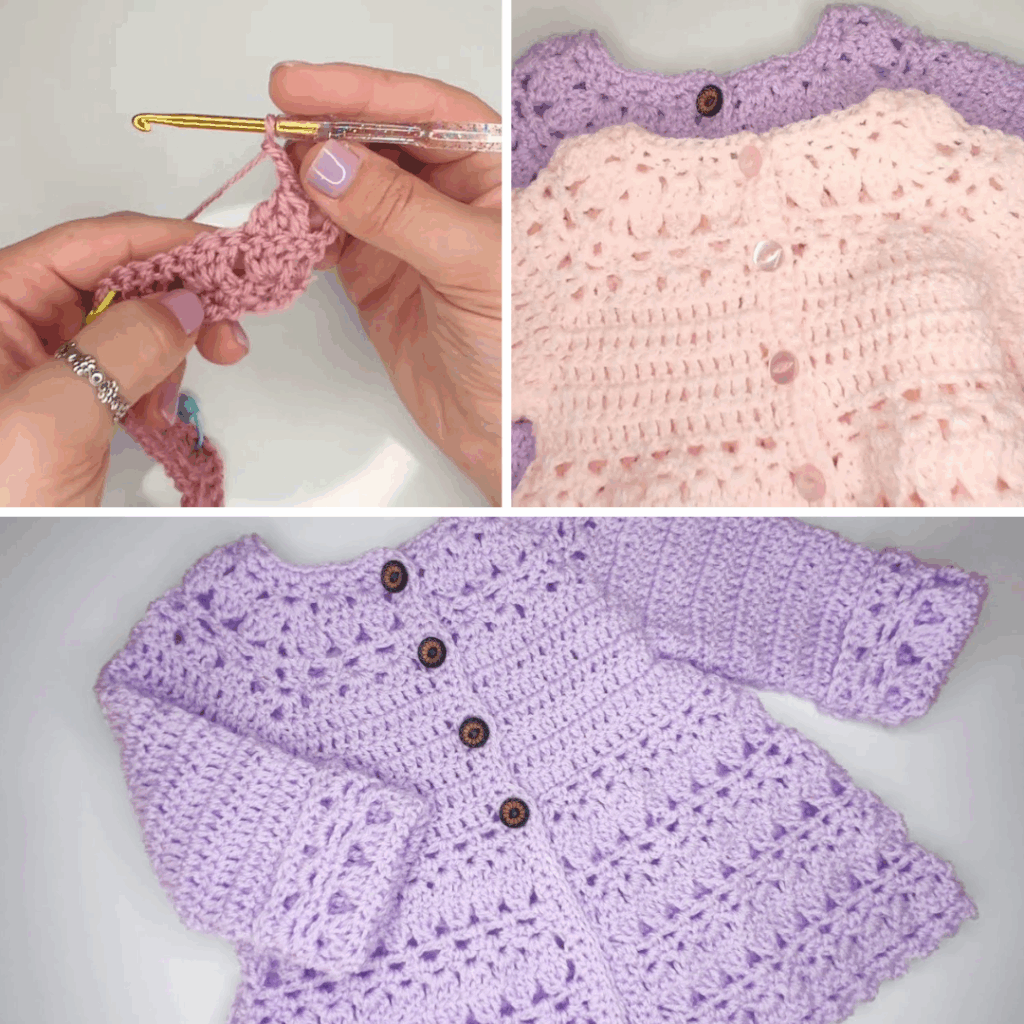
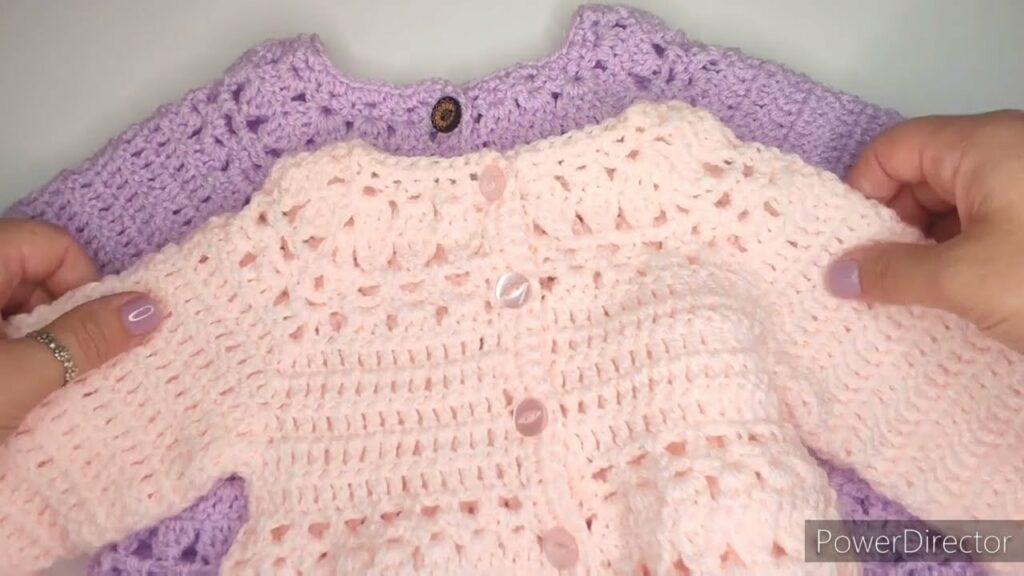
- Buttons: 3-5 small buttons that complement your chosen color palette (e.g., wooden, mother-of-pearl, or simple plastic in an earthy tone).
Video Tutorial Part 1 ;
Key Crochet Techniques for Your Baby Cardigan
You’ll utilize a combination of fundamental and garment-specific techniques:
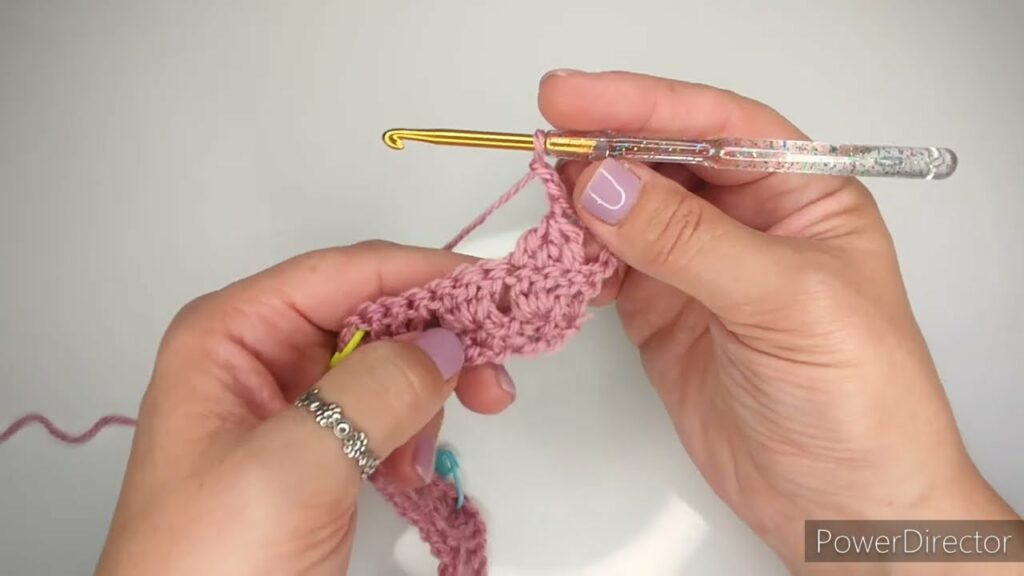
- Basic Stitches: Chain (ch), Slip Stitch (sl st), Single Crochet (sc), Half Double Crochet (hdc), Double Crochet (dc). These will form the core fabric.
- Increasing & Decreasing: Essential for shaping the cardigan (e.g., increasing along raglan lines, decreasing for sleeve tapering).
- Working in Rows/Rounds: Depending on your chosen construction method.
- Buttonholes: Learn how to create simple chain-space buttonholes within your front band.
- Ribbing: For cuffs, bottom hem, and the front opening band. This creates a neat, stretchy, and professional finish. Common methods include working Single Crochet in the Back Loop Only (SC in BLO) for a dense, horizontal rib, or Front Post/Back Post Double Crochet (FPDC/BPDC) for a more prominent, elastic rib.
- Edging/Borders: A simple row of single crochet or a decorative shell border can provide a neat finish around the neckline and other edges.
- Seaming (if applicable): If working in panels, the Mattress Stitch creates an almost invisible and very strong seam.
Step-by-Step Flow (Conceptual Guide for Top-Down Raglan)
- Preparation: Read your chosen pattern thoroughly. Make that gauge swatch and adjust your hook if necessary.
- Start the Yoke: Begin at the neckline with a foundation chain. Work the first few rows/rounds, placing stitch markers at the “raglan lines” (where increases will occur).
- Shape the Yoke: Continue working rows/rounds, increasing stitches at the marked raglan lines according to your pattern. This will form the shoulders and upper chest of the cardigan.
- Divide for Body & Sleeves: Once the yoke reaches the appropriate size (check pattern measurements), you’ll typically chain a few stitches for the underarm, skip the sleeve stitches, and then join the front and back sections to continue working the body of the cardigan.
- Crochet the Body: Continue working in rows (for the open front of a cardigan) until the body reaches the desired length.
- Work the Sleeves: Join yarn at the armhole opening. Work the sleeves in rounds, decreasing stitches as instructed to taper them down to the cuffs.
- Add Front Bands & Neckline: Crochet the front bands along the cardigan’s opening, incorporating the buttonholes on one side. Add a neat border around the neckline.
- Hem & Cuffs: Finish the bottom hem and sleeve cuffs with your chosen ribbing or edging pattern.
- Finishing Touches: Weave in all your yarn ends meticulously using a tapestry needle. Sew on your chosen buttons securely.
- Blocking: This final step is crucial. Gently wet or steam the finished cardigan, carefully shape it to the pattern’s dimensions, and pin it flat. Allow it to dry completely. Blocking relaxes the stitches, evens out the fabric, and gives your cardigan a polished, professional look.
Tips for Success
- Read the Pattern Twice: Understand the overall construction before you begin.
- Stitch Markers Are Your Best Friends: Especially for raglan increases, row beginnings, and dividing points.
- Count Your Stitches: Regularly count your stitches at the end of each row/round to catch errors early.
- Don’t Fear the Frogging: If you spot a mistake, it’s always better to unravel (or “frog”) back to the error and fix it than to continue.
- Weave in Ends Meticulously: Loose ends can unravel a garment, especially one for an active baby.
- Invest in Good Yarn: The quality of your yarn will significantly impact the comfort, drape, and longevity of the cardigan.
Caring for Your Crocheted Cardigan
To ensure your “End of Summer” cardigan remains beautiful and cozy:
- Follow Yarn Label Instructions: Always refer to the specific care instructions on your yarn skein.
- Gentle Washing: Hand wash in cool water with a mild, baby-safe detergent, or use a machine’s gentle/delicate cycle if the yarn is machine washable.
- Reshape and Dry Flat: Gently squeeze out excess water (do not wring!). Reshape the cardigan to its original dimensions and lay it flat on a clean towel or a mesh drying rack to air dry completely.
- Avoid Hanging: Never hang a wet crocheted garment, as it will stretch and distort under its own weight.
Video Tutorial Part 2 ;
Crocheting an “End of Summer” baby cardigan is a truly rewarding endeavor. It’s a garment that speaks of changing seasons, the warmth of handmade love, and the joy of creating something beautiful and practical for a little one. As you pick up your hook, let the golden light of the fading days inspire your stitches, creating a cozy embrace ready for crisp evening air.