 by
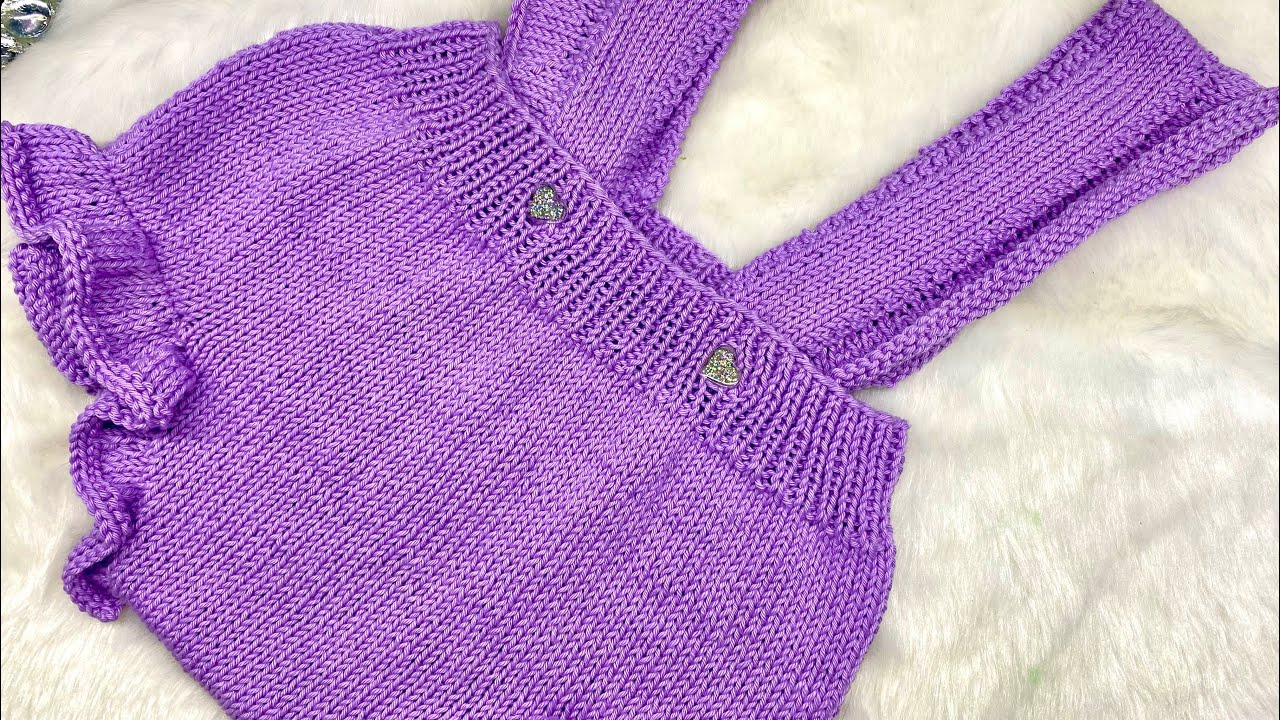
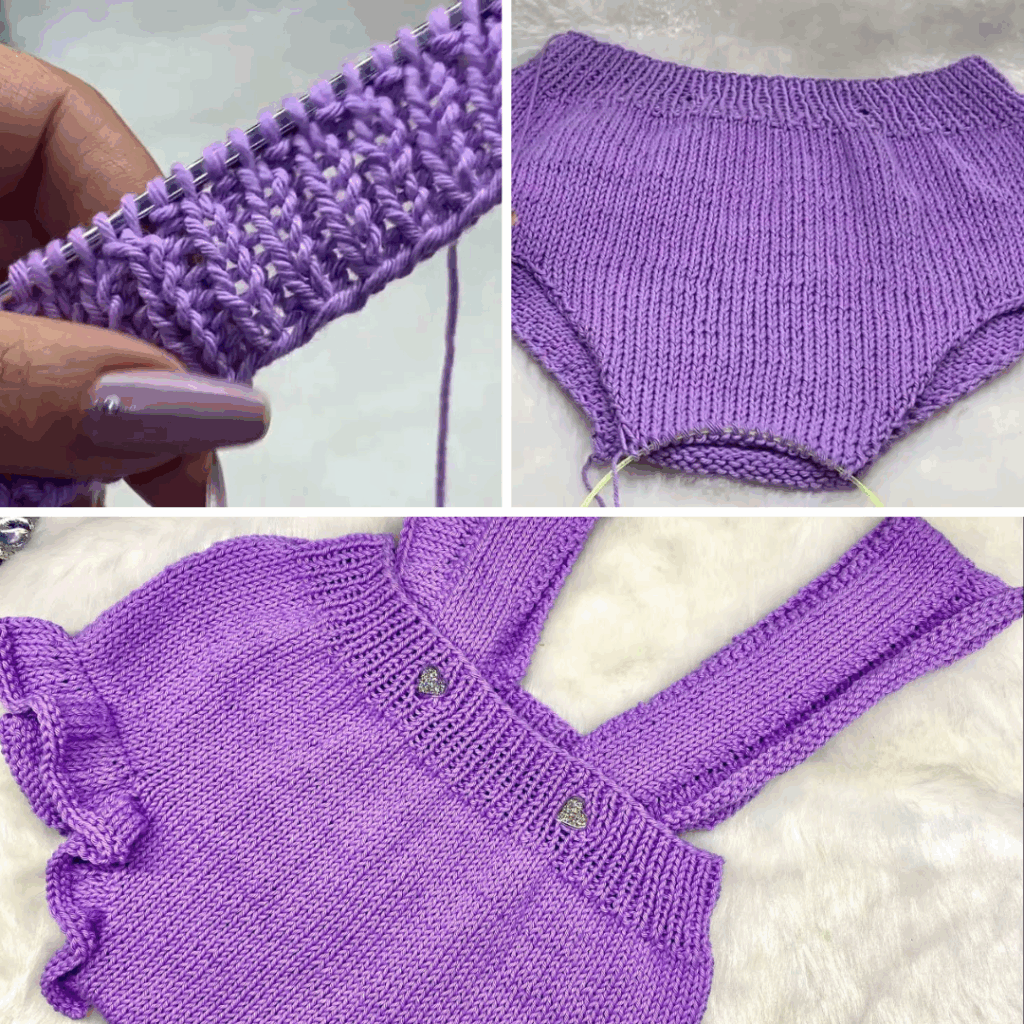
by Discover the Charm of Hand-Knitted Diaper Covers with Straps
A hand-knitted diaper cover with straps is a delightful and practical garment for any baby. It combines the cozy warmth of wool or cotton with the secure fit of a onesie, creating a perfect piece for layering. Often called “soakers” when made from lanolized wool, these covers provide an extra layer of protection and comfort over a diaper. The addition of straps ensures the cover stays in place, no matter how much your little one wiggles and plays.
Knitting a diaper cover is a rewarding project for a knitter of any skill level. It’s small, works up quickly, and allows you to practice essential techniques while creating a cherished handmade item. This detailed guide will walk you through the process, from choosing your materials to adding those adorable, functional straps.
Why Knit a Diaper Cover with Straps?
- Secure Fit: The straps prevent the cover from riding down, ensuring the baby’s tummy and back stay warm.
- Layering Essential: It’s perfect for wearing over disposable or cloth diapers, under a dress or tunic, or on its own with a little tee.
- Customizable: You have complete control over the color, yarn, and fit, allowing you to create a piece that is truly unique.
- Quick & Satisfying: Being a small garment, it works up much faster than a sweater, offering the satisfaction of a finished project in a short time.
- Excellent Skill Builder: It’s a great way to practice knitting in the round, shaping with increases and decreases, and creating buttonholes.
Designing Your Diaper Cover: Key Considerations
Before you cast on, think about a few design choices that will make your diaper cover perfect.
1. Yarn Choice: Comfort and Functionality First
The yarn is the most important factor for a garment worn so close to the skin.
- For Absorbency & Water-Resistance (Wool):
- 100% Wool or Merino Wool: When treated with lanolin after knitting, these fibers become naturally water-resistant and breathable, making them excellent “soakers” for use with cloth diapers. Look for soft, non-scratchy wool.
- For Softness & Easy Care (Cotton/Blends):
- Cotton or Cotton Blends: Soft, breathable, and machine washable, cotton is ideal for a lightweight, all-purpose cover. It’s perfect for layering or for warmer weather.
- Baby Acrylics: These are incredibly soft, hypoallergenic, and designed for frequent washing and drying, making them a practical choice.
- Weight: DK (Category 3) or Worsted (Category 4) are popular choices. They create a fabric that is thick enough for coverage but not too bulky.
2. Construction Method: Flat or In the Round?
Diaper covers are typically knit in one of two ways.
- In the Round (Seamless):
- You start at the waist with a circular needle and knit in a continuous spiral.
- You work down, shaping with increases for the hips and bum, and then work a back and front flap for the closure.
- Pros: No seaming required, which is a huge bonus!
- Flat (Seamed):
- You knit a large rectangular piece, shaping it with decreases for the leg openings.
- You then seam the piece together at the back and/or crotch.
- Pros: Can be done on straight needles and is very straightforward for beginners.
3. Sizing & Fit: The Right Measurements
Accurate sizing is key to a comfortable fit.
- Head Circumference is NOT relevant! Instead, you’ll need:
- Waist/Hip Circumference: A measurement around the baby’s tummy, where you want the waistband to sit.
- Crotch Depth: A measurement from the baby’s waist down through their legs to their crotch, and back up to the waist.
- Pattern Sizing: Use a pattern that is sized by age (e.g., 0-3 months, 6-12 months) and check the pattern’s finished dimensions to compare with your measurements.
Essential Materials You’ll Need
- Yarn: Your chosen yarn (see above) in a baby-friendly color.
- Knitting Needles:
- For in-the-round construction, you’ll need circular needles (16-inch is a common length) or double-pointed needles (DPNs) for the leg openings.
- For flat construction, a pair of straight needles.
- Check your pattern and yarn label for the recommended needle size.
- Stitch Markers: Crucial for marking the beginning of a round or for placing increases.
- Tapestry Needle (Yarn Needle): For weaving in ends and seaming.
- Scissors.
- Buttons: Two or three buttons for the straps.
- Measuring Tape: Essential for checking your gauge and dimensions as you knit.
The Construction Journey: A Step-by-Step Guide
This guide outlines a common top-down, in-the-round construction for a seamless diaper cover.
Step 1: The Gauge Swatch (Do Not Skip!)
Before you begin, knit a swatch (at least 4×4 inches / 10×10 cm) in your chosen yarn and stitch pattern. Wash and block your swatch! Measure your stitches and rows per inch. Adjust your needle size until your gauge matches your pattern’s recommendation. This step ensures the cover will fit!
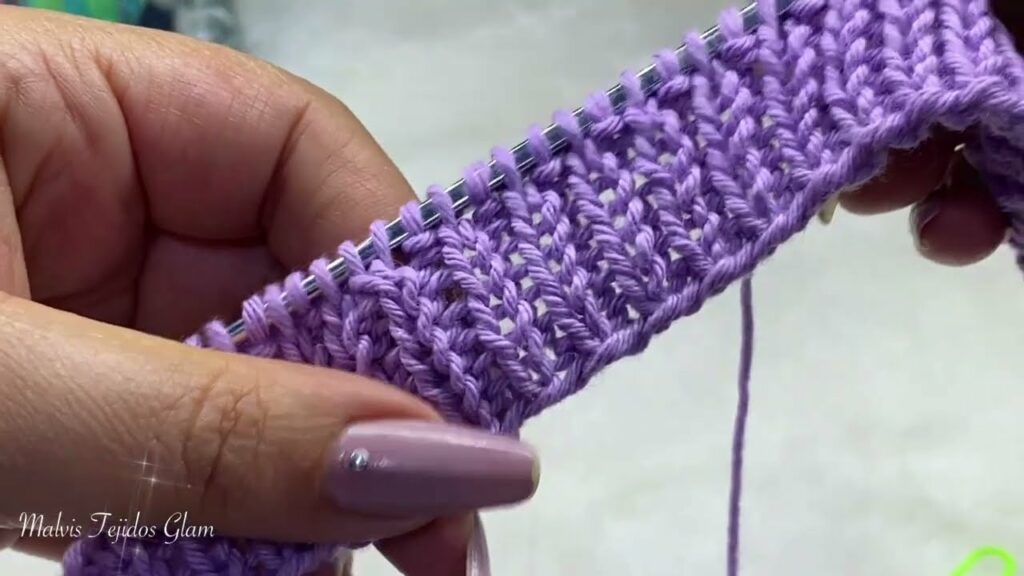
Step 2: Knit the Waistband
Cast on the required number of stitches and join in the round. Work in a stretchy stitch like 1×1 ribbing (K1, P1) for a few inches to create a comfortable, elastic waistband.
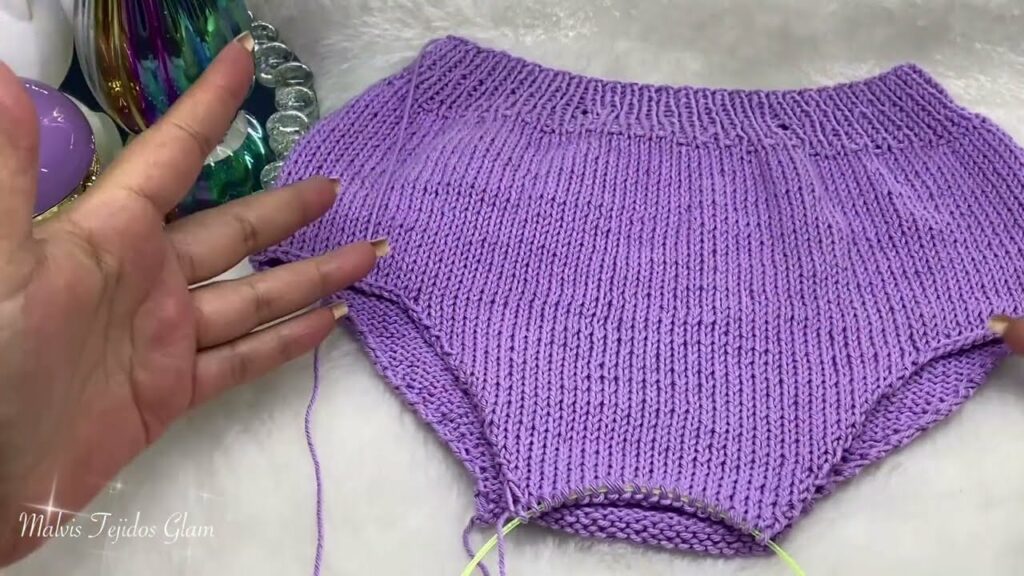
Step 3: Shape the Body
Transition to your main stitch pattern (e.g., Stockinette) and work a few rounds straight. Then, begin increasing stitches evenly in each round to shape the hips and make room for the bum. You will likely continue increasing until the body measures the correct depth to the crotch.
Step 4: Divide for the Legs
This is where the work splits. You will stop knitting in the round and begin working back and forth in rows to create two separate flaps (front and back) that will later connect at the crotch.
Step 5: Finish the Legs and Create Straps
- Leg Openings: At the end of the flap, you can finish the leg openings with a simple border of ribbing or single crochet to prevent the edges from rolling.
- Create Straps: From the top corner of the back flap, pick up stitches to create the straps. You will work back and forth in a narrow band for each strap, making it long enough to reach the front waistband. At the end of each strap, bind off and create a buttonhole (a simple yarn over and knit/purl two together) for your button.
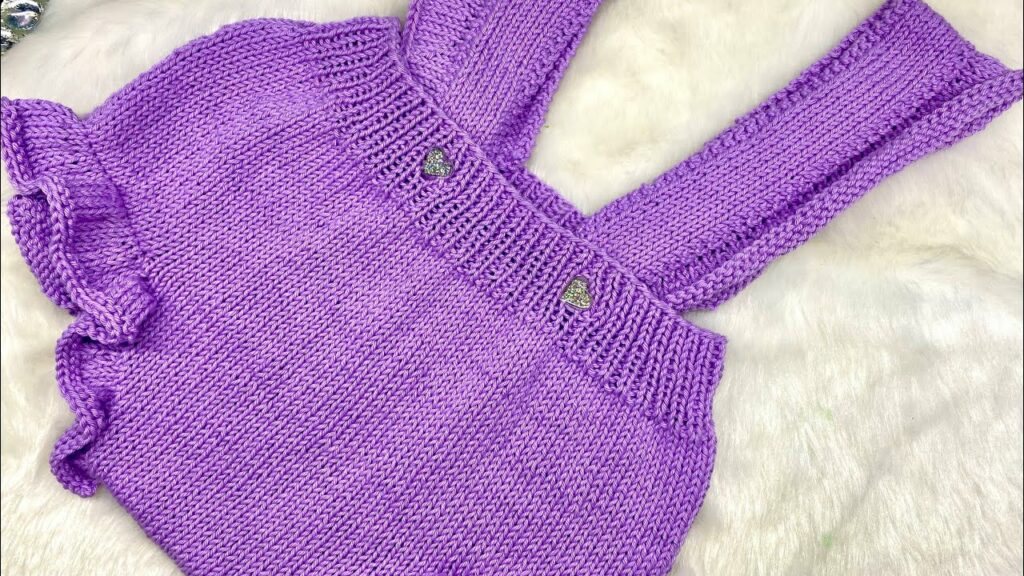
Step 6: Finish the Diaper Cover
- Weave in All Ends: Use your tapestry needle to securely hide every yarn tail.
- Add Buttons: Sew two or three buttons onto the front waistband, aligned with your buttonholes.
- Blocking: Wash and block your finished diaper cover according to your yarn’s care instructions. This will even out your stitches and set the final shape.
Tips for a Cute and Successful Diaper Cover
- Measure as You Go: Since babies grow quickly, check your measurements frequently to ensure you’re on track.
- Make it Adjustable: A great feature is making the straps a little longer and adding multiple buttonholes on the straps or the waistband for an adjustable fit.
- Lanolize Wool for Waterproofing: If you used wool, consider treating it with a lanolin soak after knitting. This makes it water-resistant and breathable, perfect for a cloth diaper system.
- Keep it Simple: For your first time, stick with a simple yarn and a basic stitch pattern. The cuteness comes from the fit and the buttons!
Knitting a diaper cover with straps is a truly special project. It’s a wonderful way to create a practical, handmade garment filled with love. Enjoy the process of stitching something so charming and useful for the little one in your life!
Video Tutorial :