 by
by Cozy Steps: A Step-by-Step Guide to Crocheting Slippers 🧶
There’s nothing quite like slipping your feet into a pair of warm, handmade slippers. Crocheted slippers are the ultimate cozy project, offering comfort, warmth, and a wonderful way to use up leftover yarn. While they may seem complex, many slipper patterns are incredibly straightforward, making them a perfect project for a beginner looking to create their first wearable item.
This detailed, step-by-step guide will walk you through the process of crocheting a simple, yet stylish pair of slippers. We’ll focus on a beginner-friendly design that starts with a flat sole and builds up to the foot, ensuring a great fit and a satisfying result.

1. Planning Your Slippers: Key Decisions
A little planning goes a long way to ensure a comfortable fit and a beautiful finished product.
- Choose Your Yarn: The yarn you choose will determine the slippers’ durability and warmth.
- For Warmth & Durability: A worsted (Category 4) or bulky (Category 5) weight yarn is excellent. Wool or wool blends are great for warmth and structure, while a sturdy acrylic is perfect for washability.
- For Softness: A chenille or plush yarn can create a wonderfully soft and luxurious slipper.
- Tip: Use a sturdy, plied yarn that won’t pill easily.
- Choose Your Hook Size: Check your yarn label for the recommended hook size. You might want to go down a size to create a denser fabric, which is perfect for slippers as it makes them sturdier and warmer.
- Choose Your Stitch Pattern: Simple stitches are best for this project.
- Single Crochet (sc): Creates a dense, durable fabric that’s great for the sole.
- Half Double Crochet (hdc) or Double Crochet (dc): Works up faster and is great for the upper part of the slipper.
2. Essential Materials and Tools
Gather your supplies before you begin to ensure a smooth crafting process.
- Yarn: About 1-2 skeins, depending on your size and yarn weight.
- Crochet Hook: A size that matches your yarn and desired tension.
- Stitch Markers: Very helpful for marking the beginning of rounds or key stitches.
- Tapestry Needle: Essential for weaving in ends and seaming.
- Scissors.
- Measuring Tape: Crucial for measuring your foot and the slipper dimensions.
- Non-Slip Fabric (Optional): A small piece of leather, suede, or a non-slip fabric for the bottom to prevent slipping.
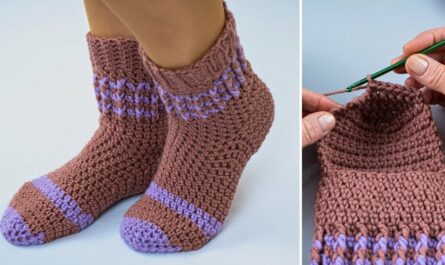
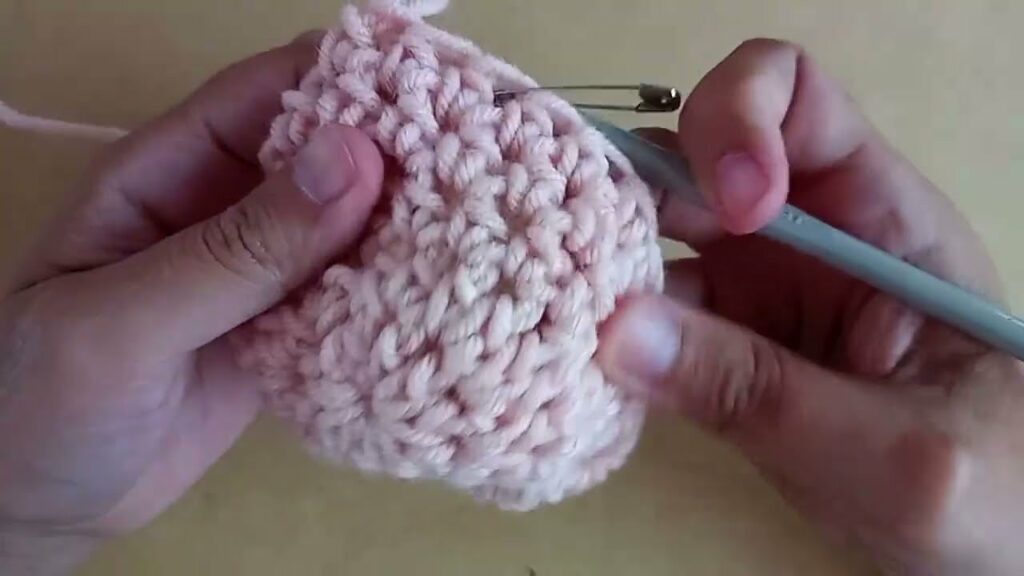
3. The Construction Journey: Step-by-Step
This guide follows the “sole-up” construction method, which is easy to size and fit.
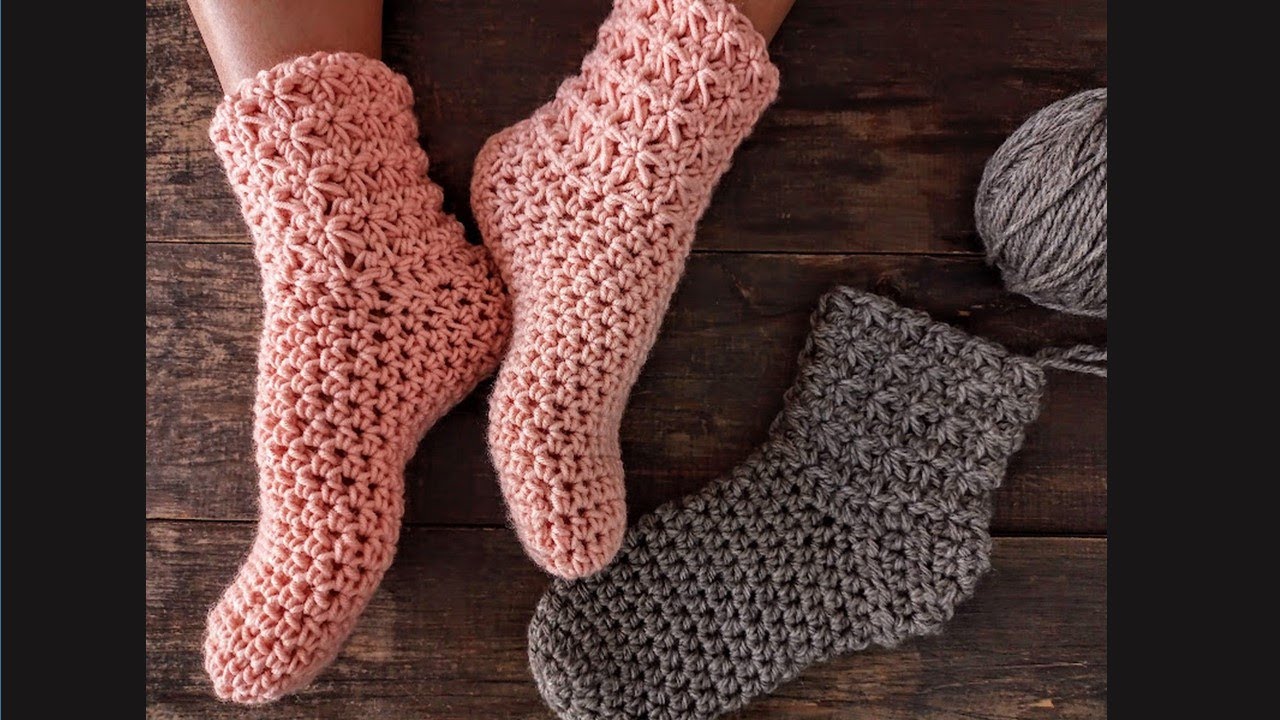
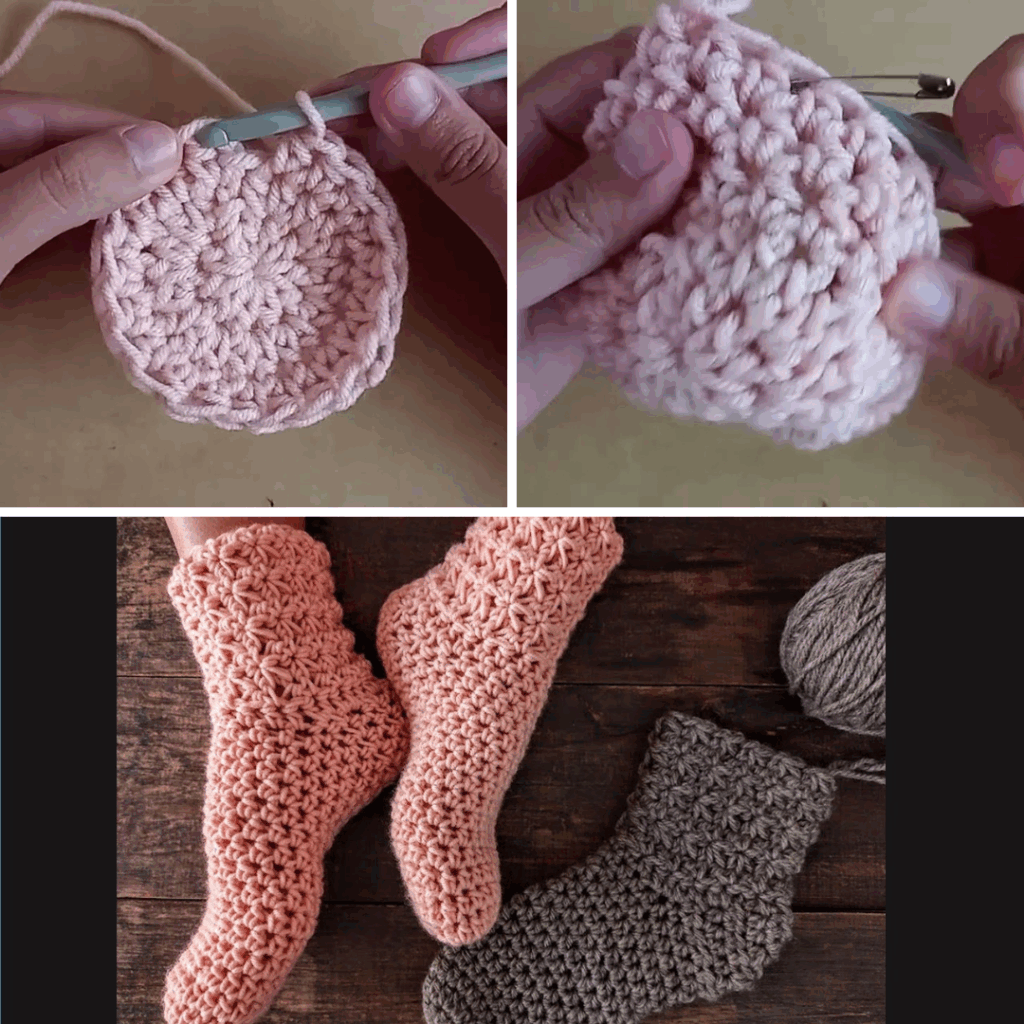
Step 1: The Sole (The Foundation of Your Slipper)
The sole is crocheted in an oval shape, like the bottom of your foot.
- Measure Your Foot: Measure the length of your foot from heel to toe. This measurement will determine the length of your starting chain.
- Chain: Chain a length that is about 1 to 2 inches shorter than your foot measurement (the stitches will add length).
- Round 1: Work a row of stitches (e.g., hdc) down one side of the chain, then work several increases into the last chain to turn the corner. Continue working down the other side of the chain, then increase at the end to create a symmetrical oval. Join with a slip stitch.
- Increase Rounds: For the next few rounds, you will work increases at the curves of the oval (the toe and heel) to gradually widen the sole. Continue until the sole is about the same width as the widest part of your foot.
- Finish: Once the sole is the right size, bind off. You have now created one flat sole.
- Repeat: Make a second identical sole for the other foot.
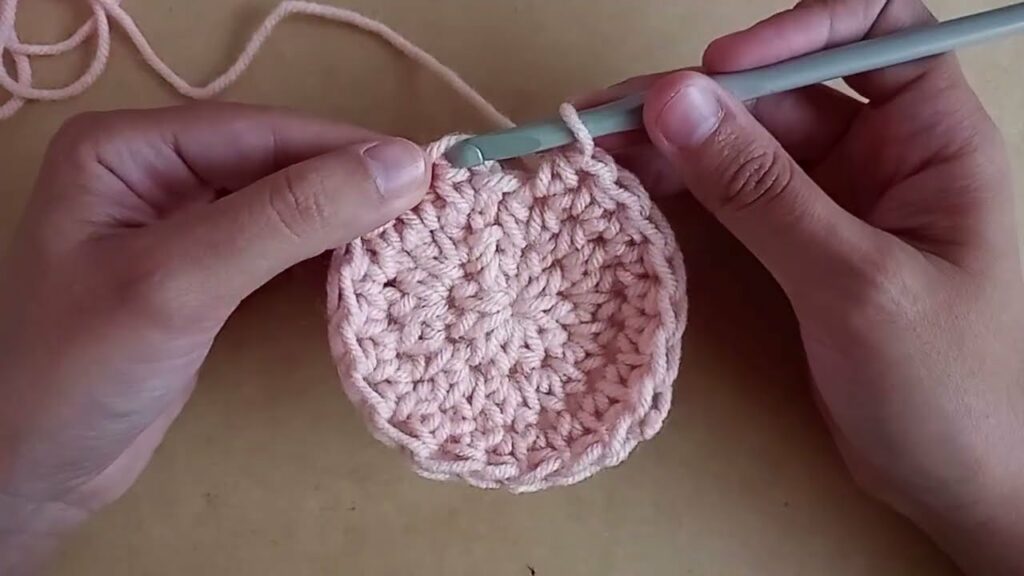
Step 2: Build the Sides of the Slipper
Now, you will work around the edge of the sole to create the sides.
- Join Yarn: Join your yarn to the edge of one of your finished soles.
- Work the First Round: Work a round of single crochet (sc) all the way around the edge of the sole. Important: Work this round into the back loop only of the stitches from the sole. This will create a ridge that makes a nice, clean edge where the sole meets the upper.
- Work Straight Up: For the next 2-3 rounds, work one stitch into every stitch around without any increases. This will start to create the wall of the slipper.
Step 3: Create the Toe and Top of the Foot
Now, you will start shaping the slipper by working back and forth to cover the top of your foot.
- Identify the Toe: Use a stitch marker to find the center of the toe section.
- Work in Rows: You will now work in rows back and forth. You’ll work a few rows of stitches across the top of your foot, from one side to the other, covering the toe.
- Decrease for a Tapered Toe (Optional): To create a rounded, tapered toe, you can work a few decreases at the beginning and end of these rows. This will gradually shape the top of the slipper.
- Check the Fit: Try the slipper on as you go to make sure it fits well over your toes.
Step 4: Finish the Slipper’s Ankle
Once the toe is covered, you will work the rest of the slipper around the ankle.
- Work in Rounds Again: After shaping the toe, you will now work in continuous rounds again, going all the way around the opening for your foot.
- Continue: Work 2-4 rounds of sc or hdc until the slipper reaches the desired height on your ankle.
- Bind Off: Finish the last round with a slip stitch and bind off.
Step 5: Finishing Touches
- Weave in Ends: Use your tapestry needle to meticulously weave in every yarn tail for a neat finish.
- Add Non-Slip Sole (Highly Recommended): Cut a piece of non-slip fabric to the shape of your sole. Use a needle and strong thread to sew it securely to the bottom of the slipper. This will prevent you from slipping on smooth floors.
You have now created a cozy and comfortable slipper! Repeat all steps to create the second slipper, and enjoy the feeling of warmth and handmade comfort. Sources
Video Tutorial :