by
by Sun-Ready & Sweet: A Detailed Guide to Crocheting a Summer Hat for a Girl ☀️
1. Planning Your Hat: Key Decisions
A bit of planning goes a long way to ensure a great fit and a beautiful finished hat.
- Choose Your Yarn: The yarn is the most important factor for a summer hat.
- For Breathability: Cotton, linen, or a cotton blend is a must. These natural fibers are breathable and won’t make the head feel too hot. Avoid wool or acrylic, which are better suited for colder weather.
- Weight: DK (Double Knitting, Category 3) or Worsted (Category 4) weight yarn is ideal. It works up quickly but isn’t too heavy.
- Color: Choose a light color to reflect the sun’s rays, or a bright, fun color to match her summer outfits.
- Choose Your Hook Size: Check your yarn label for the recommended hook size. You might use a hook that’s a bit larger than usual to create a looser, more open fabric for better airflow.
- Choose Your Stitch Pattern: A stitch with some gaps is great for airflow.
- Double Crochet (dc): A classic choice. It’s fast and creates a fabric that’s not too dense.
- Shell Stitch: Creates a pretty, lacy texture with plenty of open space.
- Granny Stitch: Clusters of double crochet create a classic, open fabric that is perfect for a summer hat.
2. Essential Materials and Tools
Gather your supplies before you begin.
- Yarn: About one skein of your chosen summer yarn.
- Crochet Hook: A size that matches your yarn and desired tension.
- Stitch Marker: Essential for marking the beginning of each round.
- Tapestry Needle: For weaving in ends.
- Scissors.
- Measuring Tape: Crucial for measuring the hat’s dimensions.
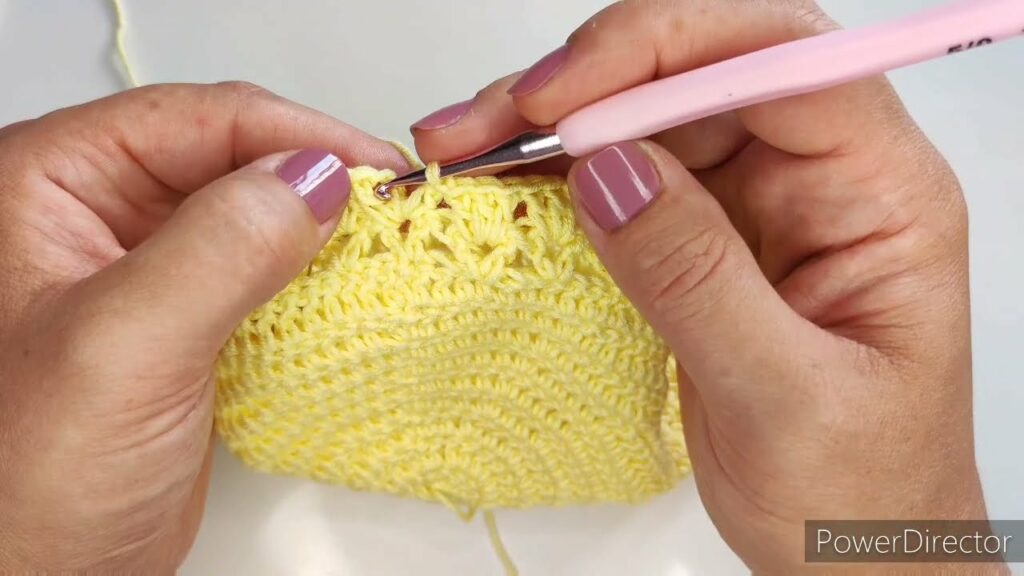
3. The Construction Journey: Step-by-Step
This guide follows the classic top-down construction method, which is easy to adjust for any head size.
Step 1: The Crown (The Top of the Hat)
The hat is worked in continuous rounds, starting from the center of the crown.
- Start with a Magic Circle: This creates a clean, tight center.
- Round 1: Work a small number of stitches (e.g., 10 double crochet) into the magic circle. Pull the circle tight and join with a slip stitch.
- Round 2: Work two stitches into every stitch from the previous round. This doubles your stitch count and begins the increase.
- Increase Rounds: In each subsequent round, you will increase your stitches evenly to create a flat circle. The pattern for a flat circle is a consistent increase:
- Round 3: Work 2 stitches into every other stitch.
- Round 4: Work 2 stitches into every third stitch.
- Round 5: Work 2 stitches into every fourth stitch, and so on.
- Use a stitch marker to keep track of the beginning of each round.
- Check the Diameter: Continue increasing until your circle measures the correct diameter for the hat’s crown. The diameter should be the circumference of the head divided by 3.14 (π). For a child, this is typically 5 to 7 inches.
Step 2: The Body (The Sides of the Hat)
Once the crown is the correct size, you will stop increasing and work straight down.
- Stop Increasing: Simply work one stitch into every stitch around for each subsequent round.
- Continue Working: The fabric will now stop expanding outwards and will start growing downwards, forming the sides of the hat.
- Check the Length: Continue working straight rounds until the hat reaches the top of the ears.
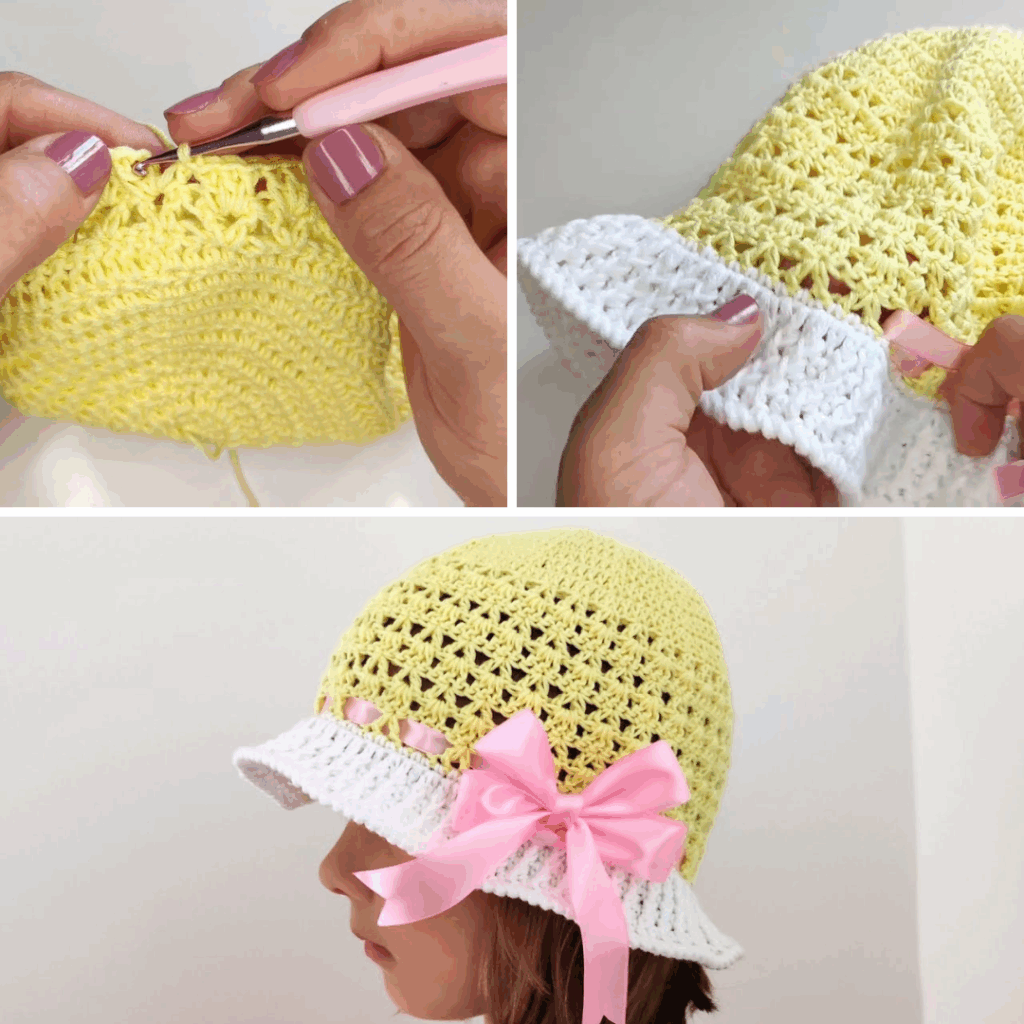
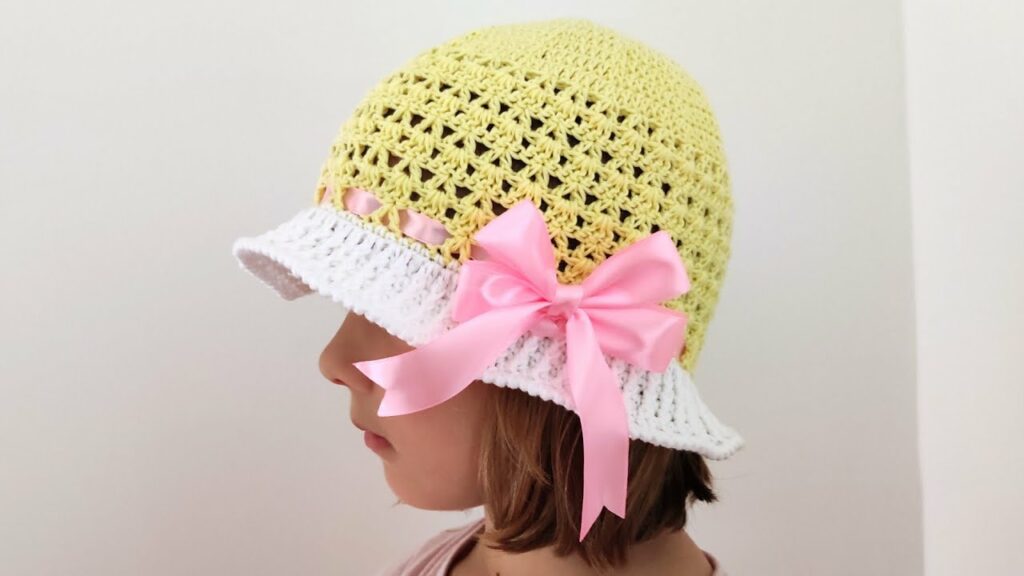
Step 3: The Brim (Sun Protection!)
Now, you will work increases again to create the hat’s brim.
- Increase for the Brim: In the first round of the brim, work two stitches into every second or third stitch around. This will cause the fabric to flare out.
- Continue: Work a few more rounds, increasing every few stitches to maintain the flare. This will create a nice, wide brim that provides excellent shade.
- Check the Brim: A brim of 2 to 4 inches is usually perfect for a child’s hat.
Step 4: Add Finishing Touches (Optional but Recommended)
- Edging: Add a pretty finishing border to the brim, such as a round of single crochet or a scalloped edge.
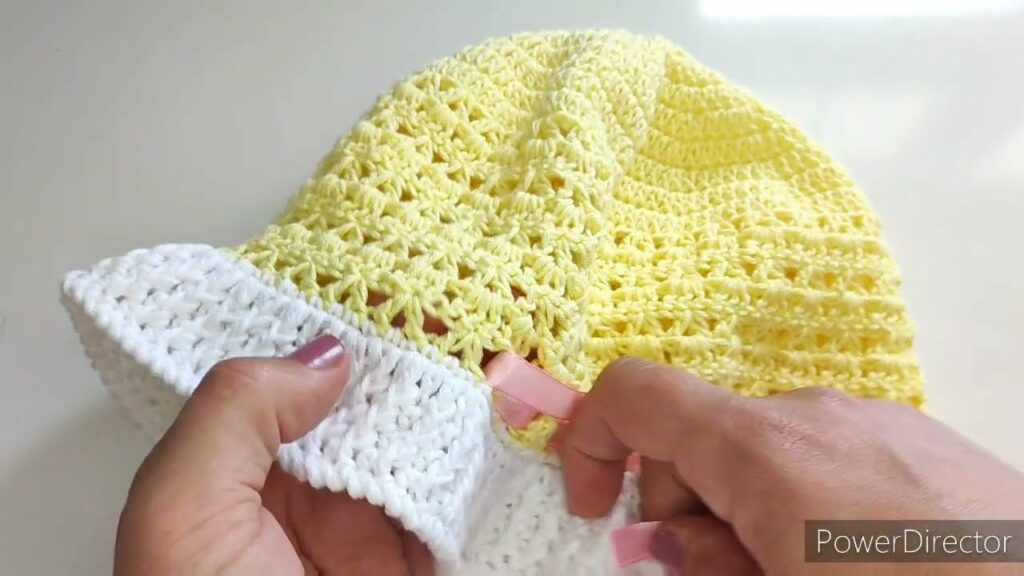
- Add a Ribbon or Bow: Thread a pretty ribbon through a row of stitches at the base of the crown, or crochet a simple bow and stitch it to the side.
- Weave in All Ends: Use your tapestry needle to meticulously hide every yarn tail on the inside of the hat for a clean, professional finish.
- Blocking: For a beautiful drape and to even out your stitches, block your finished hat. Gently soak it in cool water, lay it flat on a towel, and shape it to your desired dimensions. Let it dry completely.
You’ll be delighted by how easy it is to create this bright and cheerful summer hat. It’s a wonderful reminder that with a bit of yarn and creativity, you can stitch sunshine into any day!
Video Tutorial :