 by
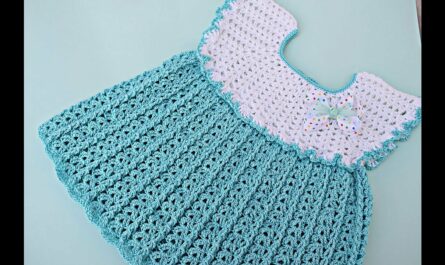
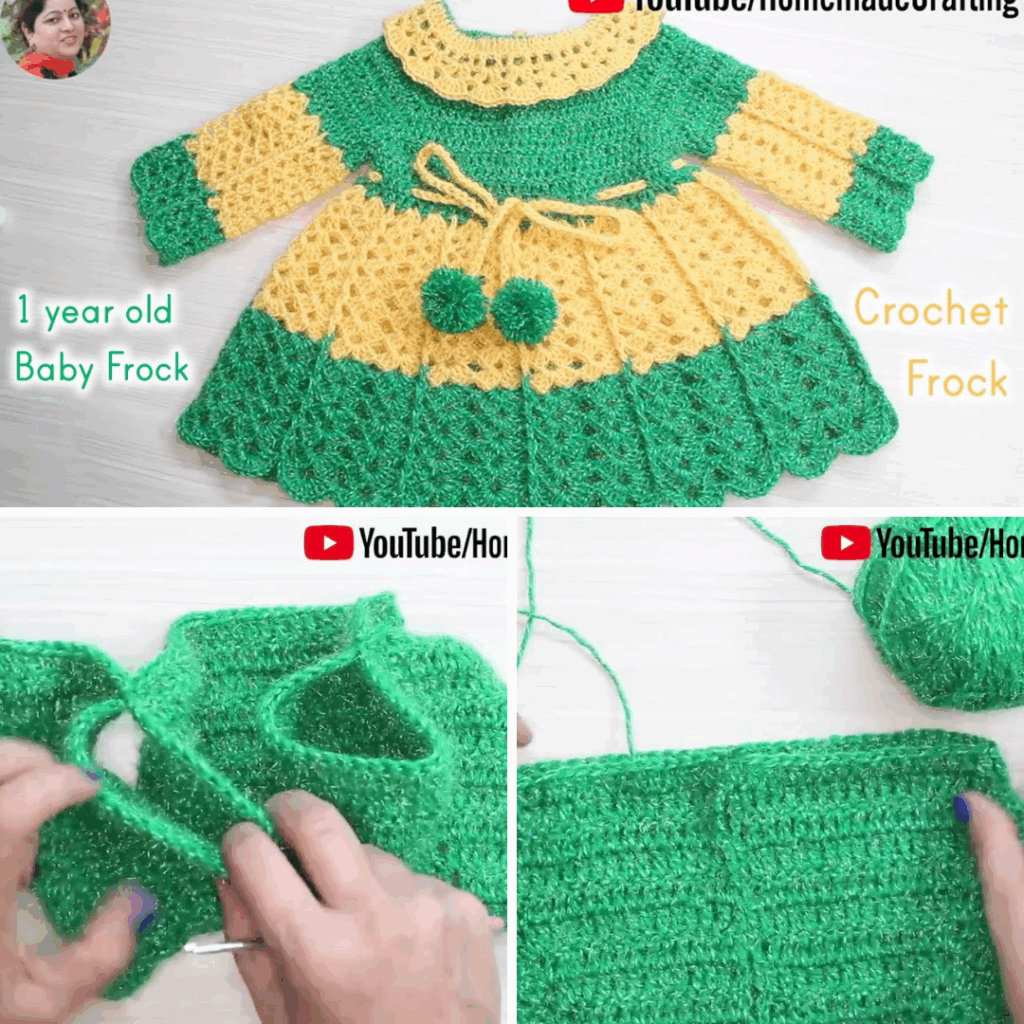
by Creating a handmade woolen frock for a 1-year-old baby is not only a beautiful and thoughtful gift but also a warm and cozy outfit for cooler weather. This tutorial walks you through the entire process, from choosing yarn to finishing touches.
Whether you’re making it for your own little one or as a handmade present, you’ll find this project both enjoyable and rewarding.
📏 Finished Size
This frock is designed to fit a 1-year-old baby:
- Chest circumference: 18–20 inches (45–50 cm)
- Length: 15–17 inches (38–43 cm)
- Sleeves (optional): Cap sleeve or long sleeve version possible
🧵 Materials Needed
| Item | Specification |
|---|---|
| Yarn | Baby wool or soft acrylic (DK or light worsted) — approx. 200–250g |
| Crochet hook | 4.0 mm (G/6) or size appropriate to yarn |
| Stitch markers | Optional, but helpful |
| Yarn needle | For weaving in ends |
| Buttons or ribbon | For back closure |
| Scissors | — |
| Measuring tape | — |
🧷 Crochet Stitches Used
You’ll need to know these basic stitches:
- Ch – Chain
- Sl st – Slip stitch
- Sc – Single crochet
- Dc – Double crochet
- Shell stitch – 5 dc in one stitch
- V-stitch – (dc, ch 1, dc) in same stitch
- Increase – 2 dc in one stitch
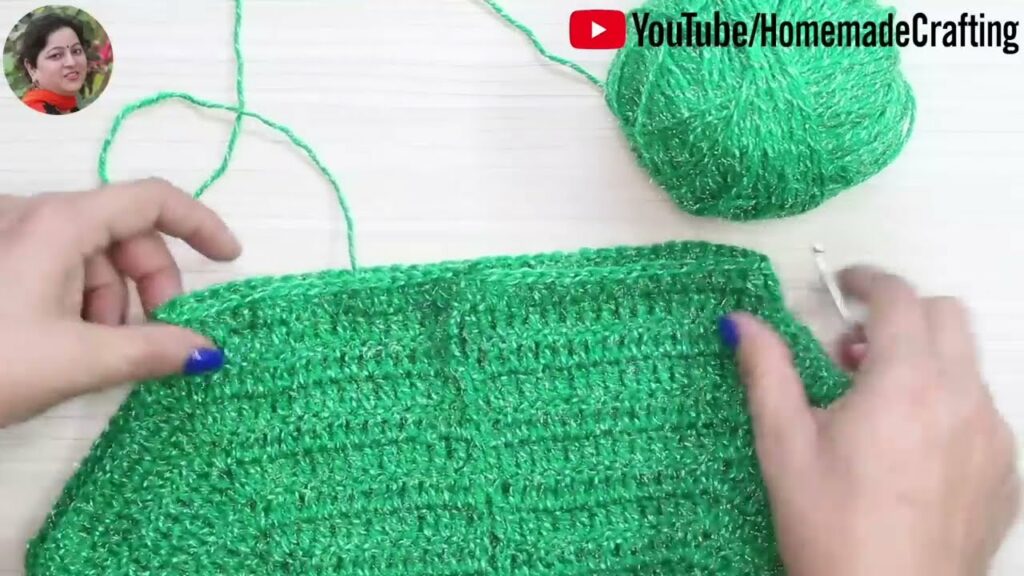
🧣 Step 1: Make the Yoke (Top of the Frock)
You will crochet from the top down, working flat at first to allow space for buttons at the back, and then joining in the round for the skirt.
✅ Instructions:
- Ch 64 — This is the foundation chain (adjust in multiples of 8 if needed).
- Row 1: Dc in 4th ch from hook, dc in each ch across. (62 dc)
- Row 2 (Increase Row): Ch 2, dc in next 6 sts, 2 dc in next st — repeat across. Turn.
- Row 3: Ch 2, dc in next 7 sts, 2 dc in next st — repeat across. Turn.
- Row 4: Ch 2, dc in next 8 sts, 2 dc in next st — repeat. Continue until you have approximately 90–100 stitches, which should fit around the chest comfortably.
💡 Use stitch markers to divide the yoke into 4 sections: front, back, and sleeves. (e.g., 25 front, 15 sleeve, 25 back, 15 sleeve)
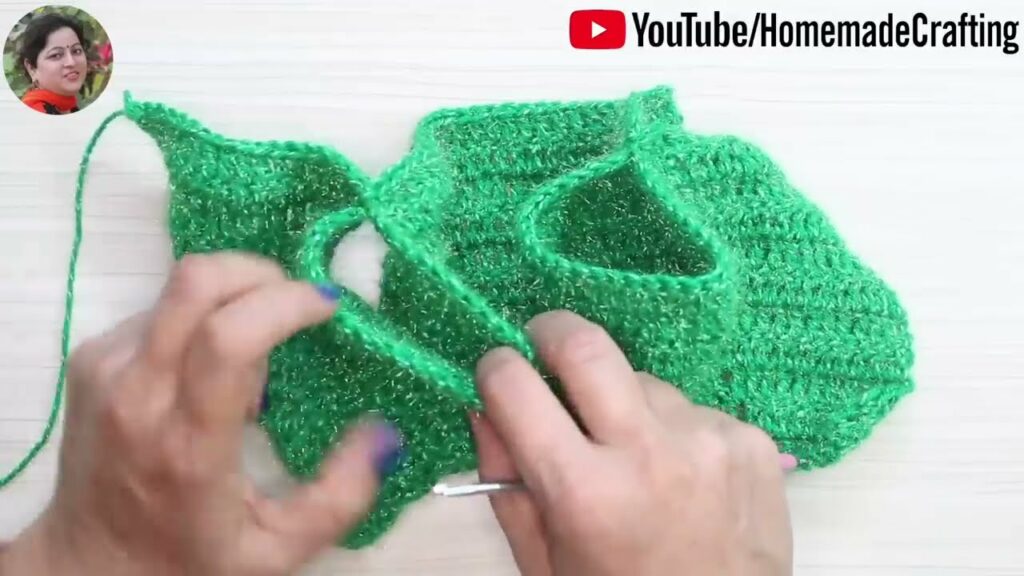
🧷 Step 2: Shape the Armholes
Now you’ll create armholes and join to start the body in the round.
✅ Instructions:
- Dc across the front section.
- Skip sleeve stitches, and ch 6 (or more if needed for underarm).
- Dc across the back section.
- Skip next sleeve, ch 6 again.
- Join with a sl st to the first dc to form a circle.
You have now created the base of the bodice.
👗 Step 3: Start the Skirt
Now you’ll work in rounds to form the skirt using a shell stitch pattern.
✅ Round 1:
- Ch 3, skip 2 sts, 5 dc in next st (shell), skip 2 sts, sc in next st — repeat around.
- Join with sl st.
✅ Round 2:
- Sl st into center of shell, ch 3, 4 dc into same st (first shell made).
- Sc in top of next shell, 5 dc in next sc — repeat.
Continue this pattern for about 20–25 rounds, or until the skirt reaches your desired length (around 10–12 inches).
💡 Optional: Add increases every 5 rounds by adding extra shells for a flared or more gathered skirt.
🧷 Step 4: Sleeves (Optional)
You can leave the dress sleeveless, add cap sleeves, or make long sleeves.
For Cap Sleeves:
- Attach yarn at underarm.
- Work 2–3 rows of sc or dc evenly around the sleeve opening.
- Fasten off and weave in ends.
For Long Sleeves:
- Join yarn under the arm.
- Work in rounds using dc or any preferred pattern.
- Decrease gradually every 3–4 rounds to taper the sleeve.
- Continue for desired length (approx. 6–7 inches).
- Add a cuff or shell edging at the end.
✨ Step 5: Edging and Finishing
Neckline:
- Work 1 round of sc, then a decorative round (picot, shell, or crab stitch).
Hemline:
- Work a scalloped edge: 5 dc in 1 st, skip 1 st, sl st in next st — repeat.
Back Opening:
- Leave 1–2 inches open at the top back.
- Attach buttons on one side and crochet small ch loops on the other.
- Or weave a satin ribbon through neckline and tie a bow.
🎀 Step 6: Final Touches
- Weave in all ends with yarn needle.
- Block the frock gently to shape it: use a steam iron held above the garment or dampen and let dry flat.
- Embellish as desired:
- Add crocheted flowers, bows, or lace
- Attach pearls or beads (safely sewn and not loose if used for babies)
💡 Tips for Best Results
- Always check the fit as you go. Babies vary in size.
- Use soft, non-irritating baby-safe yarn.
- Avoid loose embellishments (like buttons) if the baby will be unsupervised.
- Match your tension and gauge to keep the shape even.
- For gifting, pair with matching booties or a bonnet!
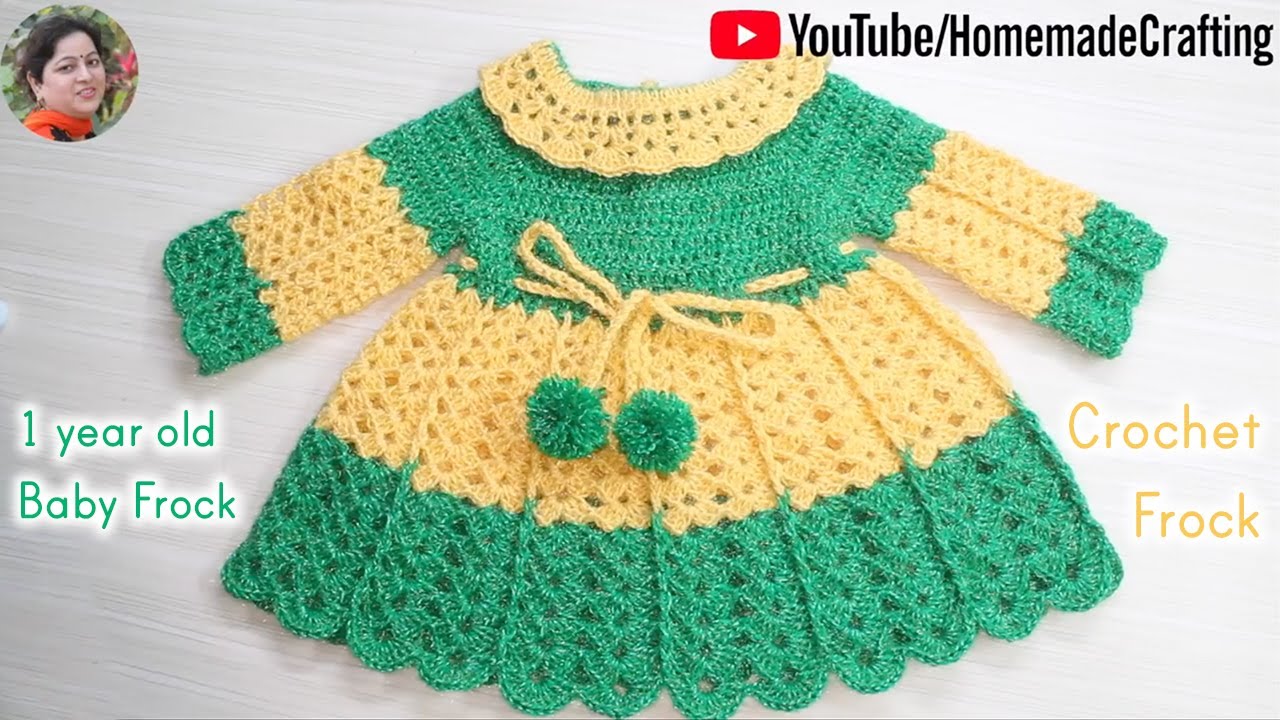
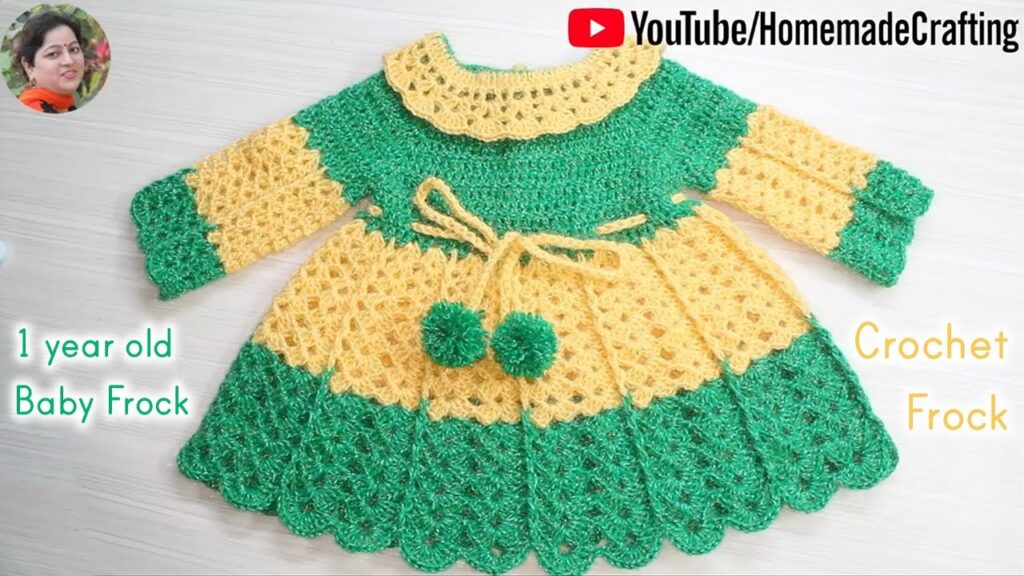
📸 Final Thoughts
A handmade crochet woolen frock is more than just clothing — it’s a work of love and artistry. It keeps the baby warm, looks absolutely adorable, and can even become a family heirloom. With basic crochet skills and a bit of creativity, you can design a custom frock that’s both beautiful and practical.
Whether you choose simple elegance or playful colors and frills, this woolen frock will surely be a cherished item in any baby’s wardrobe.
Video tutorial: