by
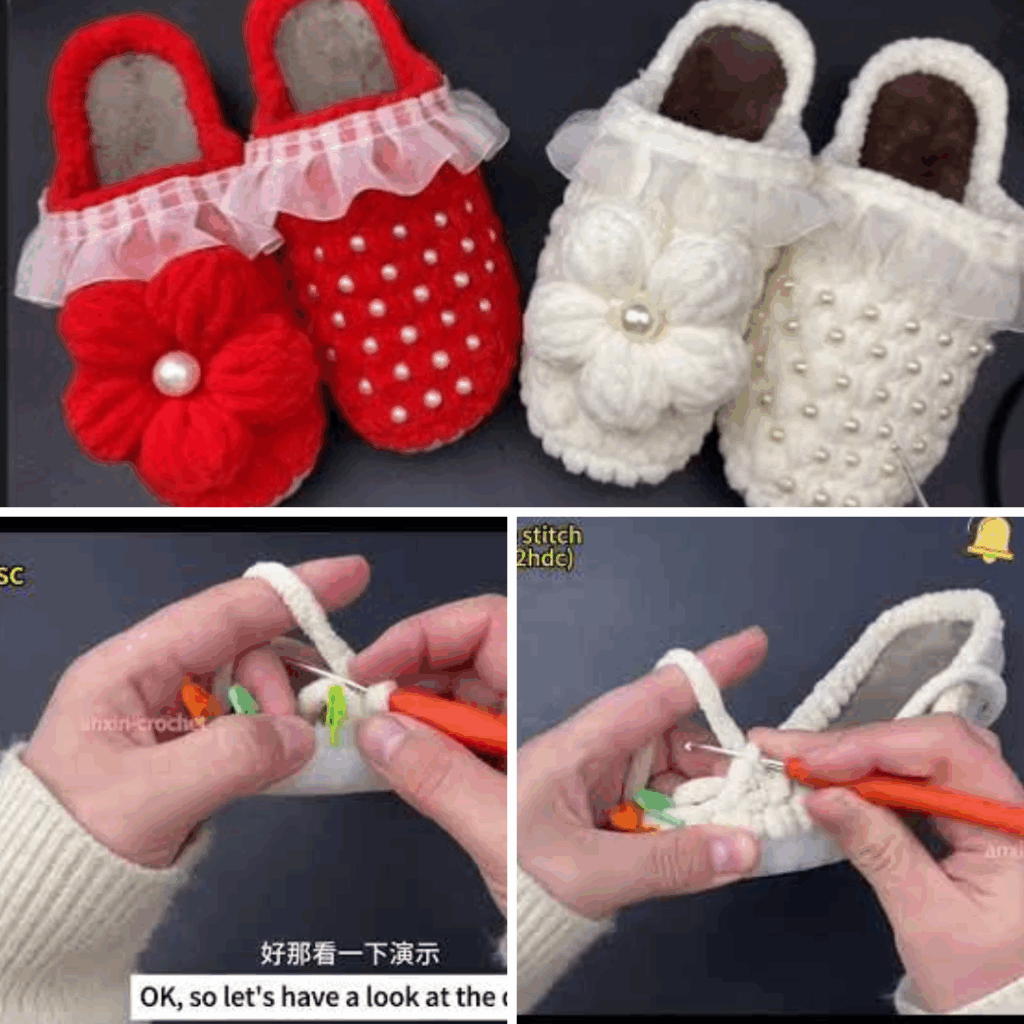
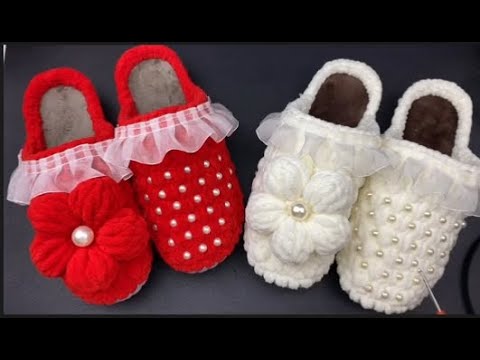
by As the chill of the colder seasons approaches, there’s nothing more comforting than slipping your feet into a pair of soft, handmade warm slippers. If you’re a crochet enthusiast or a beginner looking for a cozy project, making flower crochet warm slippers is the perfect blend of comfort and creativity. Not only are they functional, but the floral design adds a charming, handcrafted touch that makes them perfect for gifting or personal use.
In this tutorial, we’ll walk you through everything from materials to final stitches, so you can create your own pair of beautiful, flower-accented warm slippers.
🧶 Materials You’ll Need
Before diving into the tutorial, gather the following materials:
Yarn:
- Worsted weight (medium #4) yarn or chunky yarn for extra warmth
- Two colors: one for the base/slipper and one for the flower
Hook:
- Crochet hook size H/8 (5.0 mm) or appropriate size for your yarn
Tools:
- Yarn needle for sewing parts together
- Stitch markers (optional)
- Scissors
- Measuring tape
👣 Size & Fit
This tutorial fits women’s US size 6-9. Adjustments for smaller or larger sizes will be mentioned in relevant steps.
🌼 PART 1: Crochet the Slipper Base
Step 1: Start with the Sole
Ch 20 (adjust based on desired length).
Row 1: SC in 2nd ch from hook and across (19 SC). Ch 1, turn.
Row 2-5 (or until desired sole width): SC across each row. Ch 1, turn.
You should now have a rectangular base. If you want to shape the heel slightly, reduce stitches by 1-2 at the beginning and end of the next rows.
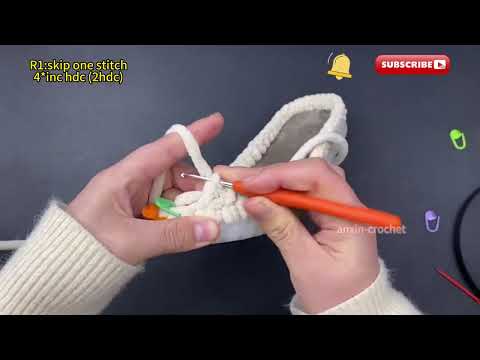
Step 2: Build the Sides
Rotate your work so you’re working around the sole edges. SC evenly around the entire sole to create a base for the walls of the slipper. Use stitch markers if needed to track your starting point.
Step 3: Build Up the Walls
Work 4–6 rounds of HDC (Half Double Crochet) around the sole to build the sides of the slipper. The height can be adjusted for ankle or ballet-style slippers.
Step 4: Shape the Toe
To shape the toe:
- Start decreasing by working 2 HDC together (HDC2tog) at the toe area (usually 5–7 stitches at the front).
- Repeat decrease every round until the toe area closes slightly (not completely).
🌷 PART 2: Crochet the Flower Decoration
You can use any simple crochet flower pattern. Here’s a basic 5-petal flower:
Simple Crochet Flower:
Round 1: In a magic ring, work 10 SC. Join with sl st.
Round 2: *(Ch 2, 2 DC, ch 2, sl st)* in next stitch – repeat 5 times to make 5 petals.
Fasten off and leave a long tail for sewing.
Make two flowers – one for each slipper. You can also add leaves or a button in the center for extra decoration.
🧵 PART 3: Assembly
- Sew the Heel
Fold the slipper in half lengthwise and sew the back heel seam using whip stitch or mattress stitch. - Attach the Flower
Place the flower on the top of the toe area and use a yarn needle to sew it securely. Make sure the positioning matches for both slippers. - Weave in Ends
Use the yarn needle to weave in any remaining loose ends.
🪡 Customization Tips
- Add Lining: Use fleece fabric or soft yarn inside for added warmth.
- Add Soles: Hot glue suede or felt fabric to the bottom to make them slip-resistant.
- Add Ribs: Crochet ribbing around the ankle for a snug fit.
🧼 Care Instructions
- Hand wash in cold water with mild detergent
- Lay flat to dry
- Avoid wringing or machine drying to maintain shape
💡 Final Thoughts
Crocheting your own flower warm slippers is not only satisfying but also a practical way to add handmade charm to your wardrobe. With basic stitches and simple customization, you can create slippers that reflect your style and keep your feet toasty.
So grab your hook and yarn, put on your favorite show or podcast, and enjoy the meditative rhythm of crochet as you bring warmth and beauty into every stitch.
Video Tutorial: