by
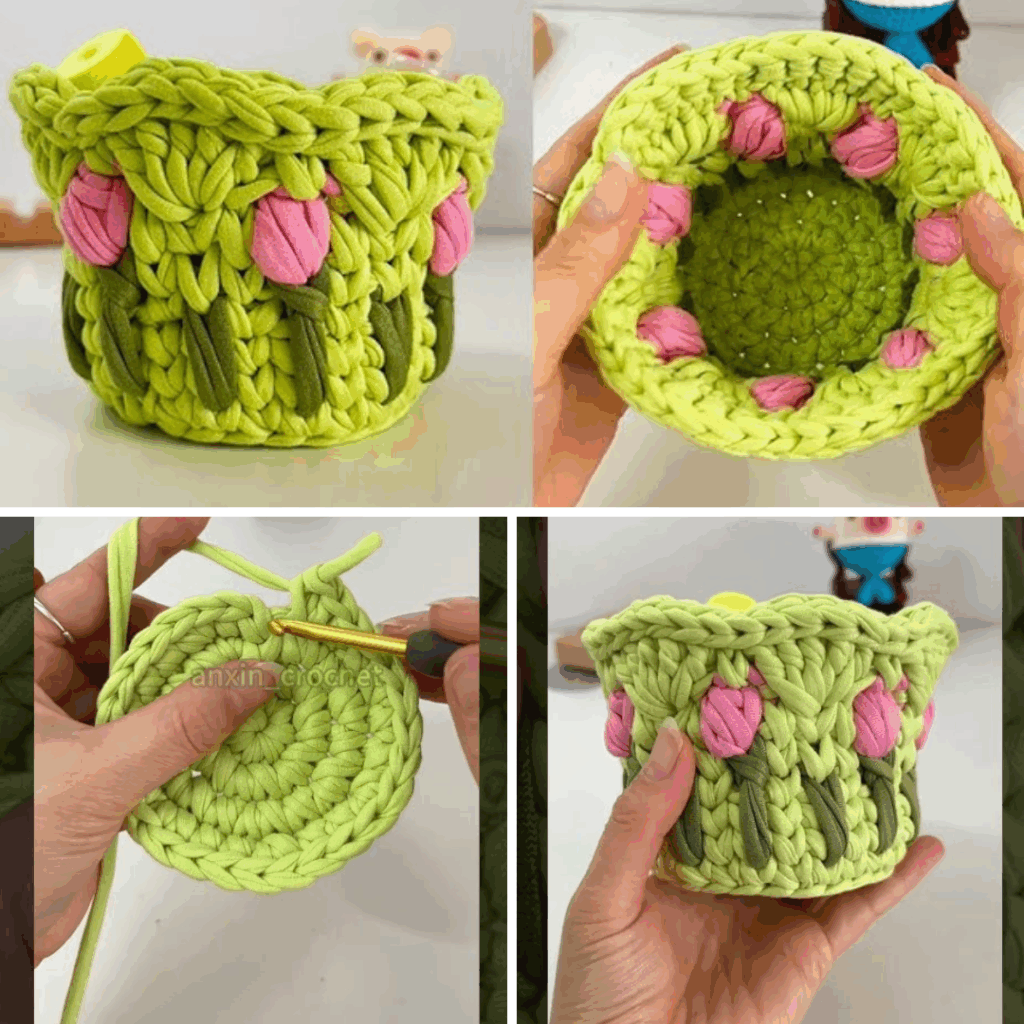
by If you’re looking for a beautiful yet practical crochet project, a Tulip Pattern Storage Box is the perfect mix of form and function. This charming handmade box brings color and style to your space—whether it’s your craft room, vanity, or office—while keeping small items like yarn, tools, makeup, or stationery tidy and accessible.
This tutorial walks you through how to crochet a sturdy square or rectangular storage box using simple stitches, with tulip-like motifs worked into the sides. It’s beginner-friendly, and you can finish it in just a few hours!
🧶 Materials You’ll Need
| Item | Description |
|---|---|
| Yarn | Worsted weight cotton yarn (for structure) in 3 colors: Base, Tulip Flower, and Stem/Leaves |
| Crochet Hook | Size 4.5 mm to 5.5 mm (US 7 to I/9) |
| Stiffener (optional) | Plastic canvas, cardboard, or interfacing to help the box hold its shape |
| Scissors | For trimming yarn |
| Yarn Needle | For weaving in ends |
| Stitch Markers | Optional but helpful |
📏 Finished Size
Approx. 6” x 6” x 6” (adjustable)
🧵 Skill Level
Beginner to Confident Beginner
Uses basic stitches: chain, single crochet (SC), half double crochet (HDC), double crochet (DC), and working in the back loop/front loop.
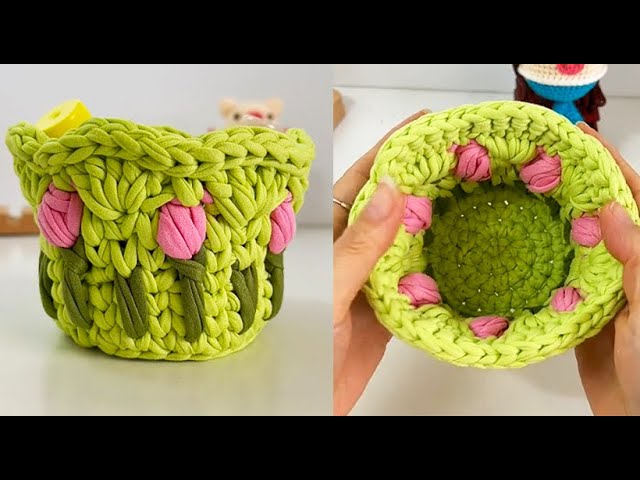
🌷 What is the Tulip Stitch?
The Tulip stitch is a combination of DC (double crochet) and a puff or cluster stitch that resembles the shape of a tulip, typically done in contrasting colors to mimic petals and stems. In this project, we use a color-change technique to make rows of tulip flowers around the box sides.
🪡 Pattern Structure Overview
- Create the base – a square or rectangle.
- Build up the sides – in rounds using single crochet.
- Crochet tulip stitch rows into the walls.
- Finish and stiffen the box (optional).
🔨 Step-by-Step Instructions
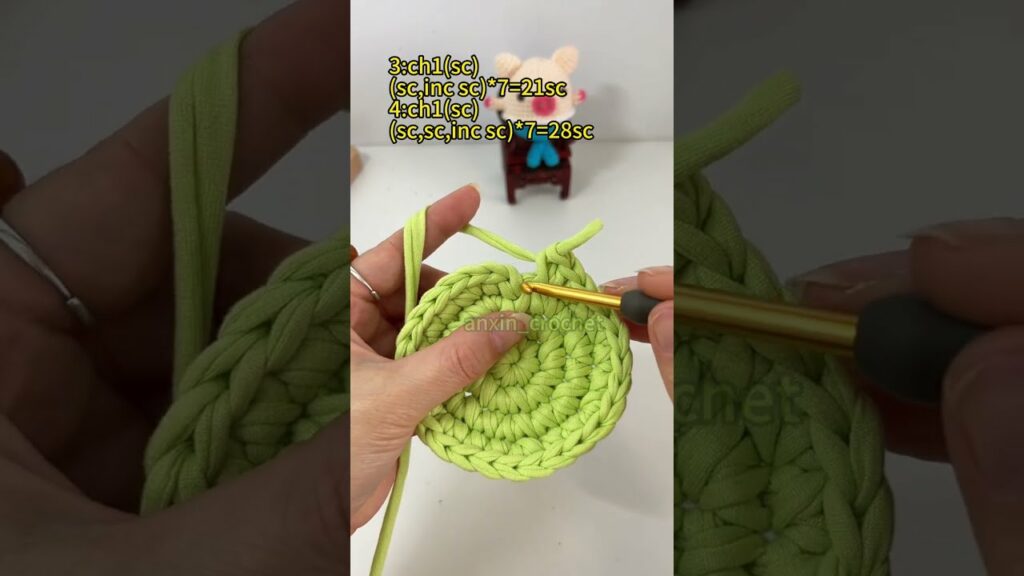
✅ PART 1: Crochet the Base
We’ll start with a square base, worked in rounds.
Using base color yarn:

Rnd 1: Ch 21, SC in 2nd ch from hook and across (20 SC). Turn the work and SC in the other side of the chain (for an oval shape). You’ll have 40 SC around.

Rnd 2: SC in each stitch around, placing 2 SC at each corner to keep it flat.

Continue adding rounds until your base measures approx. 6x6 inches.
Tip: For a sturdier box, work the last round in BLO (back loops only) to create a defined edge before building the walls.
✅ PART 2: Build the Walls
Switch to working only in SC around the base to create vertical sides.
Rounds 1–3: SC in each stitch around (no increases). Join with slip stitch. Ch 1 to start each round.
You can adjust the height of your box, but aim for 4–5 inches tall.
✅ PART 3: Tulip Pattern Rows
Now let’s add the beautiful tulip motifs!
Round A – Tulip Stems (Green yarn):
Join green yarn.

*Ch 1, SC in next st, Ch 2, skip 2 stitches, SC in next st*

Repeat around. These chain spaces will hold the tulip “flowers.”
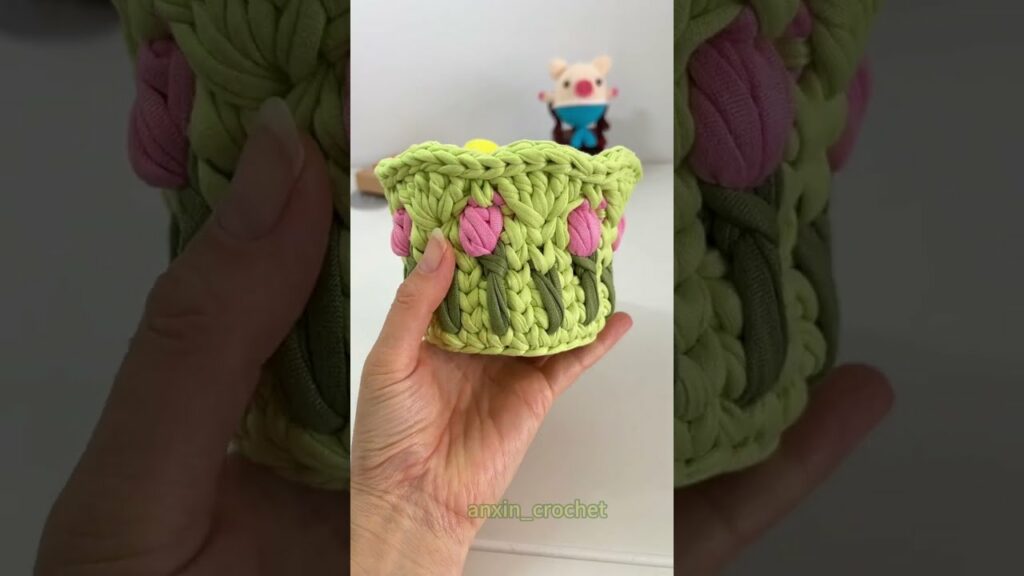
Round B – Tulip Flowers (Pink, Red, or Purple yarn):
In each Ch-2 space:

*(Yarn over, insert hook, pull up a loop) x3, yarn over and pull through all loops* → This is a puff stitch.
Ch 1 to close the flower.
Repeat puff stitch in every chain space from the previous round.
Optional Round – Secure Flowers:
Switch back to base color and SC one full round to lock in the tulip stitches and reinforce structure.
✅ PART 4: Final Rows & Edging
Once your tulip pattern is complete:
- Crochet 2–3 more rounds of SC in base color to finish the rim.
- For a clean edge, consider adding a reverse SC (crab stitch) round at the top.
✅ PART 5: Add Stiffness (Optional)
To make your box stand upright:
- Cut plastic canvas or cardboard to size for all 4 walls and the base.
- Slip these between the stitches or sew a fabric lining with pockets to insert them.
- Alternatively, crochet two layers and sandwich the stiffener in between.
✅ Optional Handles
If you want handles:
On final round, ch 8, skip 6 stitches, SC in next – repeat for opposite side to make two handles.
Next round, SC into each ch for a sturdy grip.
🎨 Customization Ideas
- 🌼 Add multiple rows of tulips in different colors
- 🧵 Embroider vines or leaves between tulips
- 🧸 Use thicker yarn for a toy storage box
- 🖼 Add a felt or leather tag for labeling
🧼 Care Tips
- Spot clean with mild detergent
- If lined with cardboard, avoid submerging in water
- Lay flat to dry if damp
🧺 Final Thoughts
A Tulip Crochet Storage Box is not only quick and easy to make, but it also brings a splash of color and handmade elegance to any room. Whether you’re organizing your yarn stash, gifting a handmade container, or just decorating with purpose, this project is a satisfying way to showcase both creativity and functionality.
Video Tutorial: