 by
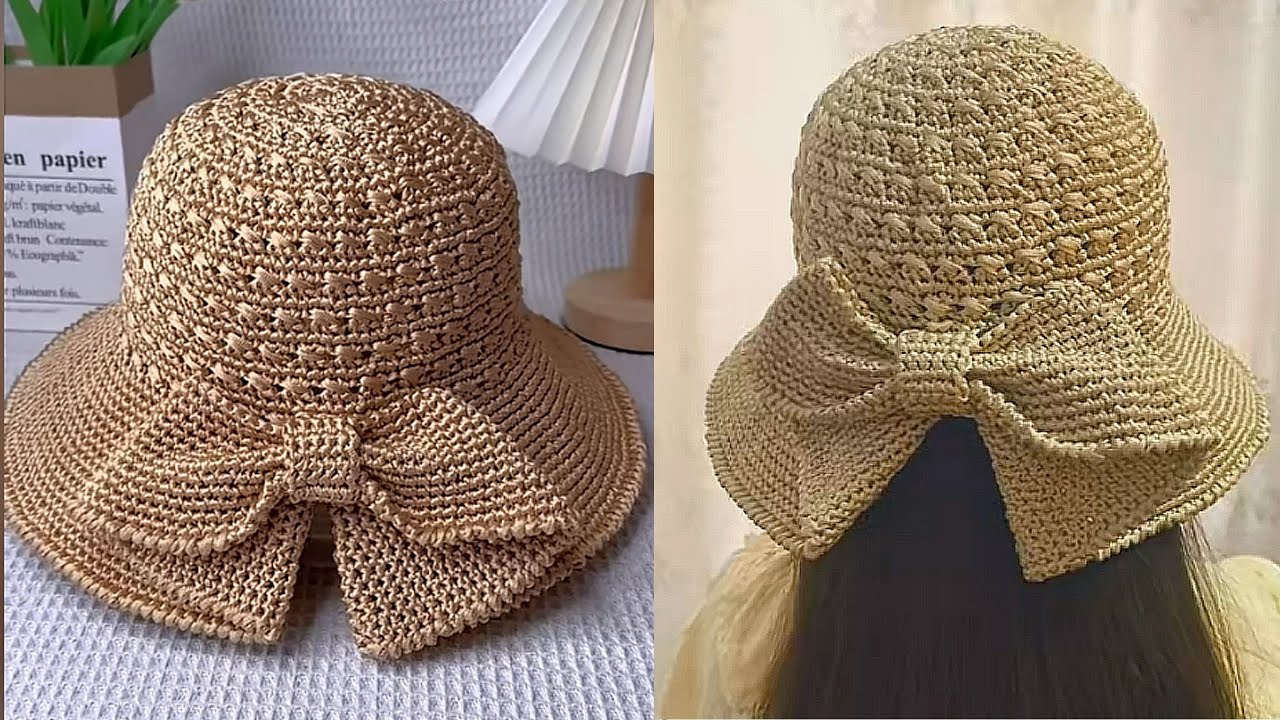
by Crochet bucket hats are stylish, lightweight, and perfect for sunny days — and when you add a cute bow, it takes the charm to the next level! This beginner-friendly tutorial will guide you through how to crochet a summer bucket hat with a bow, using breathable yarn and simple stitches.
Whether you’re making it for yourself, a child, or as a gift, this guide covers everything from materials and sizing to bow-making and finishing techniques.
🧶 Materials You’ll Need
| Item | Details |
|---|---|
| Yarn | 100% Cotton or Cotton Blend (DK or Worsted weight) – breathable and comfortable for summer |
| Hook | 4.0 mm – 4.5 mm crochet hook (check your yarn label) |
| Tapestry needle | For weaving in ends and attaching the bow |
| Scissors | Sharp pair for cutting yarn |
| Stitch markers | To mark rounds (optional but helpful) |
| Measuring tape | For sizing and checking gauge |
Color Suggestions:
- Hat Base: Neutral colors (beige, white, grey, pastel)
- Bow: Contrast color (pink, blue, mustard, lavender)
🧵 Skills You’ll Need
This is a beginner-level pattern using simple stitches:
- Magic Ring (MR)
- Chain (ch)
- Slip Stitch (sl st)
- Single Crochet (sc)
- Double Crochet (dc)
- Increase (inc) – 2 stitches in one stitch
- Working in rounds
If you’re unfamiliar with any of these stitches, take a quick look at video tutorials — they’re very easy to learn.
🎩 Part 1: Making the Bucket Hat
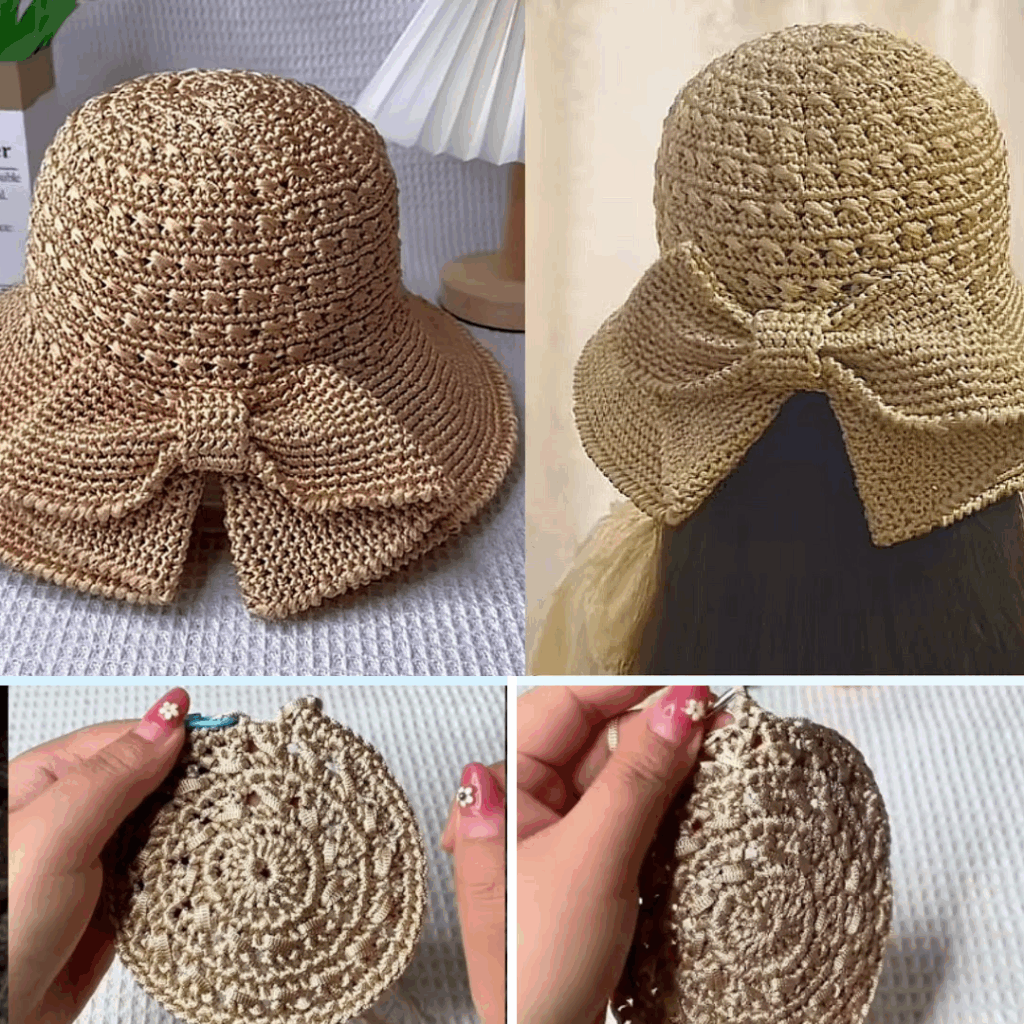
The hat is made in three sections: the crown, the sides (body), and the brim.
☀️ Step 1: Crochet the Crown (Top of Hat)
Round 1:
Magic Ring, ch 2 (counts as dc), 11 dc into ring. Sl st to top of ch-2 to join. (12 dc)
Round 2:
Ch 2, 2 dc in each stitch around. Join. (24 dc)
Round 3:
Ch 2, 1 dc in next stitch, 2 dc in next, repeat around. Join. (36 dc)
Round 4:
Ch 2, 1 dc in next 2 sts, 2 dc in next, repeat around. Join. (48 dc)
Round 5:
Ch 2, 1 dc in next 3 sts, 2 dc in next, repeat around. Join. (60 dc)
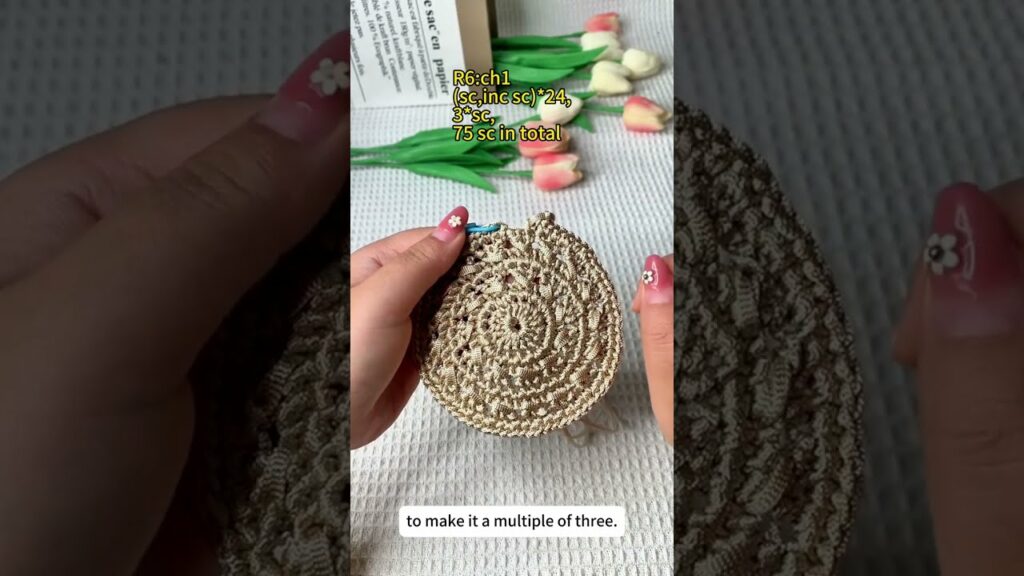
Continue increasing in this pattern until the diameter of the crown matches the top of the head size (around 6–7 inches for an adult).
🧠 Tip: Use this formula:
Crown Diameter = Head Circumference ÷ 3.14
Example: 21 inches ÷ 3.14 ≈ 6.7 inches
🧢 Step 2: Crochet the Sides (Hat Body)
Now you stop increasing and work evenly.
Round X–Y (about 8–10 rounds):
Ch 2, dc in each stitch around. Join each round with sl st.
This creates the straight sides of the hat. Try the hat on to check the length. It should cover the head snugly but not over the ears.
👒 Step 3: Crochet the Brim
Now it’s time to flare the brim slightly for a classic bucket shape.
Round 1 (Increase):
Ch 2, 1 dc in next 3 sts, 2 dc in next, repeat around. Join.
Round 2:
Ch 2, dc in each stitch around. Join.
Round 3 (Optional Increase):
1 dc in next 4 sts, 2 dc in next, repeat around. Join.
Round 4:
Dc evenly around.
You can adjust the number of rounds depending on how wide you want the brim. 3–5 rounds total is a good range.
✅ Optional: To make the brim stiffer, switch to single crochet (sc) for the last 1–2 rounds.
🎀 Part 2: Crochet the Bow
Simple Crochet Bow Pattern
Step 1 – Bow Rectangle:
- Ch 21 (adjust length for a larger or smaller bow)
- Row 1: sc in 2nd ch from hook and across. (20 sc)
- Row 2–6: ch 1, sc across. (20 sc)
- Fasten off and weave in ends.
Step 2 – Center Wrap:
- Ch 6
- Row 1: sc in 2nd ch from hook and across. (5 sc)
- Row 2–3: ch 1, sc across.
- Wrap this small strip tightly around the center of the bow and sew in place.
You now have a beautiful bow!
🎨 Feel free to make the bow more elegant by using fancy yarn or adding beads.
👛 Step 3: Attach the Bow
- Place the bow at the back or side of the hat — wherever you prefer!
- Sew it securely using a yarn needle and matching yarn.
- Make sure it’s centered and firmly attached.
✨ Optional Add-Ons
- Add a ribbon: Crochet or use a satin ribbon and thread it around the base.
- Decorative edging: Use scallop stitch on the brim’s last round.
- Add lining: For a more structured hat, add a thin cotton lining inside.
🧺 Care Instructions
- Hand wash gently in cold water with mild soap
- Lay flat to dry
- Avoid wringing or twisting
- You can lightly steam block the brim to shape it
📐 Sizing Tips

| Age/Size | Head Circumference | Crown Diameter |
|---|---|---|
| Toddler | 18″ (46 cm) | 5.7″ (14.5 cm) |
| Child | 20″ (51 cm) | 6.3″ (16 cm) |
| Teen/Adult | 21–23″ (53–58 cm) | 6.5–7.3″ (16.5–18.5 cm) |
Always measure as you go to ensure a good fit!
🌼 Final Thoughts
Making a crochet summer bucket hat with a bow is a relaxing and satisfying project that gives you something both fashionable and functional. With breathable cotton yarn and a cute feminine bow, this hat is perfect for beach days, picnics, markets, and sunny walks.
Plus, it’s a fun handmade gift idea for friends or family!