by
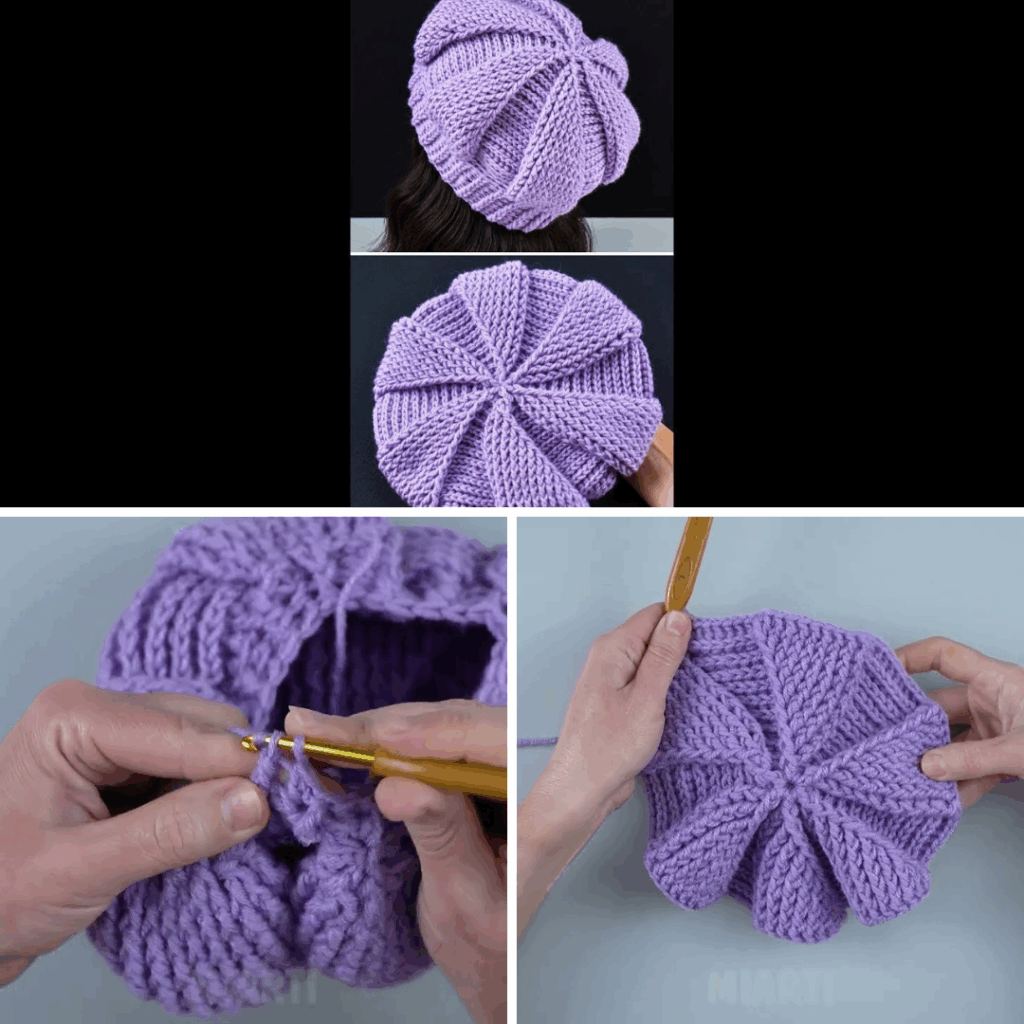
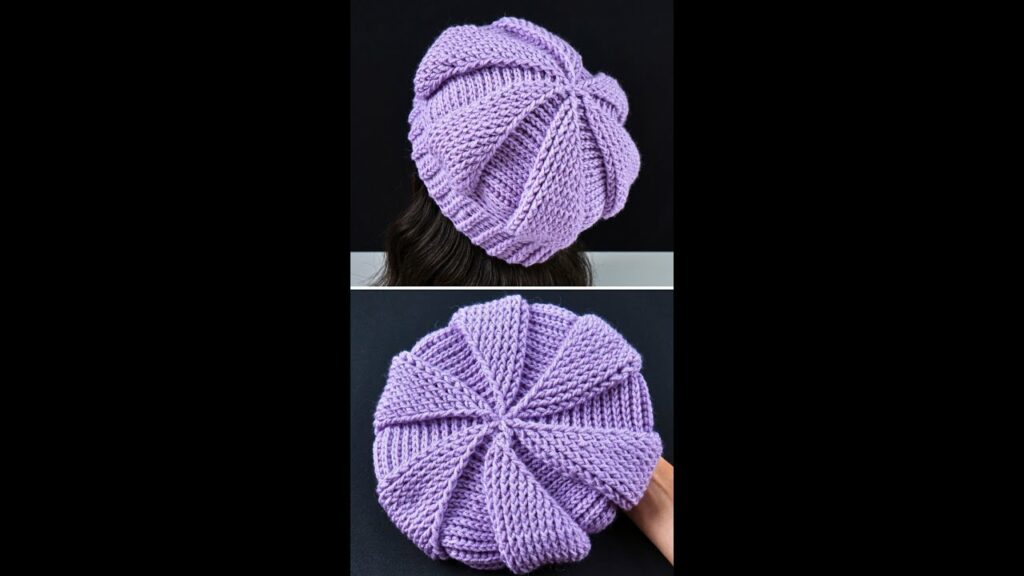
by The crochet beret is a timeless, elegant accessory — perfect for any season and outfit. With its chic, French-inspired flair, a beret is surprisingly easy to make with just a few basic crochet stitches. Whether you’re new to crochet or just want a relaxing weekend project, this easy crochet beret pattern will walk you through every step.
Let’s dive in!
🧶 Materials Needed
Before you start crocheting, gather the following materials:
Yarn:
- Worsted weight yarn (Category 4) or DK weight for a lighter beret
- Natural fibers like cotton, bamboo, or acrylic blend are great options.
Tools:
- Crochet hook: 5.0mm (H) for worsted weight, or 4.0mm for DK yarn
- Yarn needle (for weaving in ends)
- Scissors
- Stitch marker (optional)
🧵 Skills You’ll Need
This project uses only a few beginner-friendly stitches:
- Chain (ch)
- Slip stitch (sl st)
- Single crochet (sc)
- Half double crochet (hdc) or double crochet (dc) – depending on the version
- Increasing in the round
Don’t worry if you’re still learning — this pattern is simple and forgiving!
📐 Sizing Information

This pattern is sized for an average adult head (21–23 inches circumference). You can easily adjust by changing yarn weight or hook size or adding/removing increase rounds.
🪄 Basic Crochet Beret Pattern (Easy Version)
This version uses half double crochet (hdc) for a dense yet soft texture.
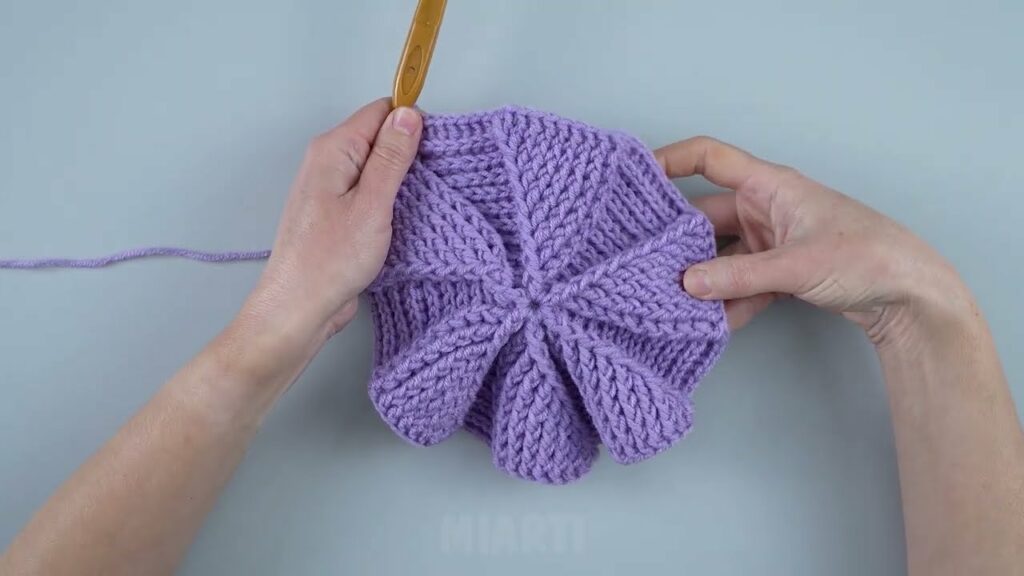
🌀 Step 1: Start with the Crown (Top Circle)
We begin by crocheting a flat circle — this will form the top of the beret.
Round 1:
- Make a magic ring, ch 2 (does not count as stitch), work 12 hdc into the ring.
- Join with sl st to the first hdc.
(12 stitches)
Round 2:
- Ch 2, 2 hdc in each stitch around.
- Join. (24 stitches)
Round 3:
- Ch 2, (1 hdc in next st, 2 hdc in next) repeat around.
- Join. (36 stitches)
Round 4:
- Ch 2, (1 hdc in next 2 sts, 2 hdc in next) repeat around.
- Join. (48 stitches)
Round 5:
- Ch 2, (1 hdc in next 3 sts, 2 hdc in next) repeat around.
- Join. (60 stitches)
Round 6:
- Ch 2, (1 hdc in next 4 sts, 2 hdc in next) repeat around.
- Join. (72 stitches)
📏 At this point, your circle should be about 6.5 to 7 inches across. You can continue increasing one more round if you want a slouchier or larger beret.
🎩 Step 2: Work the Body (No More Increases)
Now that we have the crown width, we’ll stop increasing and work even to create the body of the beret.
Rounds 7–11:
- Ch 2, hdc in each stitch around.
- Join with sl st.
🔁 Adjust the number of rounds here depending on how deep or slouchy you want your beret.
🧢 Step 3: Shape the Brim
We now decrease to bring the hat in so it hugs the head.
Round 12:
- Ch 1, (1 sc in next 4 stitches, sc2tog) repeat around.
- Join. (Decrease round)
Round 13:
- Ch 1, sc in each stitch around.
- Join.
Optional Rounds 14–15 (for tighter brim):
- Repeat a few more rounds of single crochet to form a band.
🎯 You can also switch to a smaller hook (like 4.5mm) for just the brim to make it snugger without needing too many decreases.
🧵 Step 4: Finishing
- Fasten off and weave in all yarn ends using a yarn needle.
- Block your beret lightly (optional) to give it a nice shape — lay flat and gently stretch into a circle, pin it, and let it dry.
🧺 Care Instructions
- Hand wash gently in cold water, especially if using wool or natural fiber.
- Lay flat to dry.
- Avoid heat (no tumble drying).
🎨 Customization Ideas
Want to make your beret unique? Here are some fun ways to personalize it:
- 🧵 Add a small crochet stem to the top for a classic French look.
- 🌈 Use multiple colors for a striped or color-block beret.
- 🧷 Embroider flowers or shapes onto the finished hat.
- ✨ Add beads or sequins for a glam finish.
- 🌼 Use granny squares or lacy stitches for a vintage summer beret (great with cotton yarn).
🧠 Tips for Success
- Don’t skip the magic ring — it keeps the center neat and flat.
- Keep your stitch count consistent for each round.
- Try on the beret before finishing the brim to check the fit.
✅ Summary – Easy Crochet Beret at a Glance
| Step | Description |
|---|---|
| Crown | Increase in hdc rounds to ~7″ circle |
| Body | Work even (no increases) for 4–5 rounds |
| Brim | Decrease in sc, optional tight edge rounds |
| Finishing | Weave in ends, block if desired |
🧶 Final Thoughts
The easy crochet beret hat is a quick, fun, and fashionable project that you can finish in just a few hours. It’s great for stash-busting, gift-making, or simply adding a classic handmade accessory to your wardrobe.
Once you’ve mastered the basic pattern, try experimenting with lace stitches, textured yarn, or embellishments to make it truly your own.
Video Tutorial: