 by
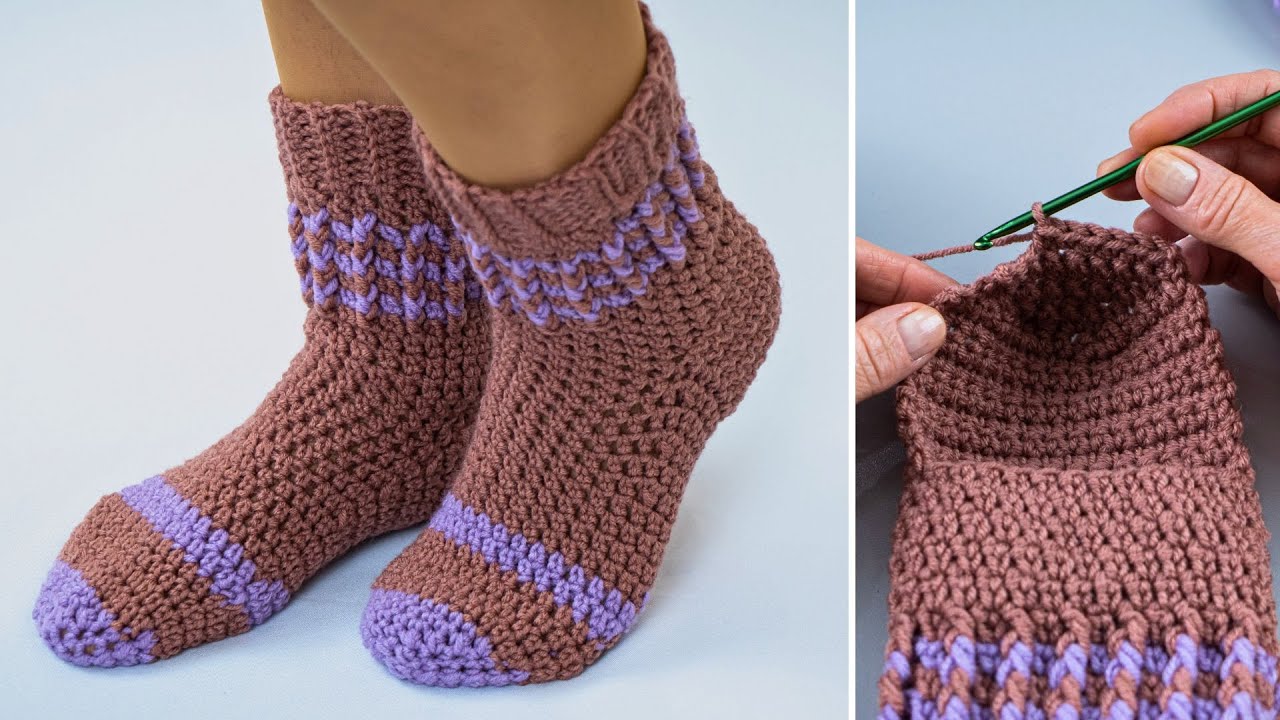
by Crocheting your own socks might sound intimidating, but it’s actually one of the coziest and most satisfying projects you can make — especially when you follow a simple beginner-friendly pattern. In this tutorial, you’ll learn how to make the easiest crochet socks, designed specifically for first-timers using basic stitches, minimal shaping, and comfy results.
Whether you’re making a pair for yourself, gifting them, or just expanding your crochet skills, this easy crochet sock pattern is a great place to start.
🧵 What You’ll Need:
| Item | Details |
|---|---|
| Yarn | Worsted weight (Category 4) acrylic or wool-blend yarn – 150–200g |
| Hook | 5mm (H-8) crochet hook |
| Scissors | For cutting yarn |
| Tapestry Needle | For seaming and weaving in ends |
| Measuring Tape | For sizing the socks |
🧶 Wool-blend yarn is great for warm socks. Choose acrylic or cotton for lightweight indoor use.
📏 Sizing Info:
This pattern is fully customizable. Just measure the foot length and ankle circumference of the wearer.
You’ll crochet a flat rectangle and seam it to form the sock. No complicated heel turns or shaping!
🧶 Crochet Stitches & Abbreviations (US Terms):
- ch – chain
- sc – single crochet
- hdc – half double crochet (used in this tutorial)
- sl st – slip stitch
- st(s) – stitch(es)
We’ll use half double crochet (hdc) for a stretchy and comfy texture.
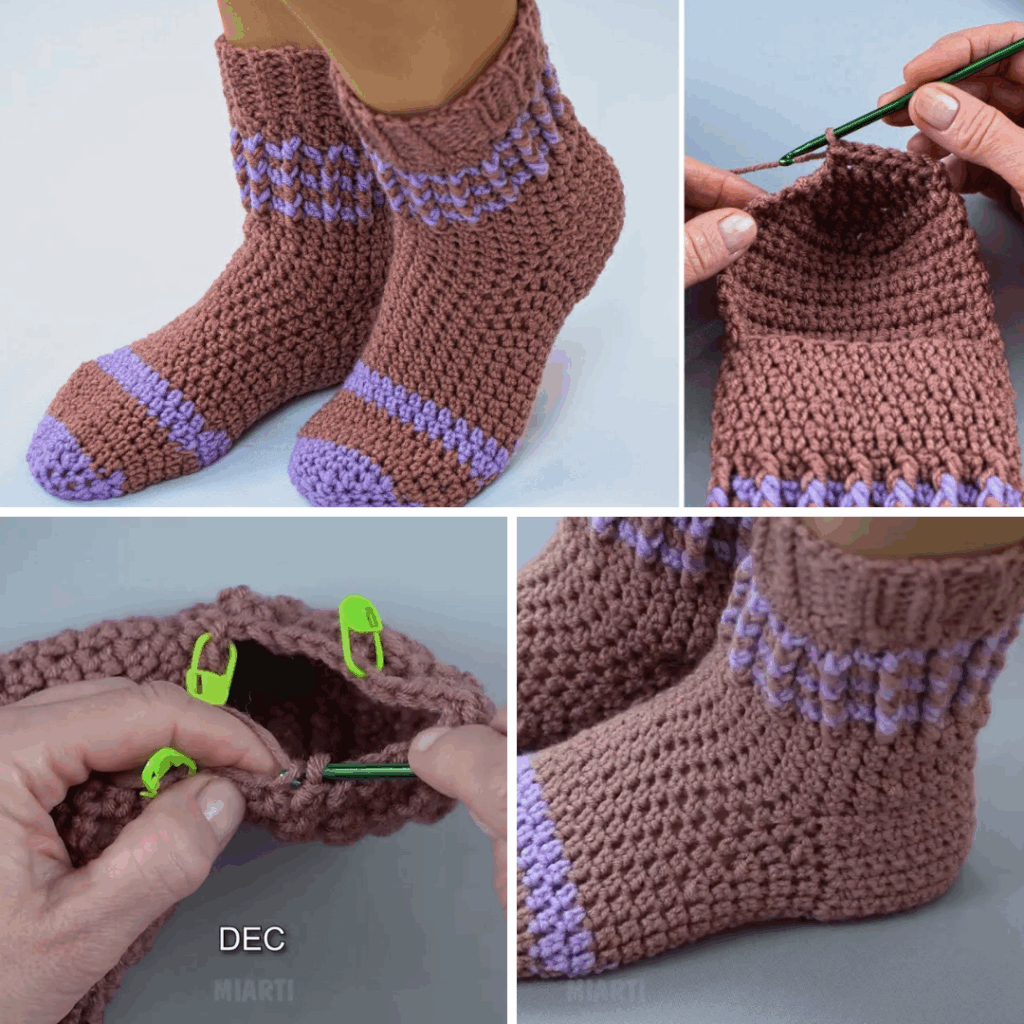
✂️ Construction Overview:
This easy sock is made in three parts:
- Cuff – stretchy ribbing around the ankle
- Foot – the body of the sock (crocheted as a flat piece)
- Toe – seamed together to shape the front
🧦 Easy Crochet Sock Tutorial – Step-by-Step
🧑🎨 Step 1: Make the Cuff (Ribbing)
This part goes around the ankle and gives the sock a snug fit.
Row 1:
Ch 11.
Sc in second ch from hook and across. (10 sc)
Ch 1, turn.
Row 2–30: (or until cuff fits around your ankle)
Sc in back loops only (BLO) across.
Ch 1, turn.
🪡 When it’s long enough to wrap around your ankle (stretchy but snug), fold the strip in half and sl st the short ends together to form a tube.
Don’t fasten off — you’ll now work into the edge of the cuff.
👣 Step 2: Crochet the Foot (Main Body)
Now you’ll crochet the length of the sock from ankle to toe in the round.
Round 1:
Ch 1. Evenly hdc around the edge of the cuff (about 30–40 sts depending on size).
Join with sl st to the first hdc.
Round 2–14: (or until desired foot length MINUS 2 inches)
Ch 1, hdc in each st around.
Join with sl st.
🧼 Try the sock on or measure against your foot. Stop about 2 inches before your toes.
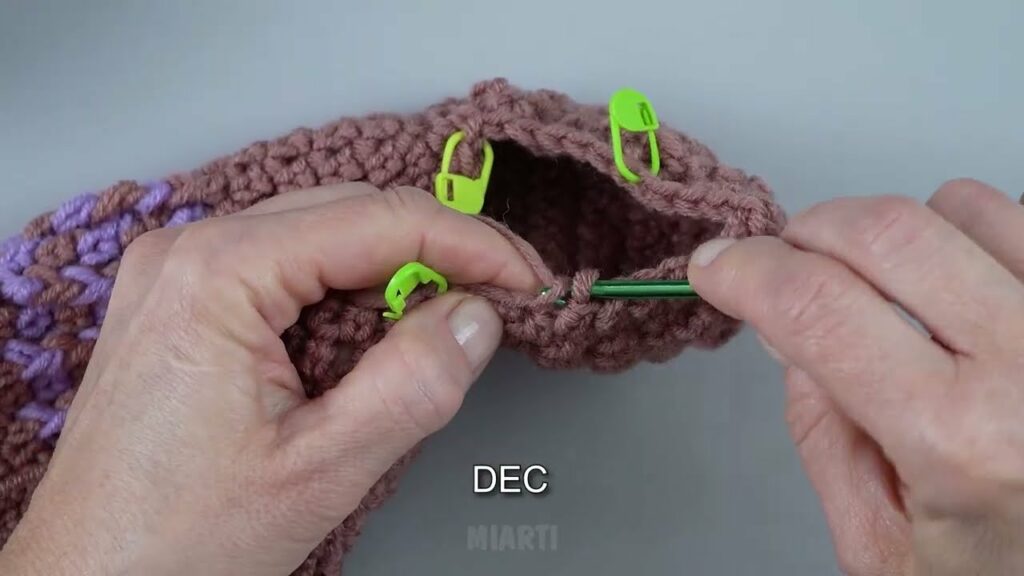
🧦 Step 3: Shape the Toe (Simple Decrease)
Now we’ll decrease to close the toe area.
Round 15:
Ch 1, hdc in 2 sts, hdc2tog (decrease) – repeat around.
Join with sl st.
Round 16:
Ch 1, hdc, hdc2tog – repeat around.
Join.
Round 17:
Ch 1, hdc2tog – repeat around.
Leave a 6-inch tail, thread your tapestry needle, and sew the toe closed with a simple whip stitch or drawstring-style pull.
Fasten off and weave in all ends.
👯 Step 4: Make the Second Sock
Repeat the same steps for the second sock. Make sure to count your stitches and rows to keep both socks the same size.
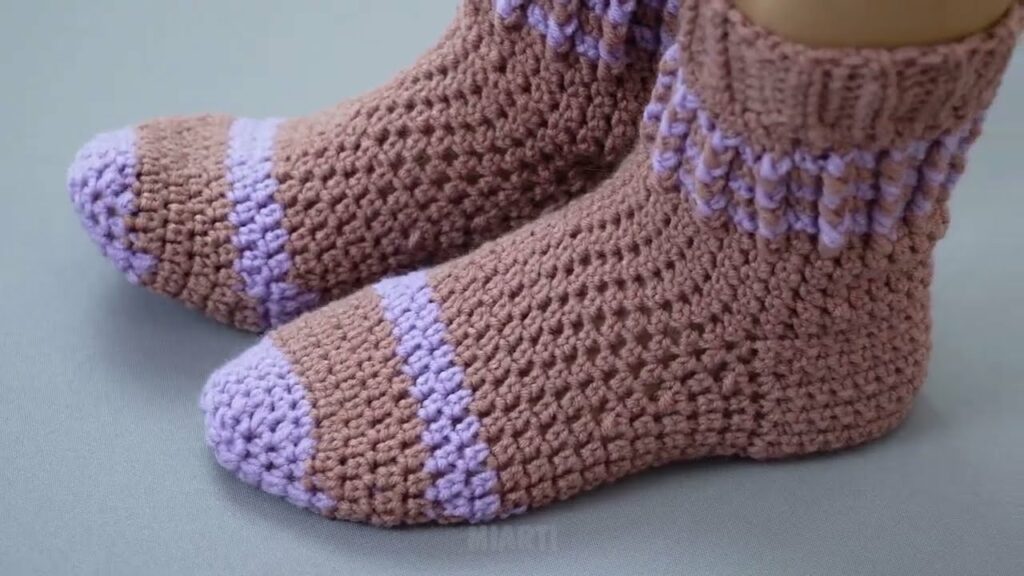
🧽 Optional Finishing Touches
- Add a contrast color cuff or toe
- Crochet a decorative scalloped edge around the top
- Use a non-slip grip paint on the bottom for indoor use
- Embroider initials or cute designs on the top
🔁 Sock Sizing Tips:

| Shoe Size | Cuff Length | Foot Length (before toe) |
|---|---|---|
| Women’s US 6–7 | ~30 rows | ~7 inches |
| Women’s US 8–9 | ~32–34 rows | ~8 inches |
| Men’s US 9–11 | ~36–38 rows | ~9–10 inches |
| Kids | ~20–26 rows | ~5–6 inches |
🧦 Tip: Crochet stretches — go slightly smaller for a snug fit.
⏱ Time Estimate:
- Beginners: 2–3 hours per sock
- Experienced Crocheters: 1–1.5 hours per sock
Great for binge-watching your favorite show while you stitch!
💬 Final Thoughts
Learning how to crochet socks doesn’t have to be complicated. This flat, fold-and-seam method is the easiest way to get started and create a cozy pair of handmade socks that you’ll love wearing. Once you master this basic version, you can explore more advanced shapes, stitch patterns, and even toe-up or heel flap socks!
So grab your yarn, hook, and make your feet happy — one cozy stitch at a time. 🧶🦶
Video Tutorial: