by
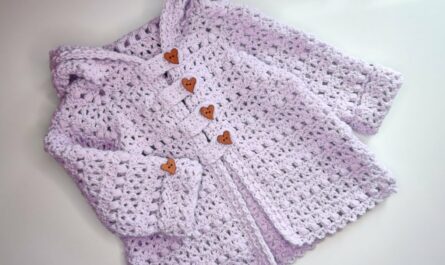
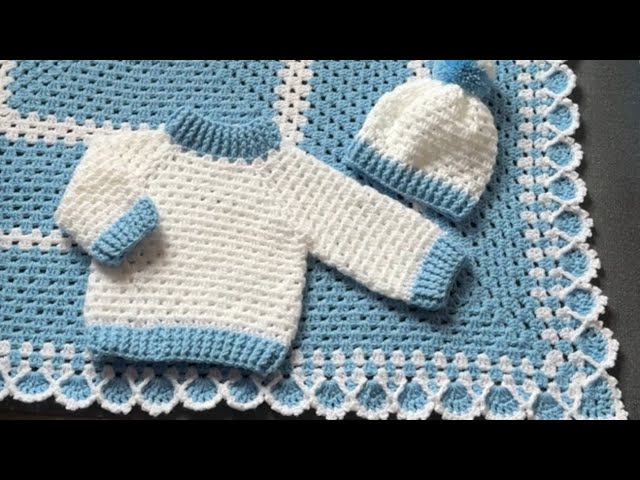
by Crocheting a baby cardigan sweater is one of the most satisfying and useful projects you can make — it’s functional, cozy, customizable, and makes a wonderful gift. Whether you’re a beginner or an intermediate crocheter, this easy crochet baby cardigan pattern will walk you through each step to create a beautiful, soft sweater for a newborn or infant.
Let’s get started!
🧵 Supplies You’ll Need
Before you begin your project, gather the following materials:
🧶 Yarn:
- Yarn Weight: DK (Double Knitting) or Light Worsted (Category 3)
- Fiber: Baby-soft acrylic, cotton, or bamboo yarn (machine-washable)
- Amount: About 250–300 yards for 0–6 month size
🧰 Tools:
- Crochet Hook: 4.0 mm (G/6) or size recommended by yarn label
- Tapestry Needle: For weaving in ends
- Stitch Markers: Helpful for raglan increases and sleeve separation
- Scissors
- Buttons (optional): 3–5 small buttons for front closure
📏 Sizing Guide (Standard Measurements)
The following pattern is written for a 0–6 month baby. You can adjust the size by increasing the number of foundation chains and rows.
| Age Range | Chest Width | Length (Shoulder to Waist) | Sleeve Length |
|---|---|---|---|
| 0–6 months | 16″–17″ | 9″–10″ | 5″–6″ |
| 6–12 months | 18″–19″ | 10″–11″ | 6″–7″ |
| 1–2 years | 20″–21″ | 12″–13″ | 7″–8″ |
🔤 Basic Crochet Stitches Used
If you’re new to crochet, these are the basic stitches you’ll need to know:
- ch – chain
- sl st – slip stitch
- sc – single crochet
- hdc – half double crochet
- dc – double crochet
- inc – increase (2 stitches in the same stitch)
Feel free to practice these before beginning your project.
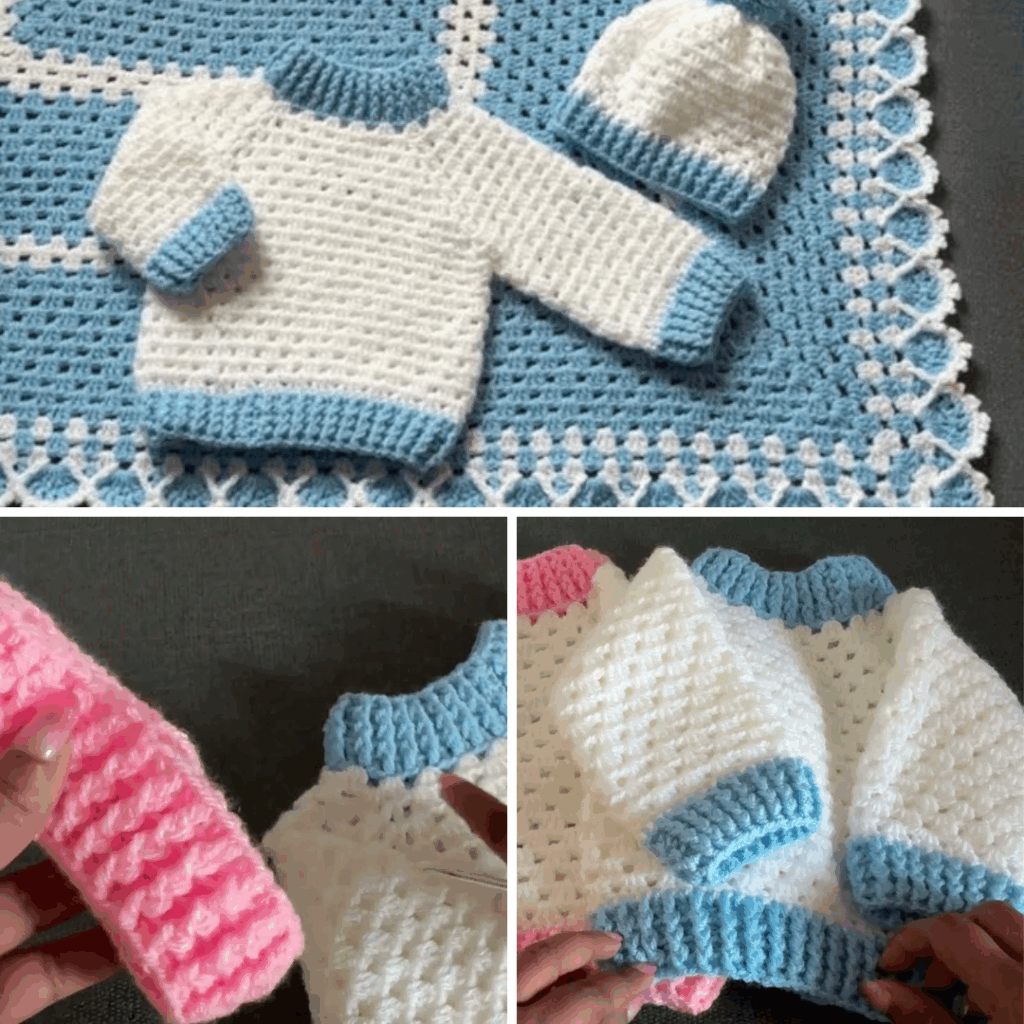
🧶 Construction Overview
This baby cardigan is made in one piece from the top down, using a raglan sleeve method. You’ll start at the neckline, work in rows, separate for sleeves, continue the body, and finish with sleeves and edging.
👕 Step-by-Step Pattern – Easy Crochet Baby Cardigan (0–6 Months)
🧷 Step 1: Foundation & Yoke
- Chain 52
This will be the foundation for your cardigan’s neckline. - Row 1 (DC Across)
- Dc in 4th ch from hook
- Dc across the row (Total: 50 dc)
- Row 2 (Raglan Setup)
- Ch 2, turn
- Dc in next 7 sts, 2 dc in next st (increase) — repeat across
- You’ll have 8 increases in total to create the shoulder shaping
- Continue Raglan Increases
- Repeat increase row for 7–9 more rows
- You’ll be increasing on either side of 4 “raglan” points (place stitch markers to keep track)
Once the yoke is about 4.5–5″ tall and wide enough to go across the baby’s shoulders, move on to the body section.
✂️ Step 2: Divide for Sleeves
- On your next row:
- Dc to the first marker (front panel)
- Skip stitches between markers (sleeve), ch 6 (underarm space)
- Dc across back panel
- Skip sleeve stitches, ch 6 again
- Dc across the other front panel
Now your cardigan has armholes and you’ll continue working on the body only.
👘 Step 3: Cardigan Body
- Continue in DC or HDC rows until the cardigan measures about 9″ long from the shoulder.
- You can keep the body straight, or:
- Add a few increases on the sides to make a slight A-line shape
- Add texture with alternating stitch patterns (e.g., HDC rows + DC rows)
Optional: Finish the last few rows with a shell stitch or picot edging for decoration.
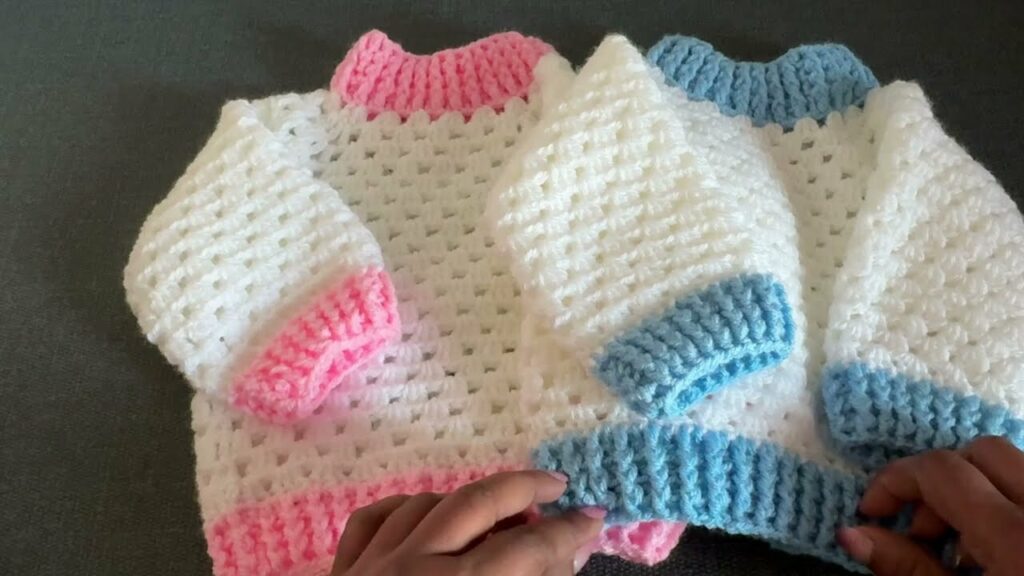
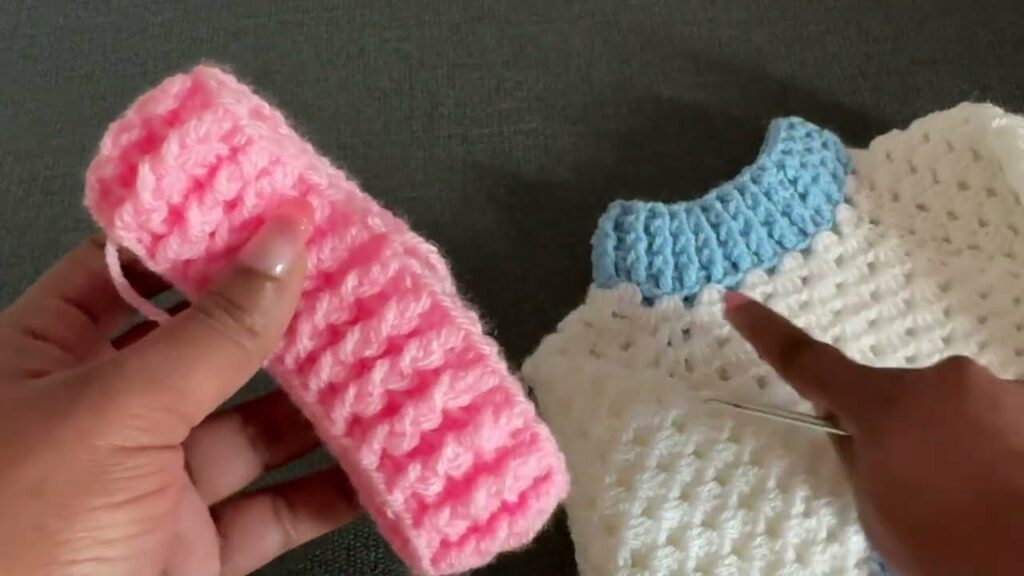
🧤 Step 4: Sleeves
- Attach yarn at the underarm
- Work dc or hdc evenly in rounds around the sleeve opening
- Continue until the sleeve is about 5″ long
- Optionally taper the sleeve by decreasing 1 stitch every 3rd round
Repeat for the other sleeve.
🪡 Step 5: Front Edging and Buttons
- Front Band / Edging:
- Attach yarn to bottom front edge
- Sc evenly up the front, around the neckline, and down the other side
- Optional: Add a second round of sc or use decorative stitches
- Buttonholes (Optional):
- On one front side, add buttonholes by:
[sc 3, ch 2, skip 2 stitches] – repeat where needed - Make 3–5 evenly spaced buttonholes
- On one front side, add buttonholes by:
- Sew Buttons:
- Attach buttons on the opposite side to align with holes
- Weave in all yarn ends and trim excess
🧼 Care Instructions
To keep your baby cardigan looking its best:
- Machine wash on gentle with cold or warm water
- Use mild baby-friendly detergent
- Lay flat to dry or tumble dry on low (if the yarn allows)
🎨 Optional Customizations
- Colors: Try color-blocking, stripes, or gradient yarn
- Stitch Variety: Alternate rows of HDC and DC, or add bobble stitches
- Decorations:
- Crochet flowers or bows
- Pockets
- Embroidered initials or patterns
- Add a Hood: After finishing the neckline, work rows upwards and shape into a hood
📸 Share Your Creations
Show off your beautiful baby cardigan on social media! Use hashtags like:
- #CrochetBabyCardigan
- #HandmadeWithLove
- #BabyCrochetSweater
You can also gift your sweater at baby showers or donate to hospitals and charities!
🧡 Final Thoughts
A handmade crochet baby cardigan is a timeless piece — warm, practical, and filled with love. This easy pattern provides a solid base that you can adapt and personalize endlessly. Whether you go for a classic solid color or embellish with cute motifs and trims, the result will always be a cherished garment.
It’s a perfect project for practicing shaping, sleeves, and finishing techniques — and best of all, it works up quickly!
VIDEO TUTORIAL: