by
by Crocheting a baby dress is not just a rewarding creative project—it’s also a heartfelt gift that can be cherished for years. Whether you’re a beginner or someone looking to craft a thoughtful handmade piece, this step-by-step guide will walk you through how to make an easy and beautiful crochet baby dress using simple stitches and soft yarn.
🧶 Supplies You’ll Need
Before getting started, gather the following materials:
Materials:
- Yarn: Soft, lightweight yarn (Cotton or baby acrylic yarn is ideal)
- Size: DK (Double Knitting) or Light Worsted (Category 3)
- Crochet Hook: Size 4.0 mm (G-6) or 4.5 mm, depending on your tension
- Scissors
- Yarn Needle (for weaving in ends)
- Stitch Markers (optional but helpful)
- Buttons or Ribbon (for closure and decoration)
📏 Size Guide
This pattern can be adjusted for different sizes, but we’ll focus on a dress for 0-6 months.
Approximate measurements:
- Chest: 16 inches (40.5 cm)
- Dress Length: 12 inches (30.5 cm)
🧵 Basic Stitches You Should Know
This pattern uses beginner-friendly stitches:
- Chain (ch)
- Slip Stitch (sl st)
- Single Crochet (sc)
- Half Double Crochet (hdc)
- Double Crochet (dc)
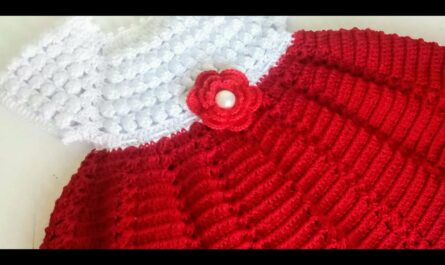
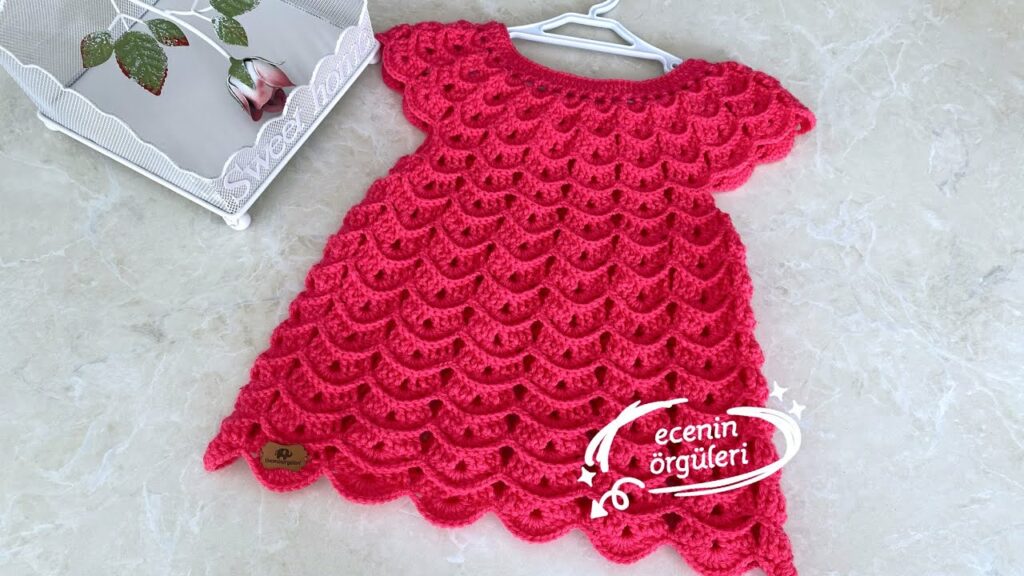
🪡 Pattern Overview
We’ll create the dress in three parts:
- Yoke (Top/Neck)
- Body (Skirt)
- Finishing touches (Sleeves, edging, buttons)
🧼 Step-by-Step Instructions
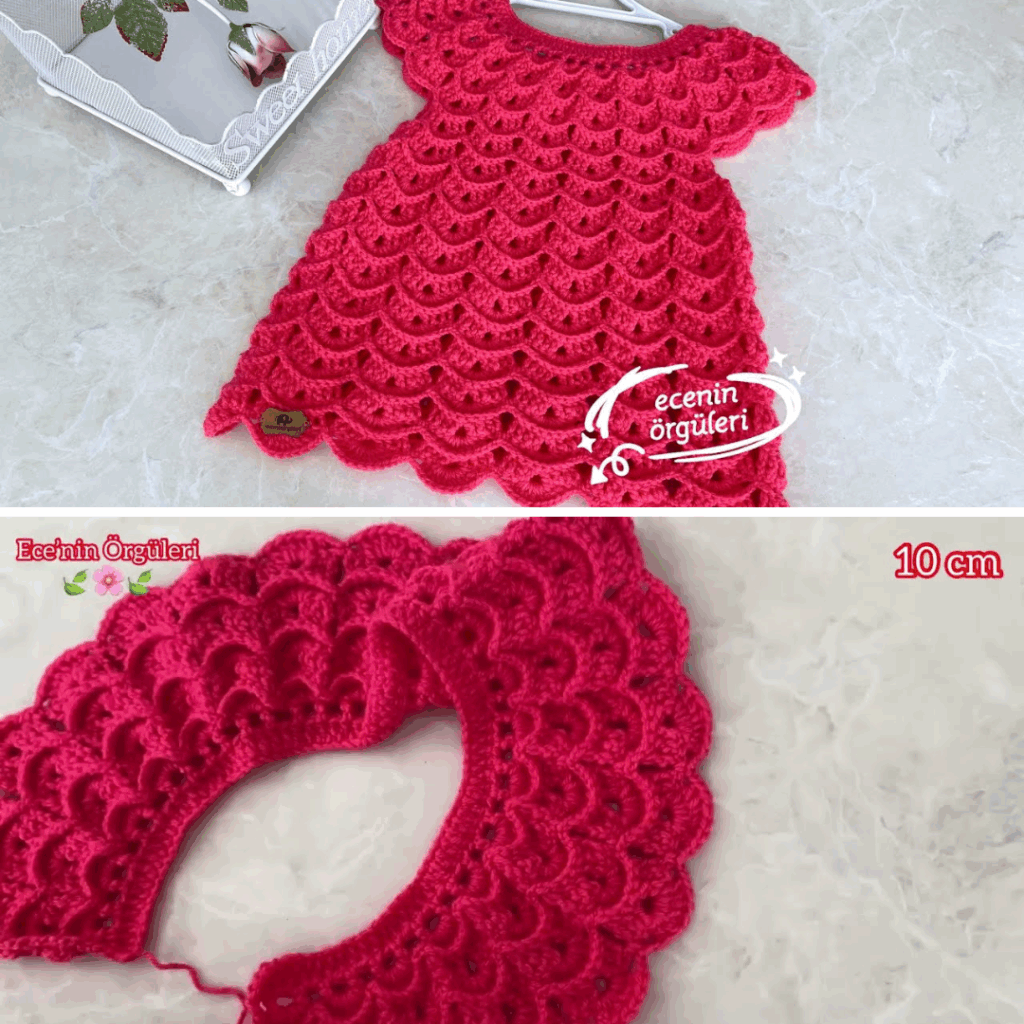
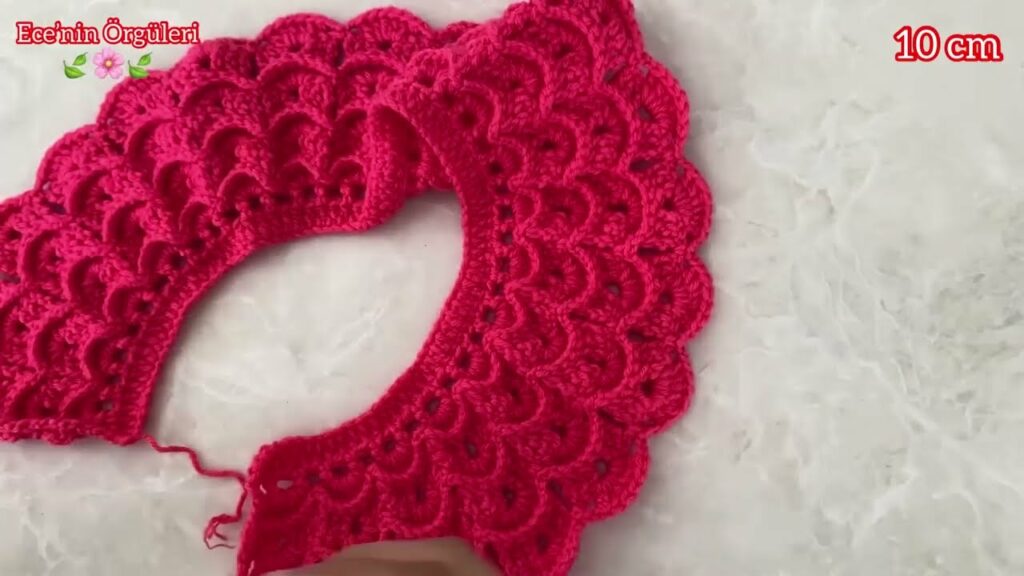
🔹 Step 1: Make the Yoke (Top)
This is worked in rows to form a flat piece that will later be joined into a circle.
Row 1:
- Chain 52 (adjust in multiples of 4 for other sizes)
- Dc in 4th ch from hook, and in each ch across (49 dc)
- Ch 2, turn.
Row 2 to 6 (or until 3” in height):
- Dc in each stitch across.
- Ch 2, turn.
➡️ You should now have a rectangular yoke. Fold it to form an opening for the arms and body. Connect ends with sl st (leaving holes for arm sleeves).
🔹 Step 2: Start the Skirt (Worked in Rounds)
Now we work in the round, crocheting downward to make the skirt portion.
Round 1:
- Attach yarn at the bottom edge of the yoke.
- Ch 2 (counts as first dc), dc evenly around the bottom.
- Join with sl st.
Round 2 (Increase Row):
- 2 dc in next st, 1 dc in next 2 sts, repeat around.
- Join with sl st.
Round 3 to 15 (or until desired length):
- Dc in each st around.
- Optional: Add texture by alternating with rows of hdc or puff stitches.
➡️ The skirt should start flaring out gently. For more flare, increase more often (e.g., every 3rd row).
🔹 Step 3: Finishing Touches
✨ Sleeves:
- Attach yarn to armhole.
- Work 2-3 rows of dc or hdc around each armhole.
- You can leave them as cap sleeves or make them longer.
✨ Neckline & Edging:
- Work a round of sc or shell stitch around the neckline and bottom hem for a polished look.
✨ Button Closure (Back):
- If your yoke has a back opening, add 1-2 small buttons.
- Make a loop using chains for buttonholes.
✨ Add a Ribbon:
- Thread a satin ribbon around the waistline for a decorative touch.
🌼 Tips for Success

- Check your gauge. Too tight and the dress will be stiff; too loose and it may lose shape.
- Use stitch markers to keep track of round beginnings.
- Mix colors or stripes to personalize the dress.
- Block your dress gently for a more professional finish.
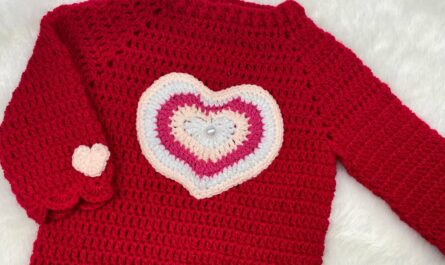
🍼 Optional Variations
- Add a ruffled hem: Use shell stitches or increase more frequently at the bottom.
- Add a flower applique or bow for embellishment.
- Make a matching headband using leftover yarn.
💖 Final Thoughts
Creating a crochet baby dress is not just about the final product—it’s about the joy of crafting something by hand for a little one. This easy and beautiful pattern gives you the freedom to experiment, personalize, and most importantly, enjoy the process.
Whether you’re gifting it at a baby shower or dressing up your own little one, this crochet baby dress will be a precious handmade treasure.
Video Tutorial: