 by
by Crafting the Perfect Keepsake for Newborns
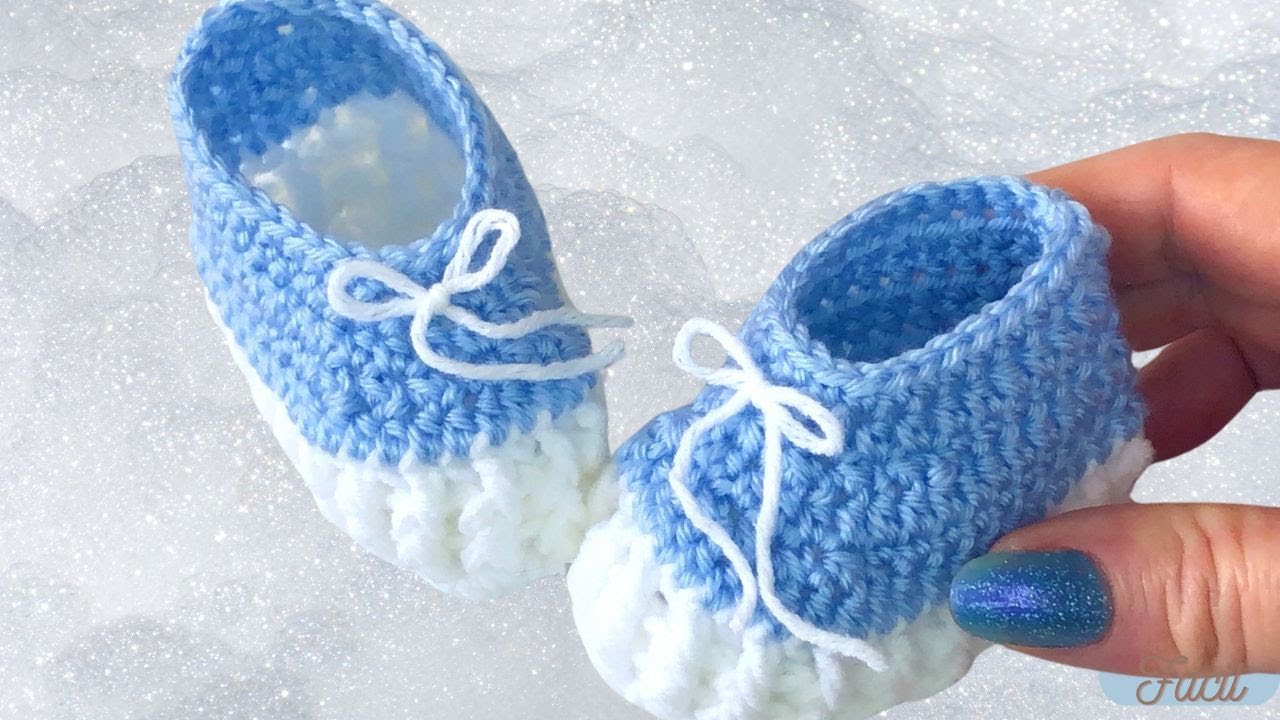
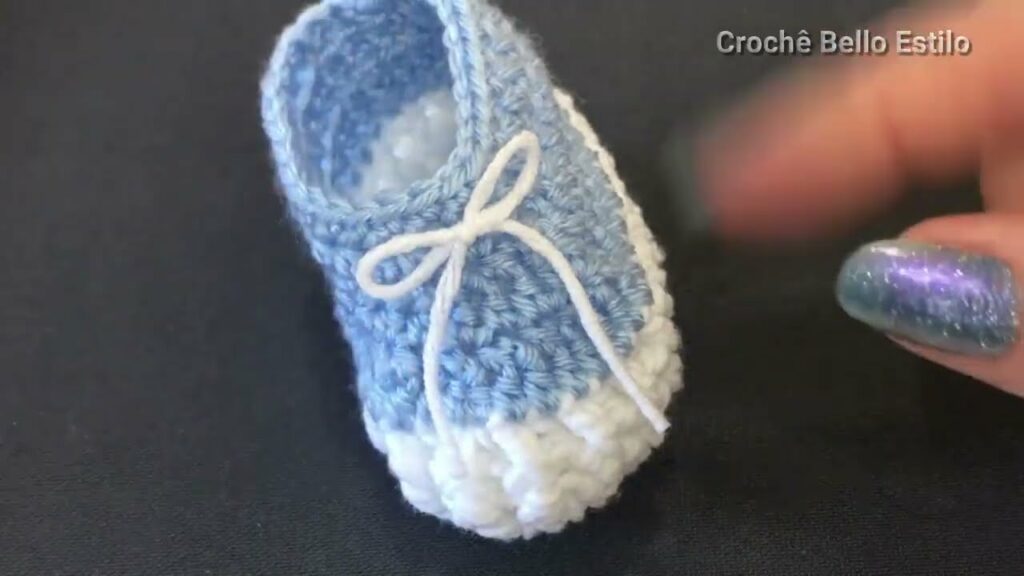
Welcome to your next favorite crochet project! If you’ve been looking for a fast, easy, and incredibly cute pattern for a newborn gift or charity project, you’ve found it. Inspired by the clear instruction in the Croche Bello Estilo Profa Mari tutorial, we’re distilling the “super easy technique” into a pattern you can keep forever.
This pattern is designed to create a beautifully shaped bootie for the youngest of feet—perfect for babies 0 to 3 months—and includes a fantastic ribbed cuff that gives it a professional, finished look.

🛠️ Section 1: Gather Your Supplies
Choosing the right yarn ensures a soft, warm, and well-fitting bootie.
| Item | Specification | Notes |
|---|---|---|
| Yarn A (Sole & Body) | DK or Light Worsted Weight (Category 3 or 4) | The tutorial used a cotton/acrylic blend for softness and structure. |
| Yarn B (Accent Color) | Same weight as Yarn A | Use a contrasting color for the toe section (optional). |
| Crochet Hook | 3.0mm or 3.5mm (E/4 or G/6) | We use a small hook to keep the sole stitches tight and prevent gaps. |
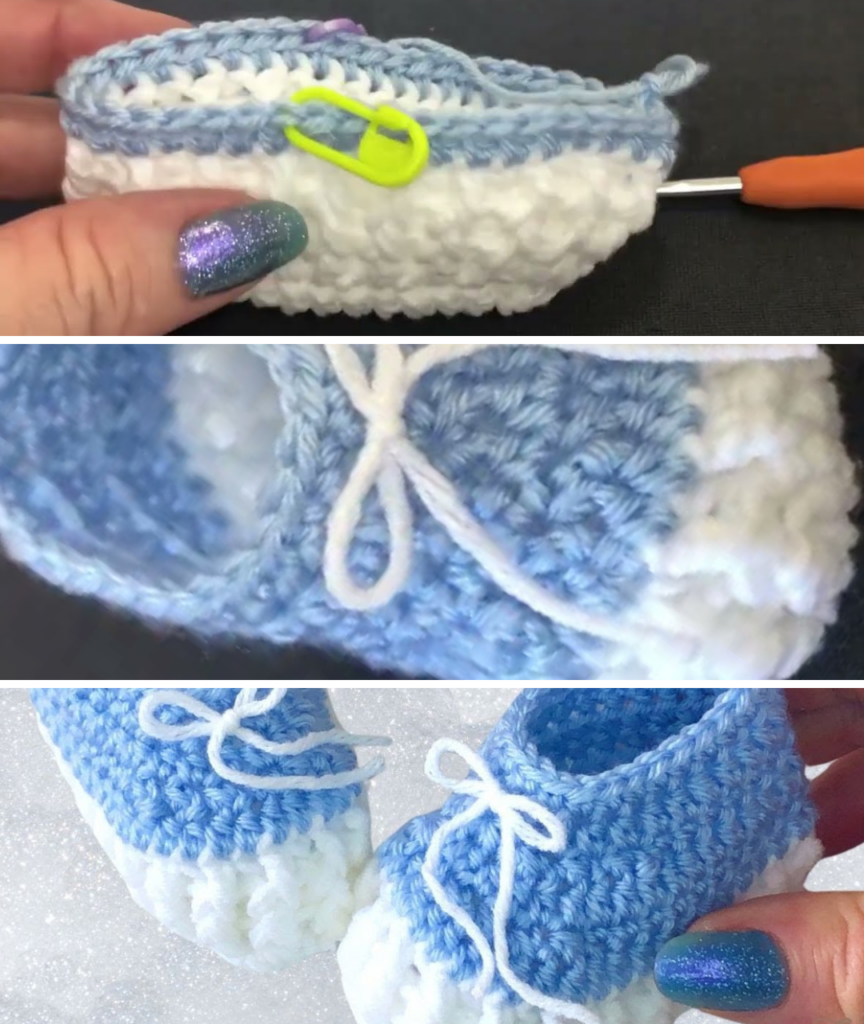
| Notions | Scissors, Tapestry Needle, 2 Stitch Markers | Markers are essential for the toe shaping section! |
📏 Sizing & Gauge Notes
- Finished Sole Length: Approximately 9 cm (3.5 inches).
- To increase the size: The instructor notes that to increase the size (e.g., for 3-6 months), simply add two more chains to your initial foundation chain and follow the rest of the pattern exactly as written.
🌹 Section 2: Pattern Abbreviations
This pattern uses standard US crochet terms.
| Abbreviation | Stitch Name |
|---|---|
| Ch | Chain |
| SL ST | Slip Stitch |
| SC | Single Crochet |
| HDC | Half Double Crochet |
| DC | Double Crochet |
| Inc | Increase (2 stitches in the same stitch) |
| Dec | Decrease (working 2 stitches together) |
| FPDC | Front Post Double Crochet |
| BPDC | Back Post Double Crochet |
👟 Section 3: The Pattern
Part I: The Foundation Sole (Yarn A)
The sole is worked in an oval shape, rotating around the foundation chain.
ROW 1: Foundation Chain
- Ch 13.
ROW 2: First Round (The Shape)
- Ch 2 (counts as 1 DC).
- Work 1 DC in the 4th Ch from the hook. (This completes your first increase.)
- Work 1 DC in the next 8 chains.
- In the final chain (the toe end), work 6 DC all in that last chain. (This creates the turn.)
- Working back down the other side of the foundation chain, work 1 DC in the next 8 stitches.
- In the last foundation chain space (where you started), work 3 DC.
- SL ST into the top of the beginning Ch 2 to join the round. (Total Stitches: 2 + 8 + 6 + 8 + 3 = 27 sts)
ROW 3: Shaping the Curve
- Ch 2 (counts as 1 DC).
- Work 1 DC Inc in the next 2 stitches. (3 Increases total at the heel.)
- Work 1 DC in the next 8 stitches.
- Toe Curve: Work 1 DC Inc in each of the next 6 stitches. (6 Increases total at the toe—12 DC total.)
- Work 1 DC in the next 8 stitches.
- Heel Curve: Work 1 DC Inc in each of the last 3 stitches. (3 Increases total at the heel—6 DC total.)
- SL ST into the top of the beginning Ch 2 to join. (Total Stitches: 36 sts)
Part II: The Body – Ribbed Cuff (Yarn A)
This is where we introduce the post stitches to create the classic, cozy ribbed texture. This step also begins to turn the work upwards, giving the bootie its wall.
ROW 4: Setting the Ribbed Texture
- Ch 2 (does NOT count as a stitch).
- In the same stitch as the join, work 1 FPDC.
- Work 1 BPDC around the next stitch.
- Repeat: *1 FPDC around the next stitch, 1 BPDC around the next stitch*. Repeat from * around the entire round.
- SL ST to the top of the first FPDC to join. (36 sts)
ROW 5: Repeating the Rib
- Ch 2 (does NOT count as a stitch).
- Work 1 FPDC around the previous row’s FPDC.
- Work 1 BPDC around the previous row’s BPDC.
- Repeat: *1 FPDC, 1 BPDC* around.
- SL ST to the top of the first FPDC to join. (36 sts)
Pattern Note: The visual reference suggests changing to Yarn B (or your accent color) at this point, but you can continue with Yarn A if you prefer a solid color.
Part III: Shaping the Toe (Yarn B)
Now we shape the front of the foot using a combination of Half-Double Crochet and decreases.
ROW 6: The Setup Round (HDC)
- Ch 2 (counts as 1 HDC).
- Work 1 HDC in every stitch around.
- SL ST to the top of the beginning Ch 2 to join. (36 sts)
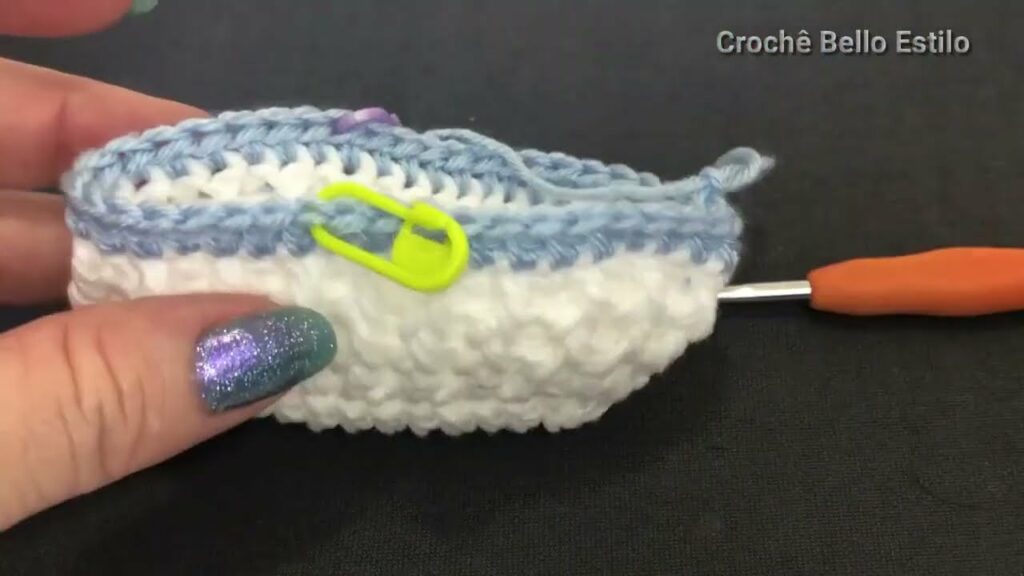
ROW 7: Marking the Toe
- Flatten the bootie and locate the center toe area. The curve you created in Row 3 is the guide.
- From the center of the toe, count 8 stitches to the left and place a stitch marker.
- From the center of the toe, count 8 stitches to the right and place a second stitch marker. (This section of 16 stitches will be our decrease zone.)
ROW 8: First Decrease Round (SC Diminutions)
- Ch 1 (does NOT count as a stitch).
- Work 1 SC in each stitch until you reach the first stitch marker.
- Remove the marker.
- Decrease Sequence: Work 8 SC Dec across the toe section (from marker to marker).
- Work 1 SC in each remaining stitch until you return to the beginning.
- SL ST to the first SC to join. (28 sts)
ROW 9: Final Decrease Round (HDC Diminutions)
- Ch 2 (counts as 1 HDC).
- Work 1 HDC in each stitch until you reach the front center of the toe (the decrease zone).
- Decrease Sequence: Work 4 HDC Dec across the toe section (working decreases over the stitches created in the previous decrease row).
- Work 1 HDC in each remaining stitch.
- SL ST to the top of the beginning Ch 2 to join. (24 sts)
✨ Section 4: Finishing Touches
- Tidy Up: Cut the yarn, leaving a long tail. Weave in all remaining ends securely using a tapestry needle. The neatness of your weaving is key to a professional finish!
- Add Decoration: You can create a simple decorative cord by chaining about 40 stitches and weaving it through the spaces in Row 8 (the final HDC row). Tie the ends in a simple bow over the foot, or sew a small fabric bow on top.
- Make a Pair: Repeat all steps for the second bootie! They are identical, so no need to reverse the pattern.
I hope this detailed pattern helps you create an adorable and cozy pair of booties! Let me know if you’d like to add a matching hat pattern to complete the set, or if you’d like to explore techniques for adding a seamless fabric lining for extra warmth!
Video tutorial: