 by
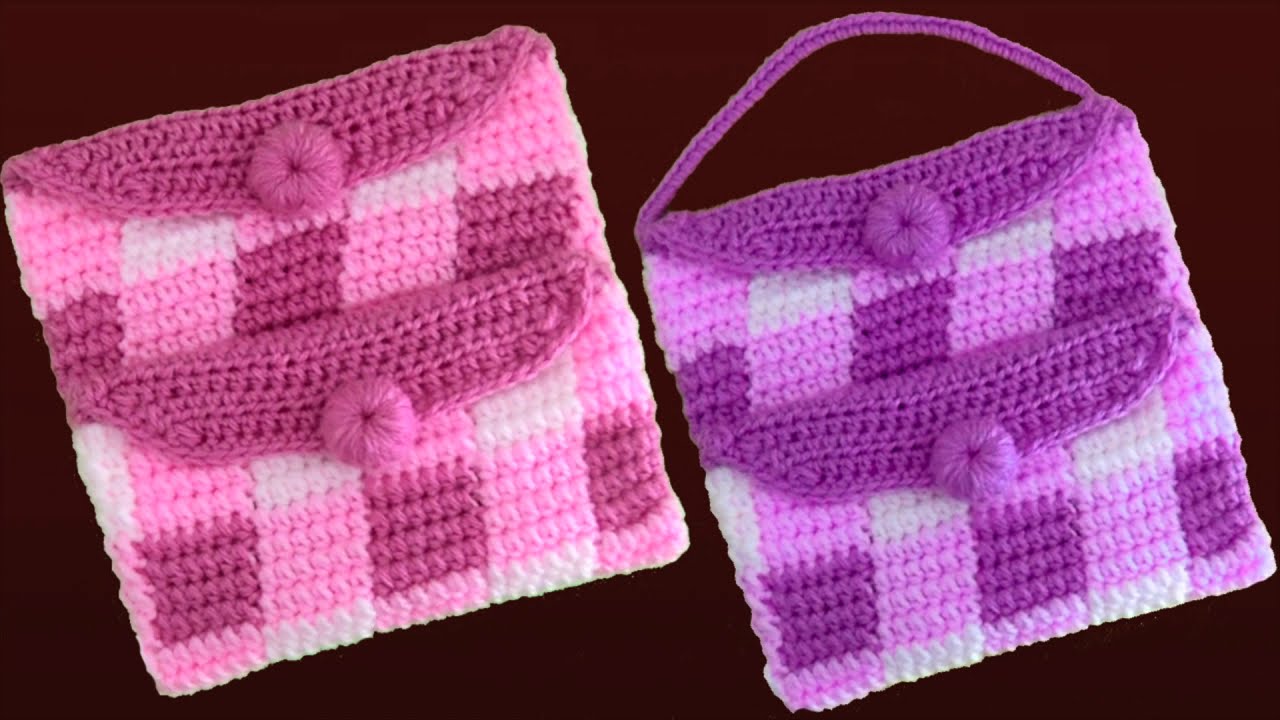
by Crochet a Multi-Compartment Masterpiece in One Piece!
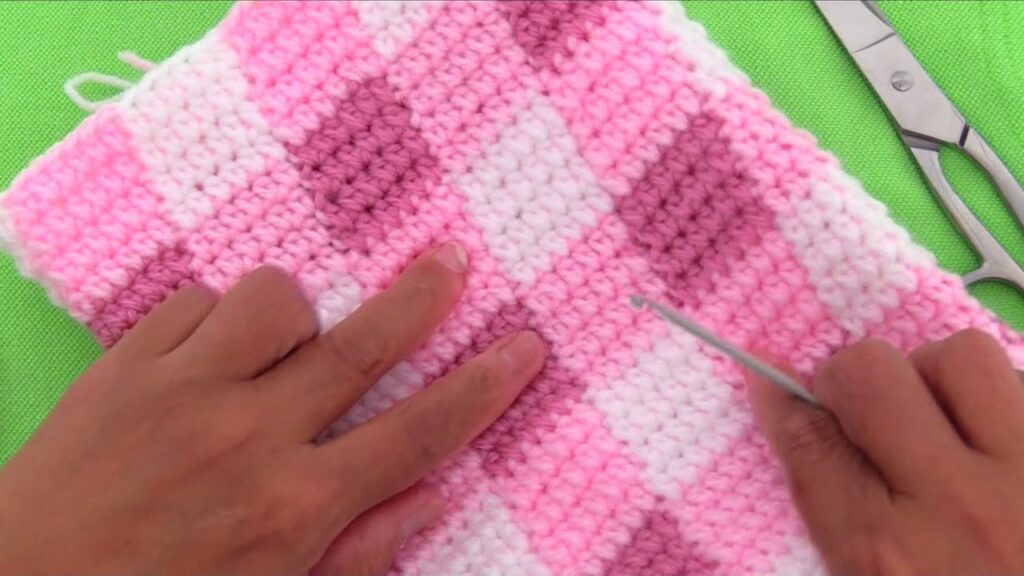
Inspired by the beautiful design from tallermanualperu, this pattern teaches you how to create a structured, zippered-look bag using three contrasting colors and a super simple stitch: the Half Double Crochet (HDC). The secret lies in the tapestry crochet technique, where you carry the unused yarn inside your stitches, eliminating countless ends to weave in and giving your fabric a sturdy, defined texture.
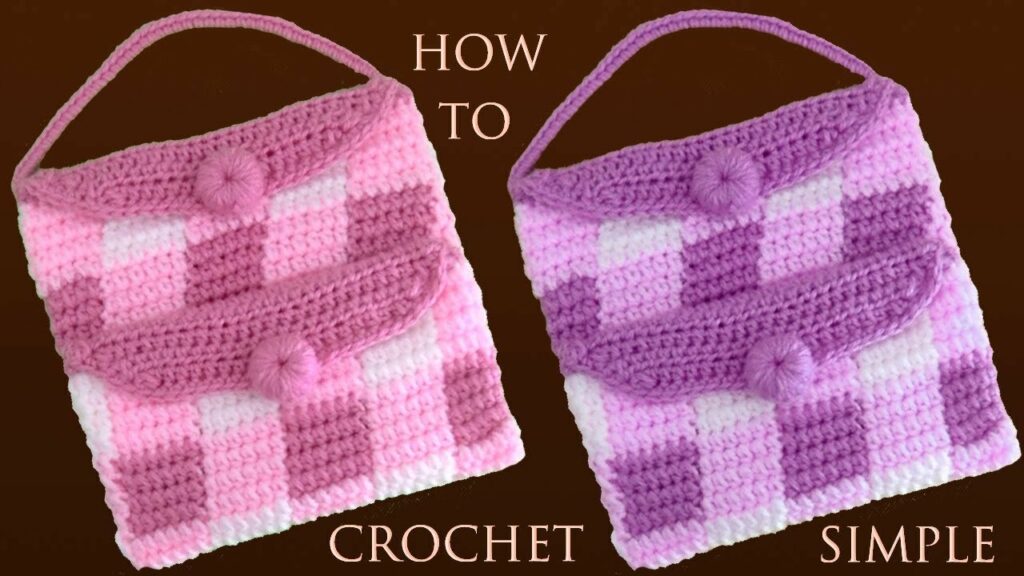
This project is worked entirely in the round as a tube, which is then cleverly folded and stitched to create multiple compartments—perfect as a large wallet, a small shoulder bag, or an elegant coin purse.
🛠️ Section 1: Gather Your Supplies
A rigid, durable yarn works best for this design to help the bag hold its shape.
| Item | Specification | Notes |
|---|---|---|
| Yarn A | Light Worsted/DK Weight (Category 3 or 4) | Main Color (e.g., White in the video) |
| Yarn B | Light Worsted/DK Weight (Category 3 or 4) | Contrast Color 1 (e.g., Light Pink) |
| Yarn C | Light Worsted/DK Weight (Category 3 or 4) | Contrast Color 2 (e.g., Darker Rose) |
| Crochet Hook | 3.0mm or 3.5mm (E/4 or G/6) | Using a smaller hook than usual is essential for a dense, tapestry fabric. |
| Notions | Scissors, Tapestry Needle, Optional: Magnetic Snap or Button for the Flaps. |
📏 Sizing & Gauge Notes
- Final Bag Size: The dimensions will depend on your yarn and tension.
- Foundation Chain: The pattern requires a chain in a multiple of 6.
- Sample Size: The video uses a starting chain of 60 stitches, which is what we will follow here. (60 stitches / 6 blocks = 10 blocks per row).
🌸 Section 2: Pattern Abbreviations (US Terms)
| Abbreviation | Stitch Name |
|---|---|
| Ch | Chain |
| SL ST | Slip Stitch |
| HDC | Half Double Crochet |
| HDC Inc | Half Double Crochet Increase (2 HDC in same stitch) |
| SC | Single Crochet |
| MC | Main Color (Yarn A) |
| CC1 | Contrast Color 1 (Yarn B) |
| CC2 | Contrast Color 2 (Yarn C) |
🧵 Section 3: The Pattern – Main Body
The entire body is worked in continuous rounds using the tapestry crochet technique. Always carry the inactive yarn(s) within your stitches.
Part I: The Foundation and First Block Band (MC & CC1)
Setup: Using MC (Yarn A), Ch 60. SL ST to the first chain to join into a ring, being careful not to twist the chain.
ROUND 1: Establishing the Blocks
- Ch 2 (does NOT count as a stitch).
- Work 6 HDC in MC, working over the tail of CC1 and carrying CC1 tightly.
- Color Change: On the 6th HDC, pull CC1 through the last loops to complete the stitch. MC is now carried.
- Work 6 HDC in CC1, carrying MC tightly.
- Color Change: On the 6th HDC, pull MC through the last loops to complete the stitch. CC1 is now carried.
- Repeat steps 2-5 around the entire loop (a total of 10 color blocks).
- SL ST to the top of the first HDC (not the Ch 2) to join. (60 sts)
ROUND 2 – 4: Continuing the Block Band
- Ch 2 (does NOT count as a stitch).
- Continue the Established Pattern: Work 6 HDC in the color of the previous row’s block, changing colors on the 6th stitch, always carrying the inactive yarn.
- SL ST to the top of the first HDC to join. (60 sts)
Key Rule for Tapestry: Always work the stitch into the stitch below, but carry the inactive yarn across the top of the stitches and enclose it in the HDC you are working.
Part II: Shifting the Blocks (Introducing CC2)
After 4 rows, we change the position of the blocks to create the classic checkerboard/square effect. We also introduce the third color, CC2.
ROUND 5: Block Shift (CC1 & CC2)
- Cut Yarn A (MC): Secure the end of Yarn A and weave it in neatly. You will no longer carry it.
- Switch to CC1: Start the round in CC1.
- New Pattern:
- Work 6 HDC in CC1 (over the previous MC block).
- Change to CC2.
- Work 6 HDC in CC2 (over the previous CC1 block).
- Repeat the [6 CC1, 6 CC2] sequence around.
- SL ST to join. (60 sts)

ROUND 6 – 8: Continuing the Shifted Block Band
- Ch 2 (does NOT count as a stitch).
- Continue the Established Pattern: Work 6 HDC in the color of the previous row’s block (CC1 over CC1, CC2 over CC2), changing colors on the 6th stitch, carrying the inactive yarn.
- SL ST to the top of the first HDC to join. (60 sts)
Part III: Repeat for Desired Length
- The video pattern repeats this 8-row sequence (4 rows of one block set, 4 rows of the shifted block set) until the bag is the desired height.
- The final bag in the video has 7 total block sets (approximately 56 rows high).
Follow the sequence:
- Block Set 3 (Rounds 9-12): Switch back to MC and CC1 (same colors as Rounds 1-4).
- Block Set 4 (Rounds 13-16): Switch to CC1 and CC2 (same colors as Rounds 5-8).
- Continue repeating this pattern until you have reached the desired length for your bag body. End with a CC2 block set (Rounds 5-8 style).
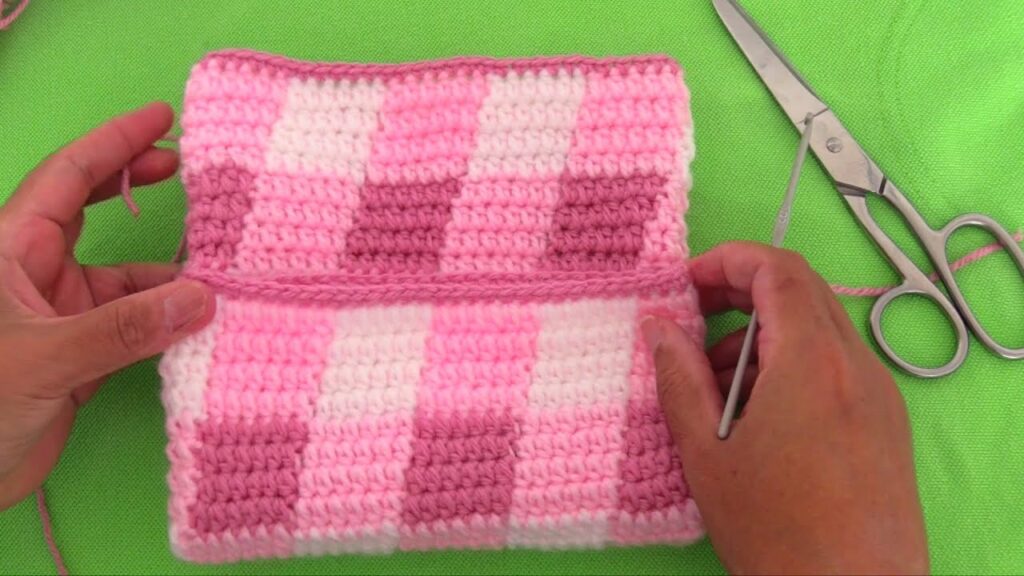
👝 Section 4: Edging, Folding, and Assembly
Once the main body is complete, we add a solid color edging, fold the piece, and sew the sides to create the compartments.
Part IV: The Final Edging (CC2)
- Cut CC1: Cut CC1 and weave in the end. We will finish with CC2 only.
- Last Rounds (CC2): Work 1 round of SC in CC2.
- SL ST to join and fasten off, leaving a long tail for seaming (about 20 inches).
Part V: Forming the Compartments
The bag is folded into a “W” shape to create three layers:
- Lay the tube flat.
- Fold the bottom edge up by about one-third of the way. This is your first layer/compartment.
- Fold the top edge down, aligning it with the edge of the first fold. This creates the second layer/compartment and leaves a wide, double-thick top flap.
- The side edges now form the opening of the bag.
Part VI: Side Seaming
- Thread the long CC2 tail onto your tapestry needle.
- Starting from the bottom corner, securely stitch the three layers together up the side edge using a neat whipstitch or mattress stitch. The layers should be held firmly, but the seam should not pucker.
- Repeat on the other side, using a new length of yarn if needed.
🎀 Section 5: The Flap and Finishing
The video creates two flaps—one for the front pouch and one for the back.
Part VII: Creating the Front Flap (CC2)
- Identify the top layer of the folded bag (which covers the front compartment). This flap is worked in rows, not rounds.
- Join CC2 yarn at the corner edge of the front flap.
- Row 1 (Setup): Ch 2 (counts as 1 HDC). Work 1 HDC in each stitch across the top of the flap. Turn.
- Row 2 (Decrease Start): Ch 1. Work HDC Dec over the first two stitches. Work HDC in each stitch until the last two. Work HDC Dec over the last two stitches. Turn.
- Row 3: Ch 1. Work 1 HDC in each stitch across. Turn.
- Repeat Rows 2 and 3 until the flap has a soft, rounded shape, or until you reach the center where you can create a buttonhole chain (as shown in the video).
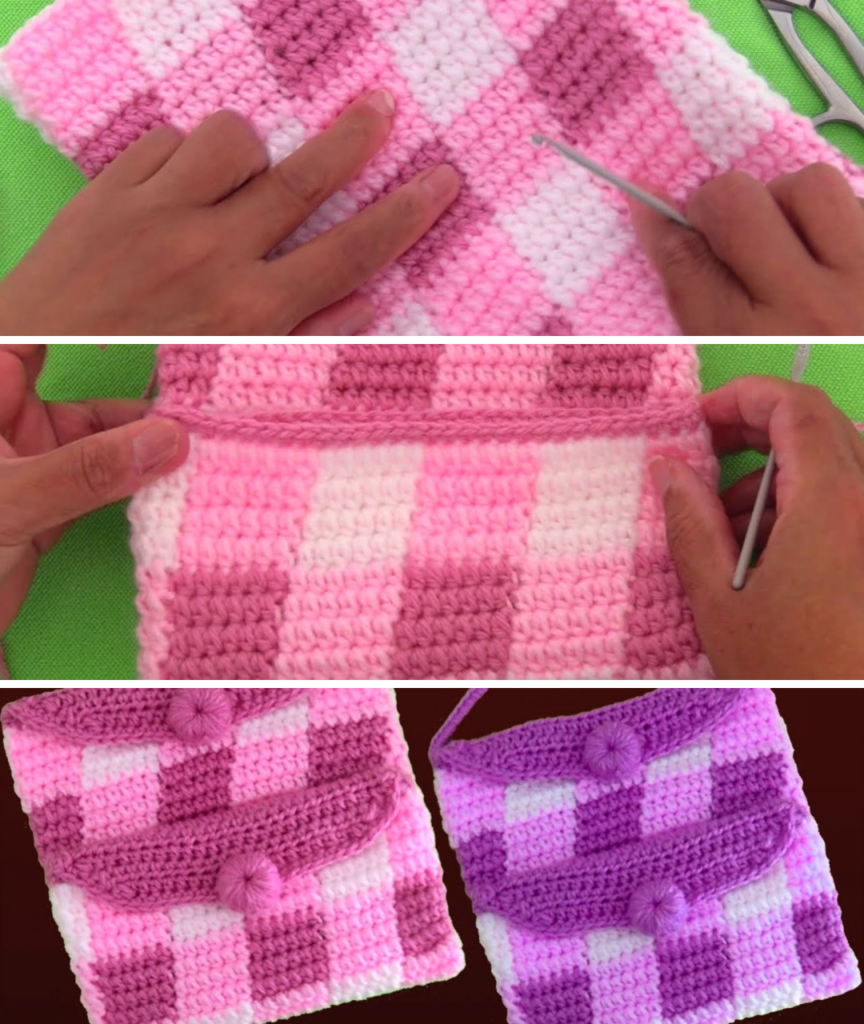
Part VIII: The Second Flap (Repeat)
- Repeat the exact instructions from Part VII on the back layer of the bag to create a matching flap.
Part IX: The Handle
- Using any color (or a mix), Ch 37 (or desired length for a short shoulder strap).
- SC back down the chain, then SL ST to join the handle to the side seam corners of the bag. Fasten off and weave in ends.
- Add a decorative button or pom-pom to the body of the bag to secure the flap closures.
This Tapestry Square Bag is a wonderful conversation piece and a practical accessory! It requires attention to detail on the color changes, but the result is a beautiful, sturdy, and entirely unique item.

Let me know if you’d like to walk through the tapestry technique more closely (especially the color change on the last stitch) or if you want to find the perfect pom-pom button pattern to complete the look! Happy hooking!
Video tutorial: