 by
by Creating custom crochet slippers is a rewarding project that combines comfort with creativity. Based on the tutorials provided, this guide will walk you through the process of making Two-Color Base Slippers and then customizing them into adorable Monster Slippers.
Part 1: Making the Slipper Base (Two-Color Technique)
The base of the slipper is constructed using a sturdy sole and a decorative diamond-stitch pattern (using two colors).
1. Preparing the Sole and Edging
- Initial Setup: Take your slipper sole and a 4.0mm crochet hook.
- Base Layer: Start by crocheting a row of single crochets around the edge of the sole.
- Insert your hook into the pre-punched holes of the sole.
- Pull through the yarn and work one single crochet into each hole.
- If a hole appears wider (common at the toe or heel), work two single crochets into that same spot to prevent the fabric from pulling.
- Closing the Round: Once you reach the start, finish with a slip stitch into the first stitch and pull tight to secure.
Video Part1;
2. Starting the Upper (V-Stitch/Diamond Pattern)
- Finding the Center: Mark the center of the toe. Count out the number of stitches required for your size (e.g., for size 38-39, use 8 stitches).
- Row 1: * Attach your first color at the right marker.
- Work a chain (turning chain).
- In the next 6 stitches, work “Diamond Flowers.” One “flower” consists of two half-double crochets (HDC) in the same stitch.
- Finish the row with a slip stitch into the sole and pull tight.
- Row 2 (Color Change): * Switch to your second color.
- Attach it one stitch further along the sole than the previous row.
- Work your HDC pairs (flowers) into the gaps between the flowers of the previous row.
- Control Thread: As you progress, hold a “control thread” along the edge of the sole and crochet over it. This keeps the shape of the slipper opening firm and prevents stretching.
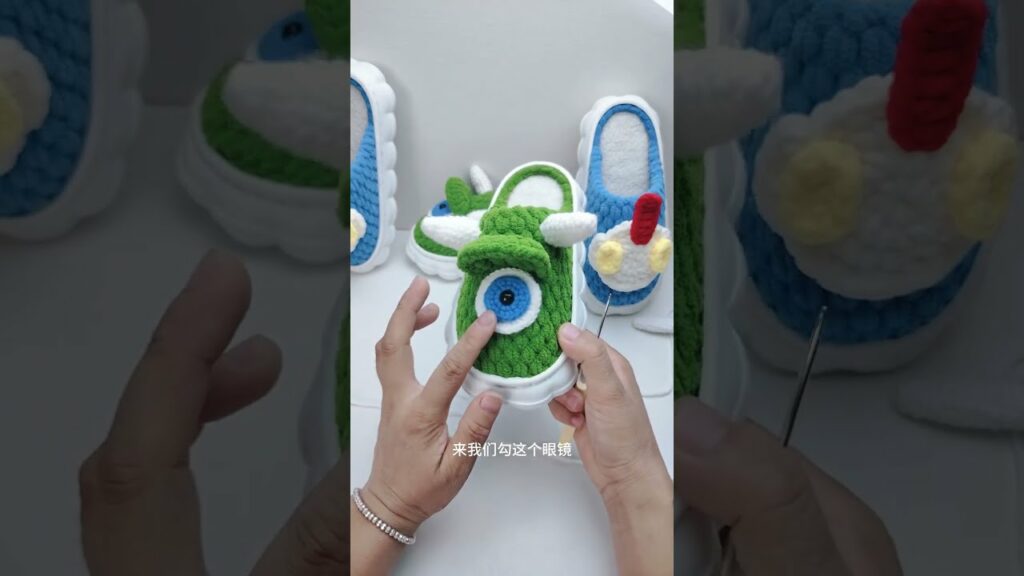
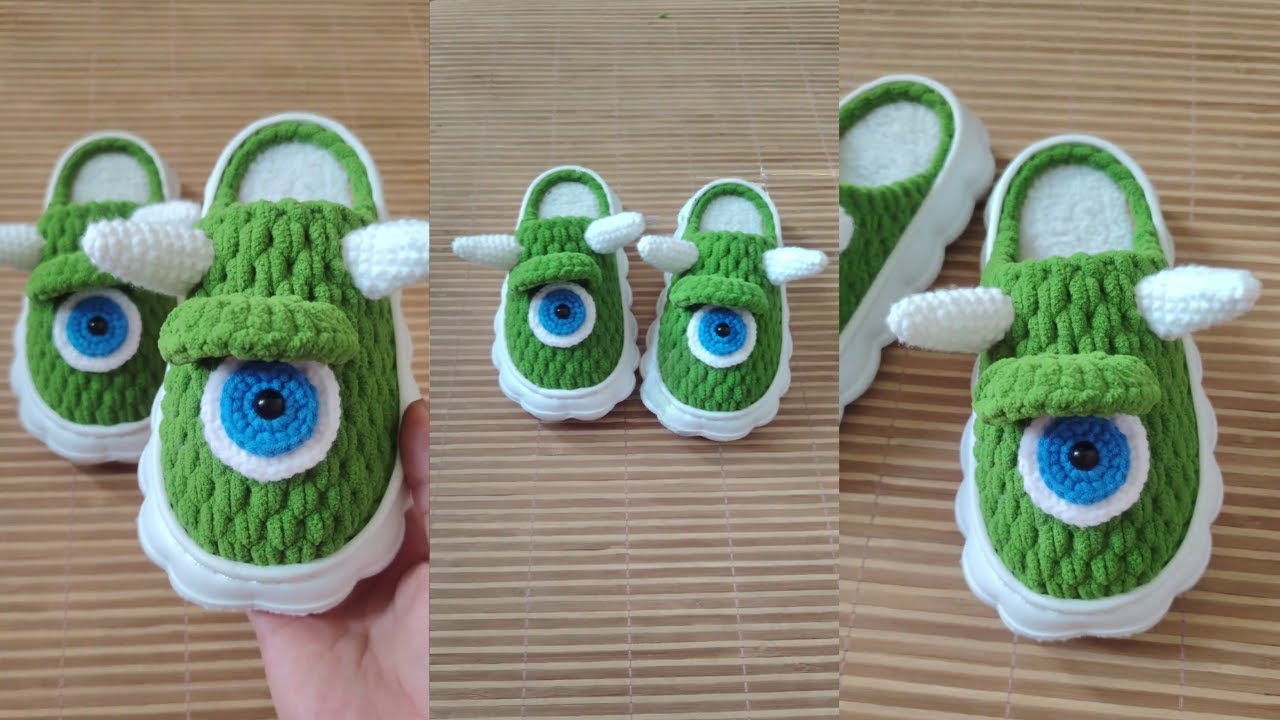
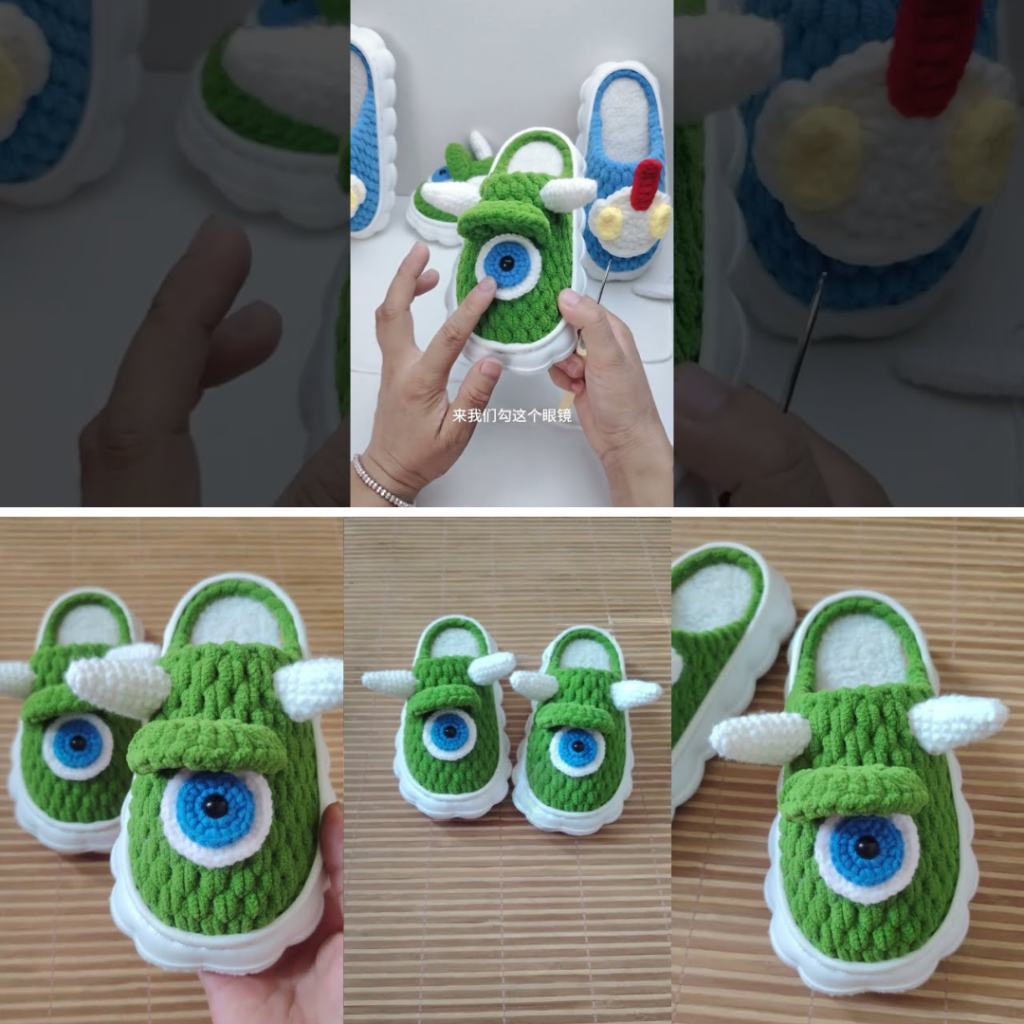
Part 2: Making the Monster Decorations
Once your base slippers are finished, you can create the “Big-Mouth Monster” accessories using a 2.5mm hook and lighter yarn.
1. The Monster Feet/Toes (Make 4)
- Round 1: Create a magic ring and work 5 single crochets (SC) into it.
- Round 2: Work an increase (2 SC in one stitch), then 1 SC. Repeat around (8 stitches total).
- Round 3: Work one SC in each stitch around.
- Round 4: Increase in the second stitch, work 2 SC, increase, 2 SC, and finish with an increase (11 stitches total).
- Rounds 5-10: Work even (1 SC in each stitch) for 6 more rounds to create a small tube.
2. The Eyes (Make 2)
- White Part: * Start with a magic ring of 6 SC.
- Increase in every stitch (12 SC).
- Continue increasing (e.g., 1 SC, 1 INC) until the circle is about 5 rounds wide.
- Blue/Pupil Part: * Make a smaller circle (3 rounds total) using blue yarn.
- Eyelid/Cover: * Using the color of your slipper base, work 7 half-double crochets into a magic ring, but do not close it into a full circle (keep it as a semi-circle).
- Increase in every stitch in the second row to create a “hood” for the eye.

Part 3: Assembly
- Placement: Place the finished slippers on a flat surface.
- Feet: Sew two “toes” onto the front edge of each slipper.
- Eyes: Glue or sew the blue pupil onto the white eye. Glue the eyelid “hood” over the top of the white circle.
- Final Attachment: Position the eyes in the center of the slipper upper and sew or use fabric glue to secure them.
Video Tutorial Part2: