 by
by 1. Preparation and Understanding the Pattern
Before starting, it is essential to understand the layout of the project.
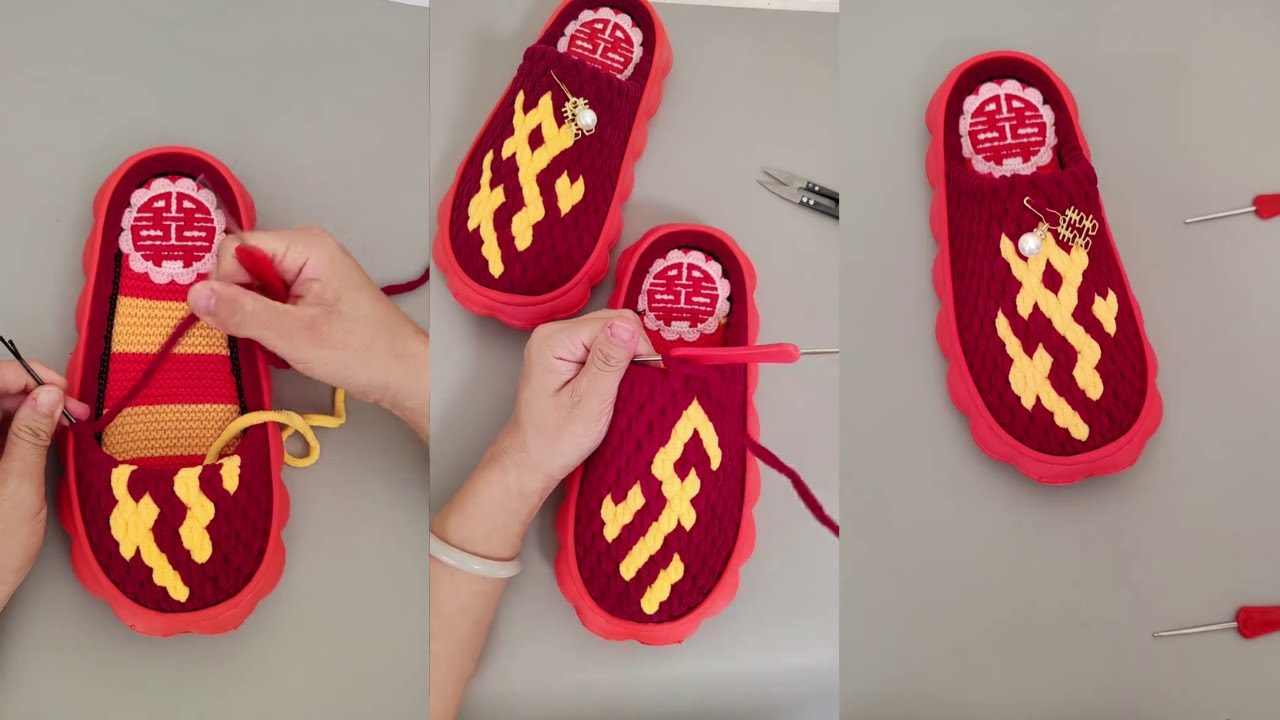
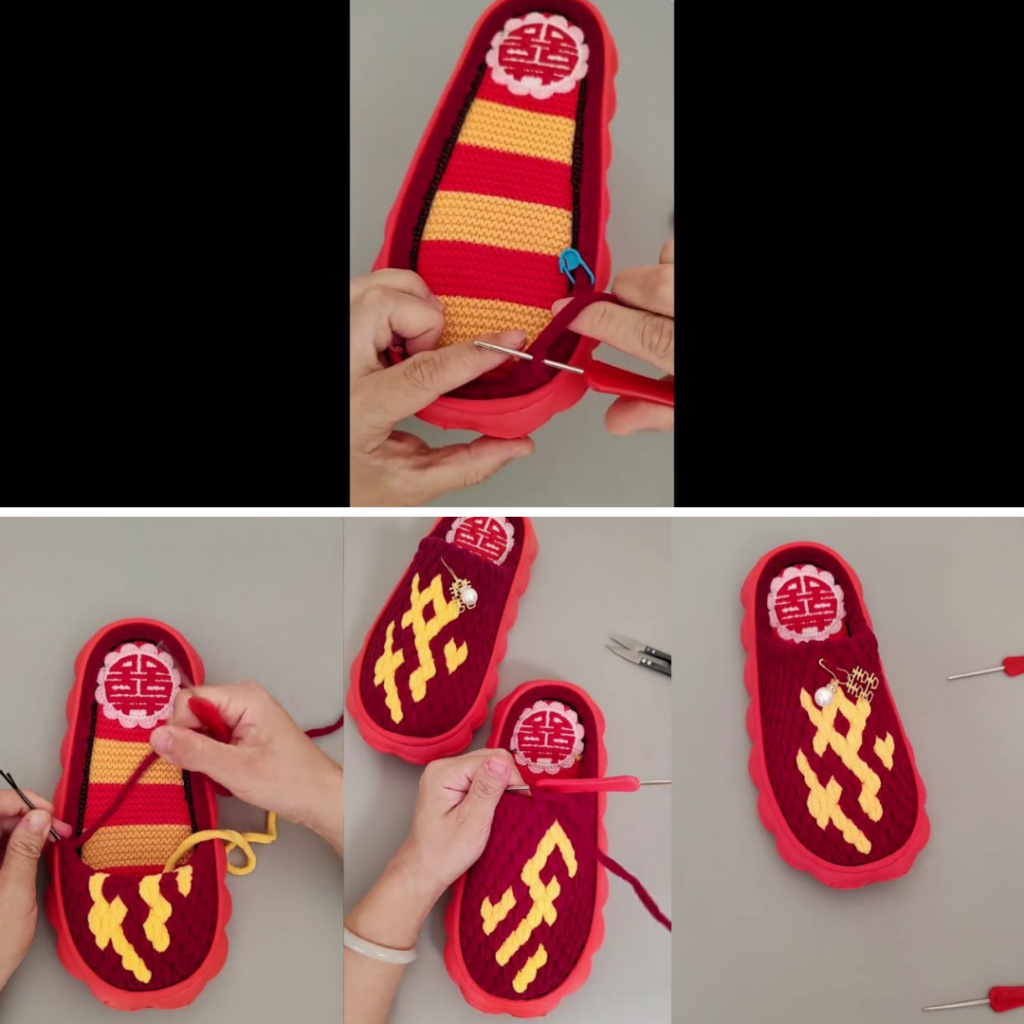
- The Grid Pattern: The shoe face consists of 14 rows. The design is charted on a grid where grey squares represent the “flower” shape (the main stitch pattern) and black squares represent the character pattern using a different color of yarn.
- Foundation: For a standard size (38/39), you start with a foundation of 6 flowers
- Stitch Used: The primary stitch is the Half Double Crochet (HDC), often worked as two HDC in one space to create a “flower” pattern
2. Preparing the Sole and Base
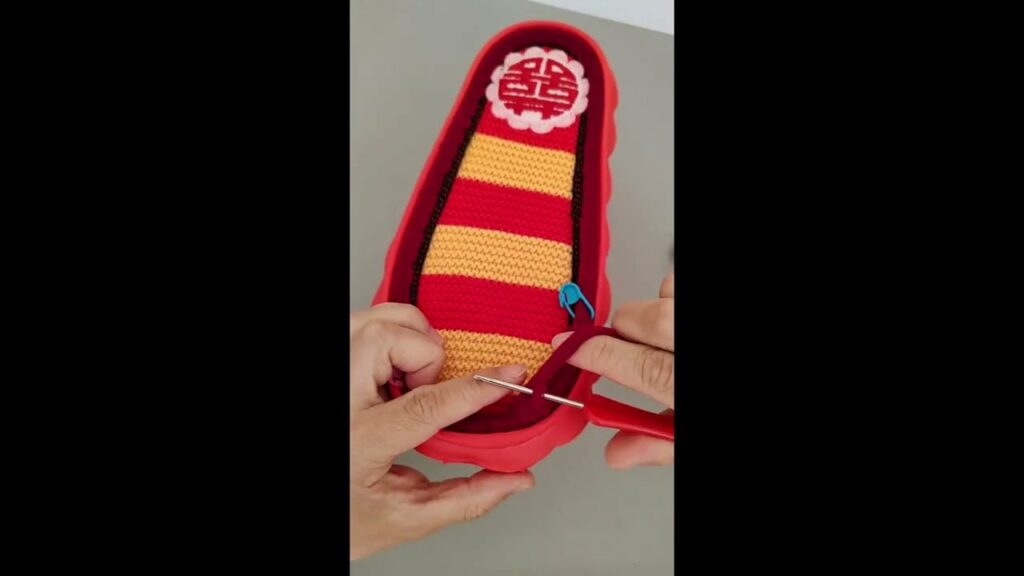
- Remove the Insole: Take out the insole from your pre-made shoe base to make crocheting easier
- The Base Round: Start at the heel. Insert the hook into the first horizontal mark on the base. Pull the yarn through and create a standing chain .
- Single Crochet Border: Work Single Crochets (SC) around the entire edge of the sole. Ensure the yarn tail is tucked under your stitches as you go
- Tension Check: After finishing the base round, pull the sole flat. If it curls upward excessively, your tension is too tight and you may need to restart with a looser hand .
3. Starting the Shoe Face (Rows 1–5)
- Marking the Center: Find the center of the toe and count out 8 stitches to ensure the face is symmetrical .
- Row 1: Join your yarn and work 6 flowers (each flower is 2 HDC in one stitch). At the end of the row, use a slip stitch (SL ST) to join to the shoe base .
- Shaping: After every row, push the toe area from the inside out to help the shoe maintain a rounded, full shape
- Row 2 (Introducing Color): This row begins the character pattern. Work 3 flowers in the main color, then switch to the accent color for the character portion according to the chart
- Row 3–5: Continue increasing by one flower per row. By Row 2, you have 7 flowers; by Row 3, you have 8, and so on
4. Advanced Shaping: “Skipping Stitches” (Rows 6–14)
To create the proper “slope” of the shoe so it fits the foot securely, you must begin “controlling” or skipping stitches.
- Skipping Stitches (Row 6): Instead of working into the very next stitch on the base, skip one stitch and move to the second one. This creates a steeper angle for the shoe opening
- Filling Gaps: When skipping stitches, a small hole may appear. To fix this, when working the next row, insert your hook into the back loop of the skipped area to “fill” the gap
- Character Completion: Continue following the grid for the “Happy” character. By Row 11, the character should be clearly visible
- Final Rows: Complete up to Row 14. Ensure the distance from the finished face to the heel is approximately “three fingers wide” for a perfect fit
5. The Decorative Edge (Twisted Stitch)
To give the shoe a professional finish, use a “Twisted Stitch” (or Crab Stitch variation) for the final border.
- The Setup: Skip one stitch on the base, pull a loop through, and create a standing chain slightly higher than the shoe face (about 3–4 cm) .
- The Twist: Insert the hook into the stitch, pull up a loop, and physically rotate the hook 360 degrees before completing the stitch. This creates a textured, cord-like edge that matches the thickness of the HDC flowers
- Finishing: Work this twisted stitch all the way around the opening of the shoe
6. Finishing Touches

- Hiding Yarn Tails: Thread the remaining yarn through the stitches on the inside of the shoe. Make a “turn” or a U-turn with the yarn inside the stitches so it cannot be pulled out
- Hardware: For a traditional wedding look, attach a metal “Double Happiness” or festive pendant to the center of the toe
Video Tutorial;
By following these steps, you will create a sturdy, elegant, and culturally meaningful pair of wedding shoes.