by
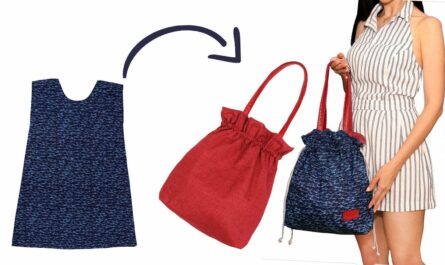
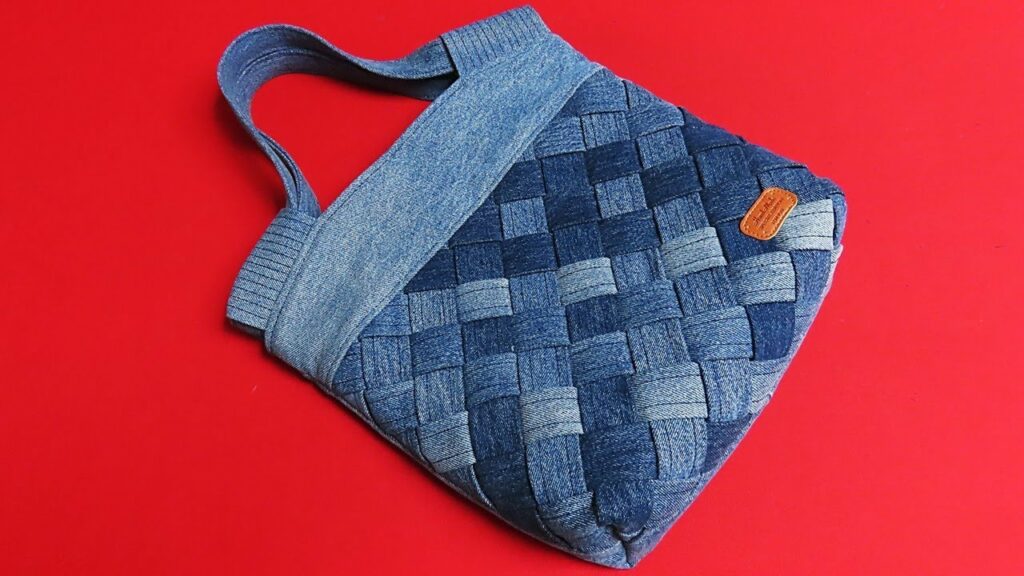
by Transforming old jeans into a stylish and functional tote bag is a fantastic way to upcycle, reduce waste, and create a unique accessory. This guide will walk you through the process of sewing a weaving tote bag, utilizing the sturdy denim to create a beautiful, textured design.
Materials You’ll Need:
- Old Jeans: 2-3 pairs, depending on the size of your bag and the desired color variations. Look for different shades of blue, black, or even colored denim for more visual interest.
- Fabric for Lining (Optional but Recommended): Cotton, canvas, or an old bedsheet will work well. This adds durability and a clean finish.
- Interfacing (Optional): Medium-weight fusible interfacing can add extra structure to your bag.
- Sewing Machine: (Highly recommended)
- Sharp Fabric Scissors or Rotary Cutter and Mat:
- Pins or Fabric Clips:
- Iron and Ironing Board:
- Matching Thread:
- Ruler or Measuring Tape:
- Fabric Marker or Chalk:
- Webbing or Fabric for Straps: Approximately 1.5 – 2 yards, 1-1.5 inches wide.
- Optional: Rivets, D-rings, magnetic snap closure, decorative patches.

Preparing Your Denim:
- Wash and Dry Jeans: Ensure your jeans are clean and dry before you start.
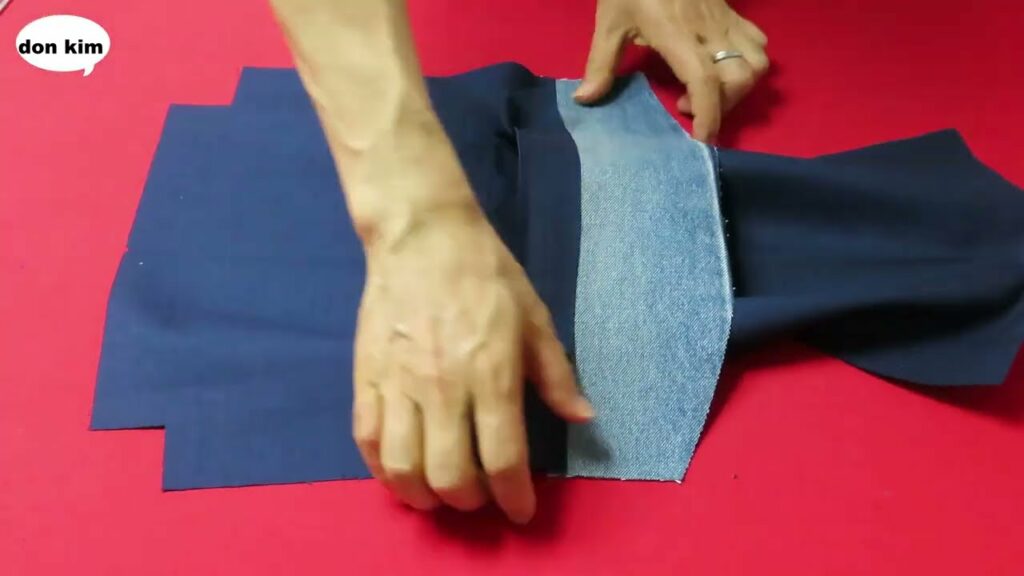
- Deconstruct the Jeans:
- Lay the jeans flat and smooth them out.
- Cut off the bottom hems.
- Cut along the inseams to open up the legs.
- Cut along the outer seams.
- Carefully cut away the thick seams, zippers, and pockets if you don’t plan to incorporate them into your design. You want as many flat pieces of denim as possible.
- Press Flat: Iron all your denim pieces flat to remove any wrinkles and creases.
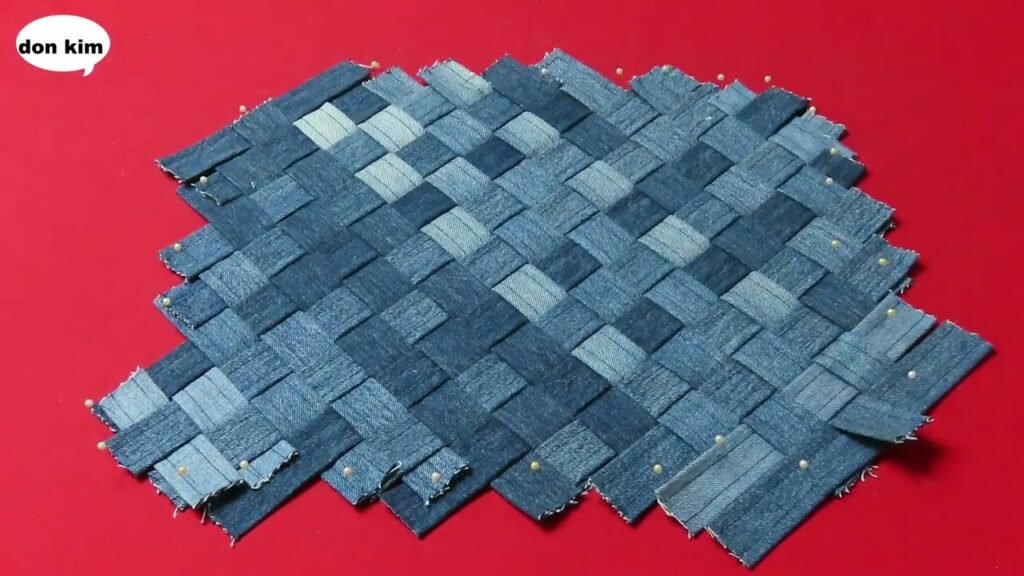
Weaving the Bag Panels:
This is where the magic happens! You’ll create two woven panels for the front and back of your tote.
- Cut Denim Strips:
- Decide on the desired width of your woven strips. 1-2 inches wide usually works well. The length will depend on the dimensions of your finished bag.
- Cut a large number of denim strips from your deconstructed jeans. Cut some lengthwise (along the grain) for less stretch, and some crosswise (across the grain) for more flexibility, which can add interesting texture.
- You’ll need a base layer of “warp” strips and then “weft” strips to weave through them.
- Prepare Your Base (Warp) Strips:
- Determine the approximate width and height of your desired bag panel.
- Lay out your “warp” strips parallel to each other on a flat surface. These will be the vertical strips of your weave.
- Pin or tape the ends of these strips to your surface to keep them from shifting. Leave some extra length on each end for trimming.
- Weave the “Weft” Strips:
- Take your first “weft” strip (a horizontal strip). Starting at one end of your warp strips, weave it over the first warp strip, under the second, over the third, and so on, just like a traditional basket weave.
- Push the weft strip snugly against the previous one (or the starting edge).
- Take your second weft strip. This time, start by weaving under the first warp strip, over the second, under the third, and so on. This creates the alternating pattern.
- Continue this process, alternating the over/under pattern with each new weft strip, until your woven panel reaches the desired height.
- As you weave, periodically push the weft strips together to create a tight, dense fabric.
- Stabilize the Woven Panel:
- Carefully remove the woven panel from your work surface.
- Machine Stitching: A crucial step to prevent unraveling. Stitch all around the perimeter of your woven panel, about 1/4 inch from the edge. You can also stitch vertically and horizontally through the weave in a grid pattern to further secure it.
- Fusible Interfacing (Recommended): If using, cut a piece of fusible interfacing slightly larger than your woven panel. Following the manufacturer’s instructions, iron the interfacing to the back of your woven panel. This will provide excellent stability and prevent fraying.
- Trim and Square Up: Once stabilized, trim your woven panel to your desired final dimensions, ensuring all edges are straight and the corners are square. Repeat this process to create a second identical woven panel for the back of your bag.
Constructing the Tote Bag:
- Cut Remaining Pieces:
- Side/Bottom Panel: Cut a long strip of denim for the sides and bottom of your bag. The length will be the perimeter of your bag panels (width + height + width + height), and the width will be your desired bag depth. You can also cut separate side and bottom pieces if preferred.
- Lining Fabric: Cut two pieces of lining fabric the same size as your woven panels, and one piece for the side/bottom that matches your denim side/bottom panel.
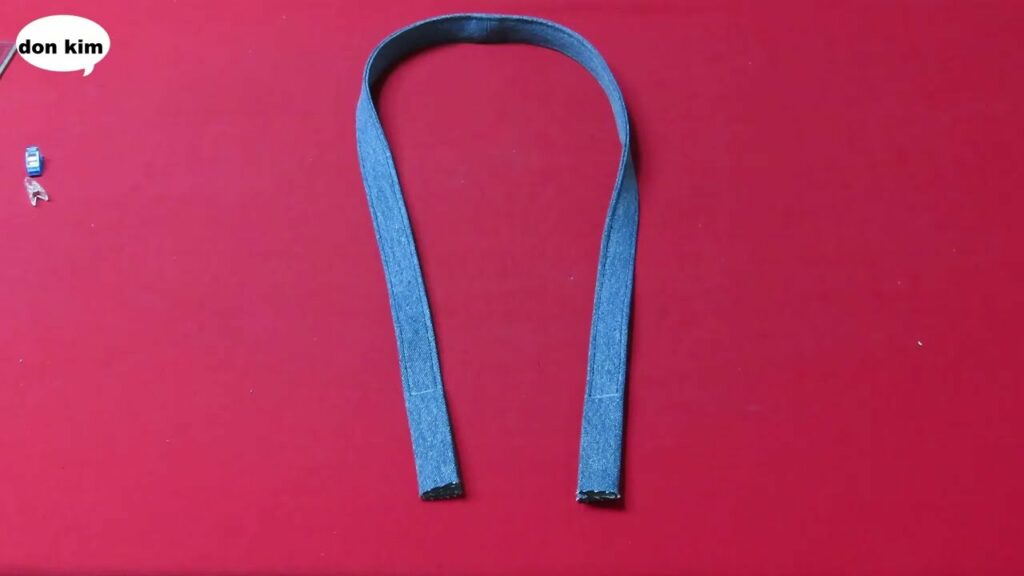
- Straps: Cut two pieces of webbing or create two denim straps. For denim straps, cut strips 3-4 inches wide, fold the raw edges towards the center, press, and then fold in half again, pressing well. Stitch down both long edges to secure.
- Attach Straps:
- On the right side of your woven front and back panels, measure in from each side and mark where your straps will be attached. Typically, 2-3 inches in from the side is a good starting point.
- Place the ends of your straps onto these marks, ensuring they are not twisted.
- Pin securely and stitch the straps in place with a strong rectangle or X-box stitch for durability. Backstitch well.
- Assemble the Outer Bag:
- Place one woven panel right side up. Place the side/bottom panel right side up along one edge of the woven panel.
- Pin the side/bottom panel to the woven panel, matching raw edges.
- Stitch with a 1/2 inch seam allowance, starting and stopping at the corners. Clip the corners of the side/bottom panel to allow it to turn easily.
- Repeat this process for the other woven panel, attaching it to the other side of the side/bottom panel.
- Carefully turn your bag right side out and check the seams.
- Assemble the Lining (If Using):
- With right sides together, sew the lining pieces together in the same way you assembled the outer denim bag, leaving a 4-6 inch opening along the bottom seam of the lining. This opening will be used for turning the bag right side out later.
- Join Outer Bag and Lining:
- Turn the outer denim bag right side out.
- Place the lining bag inside out.
- Carefully insert the outer denim bag into the lining bag, so that their right sides are facing each other.
- Align the top raw edges of both bags, matching side seams and strap placements. Pin all around the top.
- Stitch all around the top edge with a 1/2 inch seam allowance.
- Finishing Touches:
- Reach into the opening you left in the lining’s bottom seam and carefully pull the entire bag right side out through this hole.
- Push out the corners of the bag so they are crisp.
- Press the top seam of the bag to make it neat.
- Topstitch: Stitch around the top edge of the bag, about 1/8 to 1/4 inch from the edge. This gives a professional finish and helps the top edge lie flat.
- Hand-stitch or machine-stitch the opening in the lining closed.
- Optional: Add a magnetic snap closure, D-rings for a detachable shoulder strap, or decorative patches to personalize your tote.
Tips for Success:
- Use a strong needle: Denim is thick, so a denim needle (size 16 or 18) is essential to prevent bending or breaking.
- Go slow: When sewing through multiple layers of denim, take your time and don’t force the fabric.
- Press often: Pressing your seams and woven panels as you go will result in a much neater and more professional-looking bag.
- Experiment with denim shades: Mixing light, medium, and dark washes will create a beautiful visual texture in your weave.
- Consider denim weight: Thicker denim will result in a sturdier bag, but also be harder to sew.
- Reinforce stress points: Double-stitch or use bar tacks at the strap attachment points for extra durability.
By following these steps, you’ll be able to create a unique, durable, and stylish woven tote bag from your old jeans. It’s a rewarding project that showcases your creativity and commitment to sustainable fashion!
Video tutorial: