by
by For children aged 4-5 years, a hat is more than just a functional item; it’s an extension of their personality, a fun accessory for outdoor adventures, and a cozy shield against the elements. Whether they’re building snowmen, playing at the park, or simply heading to school, a hand-knitted hat offers unparalleled warmth, comfort, and a unique style that mass-produced hats can’t match. It’s a wonderfully rewarding project for knitters of all levels, allowing you to infuse love and creativity into every stitch.
This detailed article will guide you through the process of hand-knitting a hat specifically for a 4-5 year old, covering essential considerations, popular styles, design elements, and general tips for success.
Why Knit a Hat for a 4-5 Year Old?

- Ultimate Warmth & Comfort: You get to choose the softest, warmest yarns, ensuring the hat is never itchy and always cozy, protecting their head and ears from cold, wind, and sun.
- Perfect Fit: Commercial hats can often be too tight, too loose, or not quite right. Knitting your own allows for a custom fit that’s comfortable and stays put during active play.
- Express Their Personality: At this age, children start having strong preferences for colors, characters, and styles. You can incorporate their favorites into the design, making the hat truly “theirs.”
- Durable & Washable: By choosing the right yarn, your handmade hat will withstand countless washes and the rigors of playground life, lasting longer than many store-bought alternatives.
- Meaningful Gift: A hand-knitted hat is a thoughtful and practical gift for birthdays, holidays, or just because, demonstrating care and craftsmanship.
- Satisfying Project: Hats are relatively quick to knit, making them a great project for instant gratification and a good way to practice various knitting techniques.
Key Considerations for Design & Yarn:
Knitting for an active 4-5 year old requires a balance of practicality, durability, and fun.
- Sizing (Head Circumference):
- The average head circumference for a 4-5 year old is approximately 19-20.5 inches (48-52 cm). However, it’s always best to measure the child’s head if possible, or consult the specific pattern’s sizing chart.
- Negative Ease: Hats are typically designed with “negative ease,” meaning the finished circumference of the hat is slightly smaller than the head circumference (usually 1-3 inches or 2.5-7.5 cm). This allows the hat to stretch and fit snugly without being too tight, ensuring it stays on.
- Gauge Swatch (Absolutely Essential!): This is the most crucial step for any garment, especially a hat where fit is key.
- Knit a generous swatch (at least 6×6 inches / 15×15 cm) in the main stitch pattern of your hat.
- Wash and block your swatch exactly as you plan to treat the finished hat. This is vital for accurate sizing, as yarn can change after washing.
- Measure your stitches and rows per inch/cm precisely.
- Adjust your needle size (up if your knitting is too tight/too many stitches per inch; down if too loose/too few stitches per inch) and re-knit your swatch until it matches the pattern’s specified gauge.
- Yarn Choice (Durability & Washability are King!):

- Fiber:
- Superwash Merino Wool: An excellent choice. It’s incredibly soft (non-itchy for sensitive skin), warm, breathable, naturally elastic (helps retain shape), and, most importantly, machine washable without felting or shrinking.
- Baby-Specific Acrylics / Blends: Modern acrylics are often very soft, hypoallergenic, affordable, durable, and extremely machine washable. Blends (e.g., merino/nylon for extra resilience, cotton/acrylic for softness and ease of care) can combine the best properties of different fibers.
- Cotton Blends: Good for lighter hats for spring/fall, or if you prefer plant-based fibers. Ensure it has some elasticity (e.g., blended with a small percentage of elastic fiber or worked in a ribbed stitch).
- Weight:
- Worsted Weight (Aran) or DK (Double Knitting): These are very popular for hats. They work up relatively quickly, provide good warmth, and offer clear stitch definition.
- Bulky (Chunky): For very quick knits and super warm hats.
- Color Palette: Let their personality shine!
- Bright & Bold: Primary colors, jewel tones, neon accents.
- Fun Combinations: Rainbow stripes, color blocking, speckled yarns.
- Character Inspired: Use colors that hint at favorite animals or characters.
- Variegated/Self-Striping: These yarns create effortless color changes and visual interest without extra work.
- Durability & Ease of Care:
- Kids’ hats get dirty! Machine washable yarn is non-negotiable. Look for “superwash” on wools or labels that indicate machine washability.
- Choose yarns that are resistant to pilling (fuzzy balls) or are known to hold up well to friction. Tightly plied yarns often perform better than single-ply.
Popular Hat Styles for 4-5 Year Olds:
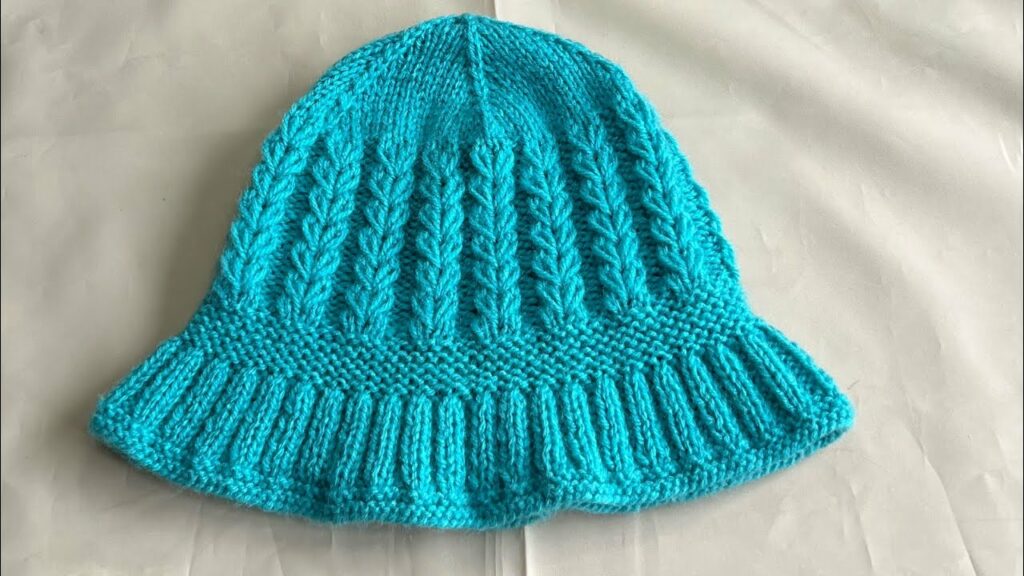
- Classic Beanie: A simple, fitted hat that covers the ears. A timeless and versatile choice.
- Slouchy Beanie: A relaxed fit with extra fabric at the crown, giving a more casual, slouchy look.
- Earflap Hat: Provides extra warmth and protection for the ears, often with braided ties. Great for colder climates.
- Animal Hat: Incorporate knitted ears (bear, cat, bunny) or simple intarsia/duplicate stitch motifs (fox face, owl) for a playful look.
- Pom-Pom Hat: A classic for a reason! A fluffy yarn or faux fur pom-pom on top adds instant fun.
- Hat with Braided Ties/I-cord: Practical for keeping the hat on active heads.
Design Elements & Stitch Patterns:
Keep it engaging for them, and manageable for you!
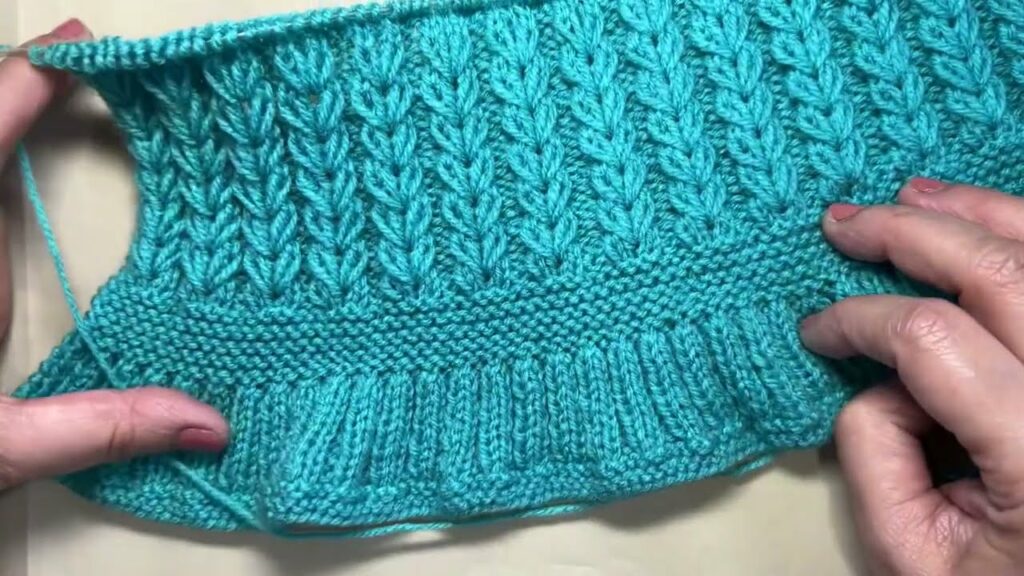
- Ribbing for the Brim:
- 1×1 Rib (K1, P1) or 2×2 Rib (K2, P2): Essential for a hat’s brim. Ribbing is very elastic, allowing the hat to stretch to fit over the head and then snap back for a snug fit. It also provides a neat, finished edge.
- Fold-over Brim: A longer ribbed brim that can be folded up for extra warmth around the ears.
- Main Body Stitch Patterns:
- Stockinette Stitch: Smooth, classic, and a great canvas for colorwork or simple textures.
- Garter Stitch: All knit stitches (when knitting flat) or alternating knit/purl rounds (when knitting in the round). Creates a squishy, reversible, and very durable fabric that won’t curl.
- Moss Stitch / Seed Stitch: Creates a lovely, subtle texture that lies flat and adds substance. Good for the entire hat or as accent panels.
- Simple Cables: Classic, adds visual interest and texture. Look for simple, repeating cable patterns (e.g., a single rope cable, small braid cables).
- Textured Stripes: Easy to create by alternating bands of knit and purl rows (e.g., stockinette and garter stitch bands).
- Colorwork (Fun & Engaging):
- Stripes: Simple horizontal stripes are easy and effective. Vary widths for more interest.
- Color Blocking: Use different colors for the brim, main body, and crown.
- Simple Intarsia/Duplicate Stitch: Add a small, simple motif like a star, heart, initial, or a simplified animal face. Duplicate stitch is great for adding small details after the knitting is done.
- Details & Embellishments:
- Pom-Poms: Make your own with yarn (using a pom-pom maker) or attach a faux fur pom-pom.
- Tassels: For the top of the hat or at the ends of earflap ties.
- Knitted Ears: Sew on simple knitted ear shapes for animal hats.
- I-cord Ties: For earflap hats, a simple knitted cord is durable and neat.
- Simple Embroidery: Add eyes or whiskers to animal hats using embroidery floss.
Common Construction Methods for Hats:
Seamless knitting is highly recommended for hats, as it eliminates bulky seams that can be uncomfortable.
- Bottom-Up Seamless (Most Common):
- How it works: You cast on stitches for the brim and knit in the round up to the desired height of the hat’s body. Then, you work a series of decreases at the top (crown) to shape the hat and close it.
- Pros: Very common, easy to follow, creates a smooth, comfortable hat with no seams.
- Cons: Requires circular needles (and often DPNs or the Magic Loop method as the hat gets smaller at the crown).
- Top-Down Seamless:
- How it works: You cast on a small number of stitches (or use a special cast-on like Judy’s Magic Cast-On) and gradually increase stitches to create the crown, then continue knitting straight down for the body and finish with a brim.
- Pros: Allows you to try on the hat as you go for perfect length, easy to adjust length.
- Cons: Increases can be more complex to execute neatly, can be trickier to master for beginners.
- Flat Knit (Seamed):
- How it works: The hat is knit as a flat rectangle on straight needles, then shaped at the top (crown) with decreases. The finished piece is then sewn together along the side seam and the top seam is cinched shut.
- Pros: Only requires straight needles, good for absolute beginners comfortable with basic knit and purl.
- Cons: Creates a seam that can be bulky or uncomfortable, less stretchy than seamless knitting.
Step-by-Step Outline for a Basic Bottom-Up Seamless Beanie:
This simplified outline assumes you’re knitting in the round. Your chosen pattern will provide exact stitch counts and specific instructions.
- Choose Your Pattern & Yarn: Select a pattern for a 4-5 year old and gather your chosen yarn, circular needles (and DPNs or a long circular for Magic Loop for the crown), stitch marker, tapestry needle, and scissors.
- Knit Your Gauge Swatch: This is the most important step for accurate sizing. Wash, block, and measure it. Adjust needle size if necessary.
- Cast On: Using a stretchy cast-on method (like the Long-Tail Cast On), cast on the number of stitches specified in your pattern. Place a unique stitch marker to mark the beginning of the round.
- Join in the Round: Carefully join your stitches in the round, ensuring they are not twisted.
- Knit the Brim: Work in your chosen ribbing (e.g., K2, P2) for the specified height of the brim (usually 1-2 inches or 2.5-5 cm).
- Knit the Body: Once the brim is complete, switch to your main stitch pattern (e.g., Stockinette Stitch or Garter Stitch). Knit in the round until the hat reaches the desired height before starting the crown decreases (this measurement is usually from the cast-on edge to the top of the head, minus the length of the crown shaping).
- Shape the Crown (Decreases): This is where the top of the hat is formed. Follow your pattern’s specific decrease instructions. This usually involves working “decrease rounds” where stitches are systematically reduced (e.g., K2tog, SSK) across the round, creating a tapered shape. You’ll switch to DPNs or Magic Loop as the number of stitches becomes too small for your circular needle.
- Finish the Top: Once a small number of stitches remain (e.g., 6-10 stitches), cut the yarn, leaving a long tail. Thread the tail through a tapestry needle and then through the remaining stitches. Pull the tail tight to gather and close the opening at the very top of the hat. Secure the tail on the inside.
- Finishing Touches:
- Weave in Ends: Use your tapestry needle to neatly weave in all loose yarn tails on the inside of the hat.
- Add Embellishments (Optional): Attach a pom-pom, tassels, or knitted ears if desired.
- Block: While not always strictly necessary for a beanie, gentle wet blocking can help even out your stitches and improve the hat’s drape and overall appearance. Wash the hat, gently squeeze out excess water, and lay it flat or place it over a bowl/balloon to shape it as it dries.

General Knitting Tips for Success:
- Read the Entire Pattern First: Understand the overall construction and anticipate any new techniques.
- Watch Video Tutorials: For any new-to-you techniques (e.g., specific cast-ons, increases/decreases, joining in the round, Magic Loop, making a pom-pom).
- Use Stitch Markers! Essential for marking the beginning of the round and raglan lines in top-down designs.
- Don’t Fear Mistakes: The seam ripper (or simply unraveling) is your friend. It’s always better to correct an error than to be unhappy with the finished item.
- Enjoy the Process: Knitting is a meditative and creative hobby. Savor the experience of creating something beautiful with your hands.
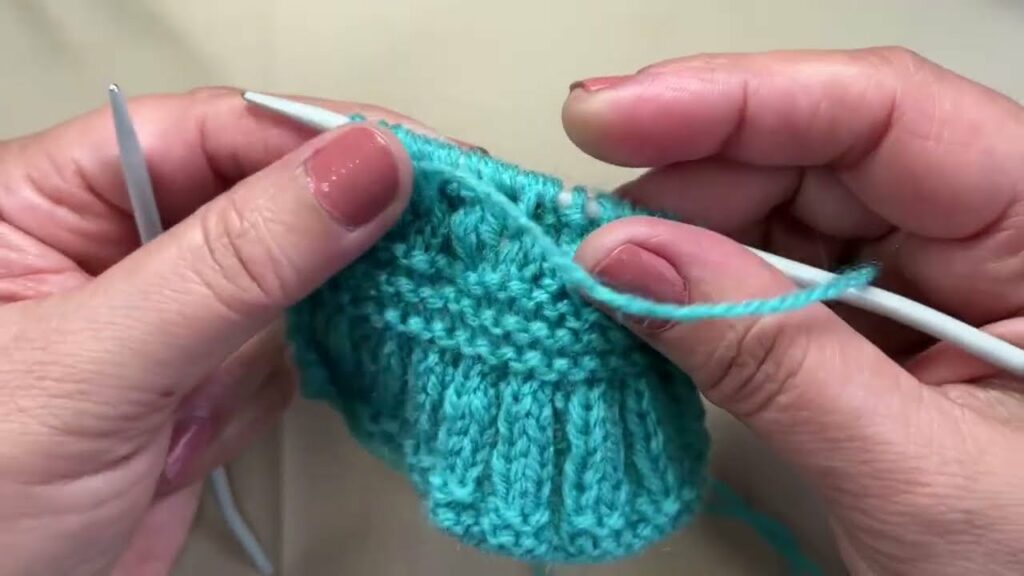
Video Tutorial :
Knitting a hat for a 4-5 year old is a practical, fun, and deeply satisfying project. The joy on their face when they wear a hat made especially for them is truly priceless!