 by
by There’s something undeniably enchanting about a hand-knitted dress on a little one. For a baby girl aged 1-2 years, a knitted frock is more than just clothing; it’s a perfect blend of cozy comfort, playful charm, and timeless elegance. At this age, babies are on the move – walking, exploring, and delighting in every new discovery. A well-designed knitted dress offers freedom of movement while looking absolutely adorable.
While I cannot provide a real-time, stitch-by-stitch tutorial for a specific pattern (as these vary immensely), this detailed article will walk you through the process of knitting a beautiful baby frock for a 1-2 year old. We’ll cover crucial considerations, common construction methods, key design elements, and what you can expect from a good knitting pattern, empowering you to choose and successfully complete your own project.
Why Knit a Baby Frock for a 1-2 Year Old?

- Comfort & Mobility: Knitted fabrics are inherently stretchy and soft, ideal for active toddlers who need to move freely.
- Adorable Style: Frocks are classic, sweet, and perfect for photo opportunities, special occasions, or everyday cuteness.
- Versatility: Depending on the yarn and pattern, it can be a light summer dress or a cozy winter layer over leggings.
- Personal Touch: A handmade dress is a unique garment, infused with your love and attention, destined to become a cherished item.
- Skill Progression: For knitters who have tackled smaller items, a dress for a 1-2 year old offers a satisfying challenge, introducing more shaping and pattern work.
Essential Considerations Before You Begin:
Successful knitting starts with thoughtful preparation and material selection.
- Choosing Your Pattern:
- Skill Level: Select a pattern appropriate for your knitting abilities (beginner, intermediate, advanced). Many “first dress” patterns are designed for confident beginners.
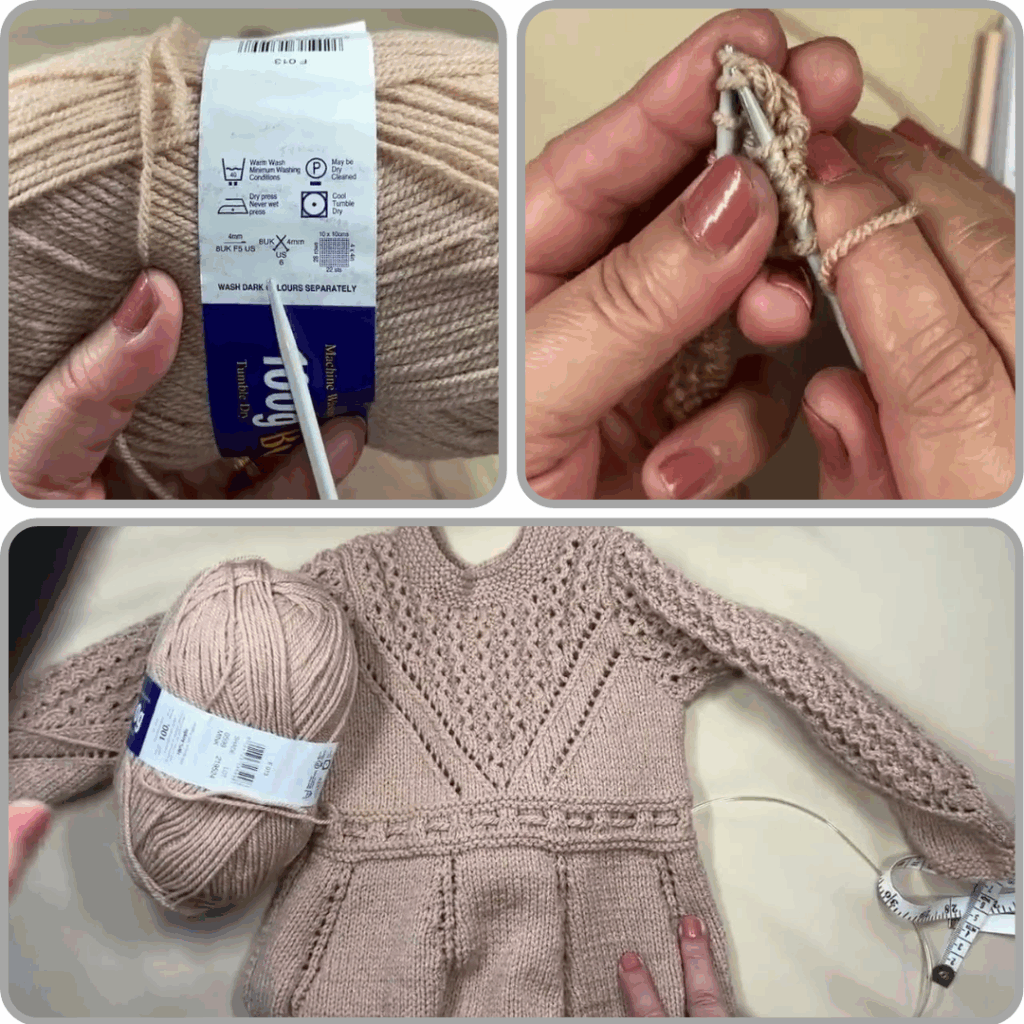
- Clear Instructions: Look for patterns with clear, well-written instructions, stitch counts for various sizes, and schematics (diagrams with measurements). Charts are essential for lace or colorwork.
- Reviews: If buying online (e.g., Ravelry), check project notes and reviews from other knitters for insights on fit, yarn suggestions, and potential challenges.
- Yarn Selection (Crucial for Toddlers!):
- Fiber:
- Superwash Merino Wool: Often the top choice. Incredibly soft, warm, breathable, has excellent drape, and is machine washable (a non-negotiable for toddler clothes!).
- Cotton or Organic Cotton: Great for warmer climates, babies with sensitive skin, or those seeking plant-based fibers. Durable and washes well.
- Bamboo or Silk Blends: Offer a lovely drape and luxurious softness, often suitable for delicate dresses.
- Baby-Specific Acrylics/Blends: Modern acrylics can be surprisingly soft, durable, hypoallergenic, and very washable. Blends offer a balance of properties.
- Fiber:
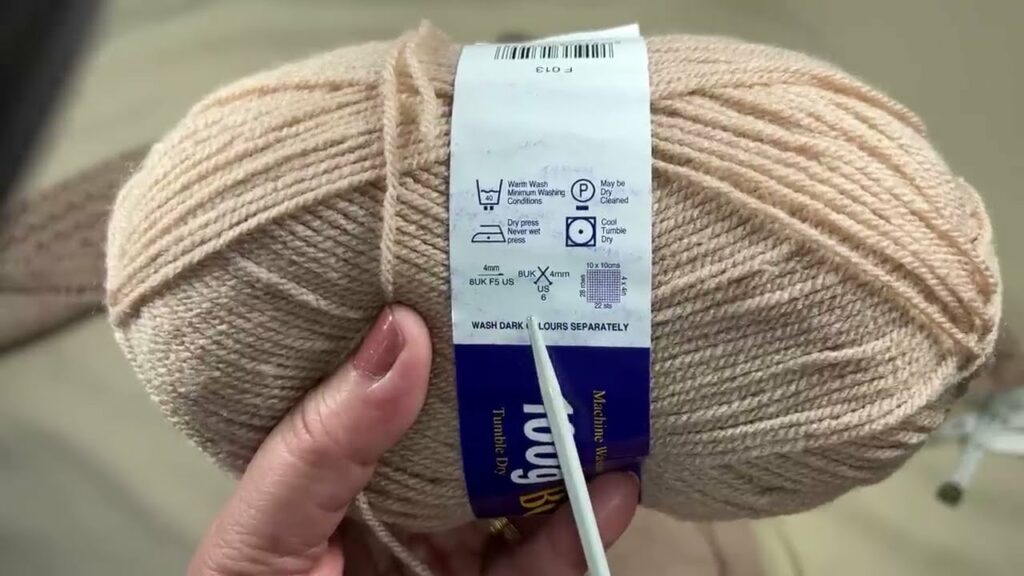
- Weight:
- DK (Double Knitting) or Sport Weight: These are generally ideal. They offer good stitch definition, work up at a reasonable pace, and create a cozy yet comfortable fabric suitable for a dress.
- Fingering (4-ply): For very fine, delicate dresses, often with intricate lace patterns.
- Color Palette: Explore beyond traditional pinks!
- Soft Pastels: Cream, blush, pale blue, mint, lavender, yellow.
- Muted Tones: Sage green, dusty rose, soft teal, mustard, rust.
- Neutrals: Oatmeal, light grey, pure white, taupe.
- Variegated/Self-Striping Yarns: Create effortless color changes and visual interest.
- Consider their favorite color (if applicable!)
- Safety: Always choose yarn that is machine washable and hypoallergenic.
- Sizing (1-2 Years / 12-24 Months):
- Patterns will typically offer sizes like 12 months, 18 months, 2T.
- Finished Measurements: Crucially, check the pattern’s finished garment measurements (chest circumference, overall length) for each size. Compare these to the child’s actual measurements.
- Positive Ease: Most knitted garments, especially for active toddlers, are designed with 1-4 inches (2.5-10 cm) of “positive ease” (the garment being larger than the body measurement) to allow for comfortable movement and layering.
- The All-Important Gauge Swatch: This is the single most critical step for any garment.
- Knit a generous swatch (at least 6×6 inches / 15×15 cm) in the main stitch pattern of your dress.
- Wash and block your swatch exactly as you plan to treat the finished dress. This is non-negotiable for accurate sizing.
- Measure your stitches and rows per inch/cm precisely.
- Adjust your needle size (up if your gauge is too tight/too many stitches; down if too loose/too few stitches) until your swatch matches the pattern’s specified gauge. Re-knit and re-measure until perfect.
Common Construction Methods for Baby Frocks:
The method of construction significantly impacts how the dress is shaped and whether it has seams.
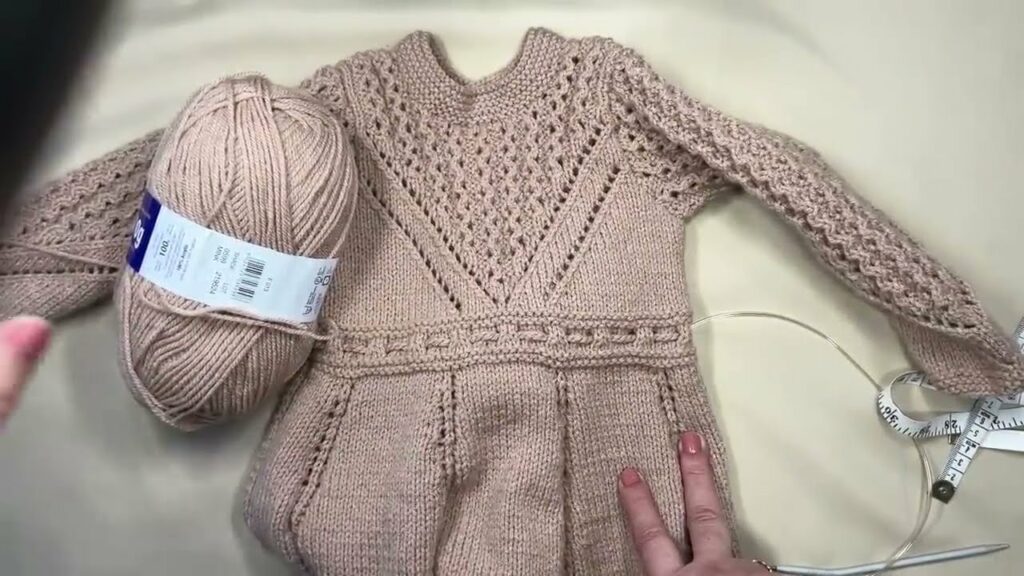
- Top-Down Seamless (Raglan or Circular Yoke):
- How it works: You cast on at the neckline and knit downwards. Increases are made along diagonal “raglan” lines or evenly around a circular yoke to shape the shoulders and upper body. The body is then knit flat or in the round, and the skirt is created by increasing stitches significantly. Sleeves are usually knit last.
- Pros: No seaming (a huge time-saver and comfortable against skin!), easy to try on for length adjustments, excellent for continuous stitch patterns from yoke to body.
- Cons: Requires circular needles (and often DPNs or the Magic Loop method for sleeves).
- Highly Recommended: Many modern baby dress patterns use this method for its clean finish and flexibility.
- Bottom-Up (Seamed or Seamless):
- How it works: The skirt is knit first (flat or in the round), then shaping (decreases) is worked to create the waist. The bodice is then knit upwards (flat or in the round). Sleeves are knit separately. Finally, all pieces are sewn together (if seamed) or joined as you knit.
- Pros: Can use straight needles (if seamed), good for knitters who prefer working larger sections first.
- Cons: Seaming can be tedious and requires practice for a neat finish. Seamless bottom-up can involve tricky joins.
Key Design Elements You’ll Encounter:
A beautiful baby frock often combines several of these elements.
- The Bodice:
- Fit: Typically fitted or semi-fitted to the underarm.
- Neckline: Crew neck, scoop neck, V-neck, or a gentle boat neck. Often with a ribbed or garter stitch band.
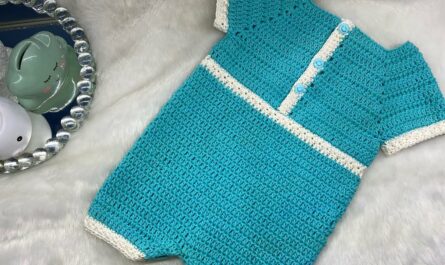
- Opening: Many frocks are designed as pullovers, but a cardigan-style full front opening (with buttons) is also popular for ease of dressing.
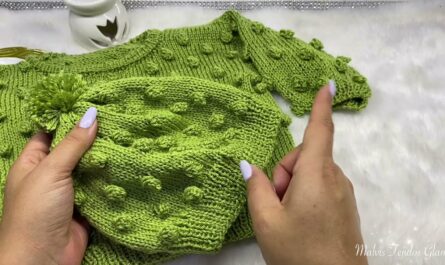
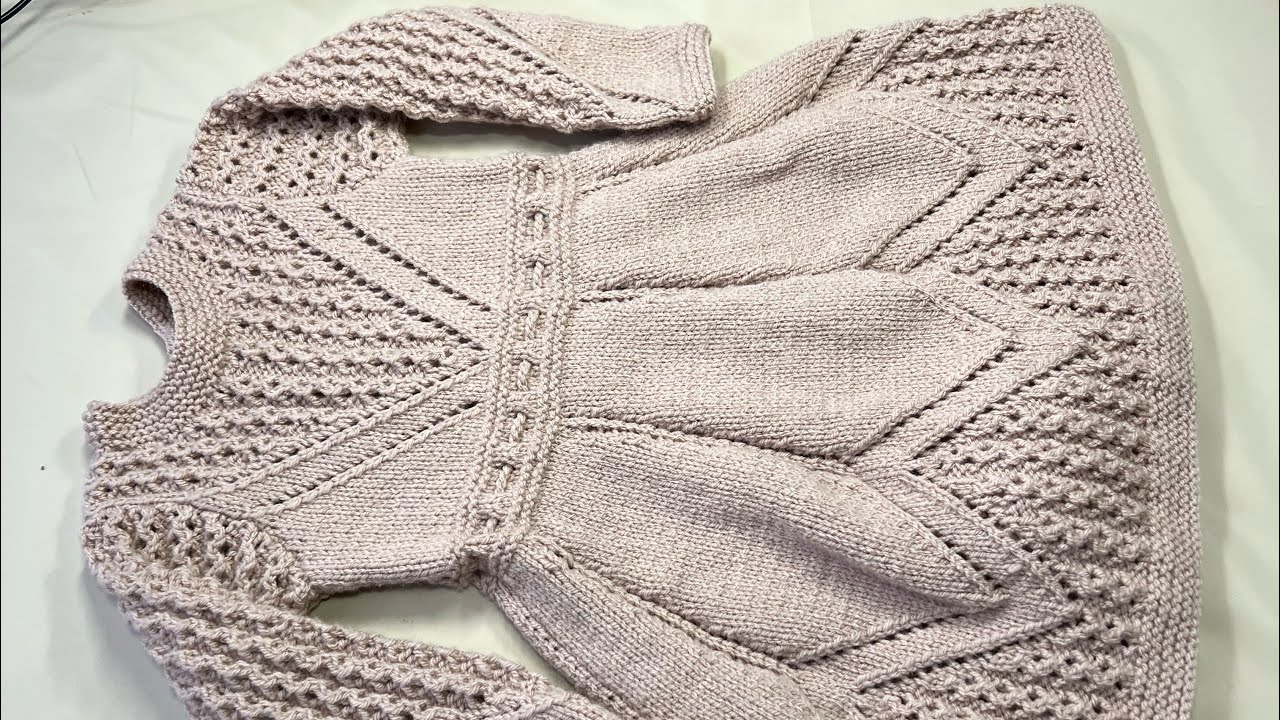
- Yoke: Can be plain, textured (e.g., moss stitch), or feature intricate lace or simple colorwork, drawing attention to the top of the dress.
- The Sleeves:
- Length: Sleeveless, short, cap, elbow-length, or full-length.
- Shape: Classic straight, gently tapered, or a charming puff sleeve (achieved with increases at the sleeve cap or gathering).
- Cuffs: Simple ribbing, garter stitch, or a decorative picot edging.
- The Skirt:
- Transition: The defining feature! There will be a significant increase in stitch count from the bodice to the skirt to create the flare. This can be a single dramatic increase round or a series of increases over several rounds.
- Shape:
- A-line: A gentle, gradual flare from the waist/hip down.
- Gathered/Full: Achieved by dramatic increases, creating a very wide skirt that gathers softly from the bodice for a whimsical, twirly effect.
- Textured/Pleated: Certain stitch patterns (like vertical ribs or specific folded patterns) can create a pleated look.
- Length: Typically knee-length or slightly below for a 1-2 year old, allowing for easy movement.
- Beautiful Stitch Patterns:
- Lace (Very Popular):
- All-Over Lace: Delicate, repeating patterns (e.g., simple eyelets, tiny hearts, fern motifs, faggoting stitch) covering the entire skirt or even the whole dress.
- Lace Edging: Applied to the hem, cuffs, or neckline.
- Lace Yokes: A stunning focal point for top-down designs.
- Textured Stitches:
- Moss Stitch / Seed Stitch: Creates a lovely, subtle texture that lies flat and is very durable. Excellent for edgings, yokes, or full bodies.
- Basketweave: A more pronounced, pleasing texture that adds substance.
- Simple Cables: Classic and timeless, adding definition to panels or along the hem.
- Colorwork (Subtle & Charming):
- Stripes: Thin, elegant stripes on the bodice or skirt using complementary colors.
- Color Blocking: A contrasting color for the yoke, sleeves, or the entire skirt section.
- Variegated/Self-Striping Yarns: These yarns create their own beautiful color gradients without any extra work.
- Lace (Very Popular):
- Charming Details & Embellishments:
- Ruffle Hem: Created by significantly increasing stitches right before the bind-off or by adding a separate gathered border.
- Picot Edging: A delicate, scalloped bind-off that adds a sweet, decorative touch to hems, cuffs, or necklines.
- Buttons: Small, flat buttons along a back or front placket (ensure they are securely sewn!).
- Applied Motifs: Small knitted or crocheted flowers, leaves, bows, or simple shapes securely sewn onto the dress. Ensure no loose parts or choking hazards.

What a Step-by-Step Pattern Will Teach You (General Process):
While specific stitch counts will vary by pattern, here’s the typical journey of knitting a top-down seamless baby frock for a 1-2 year old:
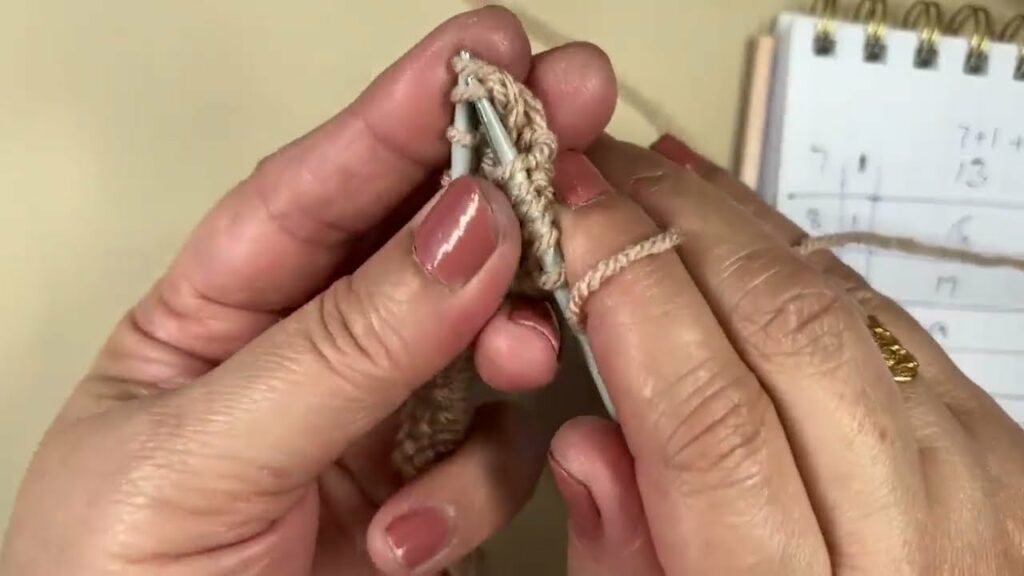
- Cast On: You’ll start by casting on a specific number of stitches for the neckline using your smaller needles (for ribbing/neckband).
- Neckband/Collar: Work in ribbing (e.g., K1, P1) or garter stitch for a few rounds/rows to create a neat neck edge.
- Yoke Establishment: Switch to your main needles. On the first round/row of the yoke, you’ll divide your stitches for the back, sleeves, and front(s) (if it’s a cardigan-style dress). You’ll place stitch markers at the “raglan” points.
- Knit Yoke & Increases: You’ll knit the yoke, working increases on designated “increase rounds/rows” around your stitch markers. This gradually expands the fabric to form the shoulders and upper chest. This continues until the yoke reaches the desired depth (usually just past the underarms).
- Separate for Body & Sleeves: You’ll put the stitches for the sleeves onto scrap yarn or stitch holders. The remaining stitches for the front and back will be joined (often by casting on a few stitches under the armholes) to form the body.
- Knit Bodice: Continue knitting the bodice straight down for a few inches/cm until it reaches the point where the skirt will begin (often around the waist or empire line).
- Skirt Flare (The “Frock” Effect): This is the key step! On a specific “increase round/row,” you will significantly increase the stitch count (e.g., by knitting into the front and back of many stitches, or by working a specific increase pattern). This creates the dramatic flare for the skirt.
- Knit Skirt: Continue knitting the skirt in your chosen stitch pattern (often lace or a textured pattern) until it reaches the desired length.
- Hem: Finish the skirt with a neat hem (ribbing, garter stitch, or a decorative bind-off like picot). Bind off all stitches.
- Knit Sleeves: Return to the held sleeve stitches. Pick up any stitches under the armholes. Knit each sleeve in the round (using DPNs or Magic Loop) or flat (then seam) to the desired length. Finish with a cuff (ribbing, garter, or picot) and bind off.
- Finishing:
- Weave in Ends: Neatly weave in all loose yarn tails using a tapestry needle.
- Add Closures (if applicable): If your dress has a back or front opening, sew on buttons securely.
- Block: This is a crucial step! Gently wash your finished dress according to your yarn’s care instructions. Gently squeeze out excess water. Lay it flat on a towel or blocking mats, shaping it to the correct dimensions from the pattern. Let it air dry completely. Blocking truly transforms the garment, evens out stitches, and sets the shape beautifully.
Tips for Success:
- Read the Entire Pattern First: Before casting on, read every word of your chosen pattern. This helps you understand the overall construction and anticipate any new techniques.
- Watch Video Tutorials: If a new technique (like a specific increase/decrease, working a buttonhole, or Magic Loop) is unfamiliar, watch a quick video tutorial online.
- Use Stitch Markers! They are invaluable for marking raglan lines, stitch pattern repeats, and the beginning of rounds.
- Don’t Fear Mistakes: Every knitter makes them! A good stitch fixer or a seam ripper is your friend. It’s always better to undo a few rows and correct an error than to be unhappy with the finished garment.
- Baby Safety First: Ensure all buttons are sewn on extremely securely. Avoid any long ties (especially around the neck) or very small, loose embellishments that could pose a choking hazard.
Video Tutorial :
Knitting a dress for a 1-2 year old is a truly joyful and rewarding experience. By choosing a well-written pattern and paying attention to detail, you’ll create a beautiful, comfortable, and cherished garment that will inspire countless twirls and happy memories. Happy knitting! Sources