 by
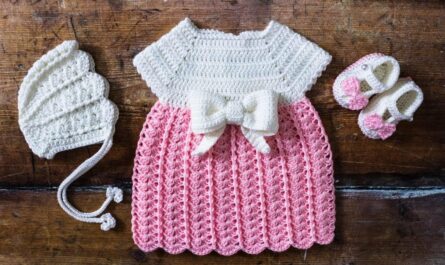
by Every little one deserves to feel like royalty, and what better way to evoke that magic than with a breathtaking, hand-crocheted princess dress? Far beyond a simple garment, a princess baby dress is a labor of love, a whimsical confection of delicate stitches, flowing skirts, and enchanting details. It’s the perfect project for special occasions like birthdays, christenings, photoshoots, or even as a treasured family heirloom.
While crafting a “princess” dress demands more skill and patience than an everyday baby garment, the joy and satisfaction of seeing your creation come to life are immeasurable. This detailed article will guide you through the intricate world of crocheting a truly regal dress for a baby, focusing on the elements that define its majestic charm.
What Defines a “Princess” Crochet Baby Dress?

A princess dress stands apart from a standard baby dress due to its elevated design and meticulous details:
- Elaborate Design: Expect features like full, often voluminous skirts, intricate bodices, unique sleeve styles, and sometimes multi-layered elements that add depth and grandeur.
- Delicate Details: The beauty lies in the finesse – intricate lace patterns, graceful ruffles, tiny picot edgings, subtle beadwork, or meticulously placed bows and flowers.
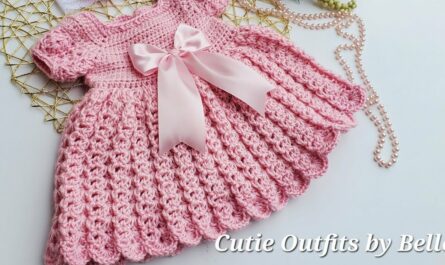
- Whimsical Silhouettes: The shaping often aims for flowing lines, bell-shaped skirts, and generous gathers that evoke a fairytale fantasy.
- Luxe Yarn Choices: Finer yarn weights, natural fibers with beautiful drape, and those with a subtle sheen or delicate sparkle are preferred to enhance the ethereal quality.
- Feminine Color Palette: While vibrant jewel tones can certainly be regal, classic princess dresses often lean towards soft pastels, pure white, ivory, or gentle metallics.
- Impeccable Finish: The overall perfection of the dress is highly dependent on meticulous blocking, invisible joins, and carefully secured embellishments.
Key Considerations Before You Begin:
Embarking on a princess dress project requires a realistic assessment of your skills and priorities.
- Skill Level: Be aware that crocheting a princess dress is generally for intermediate to advanced crocheters. It often involves complex shaping, intricate lace or textured stitch patterns, precise gauge control, and sometimes multiple techniques (e.g., joining motifs, working with fine threads).
- Occasion: Due to the time and effort involved, these dresses are typically reserved for special events rather than everyday wear.
- Baby’s Comfort: Despite the elaborate design, the dress must remain soft, non-itchy, and safe for the baby. Choose soft fibers, avoid overly stiff fabrics, and ensure all embellishments are securely attached without sharp edges or snagging potential.
- Washability/Care: Delicate yarns and intricate designs often require handwashing and careful drying. Ensure you’re comfortable with the care instructions, especially if making it as a gift.
- Sizing: Precision is paramount. The bodice typically requires a more fitted shape, while the skirt needs careful management of increases to achieve desired fullness.

Yarn Selection for a “Princess” Dress (High-End & Specific):
The yarn is the foundation of your dress’s royal appeal. Choose wisely to enhance its beauty and texture.
- Fiber (Prioritize Softness, Drape, Sheen, and Definition):
- Mercerized Cotton: An excellent choice, especially for lace. It offers a beautiful sheen, superb stitch definition, good structure, and is breathable.
- Cotton/Silk Blends: Combines the crispness and structure of cotton with the luxurious sheen and unparalleled drape of silk.
- Bamboo or Bamboo/Silk Blends: Incredibly soft with a beautiful, natural luster and excellent drape, making them perfect for flowing skirts.
- Superwash Merino Wool (finer weights): Provides a luxurious feel, excellent stitch definition, and can create a delicate, warm fabric.
- Alpaca Blends (finer weights): Known for exceptional softness and warmth, though some may have a slight halo.
- Specialty Yarns: For an extra touch of magic, consider yarns with a subtle sparkle (e.g., a fine metallic thread woven in), or a very delicate halo (like mohair lace blended with another fiber).
- Weight:
- Fingering (4-ply) or Lace Weight: These are the most common choices for achieving delicate lace patterns and a refined, ethereal look. Be prepared for these finer weights to take significantly longer to crochet.
- Sport or DK: Can be used for less intricate designs, resulting in a slightly thicker, but still lovely, fabric.
- Color Palette:
- Classic Princess: White, ivory, cream, and soft pastel shades (pale pinks, blues, purples, mint greens, peach) are timeless and elegant.
- Subtle Sparkle: Yarns with woven-in silver, gold, or iridescent threads.
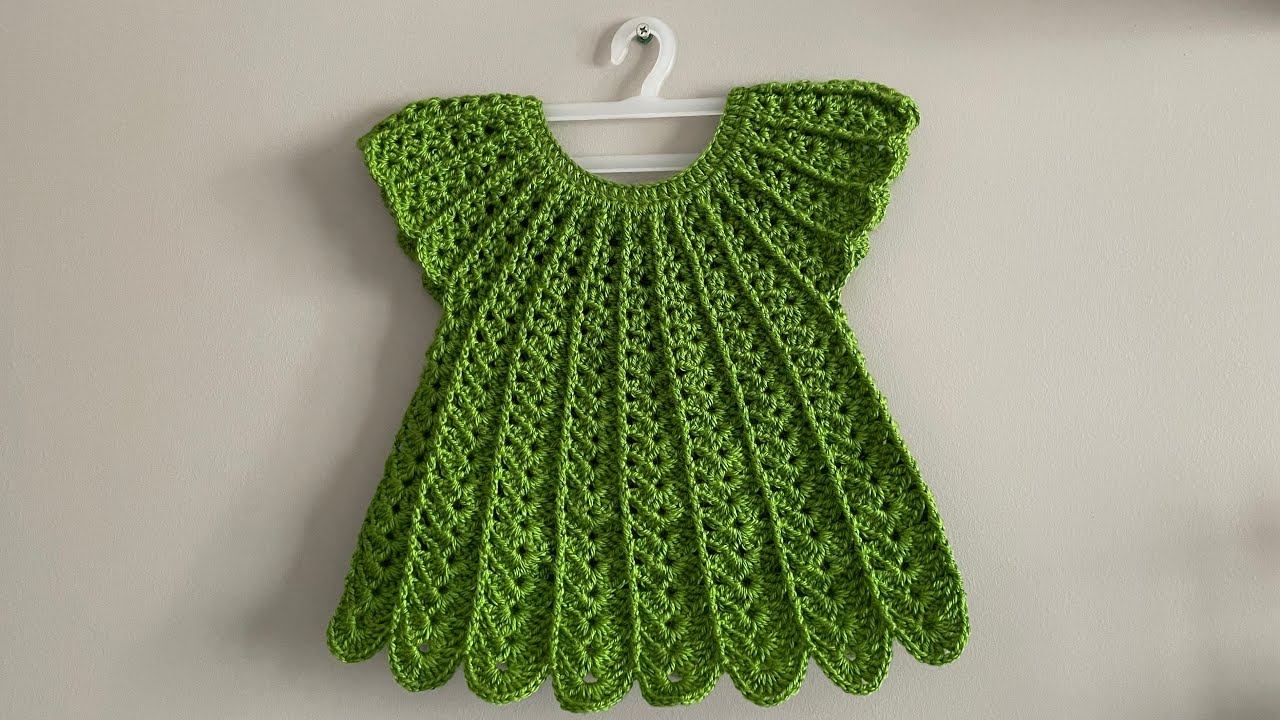
- Deep Jewel Tones: For a more “regal” or sophisticated princess look (e.g., emerald green, sapphire blue, deep rose, amethyst purple), perfect for a winter event.
Key Design Elements & Stitch Patterns for a “Princess” Look:
These elements are what truly define a princess dress.
- Bodice:
- Fitted or Semi-Fitted: Achieved with careful increases and decreases to shape the chest and waist.
- Stitch Patterns: Can be solid (single crochet or double crochet) for structure, or feature delicate lace/shell stitches for an airy feel.
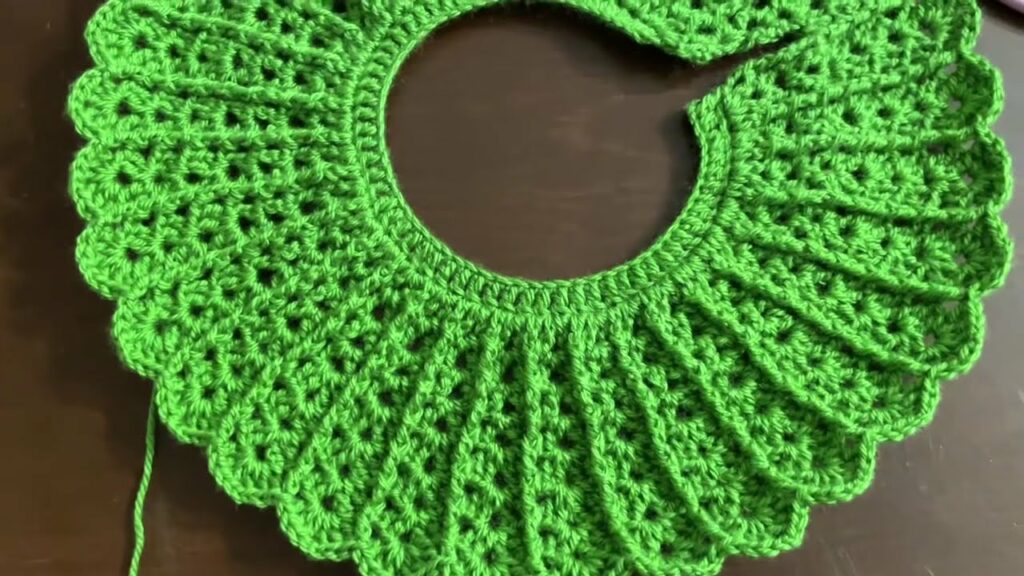
- Necklines: Often a classic rounded scoop, a gentle boat neck, or even a small, decorative collar. Edgings should be neat and refined.
- Closures: Typically small, elegant buttons (pearl, mother-of-pearl, or tiny rhinestone buttons) along the back or a shoulder placket. Hidden snaps under a placket provide a very clean look.
- Skirt:
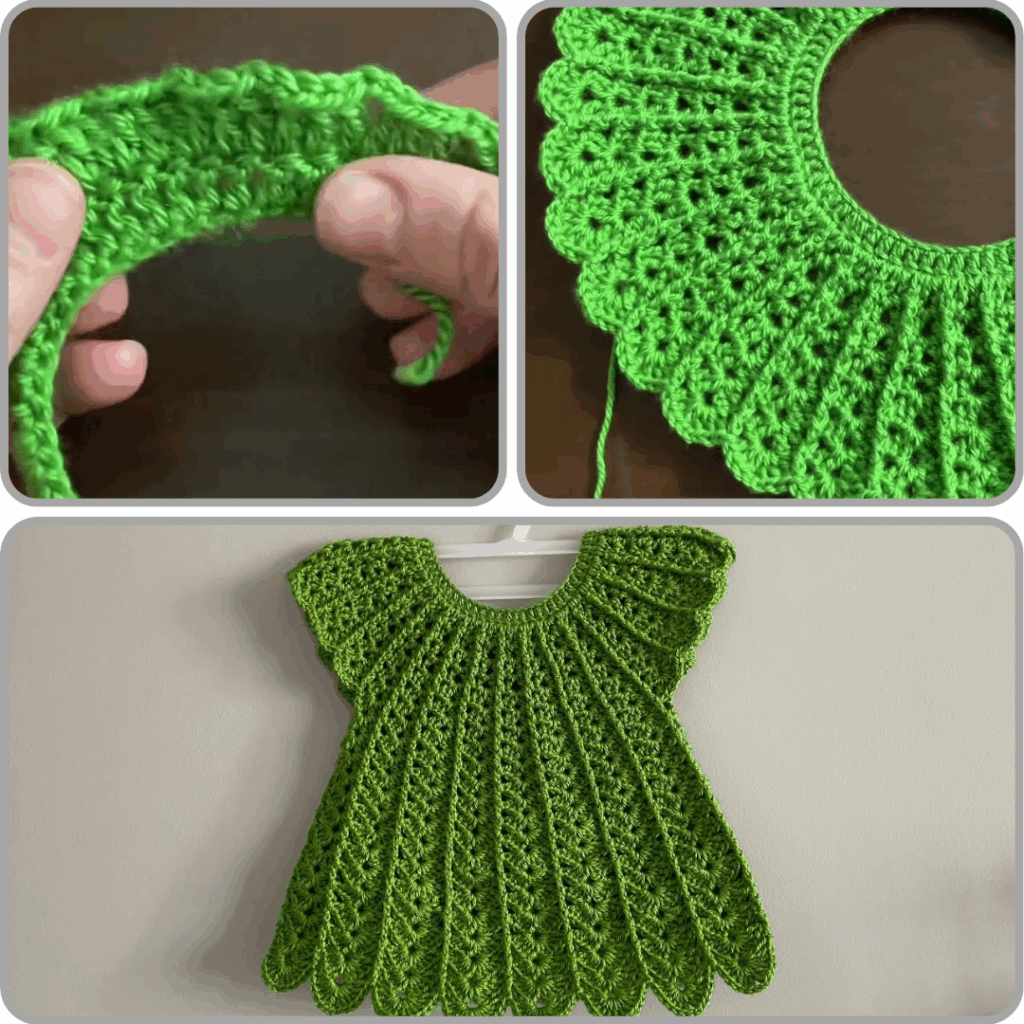
- Full and Flowing: This is the hallmark of a princess dress. Achieved by making numerous increases, often utilizing stitch patterns like large shell stitches, fan stitches, or complex lace repeats that naturally flare.
- Layered/Tiered: Some designs feature multiple layers of ruffles or are worked in several tiers, with each tier progressively wider than the last, adding incredible volume and texture.
- Sleeves:
- Puff Sleeves: Created by working clusters, increasing stitches, and then gently gathering them for a soft, voluminous shape.
- Cap Sleeves: Delicate and short, often with a picot or ruffled edge.
- Bell Sleeves: Flared out at the cuff for a graceful, flowing look.
- Long Sleeves with Delicate Cuffs: Finished with fine ribbing, a small lace pattern, or a picot edge.
- Embellishments & Details (Crucial for the “Princess” Aesthetic):
- Lace: Intricate, openwork lace patterns are often central to the design, used on the skirt, yoke, or sleeves.
- Ruffles: Multiple, delicate ruffles around the hem, sleeve cuffs, or neckline.
- Picot Edging: Small, pointed loops created by a chain and slip stitch, adding a delicate, scalloped finish.
- Beadwork: Tiny seed beads can be crocheted directly into the fabric or sewn on afterward for subtle sparkle.
- Ribbon Weaving: Threading narrow satin ribbon through eyelets on the yoke, waistline, or skirt.
- Crochet Flowers/Appliqués: Small, delicate crochet roses, bows, butterflies, or other motifs meticulously sewn onto the dress.
- Surface Crochet: Adding delicate designs (e.g., vines, tiny swirls) using slip stitches or chain stitches directly onto the fabric after the main construction.
Construction Methods (Often More Complex):

Princess dresses can employ various construction methods, often more involved than simpler designs.
- Top-Down Seamless (Yoke then Body):
- Pros: Creates a comfortable, seamless garment. Excellent for flowing lace patterns that extend from the yoke.
- Cons: Can be challenging to manage intricate stitch patterns while simultaneously working increases and separating for sleeves.
- Bottom-Up (Seamed or Seamless):
- Pros: Allows for very full skirts, as the initial chain can be quite wide. Good for combining different stitch patterns in distinct sections (e.g., a solid bodice and a lacy skirt).
- Cons: If seamed, requires meticulous joining of multiple pieces (bodice, skirt, sleeves, separate ruffles).
- Pieced Construction: The bodice, skirt, and sleeves are crocheted as individual components and then carefully joined together. This method offers flexibility for complex shaping but demands meticulous seaming for a polished finish.
Steps to Crochet a Princess Baby Dress (General Process for an Intermediate/Advanced Project):
- Select Pattern & Yarn: Choose an intermediate to advanced pattern that specifically appeals to your vision of a princess dress. Select high-quality yarn that perfectly matches the pattern’s gauge and aesthetic requirements.
- Gauge Swatch (NON-NEGOTIABLE): This is paramount for an intricate garment. Crochet a generous swatch (at least 6×6 inches / 15×15 cm) in the main stitch pattern. Wash and block it meticulously as you would the finished dress. Measure precisely and adjust your hook size until your gauge is perfect.
- Bodice Construction:
- Begin at the neckline (if top-down) or the bottom hem of the bodice (if bottom-up).
- Work increases or decreases as per the pattern to achieve the desired shaping for the bust, armholes, and neckline.
- Integrate buttonhole placements (if a back opening) at regular intervals.
- Skirt Construction:
- Attach the skirt section to the finished bodice. This often involves a significant increase in stitch count to create fullness.
- Work your chosen lace, shell, or fan stitch patterns, incorporating increases for the skirt’s flare.
- If creating multiple tiers or ruffles, follow the pattern for attaching and working each layer.
- Sleeve Construction:
- Attach or join the sleeves to the armholes.
- Work the shaping for puff sleeves (often using cluster stitches and controlled increases/decreases) or for bell sleeves (using increases at the cuff).
- Finish the cuffs with delicate edgings (ribbing, picot, or lace).
- Embellishments & Details:
- Add final edgings (picot, I-cord, or more elaborate lace) around the neckline, armholes, or hem.
- If using ribbon, carefully weave it through designated eyelets on the yoke or skirt.
- Securely attach beads or small crochet appliqués (flowers, bows, butterflies) using a sewing needle and matching thread.
- Consider adding surface crochet details for extra texture.
- Finishing:
- Meticulous Weaving in Ends: This is critical for a clean, professional finish. No stray ends should be visible.
- Blocking (ABSOLUTELY ESSENTIAL): This step transforms a princess dress. Gently wash or wet the dress, then carefully pin it out to its exact measurements on blocking mats, paying close attention to opening up lace patterns and evening out ruffles. Allow it to air dry completely. Blocking makes the stitches uniform, enhances drape, and sets the final shape beautifully.
- Add Closures: Securely sew on your chosen small, elegant buttons or apply hidden snaps.
Advanced Tips for a Truly Regal Finish:
- Mastering Stitch Definition: Practice maintaining incredibly consistent tension for crisp, well-defined stitches, especially in lace and textured patterns.
- Invisible Joins & Seams: Learn techniques for creating truly seamless joins when working in the round, and master the invisible mattress stitch for any flat seams.
- Read Charts: Many intricate princess dress patterns utilize crochet charts, which are often easier to follow for complex stitch patterns than written instructions alone.
- Patience & Precision: This is not a project to rush. Take your time, enjoy the process, and focus on the details. The beauty is in the meticulous execution.
- Safety First: Double-check that all embellishments (buttons, beads, appliqués) are sewn on extremely securely to prevent any choking hazards. Avoid any long ties or ribbons that could pose a risk.
Video Tutorial :
Creating a hand-crocheted princess baby dress is a journey into the magical world of fiber art. It’s a challenging but deeply rewarding project that culminates in a stunning garment, destined to be cherished for years to come – a tiny piece of a fairy tale brought to life by your own hands. Sources