by
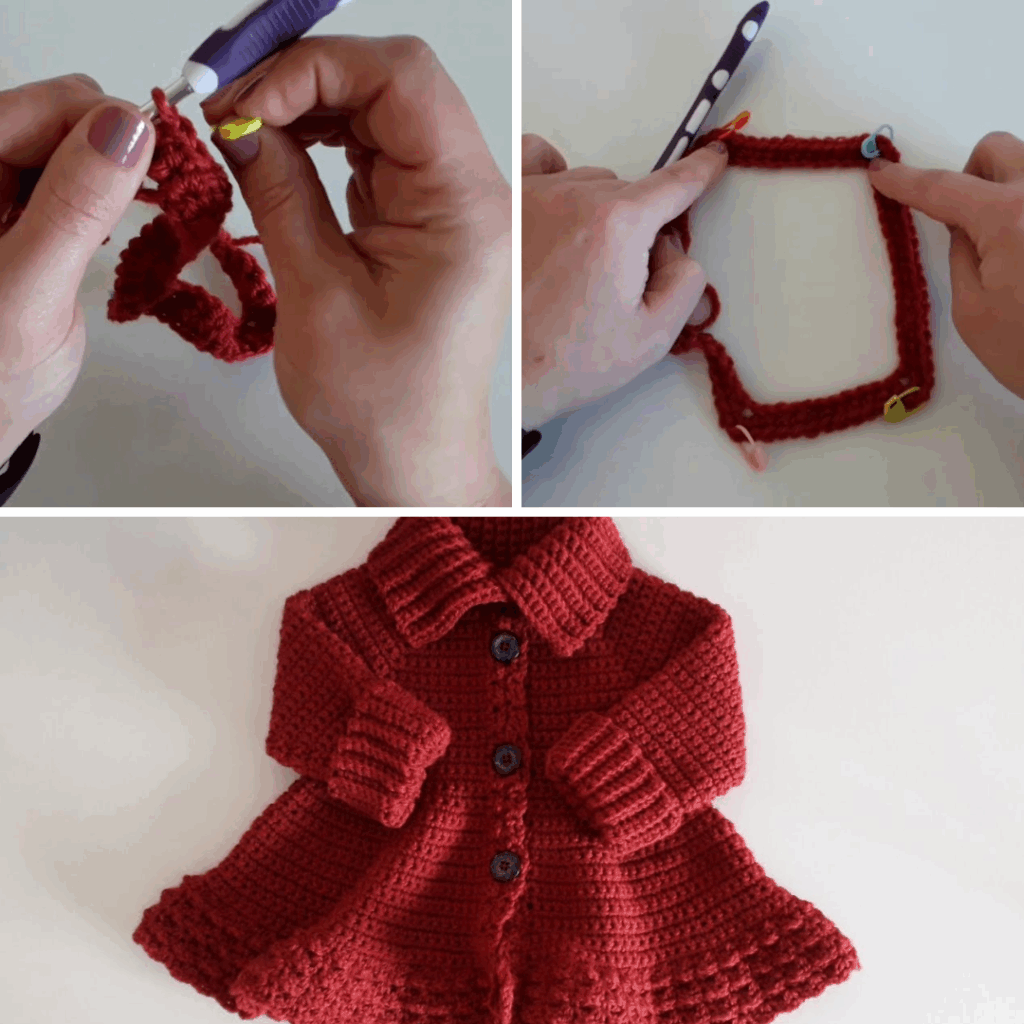
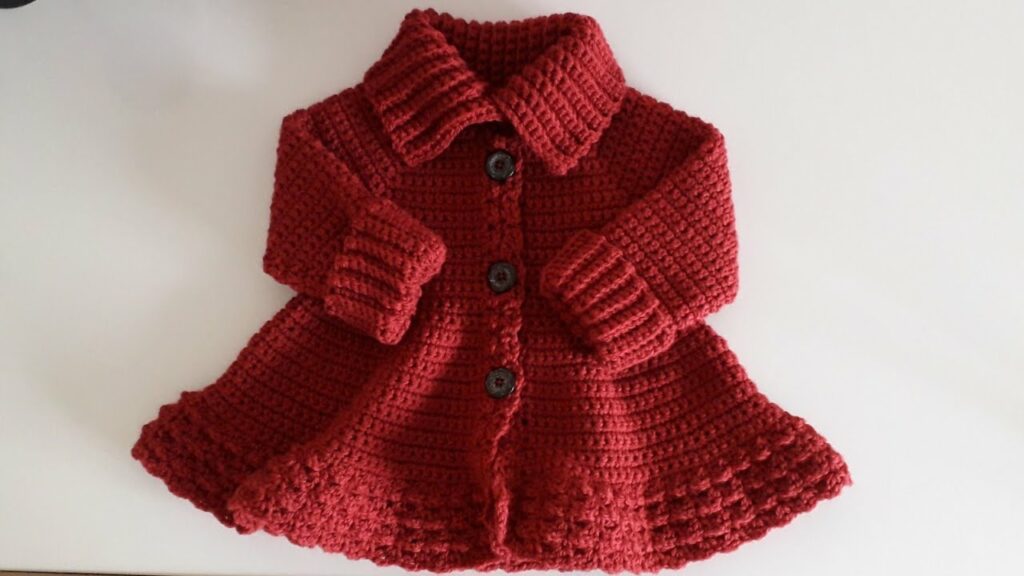
by Elevated Warmth: How to Crochet a High Neck Coat for a Girl
When the temperatures drop, a high neck coat is an indispensable item for keeping cozy and stylish. For a little girl, a handmade crocheted high neck coat combines sophisticated elegance with practical warmth, offering superior protection against chilly winds. This garment is a statement piece, blending classic fashion with the loving touch of a handcrafted item.
This detailed guide will walk you through the essential steps and considerations for crocheting a beautiful and customizable high neck coat for a girl, ensuring she stays snug and chic.
What Makes a High Neck Coat Unique?
The defining feature of a high neck coat is its elevated neckline, which extends higher than a standard collar. This design offers several advantages:
- Exceptional Warmth and Protection: The extended neckline acts as a built-in scarf, providing excellent coverage for the neck and upper chest against cold winds and low temperatures.
- Refined & Sophisticated Look: A high neck adds a touch of elegance and tailored style, making the coat appear more formal and polished.
- Structured Silhouette: The stand-up nature of the high neck often contributes to a more structured and sophisticated overall silhouette for the coat.
- Versatility: Depending on the yarn and stitch pattern, a high neck coat can be styled for formal occasions or everyday warmth.
Why Crochet a High Neck Coat for a Girl?
- Superior Warmth: The primary benefit for a coat. It provides an extra layer of insulation where it’s needed most.
- Stylish & Elegant: This design elevates a simple coat into a fashion-forward piece, perfect for making a statement.
- Personalized & Unique: Choose from a wide array of luxurious yarns, rich colors, and intricate stitch patterns to create a truly one-of-a-kind garment.
- Heirloom Potential: A substantial and well-made high neck coat is a perfect candidate to become a treasured family heirloom.
- Skill Advancement: This project offers an excellent opportunity to master garment construction, precise collar shaping, and creating durable, comfortable finishes.
- Thoughtful & Practical Gift: It’s a gift that combines beauty with high functionality, especially appreciated in colder climates.
Choosing Your Tools & Materials:
Careful selection of materials is paramount for achieving the desired warmth, structure, and aesthetic of a high neck coat.
- Yarn: The Foundation of Warmth and Structure!
- Fiber:
- Superwash Merino Wool: An excellent choice for its incredible softness, superior warmth, breathability, and convenient machine washability (always check the label!). It drapes beautifully while still offering good stitch definition for a structured look.
- Acrylic Blends (e.g., Acrylic/Wool, Acrylic/Nylon): Modern acrylic yarns are wonderfully soft, durable, hypoallergenic, and easy to care for. They offer good stitch definition and come in a vast range of colors.
- Alpaca Blends: Luxuriously soft and exceptionally warm. They drape beautifully but often require hand washing.
- Avoid: Any yarn that feels scratchy, too stiff, or lacks good stitch definition for a structured garment.
- Weight:
- Worsted (Aran / Category 4): The most common and versatile choice for a warm coat, offering a good balance of warmth and working speed.
- Bulky (Chunky / Category 5): For a very quick-to-make and incredibly warm coat, ideal for extremely cold climates.
- DK (Double Knitting / Category 3): Can be used for a slightly lighter, but still warm, coat if worked with a denser stitch or tighter gauge.
- Color Palette: Classic coat colors like camel, navy blue, charcoal grey, deep forest green, burgundy, or rich browns. Vibrant jewel tones or even playful multi-colored yarns can also create stunning results.
- Quantity: A high neck coat requires a substantial amount of yarn due to its length and the added neck height. Expect to need 1000-1500 yards for toddler sizes (2T-4T) and 1500-2500+ yards for older girl sizes (6Y-12Y), depending on yarn weight and chosen length. Always check your chosen pattern’s specific recommendations.
- Fiber:
- Crochet Hook:
- Consult your chosen yarn label for a suggested hook size (e.g., 4.5mm, 5.0mm, 5.5mm, 6.0mm, 6.5mm).
- Crucial for Garments: Your actual hook size will be determined by achieving the correct gauge for your pattern. You will almost certainly need to adjust your hook size (up or down by half a size) to ensure the proper fit, structure, and the desired comfortable tension for the high neck.
- Other Notions:
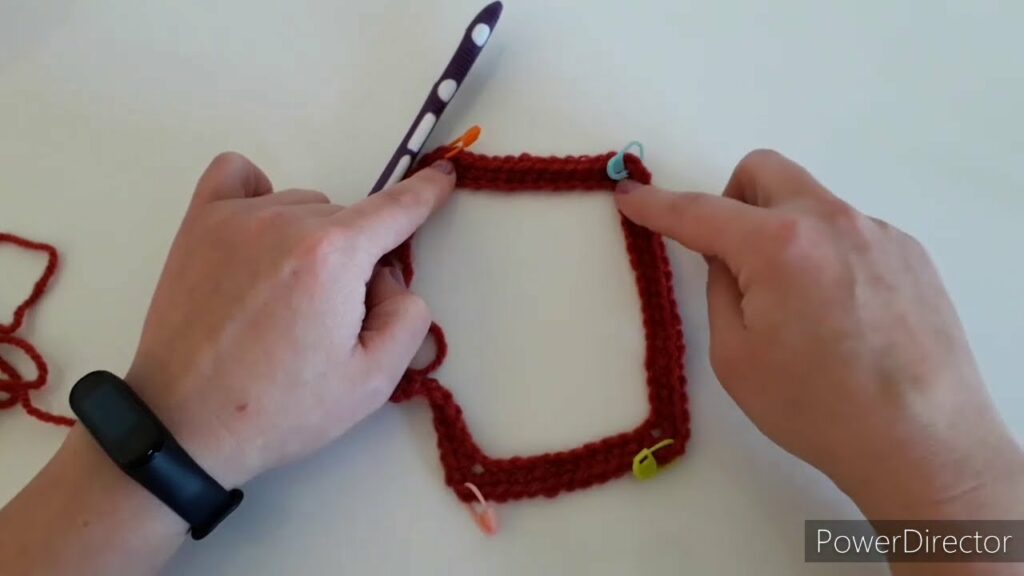
- Stitch Markers: Essential for marking raglan lines, the beginning of rounds, and specific shaping points.
- Tapestry Needle: For neatly weaving in all yarn ends and sewing any minor seams.
- Scissors.
- Buttons: Typically 3-6 small to medium-sized buttons that complement your chosen yarn. Opt for flat buttons for comfort against the body.
- Sewing Needle & Matching Thread: To securely attach the buttons.
- Measuring Tape: For frequent measurements during construction.
Understanding Sizing & Gauge (ABSOLUTELY CRITICAL for Garments!)
Accurate sizing is the cornerstone of a well-fitting, comfortable, and aesthetically pleasing garment, especially one with a crucial element like a high neck.
General Girls’ High Neck Coat Sizing (Approximate Measurements):
| Size | Approx. Chest Circ. | Approx. Finished Body Length (Shoulder to Hem) | Approx. Sleeve Length (Underarm to Cuff) | Approx. Neck Height |
|---|---|---|---|---|
| 2T | 21 inches | 16-18 inches | 10-11 inches | 3-4 inches |
| 4T | 23 inches | 18-20 inches | 11-12 inches | 4-5 inches |
| 6Y | 25 inches | 20-22 inches | 12-14 inches | 5-6 inches |
| 8Y | 27 inches | 22-24 inches | 14-16 inches | 5-6 inches |
| 10Y | 28 inches | 24-26 inches | 16-18 inches | 6-7 inches |
Export to Sheets
Disclaimer: These are general averages. Always refer to the specific pattern’s measurements and sizing chart.
How to Make a Gauge Swatch (Do NOT Skip This Step!):
- Chain: Chain about 25-30 stitches, plus any turning chains (e.g., ch 3 for dc) as per your chosen main stitch pattern.
- Work: Crochet a square of at least 6×6 inches (15×15 cm). A larger swatch provides a more accurate measurement.
- Wash & Block: Fasten off your swatch. Crucially, wash and block your swatch exactly as you plan to treat the finished garment. This step relaxes the fibers and reveals the true stitch size and drape after washing, which can change significantly.
- Measure: Once dry, lay the swatch flat. Place a ruler over the center. Count how many stitches fit within 4 inches (10 cm) and how many rows fit within 4 inches (10 cm).
- Adjust:
- If you have more stitches per inch than your pattern (or desired gauge) states (your work is too tight), go up half a hook size and re-swatch.
- If you have fewer stitches per inch than your pattern states (your work is too loose), go down half a hook size and re-swatch.
- Repeat until your gauge precisely matches.
General Stitch Patterns for a High Neck Coat:
- Main Body (for warmth and structure):
- Half Double Crochet (hdc): Creates a dense, warm fabric with excellent stitch definition and good drape. Ideal for coats.
- Double Crochet (dc): Works up quicker, creates a slightly softer drape.
- Moss Stitch (Linen Stitch): (sc, ch 1, sk 1) Produces a beautiful, dense, and evenly textured fabric with good drape.
- Textural Stitches: Basketweave stitch, simple cable patterns, or alternating front/back post stitches can add warmth, visual interest, and a more tailored feel.
- Ribbing (for cuffs, hem, and especially the high neck):
- Front Post/Back Post Double Crochet (fpdc/bpdc): Creates a strong, elastic, and professional-looking ribbed edge that stands up well.
- Single Crochet in Back Loop Only (sc blo): A simpler, stretchy ribbing option that works well for cuffs and hems, but might be less structured for a tall neck.
- Collar/High Neck: Almost exclusively worked in ribbing (fpdc/bpdc or sc blo) for its elasticity and ability to maintain its shape.
Step-by-Step Construction: The High Neck Coat (Top-Down Raglan Yoke)
This outline describes a common and highly favored construction method for children’s coats due to minimal seaming and ease of customization. This is a general guide to the methodology; for precise stitch counts, specific increase/decrease rates for different sizes, and unique design details, you MUST use a detailed crochet pattern.
Phase 1: The Yoke (Top-Down, Raglan Shaping with Front Opening)
This forms the base of the high neck, shoulders, and upper chest, worked from the top down.
- Step 1.1: Starting Chain & Initial Neckline/Button Band
- Foundation Chain: Chain the number of stitches specified by your pattern for the neckline circumference. Crucially, this initial chain forms the base of your high neck. It needs to be snug enough for the neck to stand up, but loose enough for comfort.
- Neckline Band Rows: Work 3-5 rows in a dense stitch like sc, hdc, or sc blo ribbing across the entire chain. This forms the continuous initial neckline and establishes the front button bands. On one side of the front opening (usually the wearer’s right side, or as per pattern), you’ll incorporate small, evenly spaced buttonholes on designated rows (e.g.,
ch 2, skip 2 stitches, then work into the ch-2 space on the next row).
- Step 1.2: Setting Up Raglan Yoke Divisions (First Increase Row)
- First Yoke Row (Raglan Setup): This row divides your total stitches into: Front Panel 1 (including button band), Sleeve 1, Back Panel, Sleeve 2, and Front Panel 2 (including button band). You will have 4 raglan corners where all shaping increases occur.
- Work your main stitch (e.g., hdc or dc) for Front Panel 1. At the first raglan corner, work your increase (e.g.,
(2 dc, ch 2, 2 dc)or(dc, ch 1, dc)). Place a stitch marker (SM) in the ch-2 or ch-1 space. Continue this pattern for Sleeve 1, Back Panel, Sleeve 2, Front Panel 2, with increases at each raglan corner. Turn.
- Step 1.3: Continuing Yoke Increases
- Subsequent Yoke Rows: Continue working your main stitch across, and work your specified increase into each of the 4 raglan spaces from the previous row. Move your stitch markers up to the new increase spaces. Turn.
- Continue working these increase rows until the yoke measures the correct depth from the top of the neckline to the underarm for your chosen size. Ensure you continue adding buttonholes on your button band at regular intervals.
Phase 2: Separating for Body & Sleeves
Once the yoke is the correct depth, you’ll divide the stitches to create the armholes.
- Separation Row:
- Work stitches for Front Panel 1 (including button band).
- Work into Raglan Corner 1.
- Skip Sleeve 1: Place all stitches of Sleeve 1 (the stitches between Raglan Corner 1 and Raglan Corner 2) onto a piece of scrap yarn or a stitch holder.
- Underarm Chain: Chain 2-4 stitches (this creates extra room at the underarm and fills the gap).
- Work into Raglan Corner 2.
- Work stitches for the Back Panel.
- Work into Raglan Corner 3.
- Skip Sleeve 2: Place all stitches of Sleeve 2 onto a holder.
- Underarm Chain: Chain 2-4 stitches.
- Work into Raglan Corner 4.
- Work stitches for Front Panel 2 (including button band). Turn.
Phase 3: The Body (Torso) of the Coat
This forms the main body of the garment below the armholes, worked flat.
- First Body Row: Continue working flat across the front panels, back panel, and the underarm chains. This continues the front opening with the button bands.
- Continuing Body Rows: Continue working in rows using your chosen main stitch.
- Shaping: Maintain the width of the body, or add very slight increases for a gentle A-line shape, or decreases for a straighter fit, as specified by your pattern.
- Length: Continue working until the body reaches the desired length for a coat (typically mid-thigh or knee-length for a coat).
- Hem: Finish the body with a substantial ribbed hem (e.g., 2-4 inches of fpdc/bpdc or sc blo).
Phase 4: The Sleeves (Make 2)
Each sleeve is typically worked in the round from the armhole down to the cuff.
- Attach Yarn: Attach your yarn to the center underside of one armhole opening (where your underarm chain was).
- Pick Up Stitches: Work a round of your main stitch, picking up stitches evenly around the armhole opening (including into the underarm chain stitches). Join with a sl st to the first stitch to form a round.
- Working the Sleeve: Continue working in rounds using your main stitch pattern.
- Shaping: Gradually decrease stitches evenly spaced over several rounds to taper the sleeve towards the wrist (check your pattern for specific decrease rates).
- Length: Work until the sleeve reaches the desired full length from the underarm to the wrist.
- Cuff: Finish the sleeve with a robust ribbed cuff (e.g., fpdc/bpdc or sc blo).
- Fasten off. Repeat for the second sleeve, ensuring it is symmetrical to the first.
Phase 5: The High Neck Collar
This is the defining feature, worked directly from the initial neckline of the yoke.
- Foundation: This is the base of the high neck. You will usually work directly up from the starting chain of the yoke, turning your work and continuing in a new direction.
- Stitch Pattern: Work in continuous rounds (or flat and then seam) using a tight, elastic ribbing stitch. Front Post/Back Post Double Crochet (fpdc/bpdc) is highly recommended here, as it provides the necessary structure and elasticity for the neck to stand up without being too stiff or loose.
- Shaping:
- For a mock neck (stands up without folding): Maintain a consistent stitch count in each round.
- For a turtleneck (designed to fold over): Your pattern may instruct you to gradually increase stitches over the first few rounds to create a slightly wider opening at the top, allowing for a comfortable fold.
- Height: Continue working rounds until the desired high neck height is achieved (refer to your size chart – typically 3-7 inches, depending on size and style). Finish neatly with a slip stitch or by weaving in the last tail.
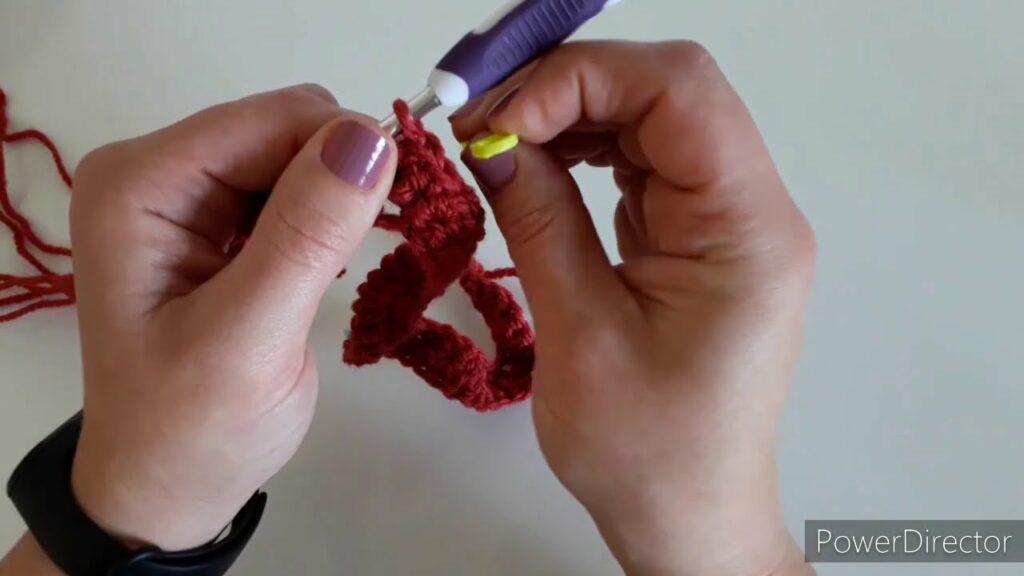
video tutorial part 1
Phase 6: Finishing Touches
These final steps bring your garment to a professional and durable completion.
- Weave in All Ends: Using your tapestry needle, meticulously weave in every single yarn tail. Secure them firmly by weaving them into existing stitches in different directions. This is crucial for a neat, durable, and safe finish (no loose ends for little fingers).
- Attach Buttons: Sew your chosen buttons securely to the button band, aligning them precisely with the buttonholes you created. Double-check that they are very firmly attached, as buttons can be a safety concern for children if loose.
- Blocking (ABSOLUTELY CRUCIAL for Garments!):
- Gentle Wash: Fill a basin with cool water and a small amount of mild, wool-friendly detergent (even for acrylic blends). Gently submerge the coat and let it soak for 20-30 minutes. Do not agitate vigorously.
- Remove Excess Water: Gently squeeze out the soapy water (do not wring or twist). Rinse under cool, running water until all soap is gone.
- Shape & Dry: Lay the coat flat on blocking mats. Gently stretch and shape it to the correct finished dimensions (chest, length, sleeve length). Smooth out any unevenness and define the edges. Pay special attention to shaping the high neck, ensuring it stands up neatly as desired. Use rust-proof T-pins to hold the shape firmly.
- Air Dry Completely: Allow the coat to air dry completely. Blocking truly transforms the fabric, softening it, evening out your stitches, enhancing the drape, and giving your high neck coat a beautifully polished, professional appearance.
Unique High Neck Challenges & Tips:

- Neck Fit is Paramount: The most critical aspect. The high neck must be snug enough to stand up or stay warm but never restrict or feel uncomfortable. Precise gauge is essential.
- Ribbing for Structure: Rely on elastic ribbing stitches like fpdc/bpdc to ensure the high neck maintains its shape and stands tall.
- Seamless Integration: If working top-down, ensure the transition from the initial neckline band to the high neck is smooth and visually continuous.
- Yarn Choice for Neck: Avoid very stiff or non-stretchy yarns for the neck, as they can result in a rigid or uncomfortable fit.
- Length and Bulk: Consider the overall proportions of the coat. A very tall neck on a very short coat might look unbalanced.
Care Instructions for Your Handmade Coat:
- Always follow your yarn label’s specific care instructions.
- Reshape and Lay Flat to Dry: Always gently reshape the coat while wet and lay it flat on a clean towel or drying rack to air dry completely. Pay extra attention to reshaping the high neck to ensure it retains its intended form. Do not hang, as this can stretch the fabric and distort the garment’s shape.
video tutorial part2 ;
Creating a crocheted high neck coat for a girl is a rewarding project that results in a garment that is both incredibly warm and stylish. By mastering the techniques for its elevated neckline, you’ll produce a truly unique and sophisticated piece that will keep a special little one cozy and chic through the chilliest days. Happy hooking! Sources
Generate Audio Overview