by
by The Foundation of Function: Crocheting a Sturdy Bag with a Square Bottom
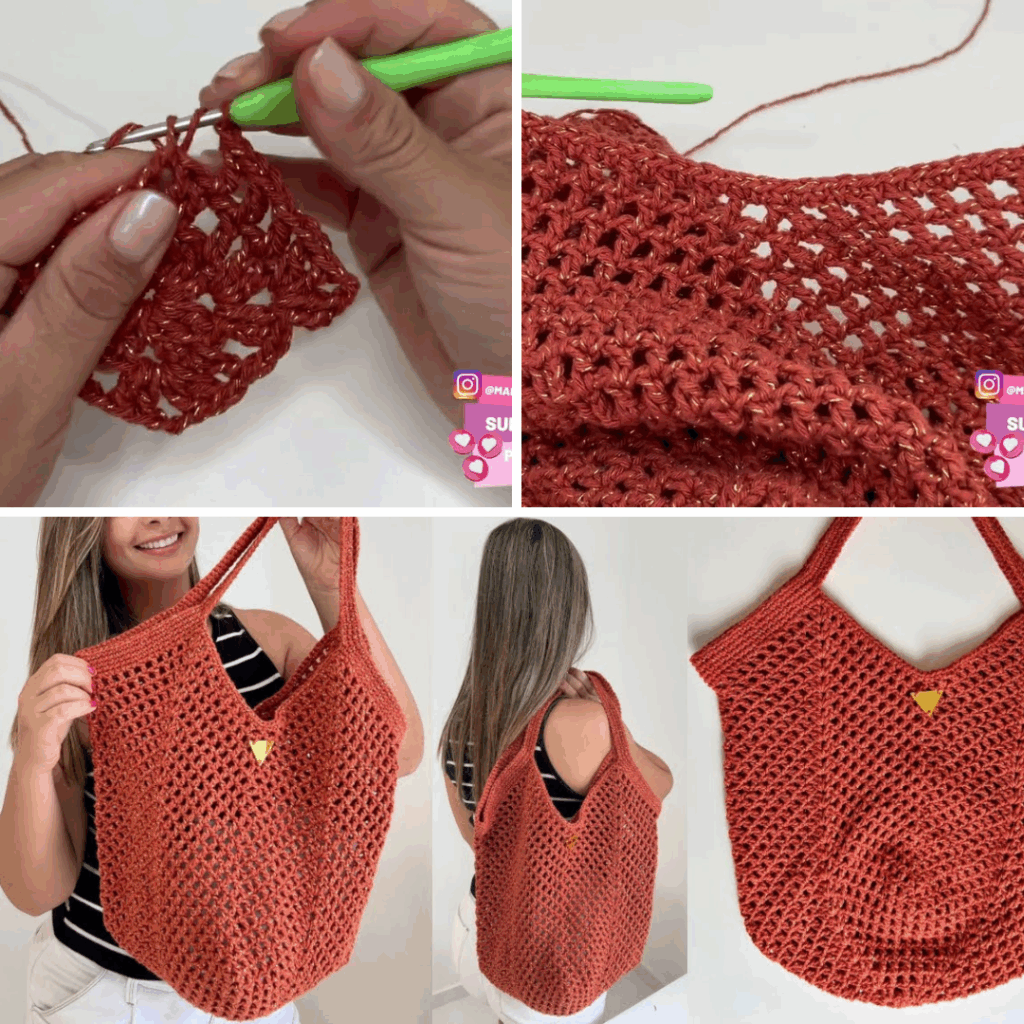
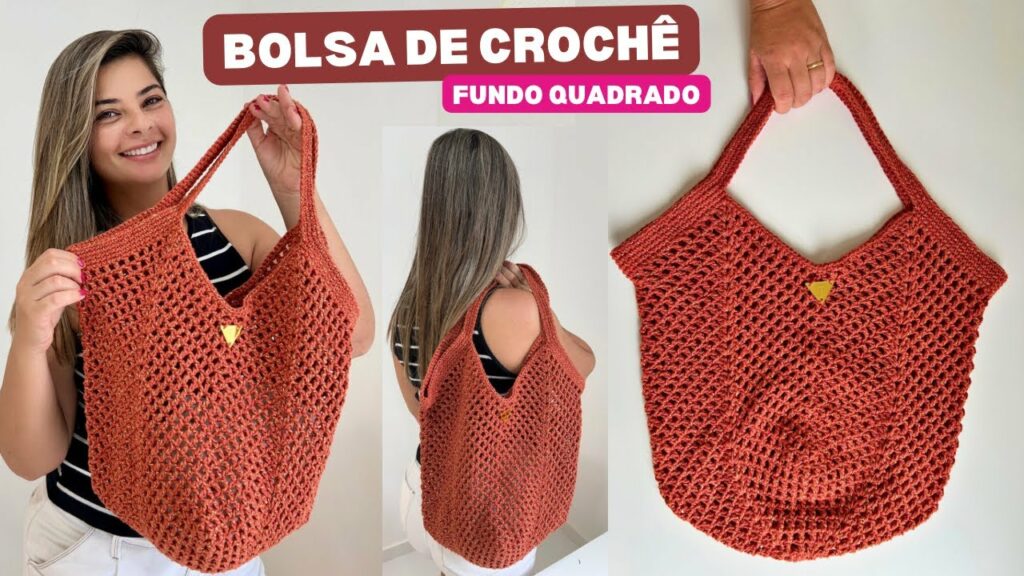
There’s an undeniable charm to a handmade crochet bag. It’s a statement of personal style, a practical companion, and a testament to your craft. But what elevates a lovely crochet bag to a truly functional and professional-looking accessory? Often, it’s the humble square bottom.
While many bags start with a simple round or oval base, a square bottom provides superior stability, maximizes interior space, and creates a polished, structured silhouette. This detailed, step-by-step guide will walk you through the process of crocheting a robust and stylish bag, beginning with its essential square foundation.
Why Choose a Square Bottom for Your Crochet Bag?
Opting for a square bottom offers distinct advantages that make your bag both more practical and more appealing:
- Superior Stability: Say goodbye to perpetually toppling bags! A flat, square base ensures your bag stands upright whether it’s empty or full, keeping its contents secure and visible.
- Increased Capacity: The geometric efficiency of a square maximizes the usable interior volume, allowing you to fit more items without your bag looking bulky or saggy.
- Professional Finish: A well-executed square bottom gives your bag a clean, crisp line and a structured appearance that mimics high-end manufactured bags.
- Easier Organization: A flat base provides a stable platform for your belongings, making it easier to organize items like notebooks, wallets, or makeup pouches inside.
- Versatile Design: This foundation is incredibly adaptable. It’s perfect for creating sturdy totes, spacious market bags, practical project bags, structured purses, or even stylish bucket bags.
- Skill Building: Mastering the square bottom involves precise stitch counting and strategic increases, which are excellent exercises for improving your overall crochet technique and creating more complex shapes.
Understanding the “Square Bottom” Aesthetic & Functionality
The success of your square bottom bag lies in strategic choices for yarn, hook, and stitch patterns.
Yarn Selection: Structure is Key!
The yarn you choose will heavily influence the bag’s stability and durability. Prioritize fibers that offer good structure and minimal stretch.
- Weight:
- Worsted (Category 4) or Aran (Category 4/5): These are ideal for sturdy bags. They work up quickly and provide a firm, dense fabric that holds its shape well.
- DK (Double Knitting, Category 3): Can be used for lighter bags, but you’ll need to use a tighter gauge (smaller hook) and likely a fabric lining to maintain shape.
- Bulky (Category 5): Excellent for very quick, large, chunky bags that stand on their own.
- Fiber:
- Cotton or Cotton Blends: The absolute best choice for bags. Cotton is naturally sturdy, offers fantastic stitch definition, holds its shape, is durable, and has very little stretch.
- High-Quality Acrylic: Good if you choose a denser, firmer variety. It’s affordable, comes in a vast color range, and is usually washable.
- Raffia/Plarn (Plastic Yarn): For extremely structured, even rigid, bags perfect for the beach or market.
- Avoid: Very stretchy (e.g., pure un-blended merino wool without a superwash treatment), overly slippery, or delicate yarns that will not hold the base’s shape.
Hook Size: The Density Secret
For a sturdy bag, especially the bottom, you’ll often want a fabric that is denser than what you’d use for a garment. This means using a crochet hook that is one or even two sizes smaller than what the yarn label typically recommends. Your gauge swatch (explained below!) is crucial here.
Stitch Patterns: Firmness for the Base, Freedom for the Body
- For the Base (DENSE!):
- Single Crochet (SC): Highly recommended for the entire base. It creates the densest, firmest fabric, ensuring maximum stability.
- Half Double Crochet (HDC): Can also be used if your tension is naturally firm, providing a slightly faster-to-work base than SC.
- For the Body (Versatility):
- Once the base is established, you can switch to a wider variety of stitches for the body: SC, HDC, Double Crochet (DC), Moss Stitch, even simple shell stitches. The body can be more decorative, but the base truly benefits from a solid, dense stitch.
- Recommendation: Use Single Crochet for the base for optimal sturdiness.
Design Elements
- Bag Shape: A square bottom is foundational for tote bags, market bags (often with openwork sides), structured purses, or even bucket bags (where the base transitions smoothly into a cylindrical body).
- Strap: You can crochet a matching strap (flat or round), or attach a purchased leather, fabric, or chain strap.
- Lining (Highly Recommended): For a truly professional and durable bag, a fabric lining is essential. It adds structure, prevents stretching, protects your bag’s contents, and ensures small items don’t slip through any crochet gaps.
- Closure (Optional): Consider adding a zipper, magnetic snap, button loop, or drawstring to the top opening.
Planning Your Square Bottom Bag Project
Careful planning ensures a smooth and successful crocheting experience.
- Bag Dimensions:
- Base: Decide on the desired length and width of your finished bag bottom.
- Height: Determine how tall you want the bag body to be.
- Yarn Quantity: Estimate the total yarn needed based on your chosen dimensions, stitch patterns, and hook size. Always purchase enough yarn from the same dye lot to prevent color variations.
- Strap & Closure: Decide on the style and material for your bag’s strap and any desired closure. This allows you to purchase hardware (D-rings, snaps) in advance.
- Lining? Plan for a lining from the start. This influences your finishing steps.
- Gauge Swatch (ABSOLUTELY CRITICAL!):
- This is the single most important step for achieving a bag of the correct dimensions.
- Crochet a large swatch (at least 6×6 inches / 15×15 cm) using your chosen yarn and hook in the main stitch pattern for your base (SC).
- Crucial Step: Wash and block your swatch exactly as you intend to wash and block your finished bag. Yarn can behave differently after laundering, affecting size and drape.
- Measure your stitches and rows per inch/cm precisely. If your gauge doesn’t match your pattern’s (or your desired density), adjust your hook size. Even a small gauge discrepancy will result in a significantly different base size and impact your yarn usage.
Materials You’ll Need
- Yarn: (As chosen in your planning stage). Quantity based on your calculations.
- Crochet Hook(s): The size determined by your gauge swatch (likely smaller than yarn label suggests).
- Notions:
- Stitch Markers: Absolutely essential for marking the corners of your base and the beginning of rounds.
- Tapestry Needle (or blunt yarn needle): For weaving in ends and any seaming (e.g., for strap attachment).
- Scissors.
- Measuring Tape: Your constant companion for checking gauge and dimensions.
- Blocking Mats & T-pins (Recommended): For blocking the finished base.
- Bag Strap: (Crochet your own, or purchase leather/fabric strap, D-rings, etc.).
- Lining Fabric & Sewing Supplies: Matching thread, sewing machine (optional), hand sewing needle.
- Closure Hardware (Optional): Zipper, magnetic snap, button, etc.
Key Crochet Techniques for a Square Bottom Bag
You’ll utilize foundational crochet techniques, plus specific strategies for achieving sharp corners.
- Basic Stitches: Chain (ch), Slip Stitch (sl st), Single Crochet (sc). (Half Double Crochet (hdc) or Double Crochet (dc) if using for the body).
- Working Flat & Turning Chains: For the initial rows that form your base rectangle.
- Working in the Round: After the flat foundation, you’ll transition to working continuously around the perimeter to build the base’s thickness and then the bag’s body.
- Precise Corner Increases: This is the secret to a perfect square. Typically, you’ll work multiple stitches in the corner stitch or chain space from the previous round (e.g., (sc, ch 1, sc) or 3 sc into one stitch).
- Working “into the side” of stitches/rows: For the first round as you work around the perimeter of your initial foundation chain. This requires careful and even stitch placement.
- Slip Stitch Join: To neatly close rounds when working in the round.
- Weaving in Ends: Crucial for a clean, durable finish.
Step-by-Step Construction (Conceptual Guide)
This guide outlines the general progression for a square bottom bag. Always refer to a specific pattern for exact stitch counts, row counts, and detailed instructions tailored to your desired size and yarn. These steps are illustrative.
Part 1: Crocheting the Square Base (The Foundation)

- Determine Starting Chain Length: Based on your desired finished length of the bag’s bottom and your gauge. Chain the desired length in stitches, then add 1 chain for your turning chain.
- Example: For a 10-inch long base with a gauge of 4 sc per inch, you’d chain 40 stitches + 1 = 41 chains.
- Row 1: Sc in the 2nd chain from the hook and in each chain across. Chain 1, turn. (You now have a straight row of single crochet stitches.)
- Rows 2-X (Building the Flat Rectangle): Sc in each single crochet across. Chain 1, turn.
- Repeat this row until your rectangle reaches the desired width for your bag’s bottom.
- Example: For a 5-inch wide base with a gauge of 5 rows per inch, you’d work 25 rows in total.
- Do NOT fasten off after the last row of the flat rectangle.
Part 2: Turning the Corner & Working Around the Base
This is where your flat rectangle transforms into the beginnings of a 3D base.
- Mark Corners: Place stitch markers in the 4 corner stitches of your last row and the corresponding 4 corner spaces of your original foundation chain. These markers are your guide for increases!
- Round 1 (Turning the Corner):
- Work across the last row: Work 1 sc in each sc across the short end (the last row you just finished, before turning).
- First Corner: In the corner stitch marked, work your corner increase (e.g., (sc, ch 1, sc) or 3 sc).
- Work down the Side: Now, work single crochet evenly down the side of the rectangle, working into the side of each row. This requires careful placement for a neat edge (aim for 1 sc per row, or 2 sc for every 3 rows, depending on your row gauge).
- Second Corner: In the corner stitch/space at the end of the original foundation chain, work your corner increase (e.g., (sc, ch 1, sc) or 3 sc).
- Work across the Original Foundation Chain: Work 1 sc in each stitch across the long side (along the original foundation chain).
- Third Corner: In the next corner stitch/space, work your corner increase (e.g., (sc, ch 1, sc) or 3 sc).
- Work up the Other Side: Work single crochet evenly up the other side of the rectangle (into the side of each row), mirroring the first side.
- Final Corner (where you started): In the final corner stitch/space, work your corner increase (e.g., (sc, ch 1, sc) or 3 sc).
- Join with a slip stitch to the first single crochet of the round.
- You have now created the first continuous round around your flat rectangular base.
- Subsequent Rounds (Squaring Up the Base):
- Continue working in the round. For each of the next 1-2 rounds (depending on how sharp you want the base edge), you will consistently work your corner increases (e.g., (sc, ch1, sc) or 3 sc) into the ch-1 space (or central sc) of each corner from the previous round.
- Work 1 sc (or desired stitch) in each stitch along the “sides” between the corners.
- This gradually builds the distinct squared bottom edge of your bag.
Part 3: Building the Bag Body
- Turning the Sides Up (Creating the “Wall”):
- Optional Round for Sharp Edge: For a very sharp and defined transition from the base to the body, work the next round in single crochet in the back loop only (BLO) of each stitch around. This technique creates a visible ridge that pushes the fabric sharply upwards, forming the first “wall” of your bag.
- Working the Body:
- Switch to your desired stitch pattern for the main body (SC, HDC, DC, Moss Stitch, etc.).
- Work in the round (joining with a slip stitch at the end of each round, or continuously, depending on your preference and pattern) without any further increases.
- Continue working rows/rounds until the bag body reaches your desired height.
- Fasten off.
Part 4: Finishing Touches
- Top Edging: Work 1-2 rounds of single crochet (SC) or a simple ribbing (e.g., K1P1 rib for knit-look) evenly around the entire top opening of the bag. This creates a neat, sturdy, and non-stretching edge.
- Attach the Strap:
- Crocheted Strap: Crochet a long chain, then work rows of SC or HDC until the desired width. Securely sew the ends of the strap to the top corners of the bag using your tapestry needle.
- Purchased Strap: Attach using D-rings (which you would sew onto the bag) or by sewing the strap directly to the bag.
- Add Lining (Highly Recommended):
- Measure the finished bag’s base dimensions and height.
- Cut and sew your chosen lining fabric to match the bag’s shape (allowing for seam allowances).
- Insert the fabric lining into your crochet bag. Fold the top edge of the fabric under for a neat hem, and then hand-stitch or machine-stitch it securely to the inside top edge of the crochet bag.
- Add Closure (Optional): Sew on a zipper (requires more advanced sewing skills), magnetic snap, button loop, or weave in a crocheted drawstring (after the top edging).
- Weave in All Remaining Ends: Using your tapestry needle, securely weave in any remaining yarn tails. This is crucial for a professional and durable finish.
- Blocking (Optional but Recommended): Lightly block the finished bag to help it set its final shape, especially the square bottom. You can stuff the bag lightly while it dries to help it keep its form.
VIII. Tips for Square Bottom Success
- Stitch Markers Are Your Best Friends: This is not optional for the base! Use markers liberally to highlight the 4 corner stitches/spaces, especially in the rounds where you are increasing around the perimeter.
- Count Your Stitches! After every single row and round of the base. Precision here is paramount for a truly square and flat base.
- Work Tightly on the Base: Use a firm tension, or even go down a hook size, for the base. A dense base will create a much sturdier bag.
- Master Working into Row Ends: The first round as you work around the perimeter of your initial foundation chain can be tricky. Practice placing your hook evenly into the side of each row to avoid gaps or puckering.
- Blocking the Base: Even if you don’t block the entire bag, blocking the completed base before you start the body can help it lie perfectly flat and set its crisp corners.
- Lining is Key: For maximum structure and a professional finish, a fabric lining is a game-changer for a square bottom bag.
IX. Caring for Your Square Bottom Bag
Proper care will ensure your robust bag remains beautiful and functional.
- Follow Yarn Label Instructions: Always refer to your specific yarn’s care instructions for washing and drying.
- Hand Wash Recommended: Especially if your bag is lined or has hardware, hand-washing is often the safest bet to preserve its shape and integrity.
- Reshape & Lay Flat to Dry: This is absolutely crucial for maintaining the bag’s shape, particularly the square bottom. Never wring or hang a wet crocheted bag, as the weight of the water will cause it to stretch and distort.
- Protect Hardware: If your bag has metal hardware, consider wrapping it in a small cloth during washing to prevent scratching or tarnishing.
Conclusion
Crocheting a bag with a square bottom is a rewarding project that combines practical design with the beauty of handmade craft. By mastering the foundational techniques for creating a sturdy, well-defined base, you’ll unlock a new level of functionality and professionalism in your crochet bags. Embrace the precision, enjoy the process, and take pride in the robust, stylish accessory you create!
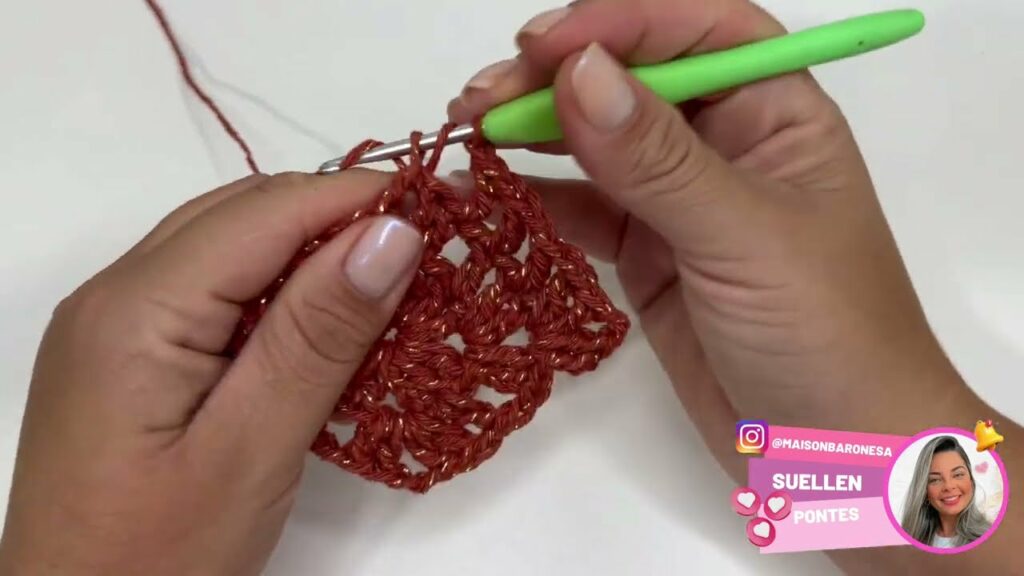
Video tutorial ;