 by
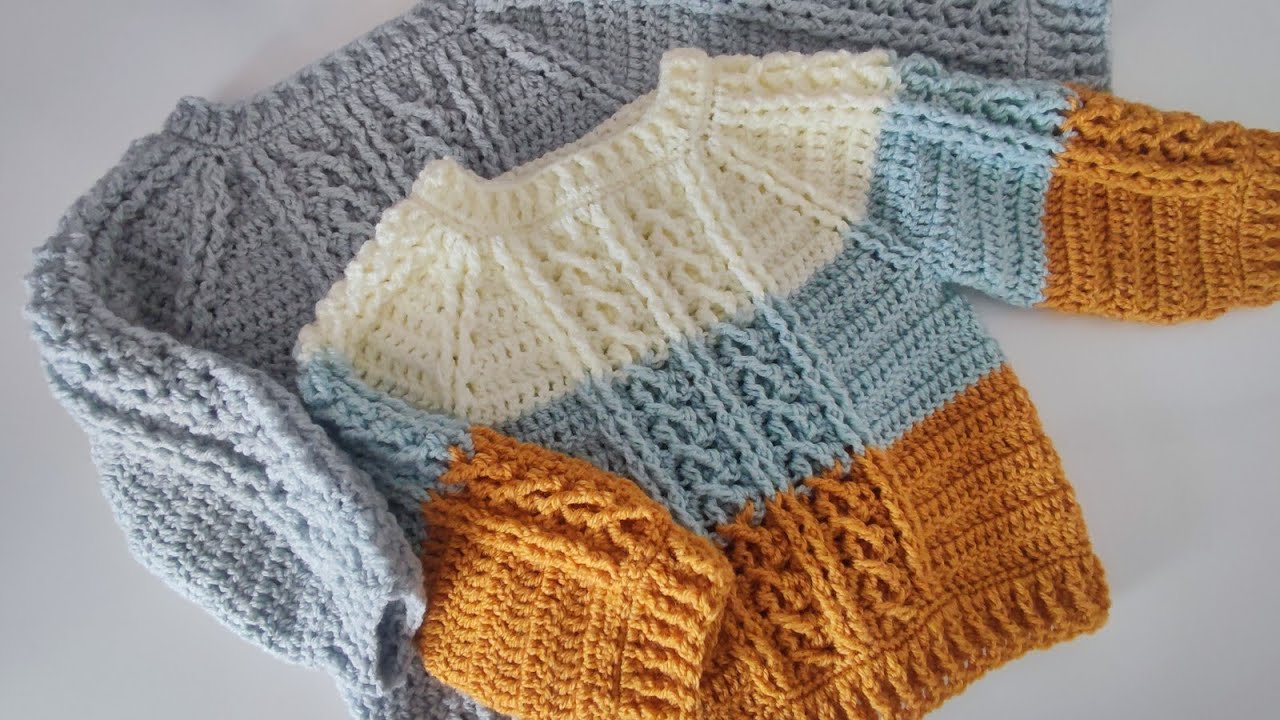
by For many crocheters, the intricate beauty of cables has traditionally been associated solely with knitting. Yet, the world of crochet offers its own powerful and often even more defined interpretation of this classic texture. Crocheting a pullover adorned with cables is a truly rewarding project, transforming simple yarn into a garment of remarkable depth, warmth, and timeless elegance. It’s a journey that builds significant skills and culminates in a cherished, handcrafted masterpiece.
If you’re ready to elevate your crochet artistry, this detailed guide will walk you through the essential elements of how to crochet a pullover featuring those captivating twists and turns.
Why Crochet a Cable Pullover?
Choosing to crochet a cable pullover goes beyond mere utility; it’s about creating a statement piece:
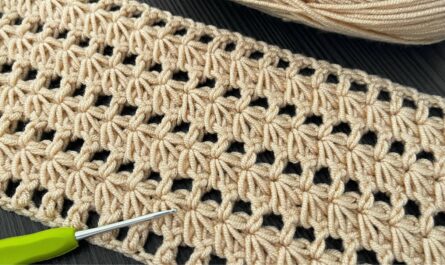
- Stunning Three-Dimensional Texture: Crochet cables often appear bolder and more sculptural than their knitted counterparts, creating a dramatic visual and tactile effect.
- Exceptional Warmth & Density: The very nature of cable stitches, which involve crossing and overlapping strands, creates a dense, thick fabric. This makes a cable pullover incredibly warm and cozy, perfect for colder seasons.
- Unique Aesthetic: It marries the classic appeal of cable patterns with the distinct, rich texture that only crochet can offer, resulting in a truly unique garment.
- Skill Building: Tackling cables in a garment pushes your crochet abilities, introducing you to advanced techniques and increasing your confidence.
- Heirloom Potential: A well-crafted cable pullover is a timeless garment that can be worn for years and potentially passed down, carrying the warmth of your stitches through time.
Planning Your Cable Pullover Project: The Blueprint for Success
Success with a cable pullover begins long before the first stitch. Careful planning is paramount:
- Pattern Selection (Crucial!):You absolutely need a well-written crochet pattern designed specifically for a cable pullover. Look for patterns that include:
- Clear written instructions: For both the main garment construction and the cable patterns.
- Cable Charts: Visual charts are invaluable for following complex cable repeats.
- Sizing Information: Detailed schematics and measurements.
- Skill Level: Ensure it matches your current abilities (cables are typically intermediate to advanced).
- Size & Fit: Pullovers generally require a comfortable amount of “ease” (roominess). Consult the pattern’s sizing chart carefully, comparing it to actual body measurements (chest circumference, sleeve length, overall length). Consider if you want a more fitted or relaxed silhouette.
- Cable Design & Placement: Patterns vary widely in how cables are used:
- A single, bold cable running down the center front.
- Multiple smaller cables arranged across the body.
- An all-over cable pattern for maximum texture.
- Cables on sleeves or just the body. Your chosen design will impact the complexity and the overall aesthetic.
- Yarn Choice (The Foundation of Great Cables): This is perhaps the most critical decision for a cable project.
- Fiber: Wool (especially Merino), Alpaca, or sturdy acrylic/wool blends are ideal. These fibers have good stitch definition, a bit of elasticity, and excellent memory, allowing the cables to “pop” and hold their shape. Avoid overly fuzzy, “hairy,” or splitty yarns that will obscure the intricate cable details.
- Weight: Worsted (Category 4) or Aran are highly recommended. They offer a good balance of warmth, stitch definition, and reasonable working time. Bulky yarns can create very large, dramatic cables, but might be too heavy for some.
- Color: Solid, light to medium colors showcase cable texture best. Dark colors (like black or very deep navy) or highly variegated yarns can make the cable details disappear into the fabric.
- Gauge Swatch (Non-Negotiable and Extra Critical!): For cable projects, your gauge swatch is even more vital. You must swatch the cable pattern itself, not just basic stitches. Cables pull in the fabric, so your stitch count and row count will differ significantly from a plain swatch. Adjust your hook size until your cable swatch matches the pattern’s gauge. Skipping this step is the most common reason for a garment not fitting correctly.
Understanding Cable Stitches in Crochet: The Core Technique
The magic of crochet cables lies in the strategic use of post stitches and crossing stitches.
- Post Stitches (FPDC/BPDC etc.): These are the building blocks. Instead of inserting your hook into the top of a stitch, you insert it around the post (the vertical body) of the stitch from the previous row.
- Front Post Double Crochet (FPDC): Creates a raised, vertical ridge on the fabric’s surface, pulling the stitch forward.
- Back Post Double Crochet (BPDC): Creates a raised ridge on the opposite side of the fabric, pulling the stitch backward.
- Crossing Stitches: This is where the cable’s characteristic twist comes from.
- You’ll typically skip a certain number of stitches, work post stitches into the next group of stitches, then go back and work post stitches into the previously skipped stitches. This creates the overlapping effect.
- Patterns will specify whether you work in front of or behind the stitches you just made to create a clean cross.
- Cable Panels: Cables are almost always worked over a specific number of stitches, flanked by “filler” stitches (like single crochet, half double crochet, or double crochet) on either side. These filler stitches create a recessed background, making the raised cable stand out even more.
- Cable Repeats: Cables are formed over multiple rows or rounds. A “cable repeat” defines how many rows you work before you perform the next crossing action. This creates the continuous, twisting pattern.
- Types of Cables: From simple 2/2 cables (crossing 2 stitches over 2) to complex 3/3 braids or basketweave effects, the possibilities are vast. Your pattern will specify the type of cable used.
Pullover Construction Methods
Crochet pullovers are typically constructed using one of these common methods:
- Bottom-Up (Most Common):
- The body is worked in the round from the bottom hem up to the armholes.
- Then, the work is split into front and back panels, which are worked separately up to the shoulders.
- Sleeves are usually worked separately (flat or in the round) and then seamed to the body.
- The neckline ribbing or collar is added last.
- Panel Construction:
- The front, back, and two sleeves are crocheted flat as separate pieces.
- These panels are then meticulously seamed together. This method often results in very crisp, defined seams and can be easier for managing complex stitch patterns like all-over cables.
- Top-Down Raglan (More Advanced for Cables): While possible, working cables seamlessly in a top-down raglan style can be challenging as you need to incorporate increases while maintaining the cable pattern. This is generally recommended for very experienced crocheters.
Key Techniques Beyond Cables
Mastering cables is a triumph, but a great pullover requires other essential skills:
- Shaping (Increases & Decreases): You’ll need to skillfully incorporate increases and decreases to shape armholes, necklines, shoulder slopes, and taper sleeves. The trick is to do this within or around your cable pattern without distorting its flow. Your pattern will provide precise instructions.
- Ribbing: For the cuffs, bottom hem, and neckline, crocheted ribbing provides a neat, stretchy, and professional finish. This is typically achieved using Front Post/Back Post stitches (FPDC/BPDC) or by working Single Crochet in the back loop only (SC in BLO).
- Seaming: For panel construction, learn the Mattress Stitch. It creates an almost invisible, flat, and very sturdy seam, ideal for a refined garment.
- Neckline Finishing: Whether it’s a crew neck, V-neck, or boat neck, the neckline needs to be finished neatly with a band or collar. Ensure the opening is wide enough for a comfortable pullover.
Step-by-Step Flow (Conceptual Guide)
- Prepare: Carefully read your pattern, gather all materials, and make that crucial cable gauge swatch.
- Crochet the Body: Begin with the back panel (or work the body in the round). Pay close attention to the cable chart or instructions, marking cable crosses and stitch counts as you go. Shape armholes and neckline as instructed. Repeat for the front panel(s).
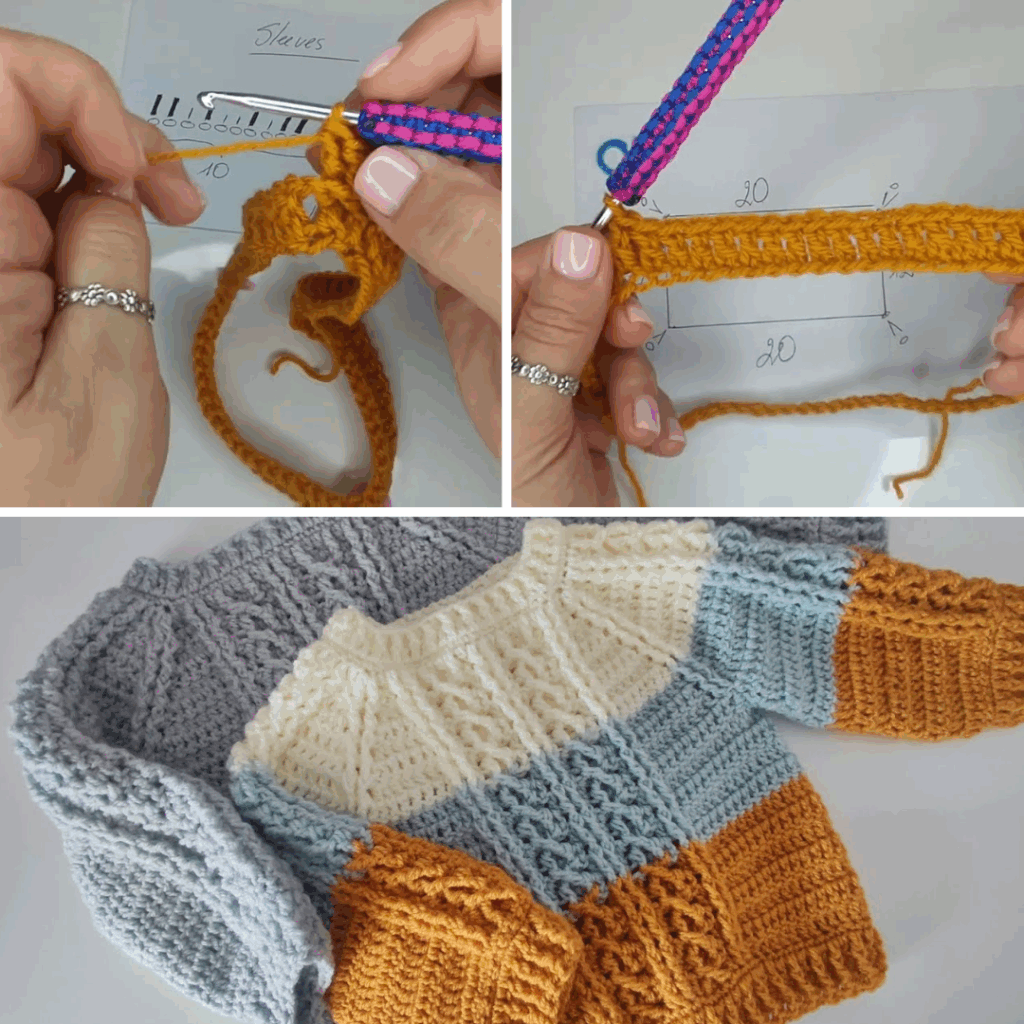
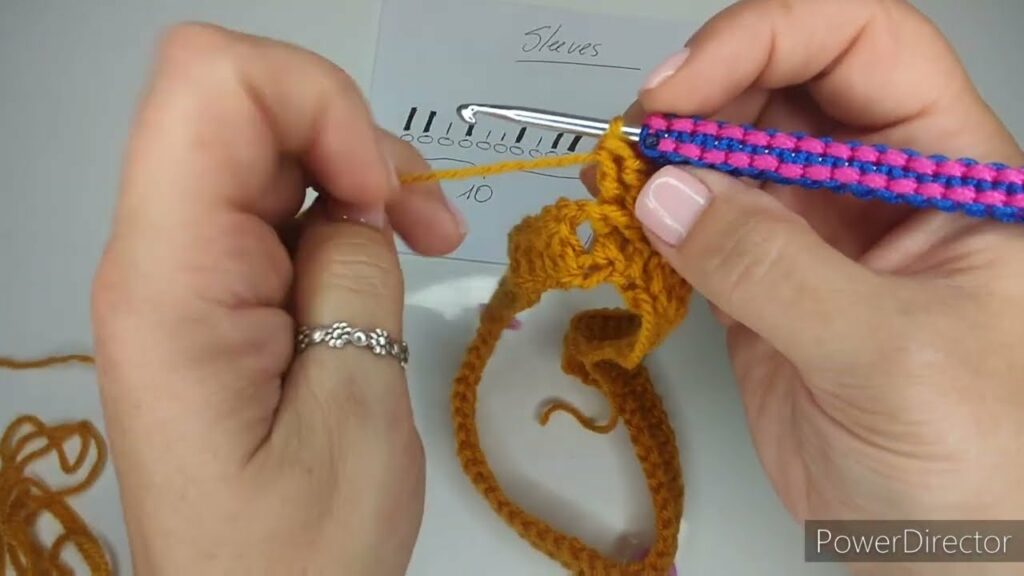
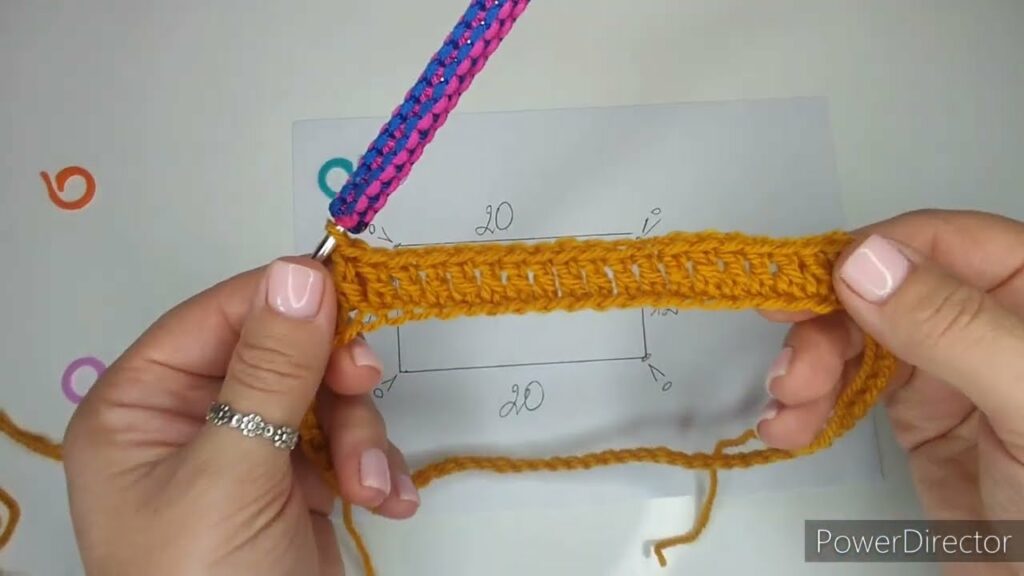
- Crochet the Sleeves: Work the sleeves, either flat or in the round, following the pattern for decreases to taper the sleeve and incorporate any cable motifs if desired.
- Assemble the Body: Join the shoulder seams first, then the side seams, using a mattress stitch for an invisible finish.
- Attach Sleeves: Carefully align and seam the sleeves to the armhole openings.
- Add Ribbing: Crochet the ribbing for the cuffs, the bottom hem of the body, and finally the neckline, joining neatly.
- Finishing Touches: Weave in all remaining yarn ends meticulously with a tapestry needle.
Video Tutorial Part 1 ;
Tips for Success with Cables
- Practice Makes Perfect: If cables are new to you, practice the specific cable stitch from your pattern on a small swatch before incorporating it into your garment.
- Use Stitch Markers: Place markers to delineate cable panels, track cable repeats, mark beginning/end of rows/rounds, and denote increase/decrease points. They are invaluable.
- Watch Tutorials: Don’t hesitate to search for video tutorials on YouTube for specific post stitches or cable crossing techniques if you’re a visual learner.
- Read Charts Carefully: If your pattern includes a chart, learn how to read it. They provide a concise visual map for cable patterns.
- Maintain Consistent Tension: Even tension is crucial for well-defined cables. Try to keep your stitches consistent throughout the project.
- Patience and Focus: Cables require more concentration than basic stitches. Take your time, focus on each stitch, and don’t rush.
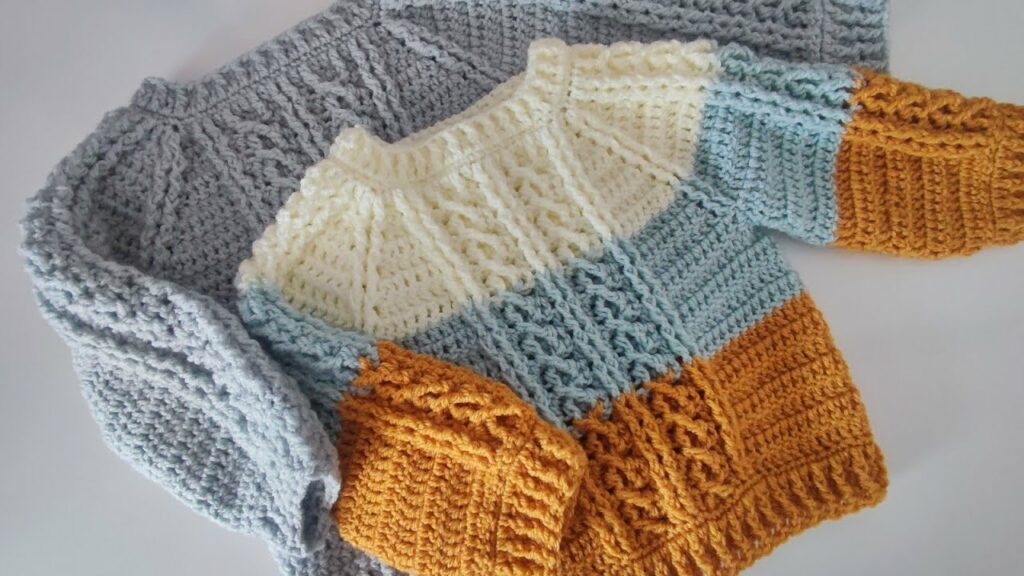
- Blocking is ESSENTIAL: Once your pullover is complete, blocking will transform it. It relaxes the yarn, evens out all your stitches, makes the cable pop, and sets the garment’s final shape, giving it a truly professional finish.
Caring for Your Cable Pullover
To preserve the beauty and integrity of your crocheted cable pullover:
- Follow Yarn Label Instructions: Always defer to the specific care instructions on your yarn skein.
- Gentle Washing: Hand wash in cool water with a mild detergent, or use a machine’s gentle/delicate cycle if the yarn is machine washable (especially for superwash wools).
- Reshape and Dry Flat: Gently squeeze out excess water (never wring!). Reshape the pullover to its original dimensions and lay it flat on a clean towel or a mesh drying rack to air dry completely.
- Avoid Hanging: Never hang a wet crocheted garment, especially one with heavy cables, as it will stretch and distort under its own weight.
- Storage: Store folded to prevent stretching.
Video Tutorial Part 2 ;
Crocheting a pullover with cables is a significant undertaking, but the reward is immense. It’s a journey of skill development, patience, and creative expression that culminates in a warm, stunningly intricate garment. Wear your finished cable pullover with pride – it’s a testament to your growing mastery of the hook and yarn! Sources